Easy Loofah Soap Recipe
An easy melt and pour soap recipe with an invigorating twist: loofah in the center helps exfoliate your skin and a citrusy fragrance leaves you ready to seize the day.
Equipment
- Microwave safe mixing bowl (or large measuring cup)
- Spatula
- Individual cavity soap mold (round is best)
- Cutting board
- Toothpick (optional for pushing down the loofah)
- Spray bottle with rubbing alcohol (optional for dispersing powdered colorant)
Ingredients
- 2 pounds clear melt and pour soap base (I use this base from Nurture Soap which is super clear.)
- 8-12 loofah slices (This package from Amazon is enough for 3 batches of this recipe.)
- 2 tablespoons fragrance oil (such as grapefruit)
- 1/2 teaspoon colorant (pick your favorite mica from Nurture Soap)
- 1 teaspoon rubbing alcohol (if using powdered colorant)
Instructions
- Prepare the mold and loofah slices. Place the loofah slices into each cavity of the soap mold. Then, trim them if necessary to make sure they fit well. It's best to prepare the mold before melting the soap base to prevent the soap from cooling too quickly.

- Cut the soap base into chunks. Using a sharp knife, chop the melt-and-pour soap base into small chunks to help the soap melt faster. No need to be precise—roughly cut pieces work just fine.

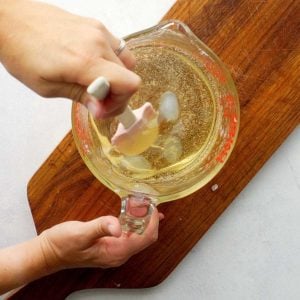
- Melt the soap base. Place the soap chunks in a microwave-safe container, such as a large Pyrex measuring cup. Microwave in 30-second intervals, stirring between intervals, until the soap completely melts. Be careful, as the soap will be very hot.

- Add the color and fragrance. If you’re using powdered colorant, mix it with rubbing alcohol to help it disperse evenly. If using a liquid color, simply add it directly to the melted soap. Stir in the fragrance oil and mix thoroughly with a spatula.

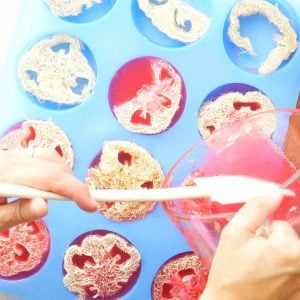
- Pour the soap batter into the molds. Carefully pour the melted soap mixture over the loofah slices in the mold. It’s okay if the loofah sticks out on one side. If you want the loofah fully submerged, use a toothpick to push it down while pouring.

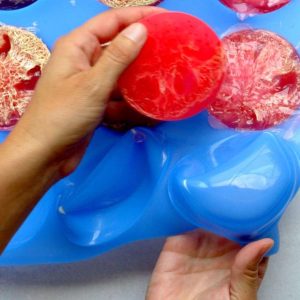
- Allow the soap to harden. Let the soap cool and harden for at least 4 hours. For larger bars, you may need to wait up to 8 hours. Once the soap is fully set, gently remove it from the molds.

Notes
The type of soap base you choose is essential. Go for a clear, good-quality melt-and-pour base. It melts more smoothly, produces a less bumpy soap, and improves the smell.
When your soap has melted, it’ll start to get solid again pretty quickly. So, have all your mix-ins ready when the soap is all melted. This way, you can mix everything nicely and smoothly without any lumps.
You can choose any smell and color you like! I like the combination of pink and grapefruit because it’s bright and fresh. But you could also go for something sweet or flowery with this recipe.
For my soap, I picked a pink colorant called mica from Nurture Soap and a scent called Energy Fragrance from Brambleberry.
Different fragrance oils have different strengths. If you like your soap more fragrant, add more, but try not to use more than 3% of your soap’s total weight to keep the soap feeling right. It’s a good idea to try a little batch first to see if you like the smell.
When you add coloring, stir it well until it’s mixed in. This helps avoid any uneven spots or lines in your soap. A tiny whisk or fork works great for mixing the color in well.
If you decide not to add color, your soap will still look nice and be transparent.
Wait until the soap is excellent before trying to remove it from the mold. If you try too soon, the soap might crack or break.
The loofah might initially feel scratchy but will get softer once you use it.
Servings: 9 bars