Men's Soap Recipe
A hard, super-cleansing bar that's perfect for the manly man in your life.
Equipment
- Safety gear (gloves, eye protection, and long sleeves)
- digital scale (I use this every single day)
- soap mold (silicone or wooden molds work well)
- Heatproof Containers
- Stainless Steel Pot
- Thermometers
- Soap Cutter or Knife
Ingredients
- 9 ounces water
- 3.75 ounces lye
- 9 ounces coconut oil
- 9 ounces palm oil
- 8 ounces olive oil
- 2 ounces beeswax
- 2 tablespoons Cavalier fragrance oil
- 1 teaspoon green mica
Instructions
- Prepare the lye solution. Before handling all the ingredients, wear your safety gear (gloves, eye protection, long sleeves). Then, measure the lye and water in separate containers. Slowly add the lye to the water (never the other way around), and stir carefully until the lye is completely dissolved. Set the lye solution aside in a safe place to cool.

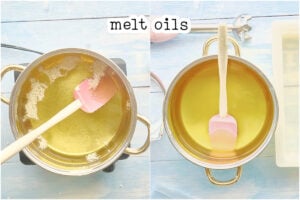
- Prepare the oils and beeswax. Measure the coconut oil, palm oil, olive oil, and beeswax. Melt them over low heat in a large pot. The beeswax will take longer to melt, so be patient. Once fully melted, remove from heat and allow the oils to cool to 140°F.

- Cooling and Mixing. When both the lye solution and the oils have cooled to 120°F, slowly pour the lye solution into the oils. Use a stick blender to combine the mixture. Blend until “trace” is achieved—the soap thickens slightly, and a trail of soap rests on top without immediately sinking.

- Add the fragrance and color. Add the fragrance oil and green mica (if using) to the soap mixture. Stir gently by hand to incorporate.Tip: Avoid over-blending at this stage, as the mixture can seize up if you continue to blend with the stick blender.

- Pour into mold. Pour the soap batter into your prepared mold, smoothing the top as needed. Leave the mold at room temperature to set for 24 hours.

- Unmold and cure. After 24 hours, carefully unmold the soap and cut it into bars. Allow the bars to cure for at least 2 weeks in a well-ventilated area before using them for optimal hardness.

Notes
This soap gets hard fast, so prepare your tools and ingredients before mixing.
Different scents can change how quickly your soap sets or even make it harden too fast. Stick to scents made for soap and do a small test first if you’re not sure.
To mix color without clumps, blend the color powder with some melted oils before stirring it into the main mix.
Adding a little cocoa butter or shea butter can moisturize your soap.
Try using different oils like sunflower or castor oil to tweak how your soap feels and what it does for your skin.
You can create your scent by mixing essential oils. Add them when the soap has thickened a bit. I get my fragrance oils and colorants at Nurture Soap.
Consider adding poppy seeds or flower petals to your soap for something extra.
If you want your soap to be solid and last longer, mix a teaspoon of sodium lactate per pound of oils into your lye water once it cools. This makes the soap harden faster and easier to take out of the mold.
To check if the soap is ready and safe to use, try the “zap test” after curing. Lightly touch it with your tongue. If it zaps, it’s not ready and needs more time to cure.
Try to unmold and cut the soap within 24 hours so it doesn’t get too difficult to work with.
Servings: 10 bars