
An old fashioned recipe from a time when nothing went to waste. This will take you two days, but most of it is hands-off time. If your grandma made these while you were growing up, you’ll love them. (And if she didn’t, you still will.)
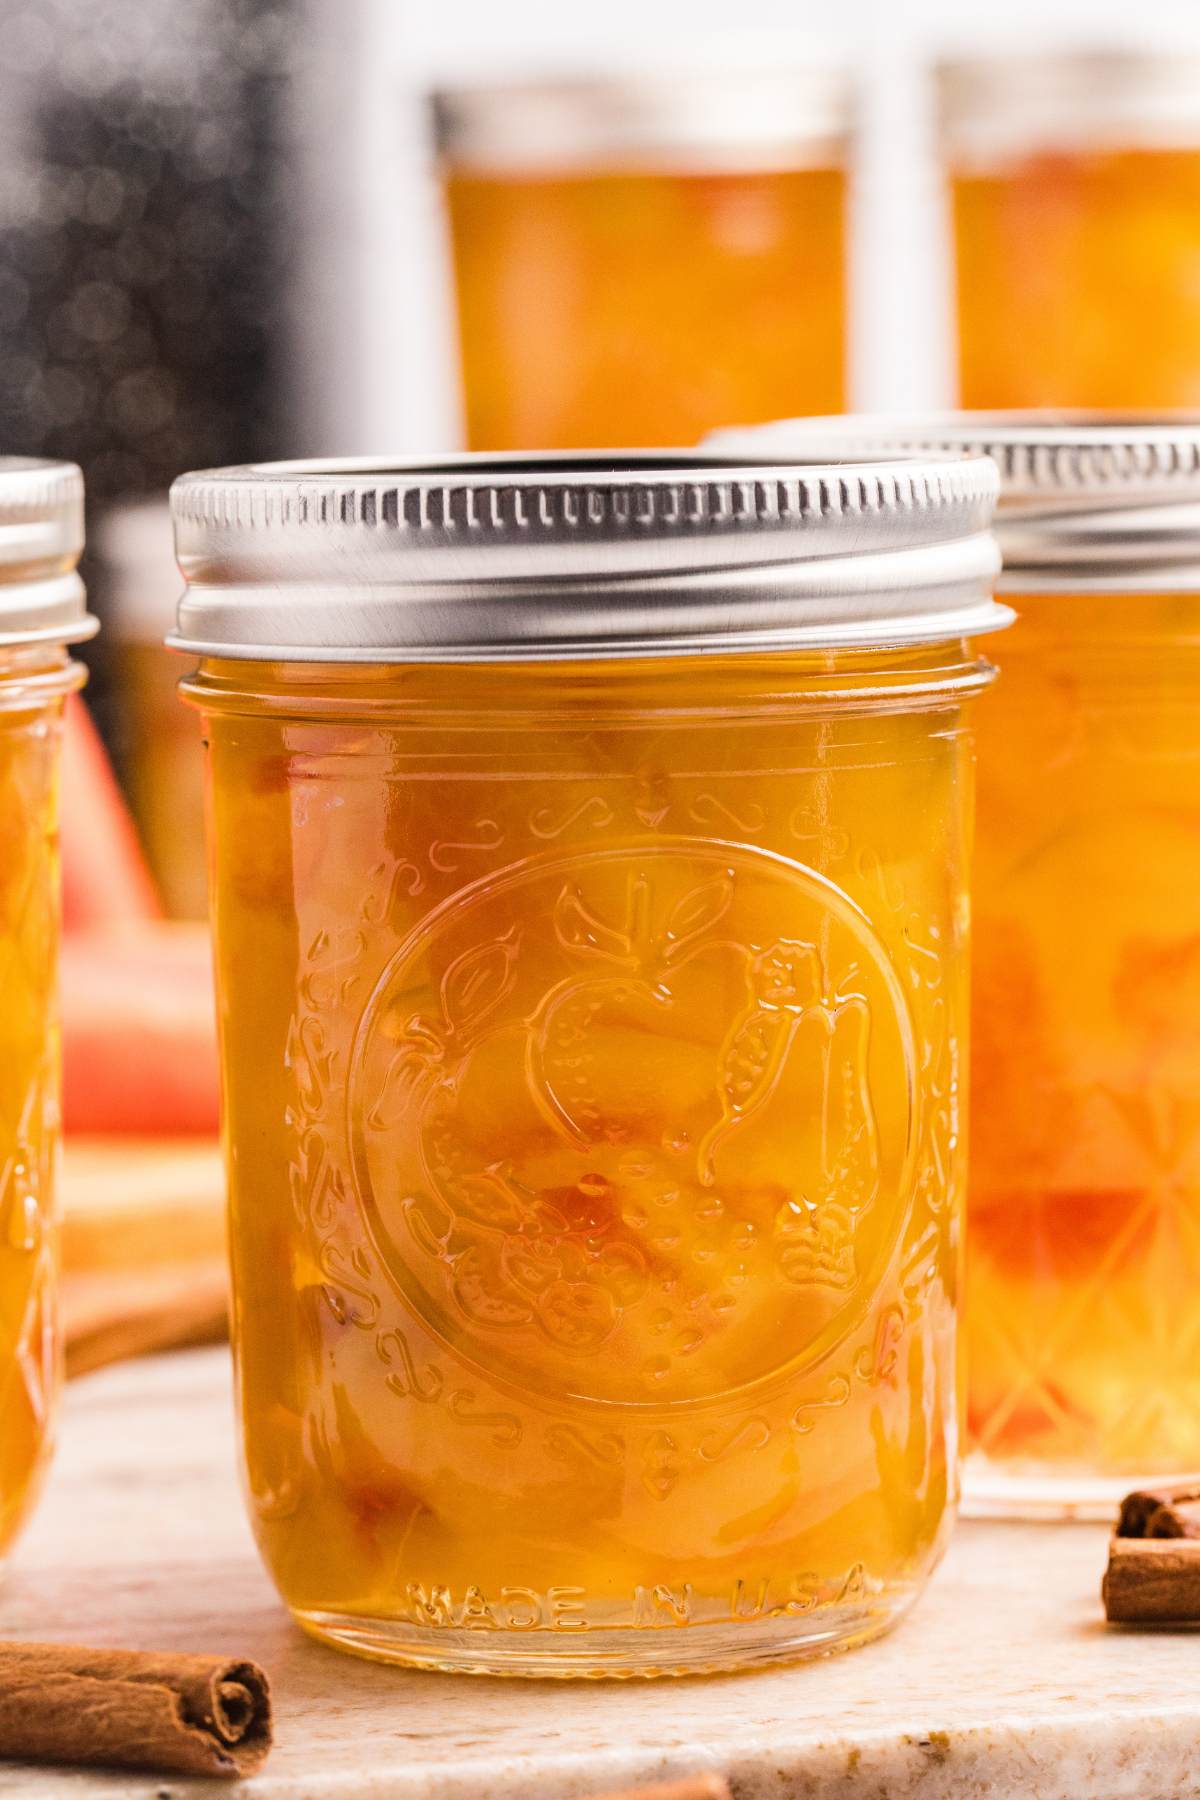
These turn what most people consider scraps into something you’ll actually be excited to open and eat. The result is so good, you might find yourself growing watermelons just to make more.
Table of Contents
What You’ll Need
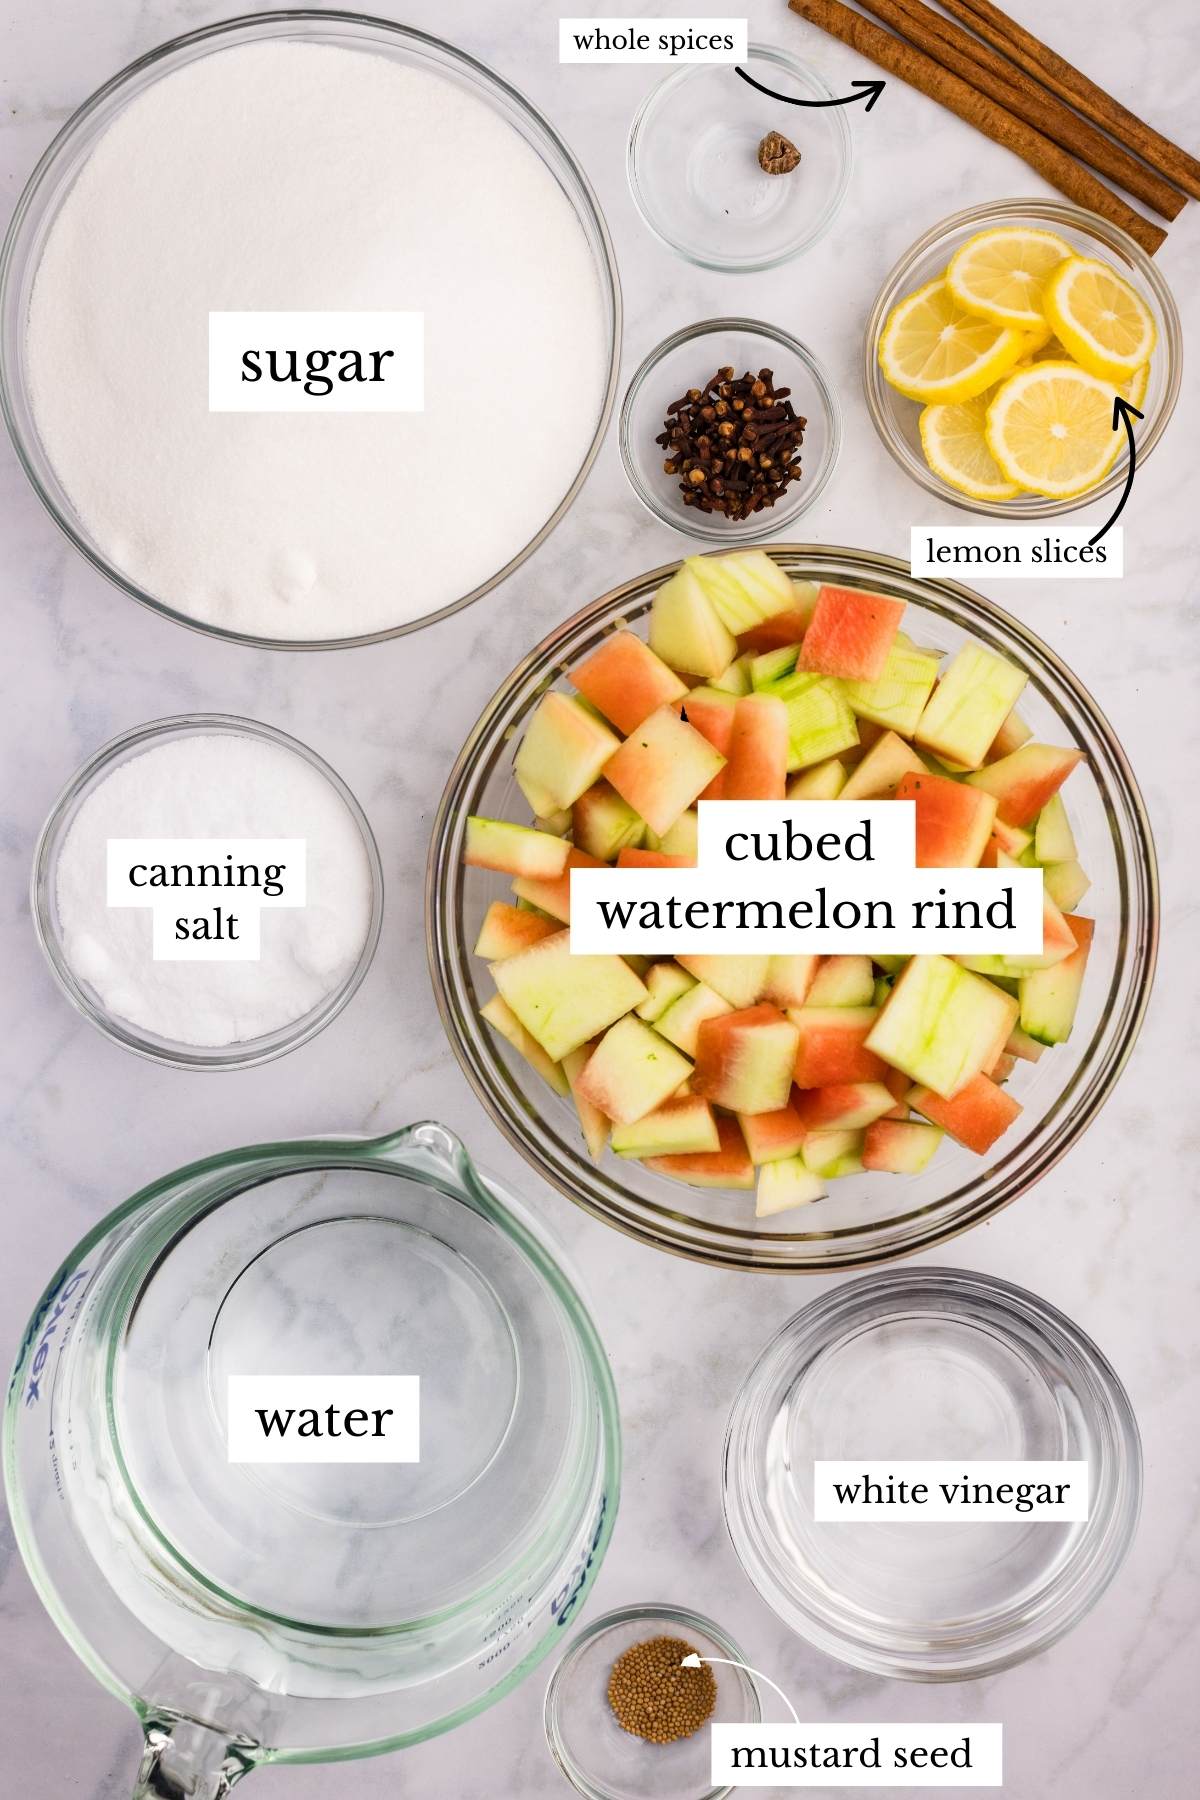
For the Brine:
- 8 cups watermelon rind, peeled and cut into 1-inch cubes (about 1 medium watermelon), remove both the green skin and pink flesh, keeping only the white part
- ½ cup canning salt (don’t use table salt, it will make the brine cloudy)
- 8 cups water
For the Pickling Syrup:
- 2 cinnamon sticks
- ½ tablespoon whole cloves
- ½ whole nutmeg, cracked
- ¼ teaspoon mustard seed
- 3½ cups sugar
- ⅓ cup thinly sliced lemon (1 small lemon)
- 1 cup vinegar, 5% acidity – white or apple cider vinegar both work
- 8 cups water (for cooking)
Optional:
- Pickle crisp (⅛ teaspoon per jar), helps keep the rind firm
Want to double it? Just make sure you have a big enough pot or bowl for the overnight brine (think stockpot size for a double batch). The cooking and processing times stay exactly the same, but you’ll need larger pots and more counter space for cooling all those jars. Tripling gets pretty unwieldy, so I’d stick to doubling or just make multiple batches on different days.
How to Make
Day 1: Prep the Watermelon Rind
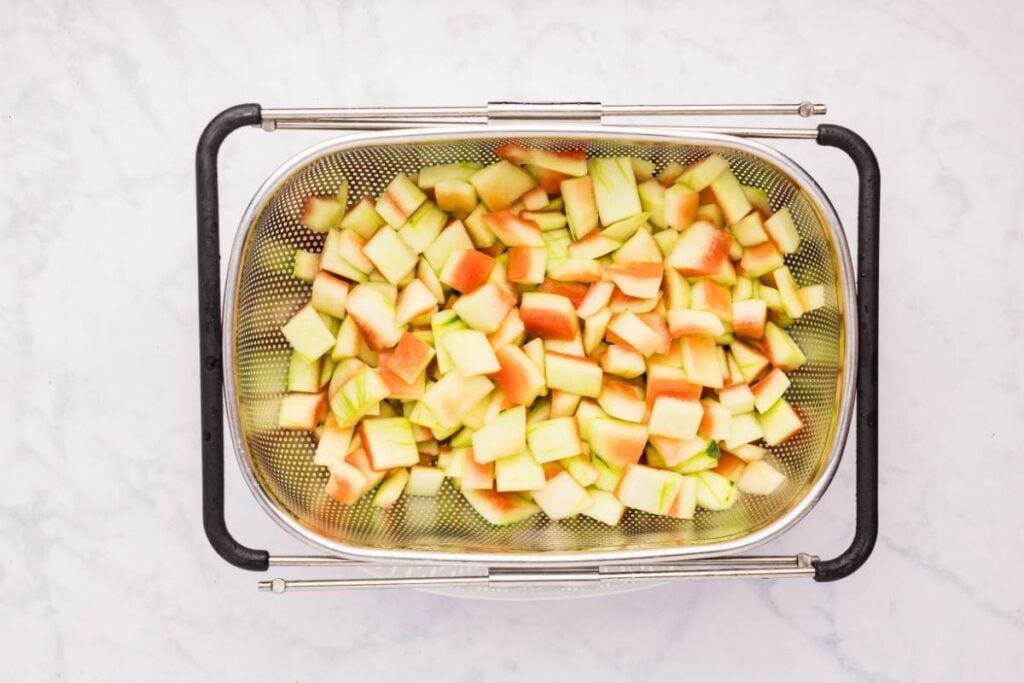
Start with a good watermelon wash. I know it sounds silly since you’re peeling it anyway, but dirt on the outside transfers to your knife and then to the rind. Just scrub it under cool water.
Cut your watermelon into quarters, then work in manageable pieces. Here’s the tedious part: you need to remove ALL the pink flesh (save it for snacking!) and ALL the green skin. What you want is just that white part in between. A sturdy vegetable peeler works for the green skin, but use a paring knife if the peeler isn’t cutting it.

FREE FOR SUBSCRIBERS
Canning Binder
Subscribe (free!) to my newsletter to receive this PDF + dozens of others in my printable library. You’ll also get emails you’ll truly love, with a weekly meal and so much more.
(Obviously, you would typically make this after eating an actual watermelon, not butcher one just for the rind. Just wash before you slice it and carefully slice off all the pink that people have left behind.)
Cube everything into roughly 1-inch pieces. They don’t need to be perfect.
Prep the Brine
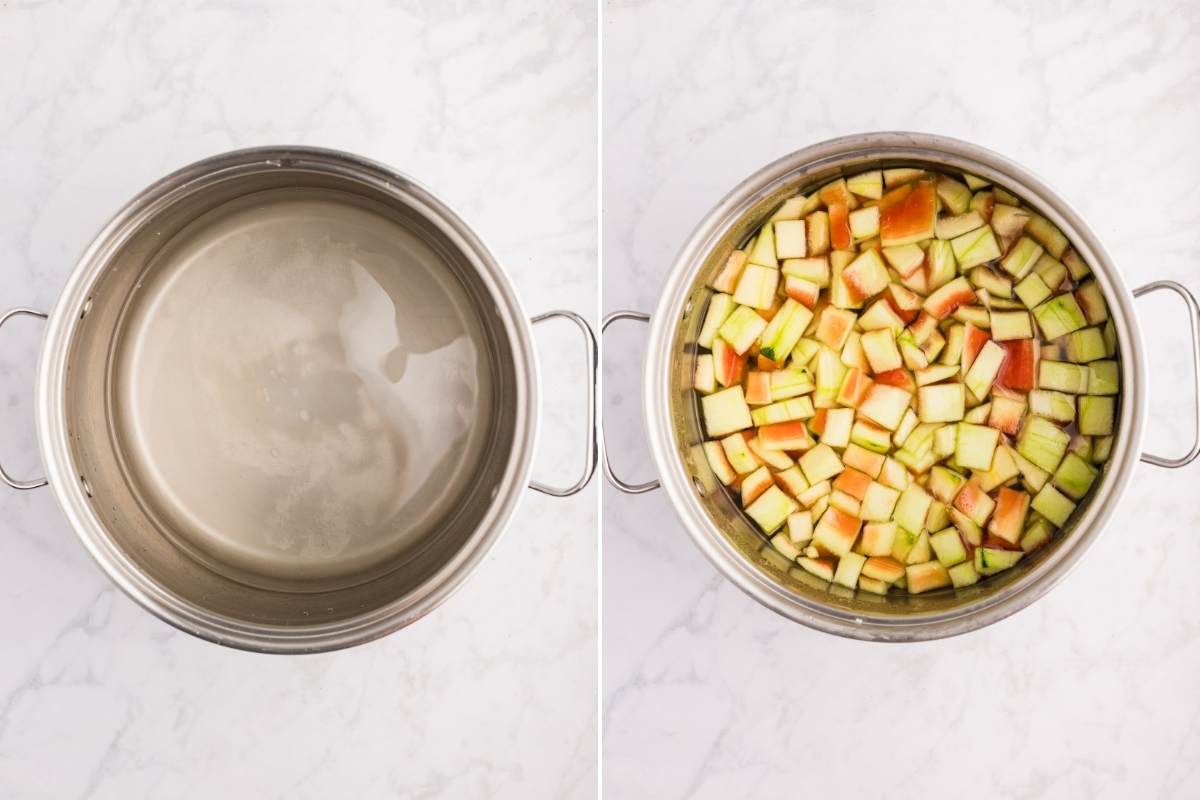
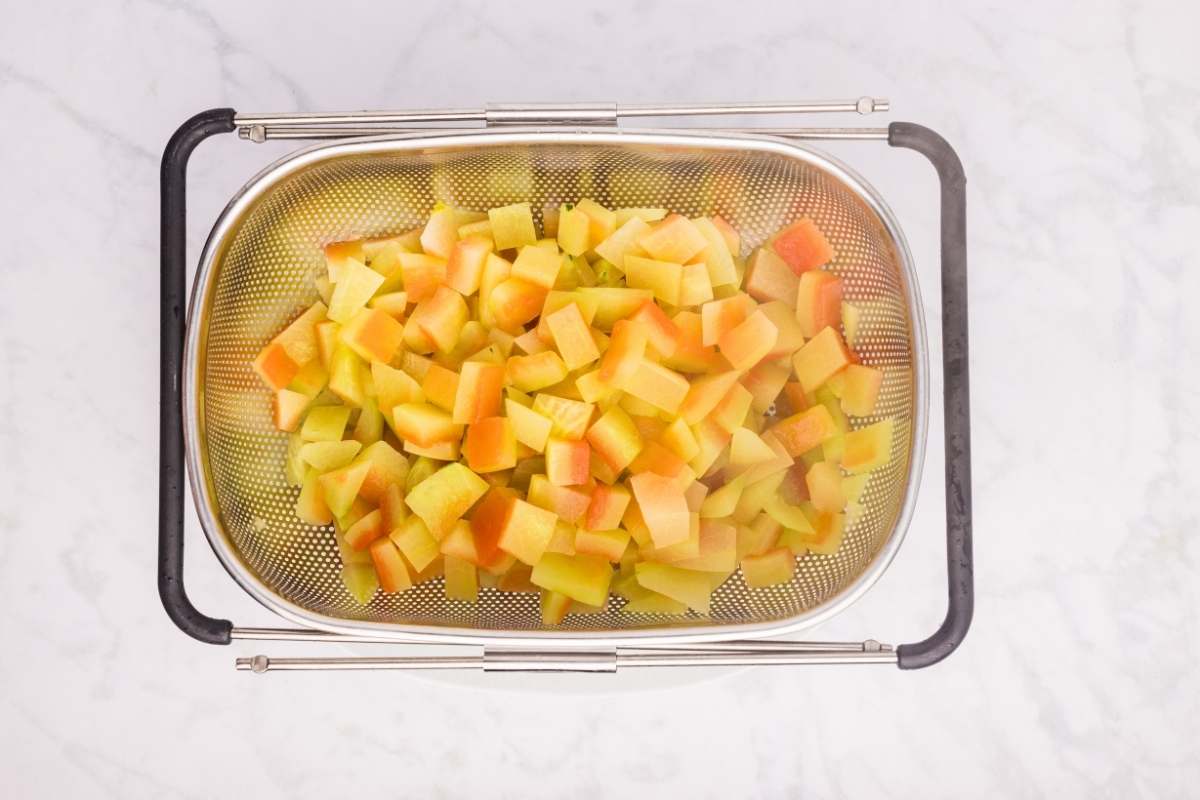
Dissolve your canning salt in 8 cups of water. Stir until you can’t see salt crystals at the bottom. Add your rind, stir, cover, and refrigerate overnight. This keeps your pickles crisp, so don’t skip it.
Day 2: The Rest of the Work!
Getting Your Jars Ready
Before you do anything else, get your canning setup going. Wash your jars in hot soapy water, then put them in your water bath canner with water and keep them simmering (not boiling). Wash your lids and rings too, but just set those aside.
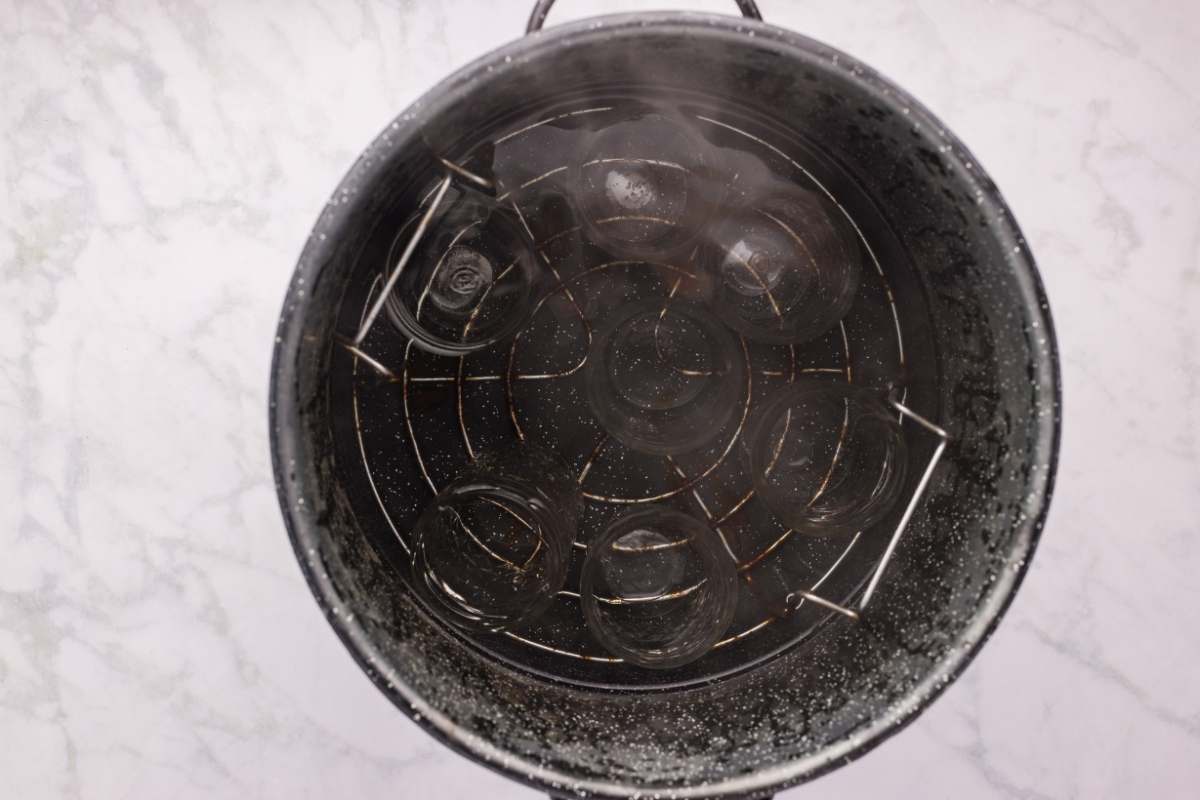
This step feels like overkill until you’re trying to fill hot jars with hot pickles and realize you forgot to heat them up.
Cooking the Rind
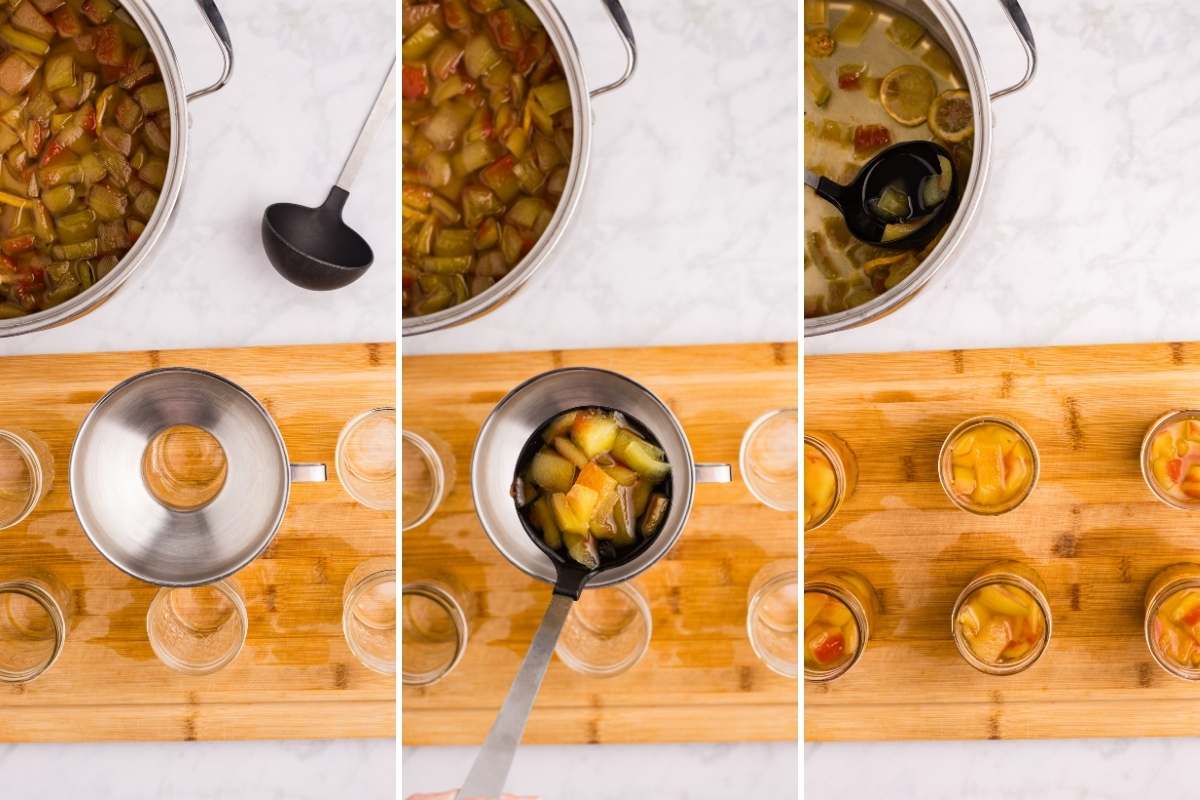
Drain and rinse your rind well. You want all that salt off. Then into a big pot with 8 cups of fresh water.
The First Cook
Bring to a simmer and cook until the rind is just tender when you poke it with a fork, about 10 minutes. It’s going to cook more in the syrup, so don’t overdo it.
Drain it well (yes, again!). Extra water will dilute your syrup.
Making the Spice Bag and Syrup
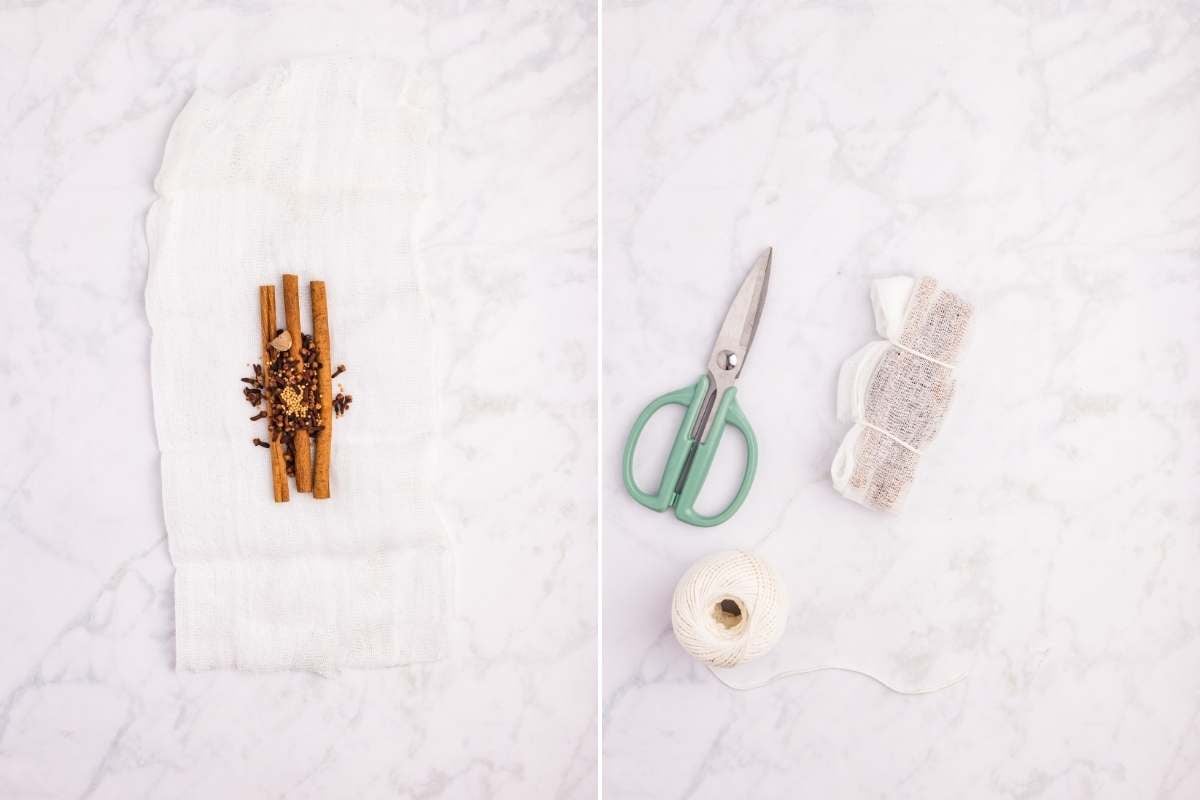
Make your spice bag. Tie the cinnamon sticks, cloves, nutmeg, and mustard seed in cheesecloth. No cheesecloth? A coffee filter tied with kitchen twine works. You just want to keep the spices contained.
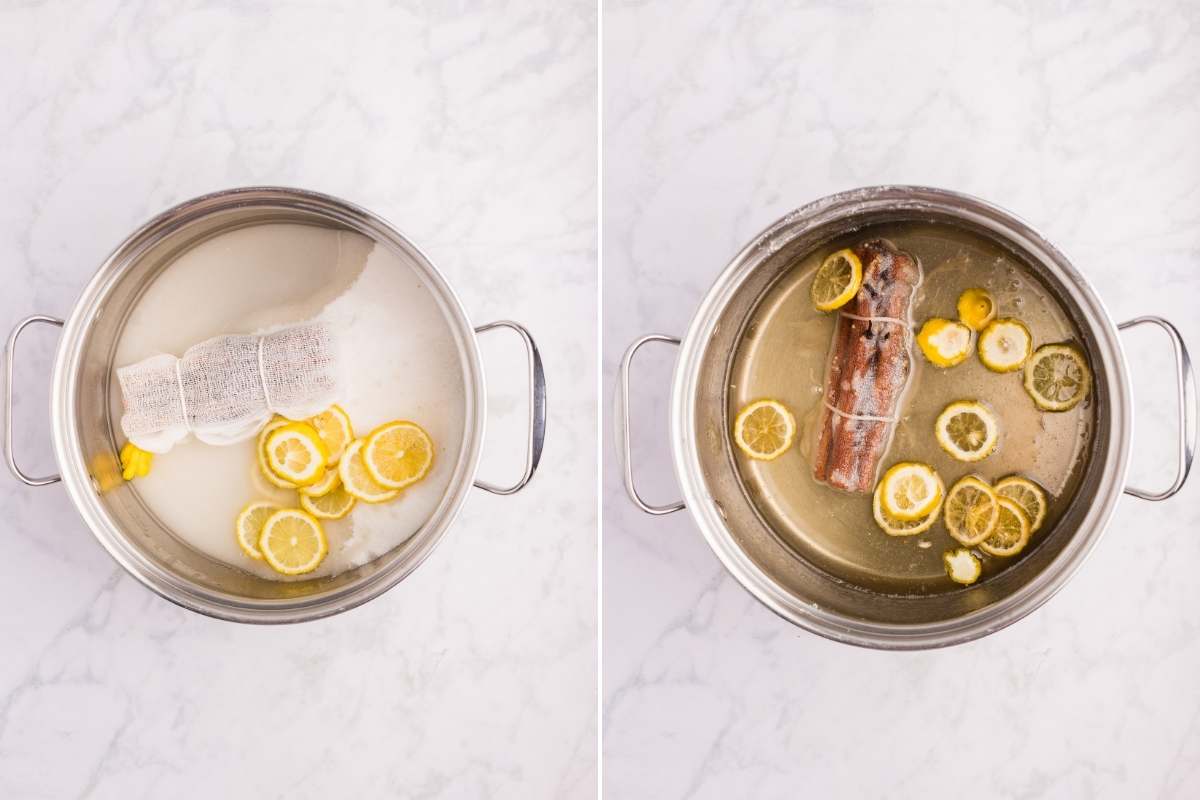
In your big pot, combine the spices, sugar, lemon slices, and vinegar. Bring to a boil, stirring until that sugar dissolves completely. No gritty bits on the bottom when you stir. Reduce to a simmer for 10 minutes.
The Final Cook
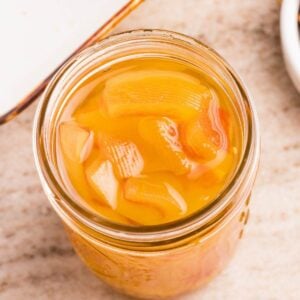
Add your cooked rind to the syrup. Simmer until the rind looks mostly translucent – another 10 minutes. It won’t be completely see-through, but you’ll notice it’s less opaque. Pull out the spice bag.

Filling and Processing the Jars
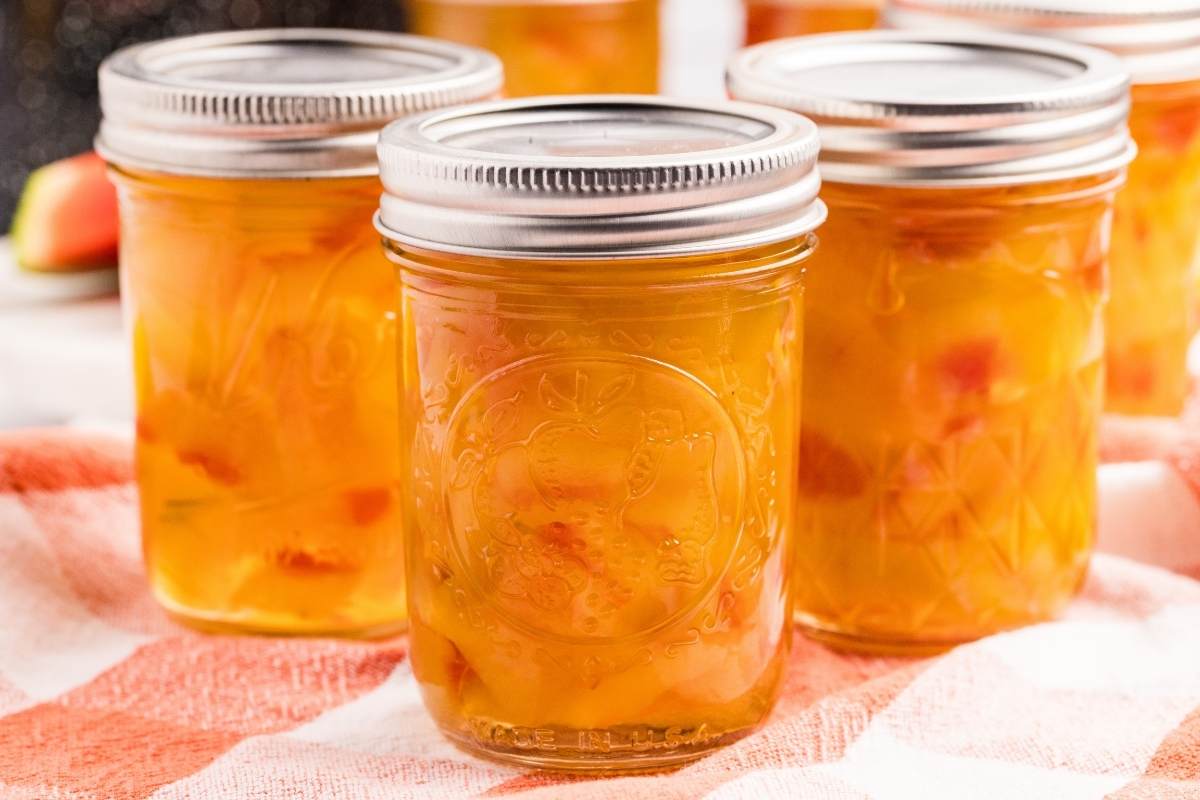
Work with hot jars and hot pickles. Using your canning funnel, ladle the rind and syrup into jars, leaving ½-inch headspace. Make sure the rind is covered with syrup.
If you’re using pickle crisp, add ⅛ teaspoon to each jar now.
Remove air bubbles by sliding a butter knife down the sides of the jar. Top off with more syrup if needed to maintain that ½-inch headspace.
Wipe the rims clean. Any syrup or rind bits will prevent a good seal. Put on lids and rings, tightening just to fingertip tight.

Water Bath Processing
Process in boiling water for 10 minutes. Start timing once the water returns to a rolling boil. When time’s up, turn off heat, remove the canner lid, and let jars sit in the hot water for 5 minutes.
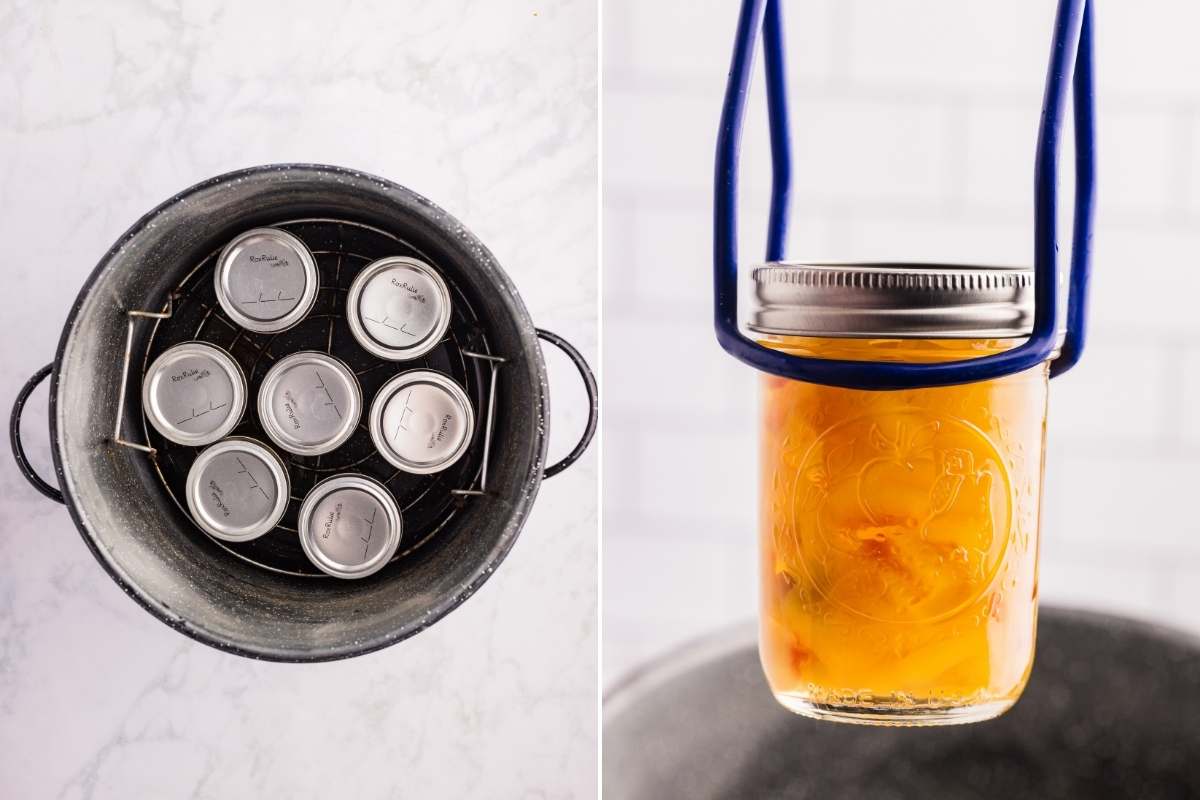
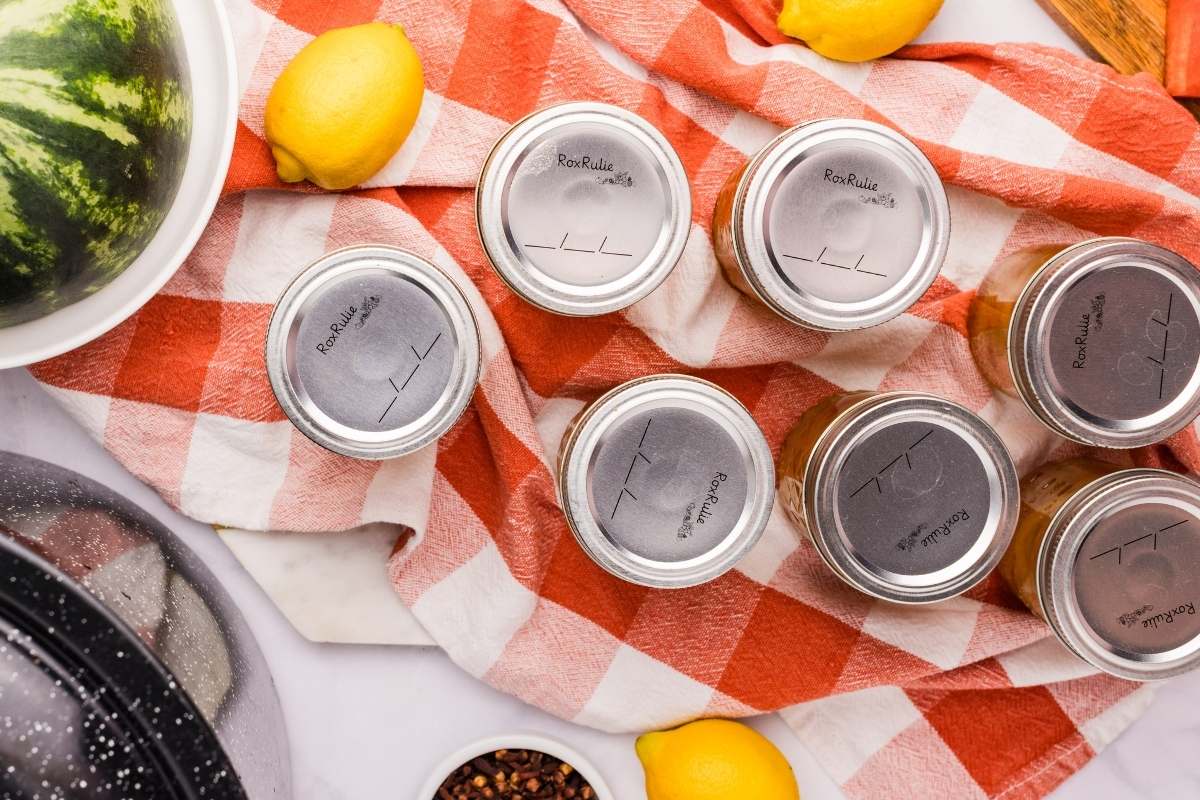
Lift them out and set on a towel-lined counter. You’ll hear lids sealing over the next few hours. Let them cool completely (12 to 24 hours ) before checking seals.
These are good right away, but they’re better after sitting for 2 weeks. The spices need time to infuse the rind.
Storage Instructions
For properly canned and sealed jars: Store in a cool, dark pantry for 12-18 months. Once you open a jar, keep it in the fridge and use within 2 weeks.
Don’t want to mess with canning? That’s fine too. Just make the pickles through the final cooking step, let them cool, and store everything in the fridge in clean jars or containers. They’ll keep for about a month this way – way longer than you’d think! You lose the long-term storage, but you still get all that delicious flavor without any of the water bath processing.
If a jar doesn’t seal after processing, no big deal. Just stick it straight in the fridge and treat it like the refrigerator version, use within 3 months.
Serving Ideas
These are great with barbecue. The sweet-tangy flavor works really well with smoky meat. They’re also good on holiday hams and charcuterie boards since they’re such a conversation starter.
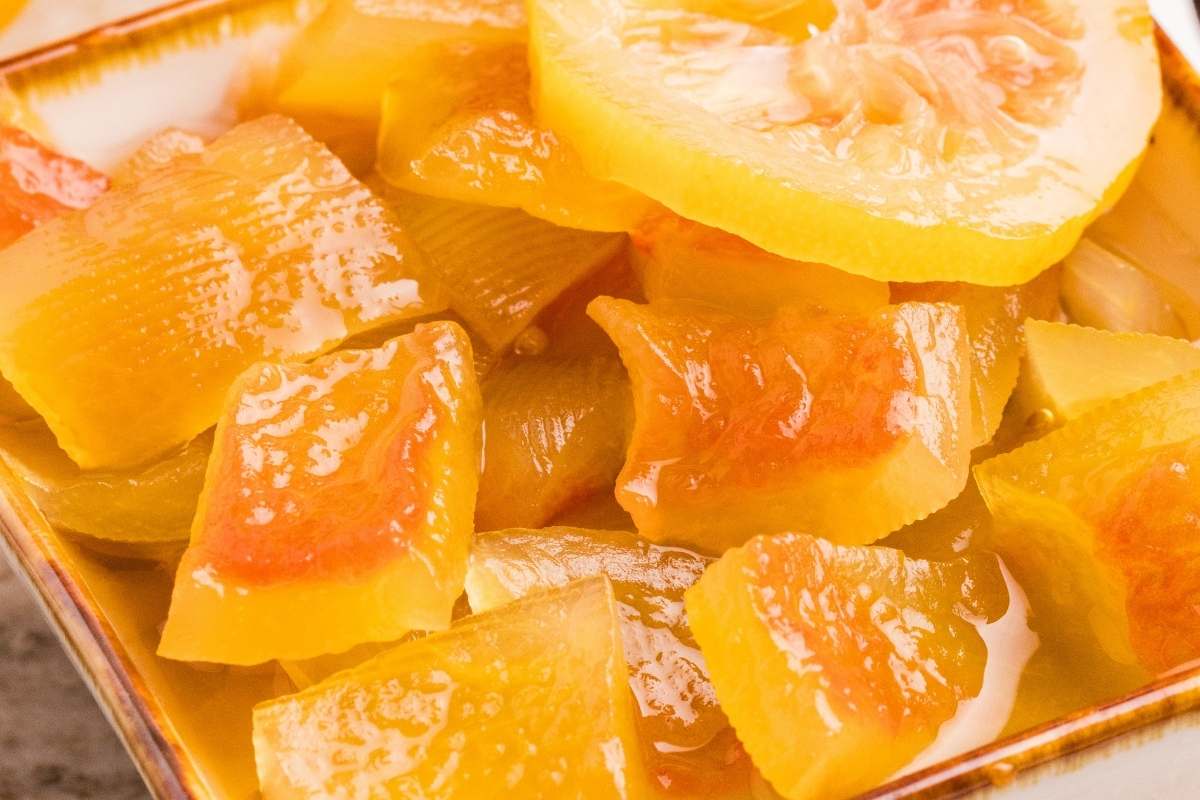
Use them as a condiment too. Chop them up for chicken salad, or serve alongside roasted pork.
Of course they’re great plain as a snack, too!
Flavor Variations
Try adding a few slices of fresh ginger to your spice bag, or toss in a star anise for something more exotic.
Just remember to keep the basic ratios the same. These are fun additions, not replacements for the main spices.
Troubleshooting
You probably skipped the salt brine or cooked it too long. The overnight salt soak is what keeps them firm, so don’t skip that step.
Just stick them in the fridge and use within a month. Don’t try to reprocess them.
Sure, but they’ll get softer faster during cooking. If you go smaller, watch them closely and reduce the cooking time a bit.
It thickens as it cools, so don’t panic if it seems thin while hot. If it’s really watery, you might have had too much water left on the rind after draining.
Printable Recipe
Watermelon Rind Pickles
Equipment
- 6-7 half-pint canning jars with lids and rings
- 1 Large pot
- 1 cheesecloth or spice bag
Ingredients
Brining Rind
- 8 cups watermelon rind peeled and cut into 1-inch cubes (about 1 medium watermelon)
- ½ cup canning salt
- 8 cups water
Cooking Rinds
- 8 cups fresh water
Syrup
- 2 cinnamon sticks
- ½ tablespoon whole cloves
- 1 whole nutmeg cracked (or ½ teaspoon ground)
- ¼ teaspoon mustard seed
- 3 ½ cups sugar
- ⅓ cup lemon thinly sliced (1 small)
- 1 cup vinegar 5% acidity
Filling Jars
- ⅛ teaspoon pickle crisp per jar, optional
Save This Recipe
You'll join my email list which you will love. And if you don't, unsubscribe in one click. ❤️
Instructions
Day 1
- Prep fruit. Remove pink flesh and green skin from watermelon, leaving only white rind. Cut into 1-inch cubes.
- Make brine. Dissolve canning salt in 8 cups water, add rind, cover and refrigerate 12 hours.
Day 2
- Prep canning equipment.Prepare canning jars by washing and keeping hot in water bath canner. Drain and rinse rind well.
- Cook rind. Place rind in large pot with 8 cups fresh water. Simmer until just tender, about 10 minutes. Drain well.
- Make syrup. Tie spices in cheesecloth. In large pot, combine spice bag, sugar, lemon slices, and vinegar. Bring to boil, stirring to dissolve sugar. Simmer 10 minutes.
- Final cook. Add cooked rind to syrup. Simmer until rind looks mostly translucent, about 10 minutes. Remove spice bag.
- Fill jars. Ladle rind and syrup into hot jars, leaving 1/2-inch headspace. Add pickle crisp if using. Remove air bubbles, wipe rims, apply lids and rings fingertip tight.
- Process. Process in boiling water bath 10 minutes. Turn off heat, let rest 5 minutes, then remove to towel-lined surface. Cool 12-24 hours before checking seals.
Notes


