
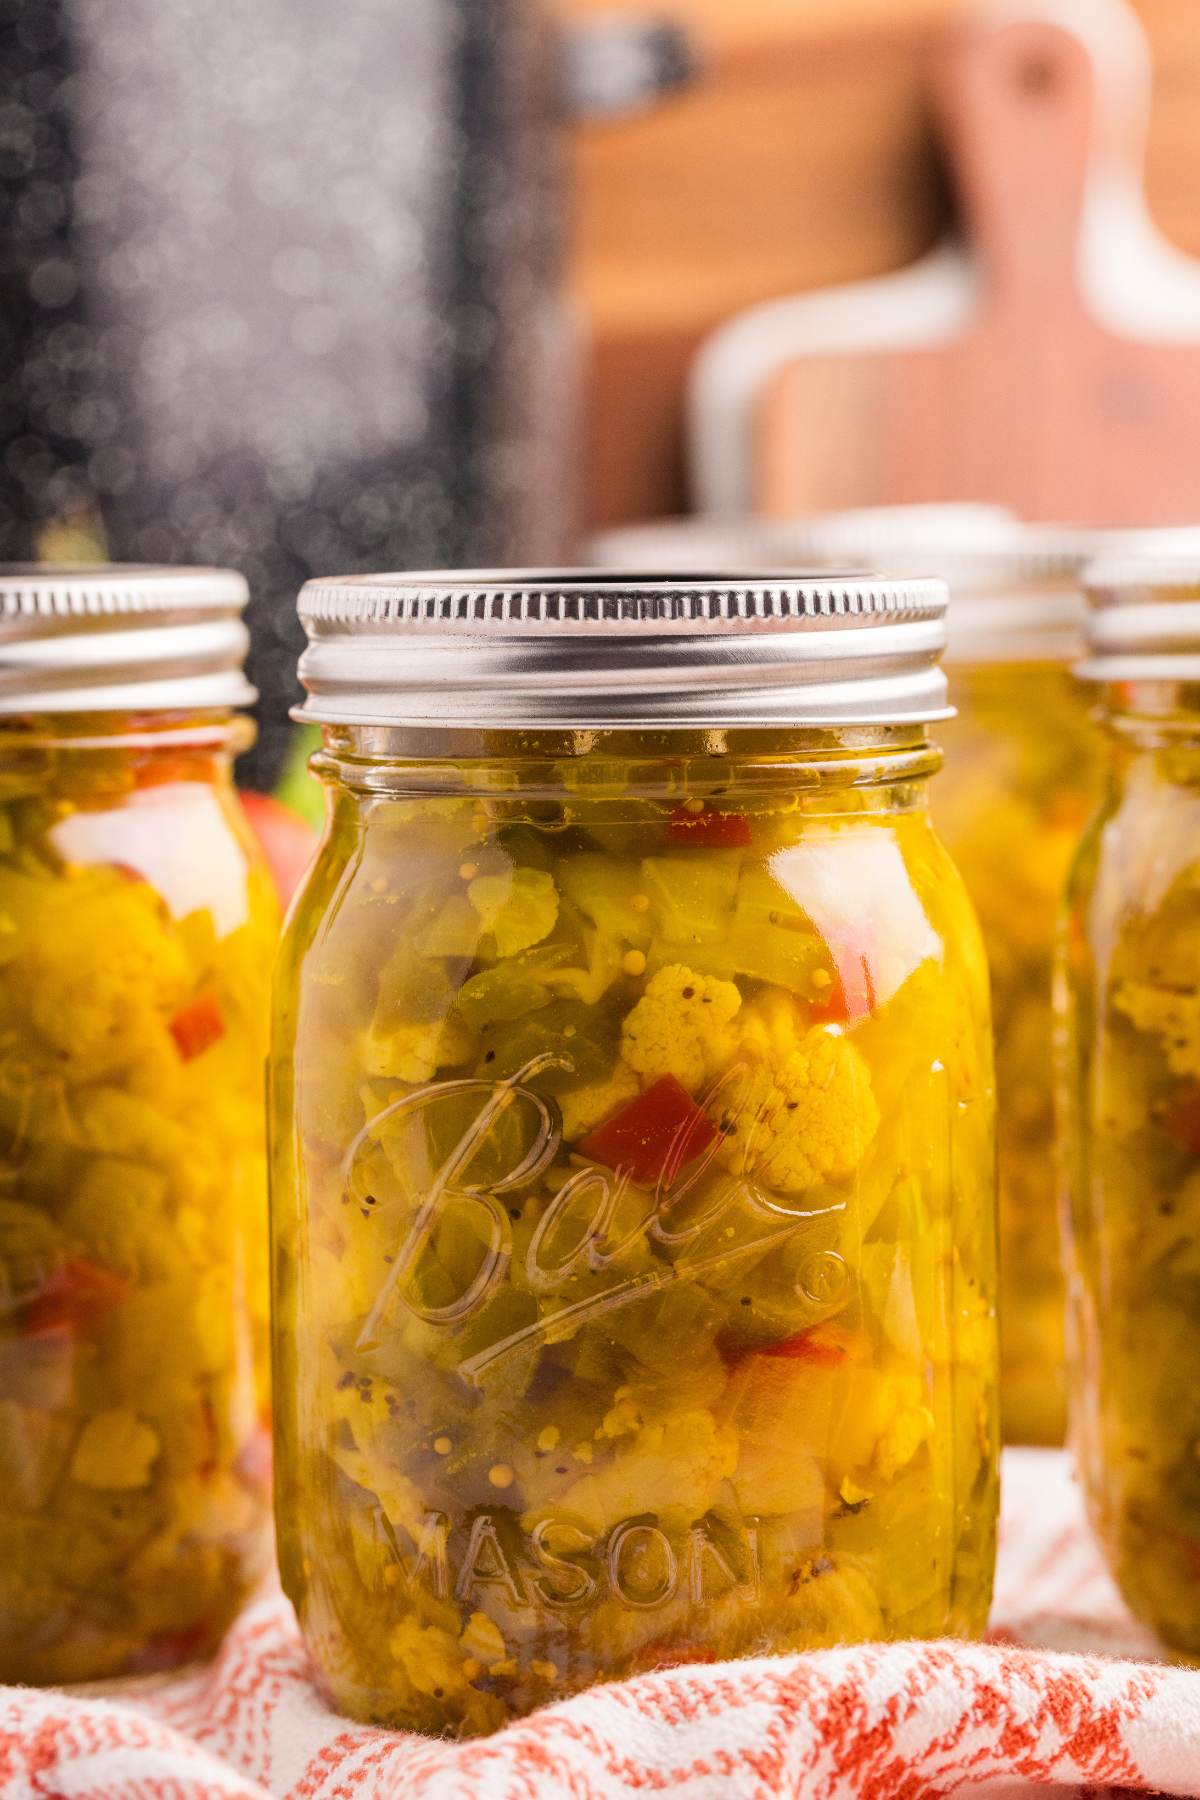
A tangy-sweet Southern favorite your grandma probably had in her pantry, and now you can too. This simple canning recipe combines fresh vegetables like cabbage, green tomatoes, and peppers with a turmeric brine that adds instant flavor to beans, burgers, and pulled pork all year long.
I stumbled onto this recipe my second year gardening when frost was coming and I had probably 20 pounds of green tomatoes staring at me, and now it’s the ONE thing I make sure to can every fall even if I’m too tired for anything else. Once you’ve tried it, you’ll hope for green tomatoes next year.
What You’ll Need
You’ll need standard canning equipment for this recipe: a water bath canner, jars with new lids, and the basic tools (jar lifter, funnel, and bubble remover).
Vegetables:
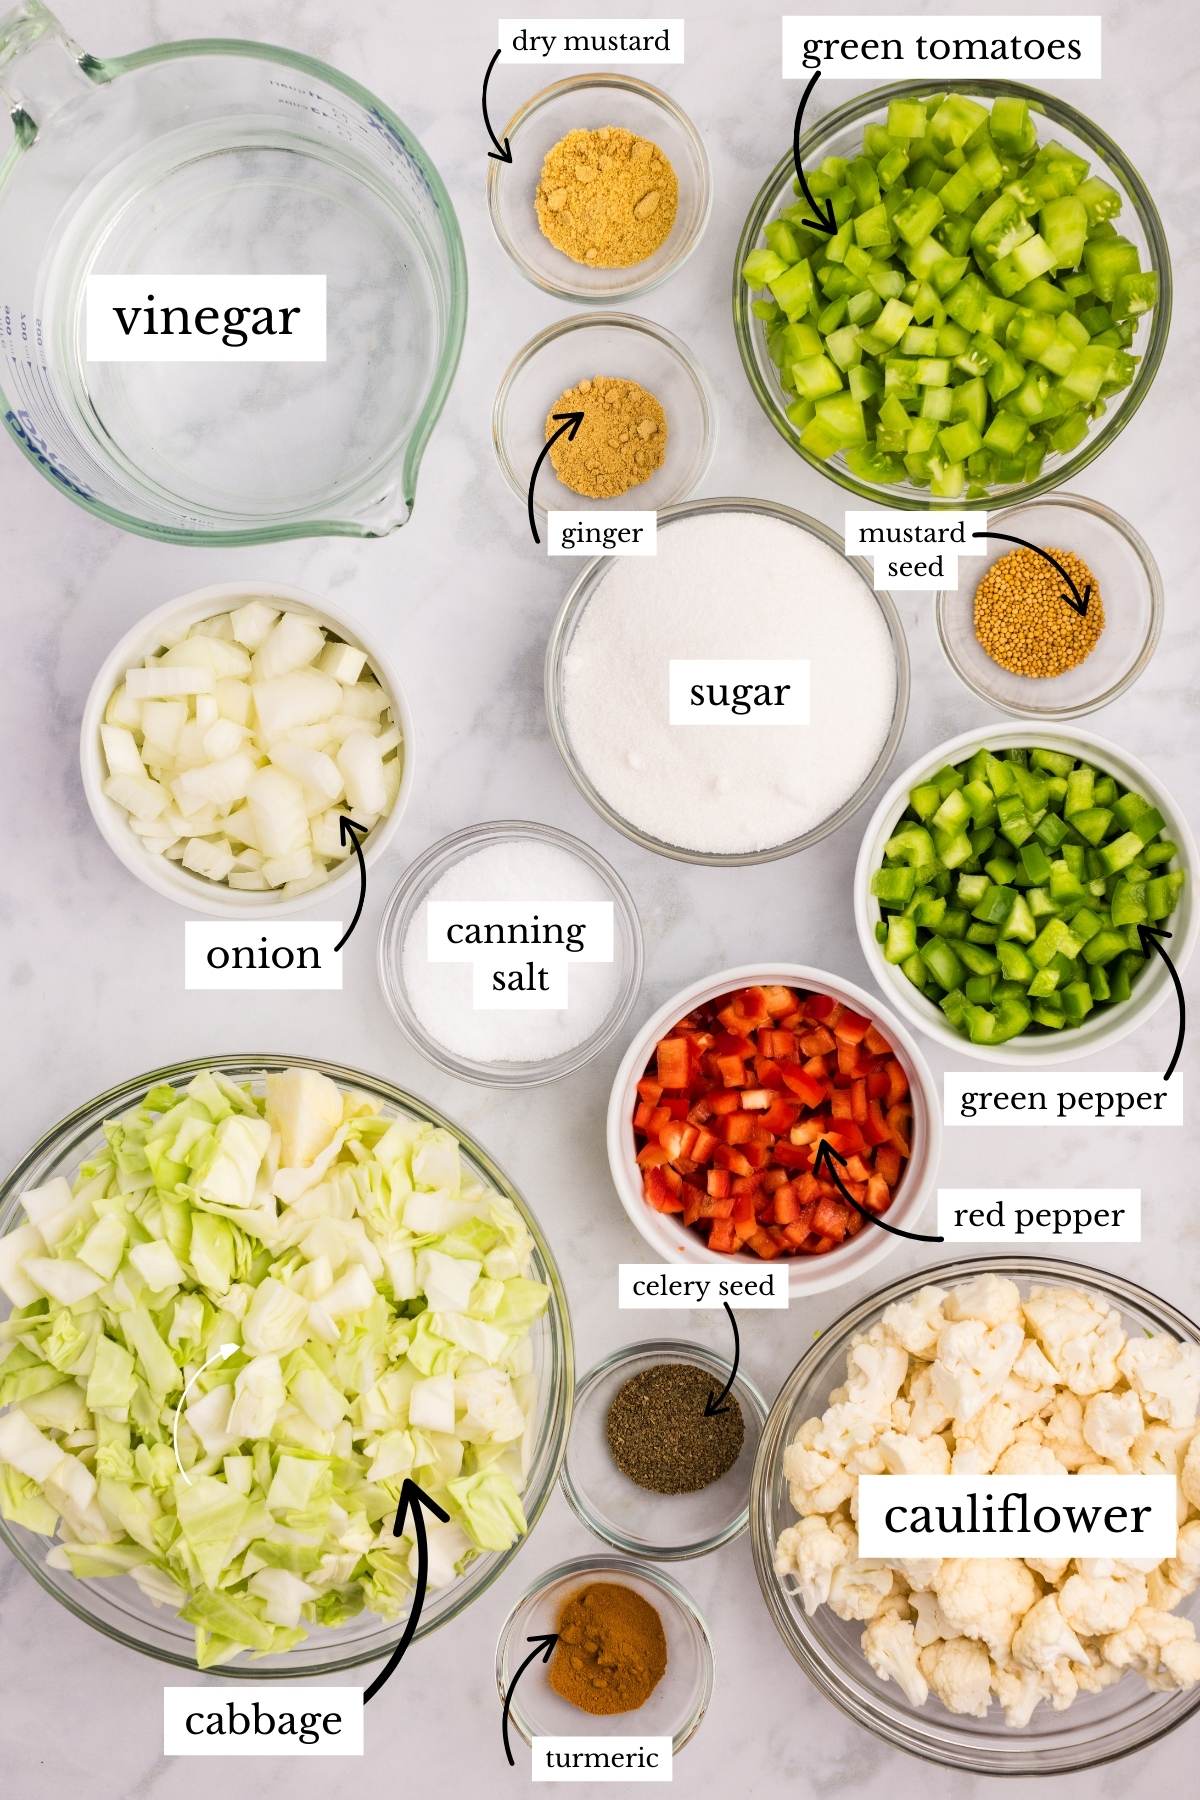
- 4 cups chopped cabbage (about 1 small head)
- 3 cups cauliflower, chopped (about 1 medium head)
- 2 cups green tomatoes, chopped (about 4 medium tomatoes) these should be completely green and hard, not starting to ripen
- 2 cups onion, chopped (about 2 medium)
- 2 cups green bell peppers, chopped (about 2 large)
- 1 cup red bell pepper, chopped (about 1 large)
For the Brine:
- 3 tablespoons canning salt: NOT table salt, which will make your brine cloudy
- 1 ½ cups sugar
- 2 teaspoons celery seed
- 2 teaspoons dry mustard
- 1 teaspoon mustard seed
- 1 teaspoon turmeric
- ½ teaspoon ginger
- 2 ½ cups vinegar, 5% acidity white vinegar keeps it bright, apple cider vinegar works but darkens the color
Optional:
- Pickle crisp (¼ teaspoon per jar if using)
How to Make
This is, for sure, a process. None of it is hard, there’s just a lot of steps. I know you have it in you.

FREE FOR SUBSCRIBERS
Canning Binder
Subscribe (free!) to my newsletter to receive this PDF + dozens of others in my printable library. You’ll also get emails you’ll truly love, with a weekly meal and so much more.
Getting Your Vegetables Ready
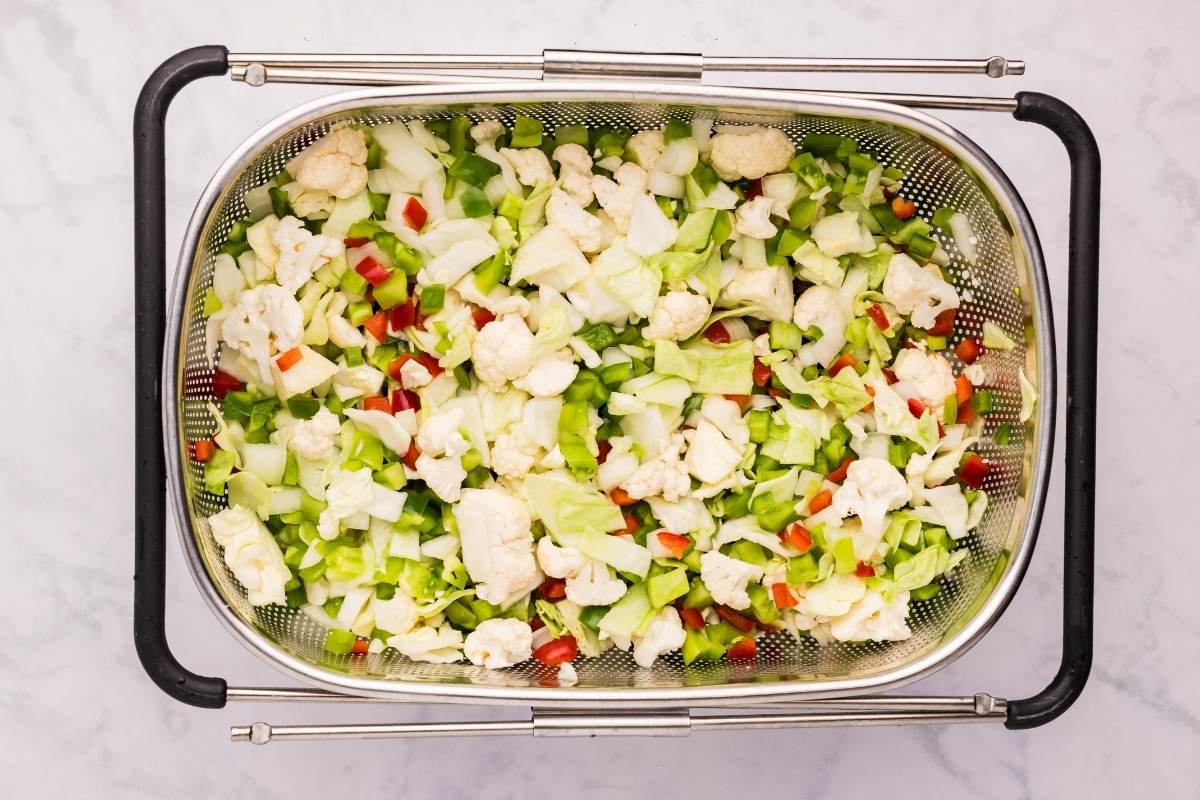
Start by chopping everything into small, uniform pieces, about the size of corn kernels works perfectly. Don’t stress about making them identical, but keeping them roughly the same size means everything will pickle evenly.
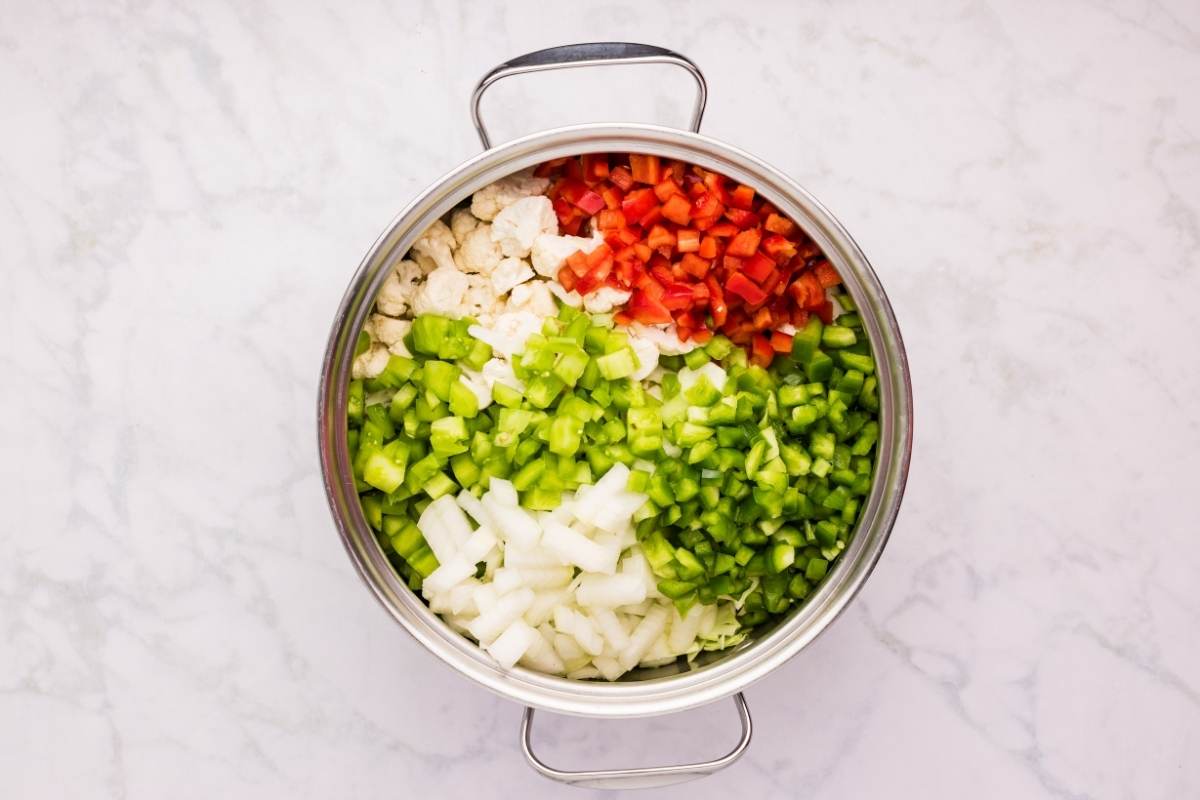
I use my biggest cutting board for this and just work through one vegetable at a time. The green tomatoes should be completely hard and green. If they’re starting to turn even slightly pink, save those for something else because they’ll get mushy in the brine.
Salt Soak
Once everything’s chopped, toss it all into your largest nonreactive bowl (glass, stainless steel, or ceramic – not aluminum). Sprinkle the canning salt over everything, then cover with cold water. The vegetables need to sit for at least 4 hours, but overnight is actually easier if you’re planning ahead.
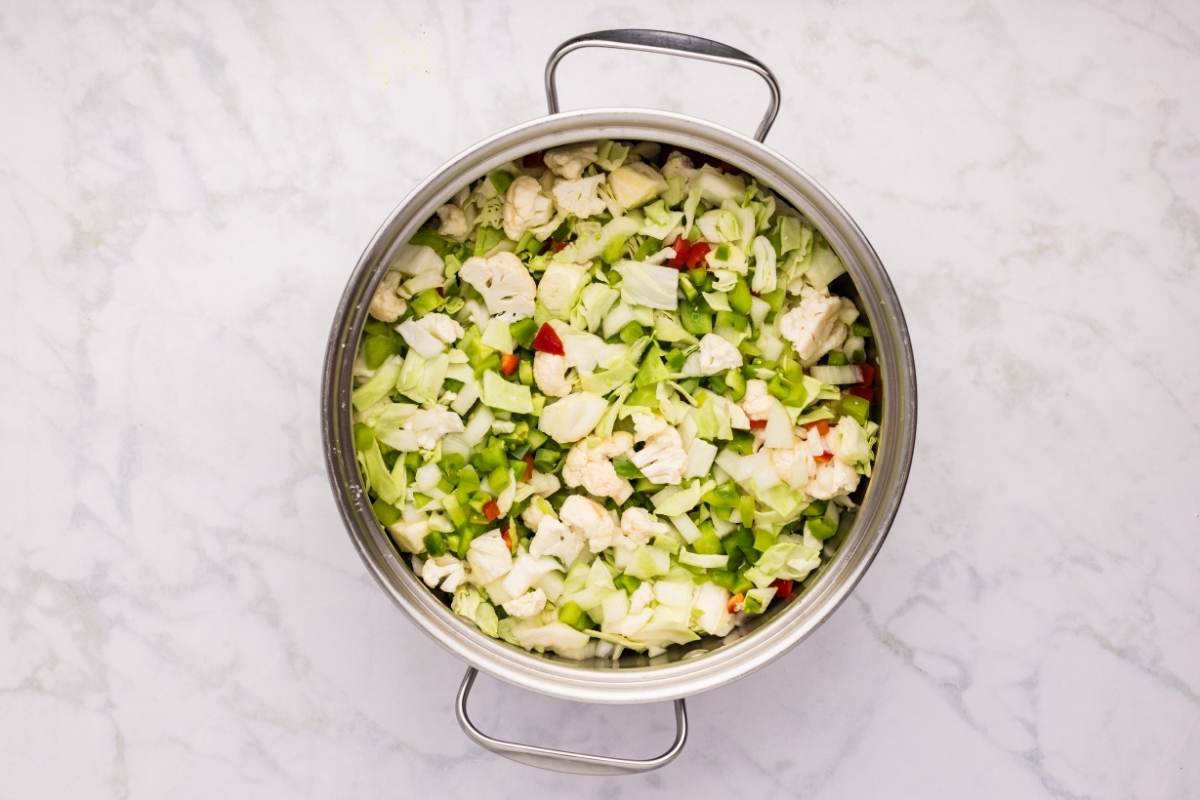
This salt soak pulls out excess moisture so your relish stays crisp instead of going limp in the jars.
Draining and Prepping for Canning
After the soak, drain everything in a colander and rinse really well under cold water. You want to get rid of that excess salt. Give it a good shake.
While that’s draining, get your canner heating up with your jars in it, and was your lids and rings in hot soapy water. I put them in a pot of simmering water while I’m waiting to keep them warm and clean.
Making the Relish
In your largest stainless steel pot (not aluminum, the vinegar will react with it), combine the vinegar, sugar, and all those spices. Bring this to a boil first, stirring to dissolve the sugar completely.
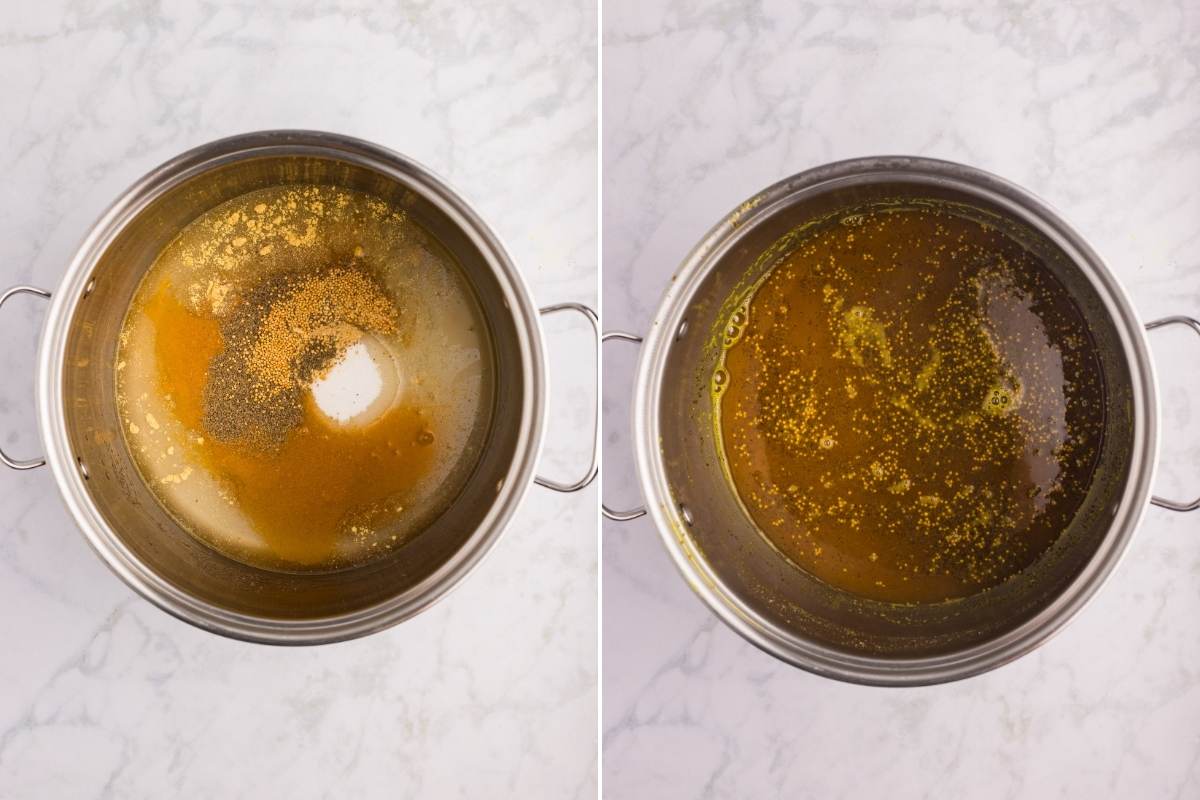
The kitchen’s going to smell STRONG. Just turn on your exhaust fan.
Once it’s boiling, add all your drained vegetables. You want to simmer for just 10 minutes. This isn’t supposed to be mushy relish. The vegetables should be heated through and slightly softened but still have some bite to them.
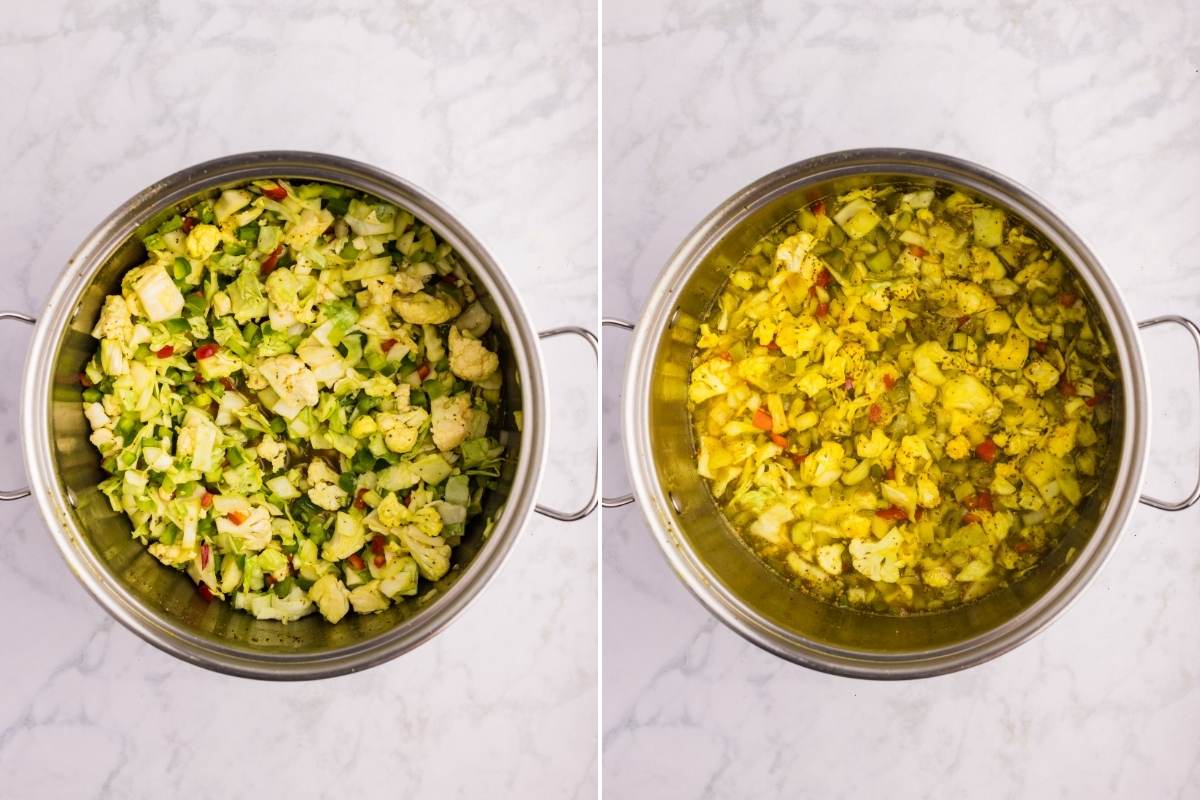
Stir occasionally so nothing sticks to the bottom.
Filling Your Jars
Work with one jar at a time, keeping the others hot in the canner. Ladle the relish into the jars, making sure you get a good mix of vegetables and liquid in each one.
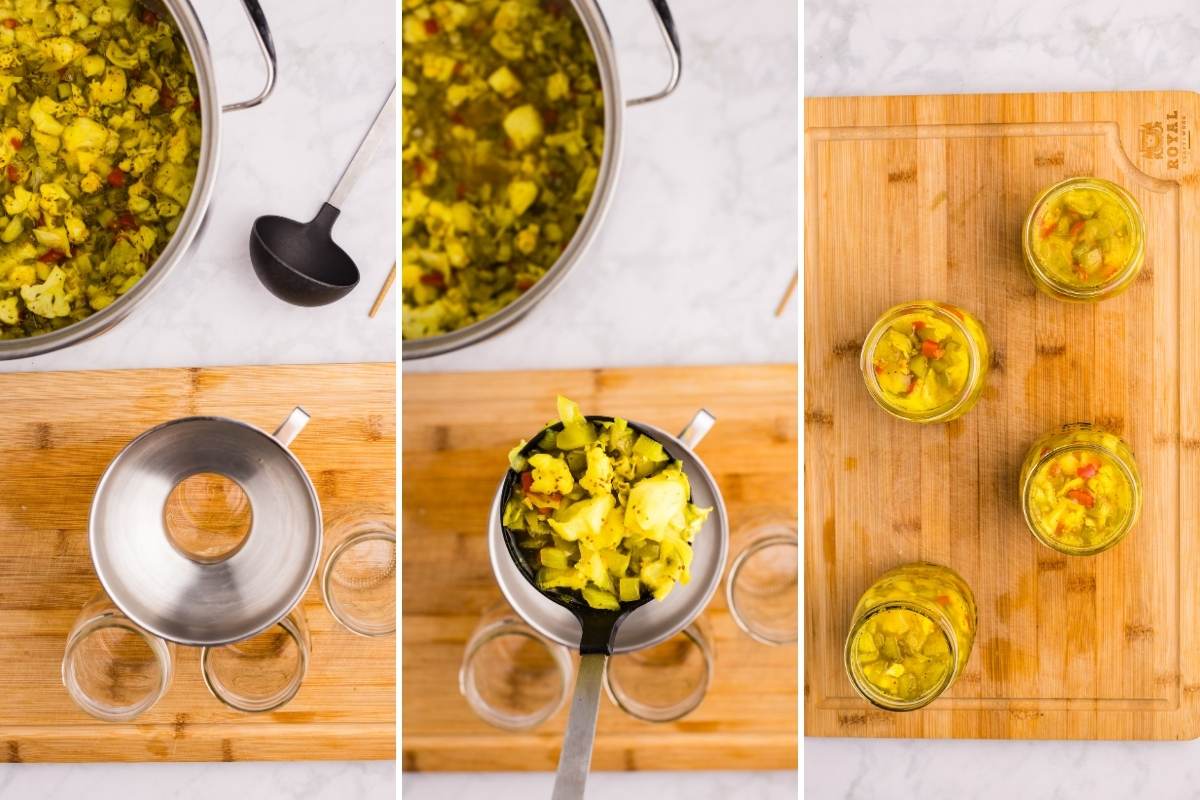
Leave a ½ inch headspace (use your headspace tool or just eyeball it against the jar threads).
Run your bubble remover or a clean butter knife around the inside edges to release any trapped air. If you’re using Pickle Crisp for extra crunch, add ¼ teaspoon now. Wipe the rim with a damp cloth. Any little bit of food on the rim can prevent sealing.
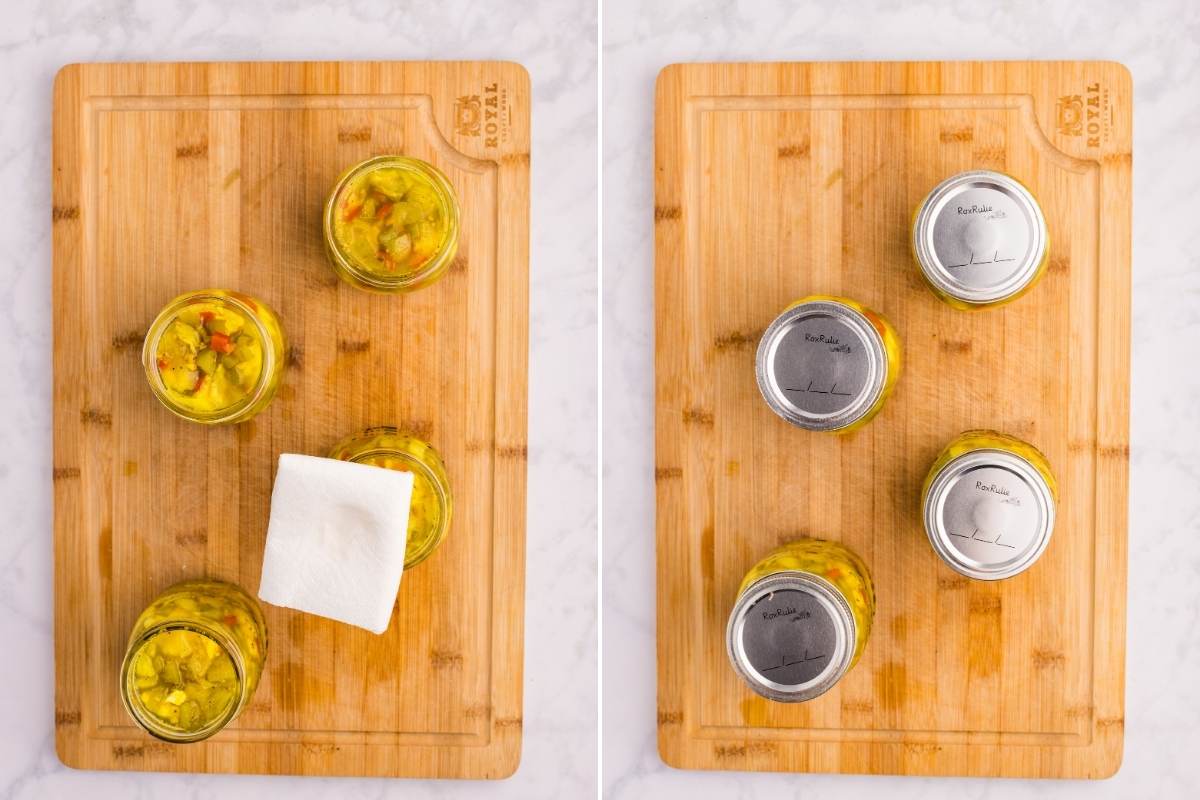
Put your lid on and tighten the band just until you feel resistance (what they call “fingertip tight.”) You’re not trying to crank it down super tight.
Processing and Finishing
Process in your boiling water bath for 10 minutes (add time if you’re above 1,000 feet elevation – check a canning altitude chart). When time’s up, turn off the heat, remove the canner lid, and let everything sit for 5 minutes. This little rest helps prevent siphoning, when hot liquid spurts out and ruins your seal.

Use your jar lifter to move the jars to a towel-lined counter, keeping them upright.
Don’t tilt them to check the liquid level, just leave them alone. You’ll hear that satisfying “pop” as they seal over the next few hours. After 12-24 hours, check that all the lids sealed (they shouldn’t flex when you press the center), remove the rings, and store in your pantry.
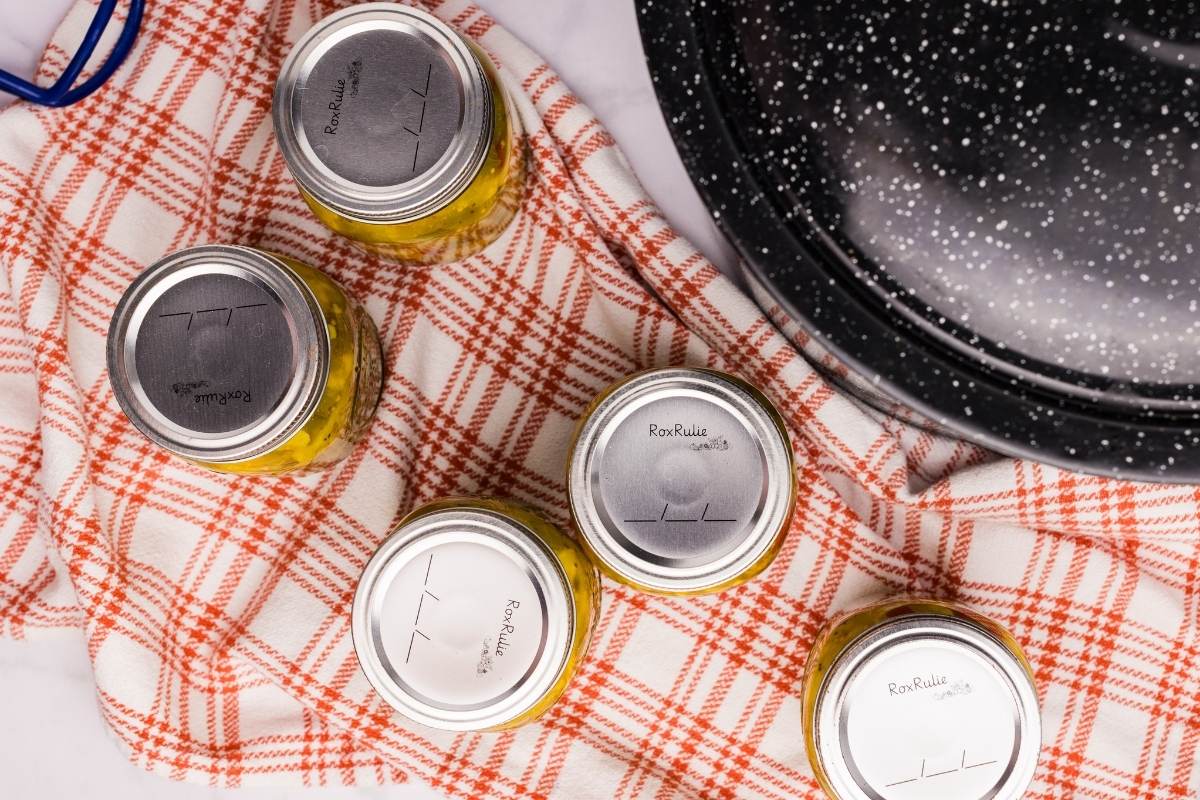
Any that didn’t seal go straight to the fridge.
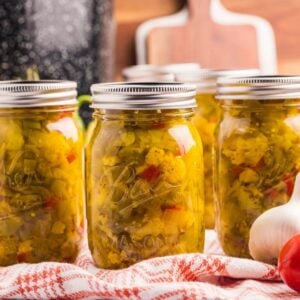
Storage Instructions
Once you’ve confirmed all your jars have sealed properly, remove the rings and wipe down the jars with a damp cloth. Store them in a cool, dark spot. They’ll keep for a full year.
After you open a jar, keep it in the fridge and use it up within a month.
Chow chow is traditionally served alongside beans and cornbread in the South, but it’s honestly fantastic anywhere you’d use pickle relish: hot dogs, burgers, pulled pork sandwiches, or stirred into homemade potato salad. I even love a spoonful on the side of a simple dinner like pork chops or roast chicken.
Troubleshooting
Yep! Just store it in the fridge right away and use within 2-3 weeks. The flavor actually gets better after a few days of sitting.
Nope, table salt has anti-caking agents that’ll make your brine cloudy and can affect the taste. But Kosher salt without additives works in a pinch.
Don’t mess with the vinegar amount, it’s what keeps this safe for water bath canning. You can add a bit more sugar if it’s too tangy for you, but that vinegar amount has to stay.
Firm tomatillos work, or just add extra green peppers and cauliflower to make up the volume. Just keep your total vegetables the same. Or make a dill relish instead!
Printable Recipe
Chow Chow Relish
Equipment
- 4-5 pint canning jars with new lids
- 1 large stainless steel pot
- 1 Jar lifter
- 1 Canning funnel
Ingredients
- 4 cups cabbage, chopped about 1 small head
- 3 cups cauliflower, chopped about 1 medium head
- 2 cups green tomatoes, chopped about 4 medium, completely green and hard
- 2 cups onion, chopped about 2 medium
- 2 cups green bell peppers, chopped about 2 large
- 1 cup red bell pepper, chopped about 1 large
- 3 tablespoons canning salt NOT table salt
- 1½ cups sugar
- 2 teaspoons celery seed
- 2 teaspoons dry mustard
- 1 teaspoon mustard seed
- 1 teaspoon turmeric
- ½ teaspoon ground ginger
- 2½ cups white vinegar 5% acidity
- ¼ teaspoon per jar Pickle Crisp optional, for extra crunch
Save This Recipe
You'll join my email list which you will love. And if you don't, unsubscribe in one click. ❤️
Instructions
- Prepare vegetables. Chop all vegetables into small, uniform pieces. Place in a large nonreactive bowl, sprinkle with canning salt, and cover with cold water. Let stand 4 hours or overnight.
- Drain and rinse. Drain vegetables in a colander and rinse well under cold water to remove excess salt.
- Make the brine. In a large stainless steel pot, combine vinegar, sugar, celery seed, dry mustard, mustard seed, turmeric, and ginger. Bring to a boil, stirring to dissolve sugar.
- Cook the relish. Add drained vegetables to the brine and simmer for 10 minutes, stirring occasionally. Vegetables should be heated through but still crisp.
- Fill jars. Ladle hot relish into hot sterilized jars, leaving ½ inch headspace. Add ¼ teaspoon Pickle Crisp if using. Remove air bubbles, wipe rims, and apply lids fingertip-tight.
- Process. Process in boiling water bath canner for 10 minutes (adjust for altitude). Turn off heat, remove lid, let sit 5 minutes, then remove jars to a towel-lined counter.
- Cool and store. Let jars cool undisturbed for 12-24 hours. Check seals, remove rings, and store in a cool, dark place for up to 1 year.
Notes
Nutrition

More to Explore
Baked BBQ Chicken Sliders
Super-Easy Crockpot Fried Apples
Hot Pepper Jelly Glazed Wings
Simple Homemade Marinara