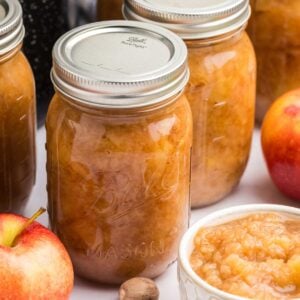
Classic Homemade Applesauce for Canning

This costs about half of what you’d pay at the store (yes, even if you buy the apples!) and tastes infinitely better. The best part is how forgiving this recipe is; you can adjust the sweetness, spices, and texture to match your family’s preferences perfectly. A simple and straightforward waterbath process makes this a good beginner canning recipe. This was one of the first things I ever learned how to make, and I still do it every year.

I’ll walk you through the process. Whether you’re experienced or this is your first canning project, I promise you’ll have something delicious at the end.
Table of Contents
Ingredients and Tools You’ll Need
Unlike many canning recipes, there is some flexibility here. You need the lemon juice for acidity, but the sugar and spices are all for flavor and are optional. Try to use a mix of sweet and tart apples for the best flavor, but only one kind is fine too. The sugar is optional because of the sugar in the apples, and since we are using bottled lemon juice. Use a potato masher for more texture, or a stick blender if you want a smoother sauce.
If you have an apple peeler/corer that attaches to the counter, it’s worth using for this recipe. Makes prepping your fruit so much easier.

Keep mind how much your family goes through in a week when picking the jar size. We typically do it in a pint, but half pints or even quarts are good too.

This will make 6 pints, but if you have lots of apples and your family goes through applesauce a lot, you can make a big batch. Just hit the 2x or 3x button in the recipe card below and it will do the calculations for you.
Equipment
- Water Bath Canner
- Large pot
- Canning jars with lids and bands
- immersion blender or potato masher
- Jar lifter and canning funnel
Ingredients
- 10 pounds apples (a mix of sweet and tart varieties for best flavor)
- 1-2 cups apple cider for a richer flavor (can use water too)
- 2 tablespoons bottled lemon juice (not optional, needed for safety)
- 2 teaspoons ground cinnamon (optional)
- ¼ teaspoon ground nutmeg (optional)
- 1-1½ cups sugar (optional, depending on the sweetness of the apples)
How to Make Applesauce For Canning
One thing: applesauce likes to bubble out of the jars during processing. Don’t overfill them, don’t overtighten the lids, make sure you get those air bubbles out, and don’t rush the cooling. That should help prevent the mess.
Step One: Prep Apples
Wash and peel all those apples, then core and quarter them.

Step Two: Cook the Apples
Toss them in a big pot with just enough liquid to cover the bottom so they don’t burn. Bring it to a boil, then turn it down and let them simmer covered until they’re soft – takes about 20-30 minutes.

Step Three: Season and Mash
Add the lemon juice, then taste your apples. If they need sweetening, add sugar. Throw in the spices if you’re using them.

Now mash them up however you like – chunky with a potato masher or smooth with an immersion blender.

Step Four: Prep Your Canning Equipment
While that’s happening, get your canning stuff ready. Boil the lids and bands for 10 minutes and heat up your jars in the water bath canner.
Step Five: Fill the Jars
Fill your hot jars with the hot applesauce, leaving about half an inch at the top. Run something non-metal around the inside to get rid of air bubbles. Wipe the jar rims clean, put the lids on, and screw the bands on fingertip tight – not super tight.

Step Six: Process in Water Bath
Put the jars in your canner with at least an inch of water over the tops. Once it’s boiling hard, process for 20 minutes. Turn off the heat and let them sit in there for 5 minutes before you take them out.

Step Seven: Cool and Store
Let them cool on a towel for 12-24 hours. Check that they sealed properly and store them somewhere cool and dark. They’ll keep for a year.

Storage Instructions
Once your jars are canned, cooled, and sealed, store them in a cool, dark, dry place like a pantry or basement. They will stay good for about a year.
If you don’t want to can your applesauce, you can freeze it. Once it’s cooled, use freezer-safe containers or bags leaving a half an inch headspace (it will expand when frozen).
If you’re building up an emergency long-term pantry, this is a great choice because it’s ready to eat right out of the jar.
Questions and Troubleshooting
Yes, but using a mix of sweet and tart will give you the best result. You might need to experiment to find your favorite apple combination.
Yes, as long as you add lemon juice for the right PH, you don’t need the sugar for preservation. But you might want it for sweetness. Taste the applesauce as you cook and add sugar if needed.

More Ways to Preserve Your Apples
When it’s apple season, it’s apple season. Here are even more ways to preserve them.
- Canned apple pie filling makes baking easy.
- Old-fashioned apple butter has a rich, spiced flavor.
- Apple chutney is perfect with meats or cheese and crackers.
Printable Recipe
Applesauce For Canning
Equipment
- Large pot
- immersion blender or potato masher
- Jar lifter and canning funnel
Ingredients
- 10 pounds apples a mix of sweet and tart varieties for best flavor
- 1-2 cups apple cider for a richer flavor (can use water too)
- 2 tablespoons bottled lemon juice not optional – needed for safety
- 2 teaspoons ground cinnamon optional, but makes it taste better
- ¼ teaspoon ground nutmeg optional, but makes it taste better
- 1-1½ cups sugar optional, depending on the sweetness of the apples
Save This Recipe
You'll join my email list which you will love. And if you don't, unsubscribe in one click. ❤️
Instructions
- Prep apples. Wash, peel, core, and quarter the apples.
- Cook. In a large pot, combine the apples with water or apple cider. The liquid should just barely cover the bottom of the pot to prevent burning. Bring the mixture to a boil over medium-high heat. Reduce heat to a simmer and cook, covered, until the apples are soft (about 20-30 minutes).
- Add. Add the lemon juice. Taste the apples and see if they sweet enough. If not, not add the sugar. Add the spices as desired.
- Mash or blend. Remove the apples from the heat. For chunky applesauce, use a potato masher. For smooth applesauce, use an immersion blender. Mash or blend the apples to your desired consistency.
- Prep for canning. Sterilize your lids and bands by boiling them in water for at least 10 minutes. Heat the jars in the water bath canner. It should be hot but not boiling when the jars are added. They do not need to be sterile, just hot.
- Fill jars. Using a canning funnel, ladle the hot applesauce into the hot jars, leaving ½-inch headspace. Run a non-metallic tool or bubble remover tool around the insides of the jars to remove air bubbles. Wipe the rims of the jars with a clean, damp cloth. Apply lids and screw on bands until fingertip tight.
- Process. Return the canner to a full rolling boil. Place the jars in the canner using a jar lifter. Make sure they are covered by at least 1 inch of water. Bring back to a rolling boil and process for 20 minutes (adjust time for altitude if necessary). Turn off heat, carefully remove canner lid, and let the jars rest in the canner for 5 minutes.
- Cool and store. Remove the jars from the canner and place them on a towel to cool for 12-24 hours. Check seals, label, and store in a cool, dark place for up to a year.
Notes
- Don’t overfilll! Overfilling can cause food to expand and push out under the lid during processing. Always measure the headspace carefully.
- Don’t over tighten! Screw bands should be tightened just to “fingertip tight”. This means as tight as you can get them using just your fingertips, not your whole hand. Over-tightening can prevent air from escaping, leading to siphoning.
- Check for bubbles. After filling the jars and before applying the lids, remove air bubbles by running a non-metallic spatula or bubble remover tool along the inside of the jar.
- Cooling time in the canner is important. After processing, allow the jars to cool in the canner for the recommended time before removing them.
Nutrition


I’ve never canned before, do you need a basket in the water bath when you can? or can the jars go directly on the bottom? Thank you!
you’ll need a basket or a makeshift aluminum foil…wrather shaped thing. anything to keep the glass from touching the bottom of the pot directly. 🙂
Excellent applesauce recipe! We added three cloves to each batch and omitted the sugar. Fabulous sauce recipe! Will make again and again!
thank you mimi for coming back to leave me a comment! glad you liked it.
Can you use frozen, defrosted apples? I have a ton of chopped apples in my freezer I’d love to use up.
yes that should be fine since they will soften anyway!
Yummy, yummy! Everyone enjoys this sauce, especially my dad who is a huge apple sauce fan Thank you for sharing.
Hi Nikki,
I’m so glad to hear that your dad loves it! There’s just something special about homemade applesauce that you can’t get from a store-bought jar, especially with all those fresh apple flavors. Thanks for the sweet comment, and happy canning! 😊
My applesauce tasted wonderful. Thank you for the recipe. I did a couple things different such as I used honey instead of sugar and I simmered my apples a little longer and the consistency was perfect without mashing. The cinnamon and nutmeg in it were wonderful. I may try a little clove in the next batch. I would recommend this recipe to all those applesauce makers.
hi sosanna! thank you so much letting me know and I am happy to hear that honey worked well!