There’s something classically comforting about old-fashioned roll-out sugar cookies. The only problem? So many recipes are bland, doughy, or not worth the effort. But with just a few basic pantry ingredients and a little chilling time, you’ll get a dough that’s easy to handle and cookies that turn out great every time.
Whether you’re making holiday shapes or fun designs with the kids, the buttercream icing gives the perfect touch of sweetness and a solid finish for stacking. A classic cookie recipe you should add to your baking list.❤️

Old Fashioned Roll Out Sugar Cookies
Equipment
- Rolling Pin
- Cookie cutters
- Hand mixer or stand mixer
- Mixing Bowls
- Whisk
- Plastic Wrap
- Baking sheets
- cooling rack
- Piping bag with tips
- Parchment paper or silicone baking mats
Ingredients
For the Cookies
- 1 cup unsalted butter (softened)
- 1½ cups granulated sugar
- 2 eggs (large)
- 1½ teaspoons vanilla
- 4 cups all-purpose flour
- 1 teaspoon baking powder
- 1 teaspoon baking soda
- ¾ teaspoon salt
- ⅓ cup whole milk (or half and half)
Crisp-Setting Buttercream Icing
- 2½ cups powdered sugar
- ¼ cup unsalted butter (softened)
- ¼ cup shortening (such as Crisco)
- 1-2 tablespoons cream or milk
- 1 teaspoon vanilla (or other flavoring, such as almond or lemon, based on your preference)
- ¼ teaspoon salt
- food coloring optional
Save This Recipe
You'll join my email list which you will love. And if you don't, unsubscribe in one click. ❤️
Instructions
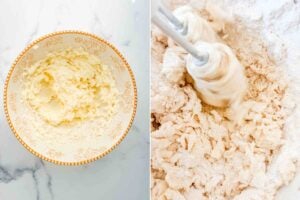
- Prepare the wet ingredients. In a large mixing bowl, cream the softened butter and granulated sugar until light and fluffy (about 2–3 minutes). Then, add the eggs, one at a time, beating well after each addition to make sure they’re fully combined. Next, mix in the vanilla extract.

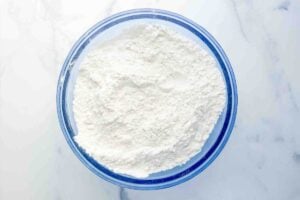
- Combine the dry ingredients. Whisk together the flour, baking powder, baking soda, and salt in a medium bowl.
- Mix the wet and dry ingredients. Add one-third of the dry ingredients to the butter mixture and mix until combined. Then, pour in half of the milk or half-and-half, mixing gently. Mix the remaining dry ingredients and milk in two more additions until a soft dough forms. Avoid overmixing to keep the cookies tender.
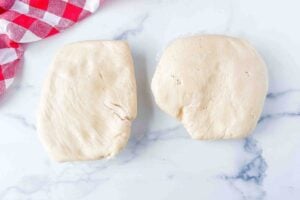
- Chill the dough. Divide the dough in half. Then, wrap each half into a flat disk tightly in plastic wrap. Chill the dough in the refrigerator for at least 2 hours or overnight for best results.
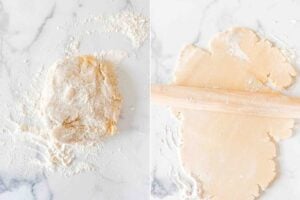
- Roll the dough. Preheat your oven to 375°F (190°C). Line baking sheets with parchment paper or silicone baking mats. Roll out one dough disk on a lightly floured surface to a ¼-inch thickness. Flour the surface, rolling pin, and dough to prevent sticking.
- Cut the dough. Use cookie cutters to cut out desired shapes, transferring them to the prepared baking sheets with about 2 inches of space between each cookie.
- Bake. Bake the cookies in the oven for 11–12 minutes or until the edges are lightly golden. Let the cookies cool on the baking sheets for 5 minutes before transferring them to a wire rack to cool completely.
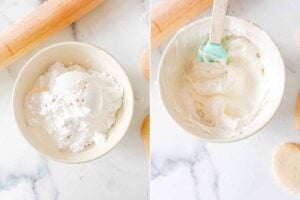
- Prepare the buttercream icing. In a large bowl, beat the powdered sugar, softened butter, and shortening until smooth and fluffy. Slowly add 1 tablespoon of milk or cream and the vanilla or other extract. Mix well, adding more milk as needed to reach the desired consistency. Divide and tint the frosting with food coloring if desired.
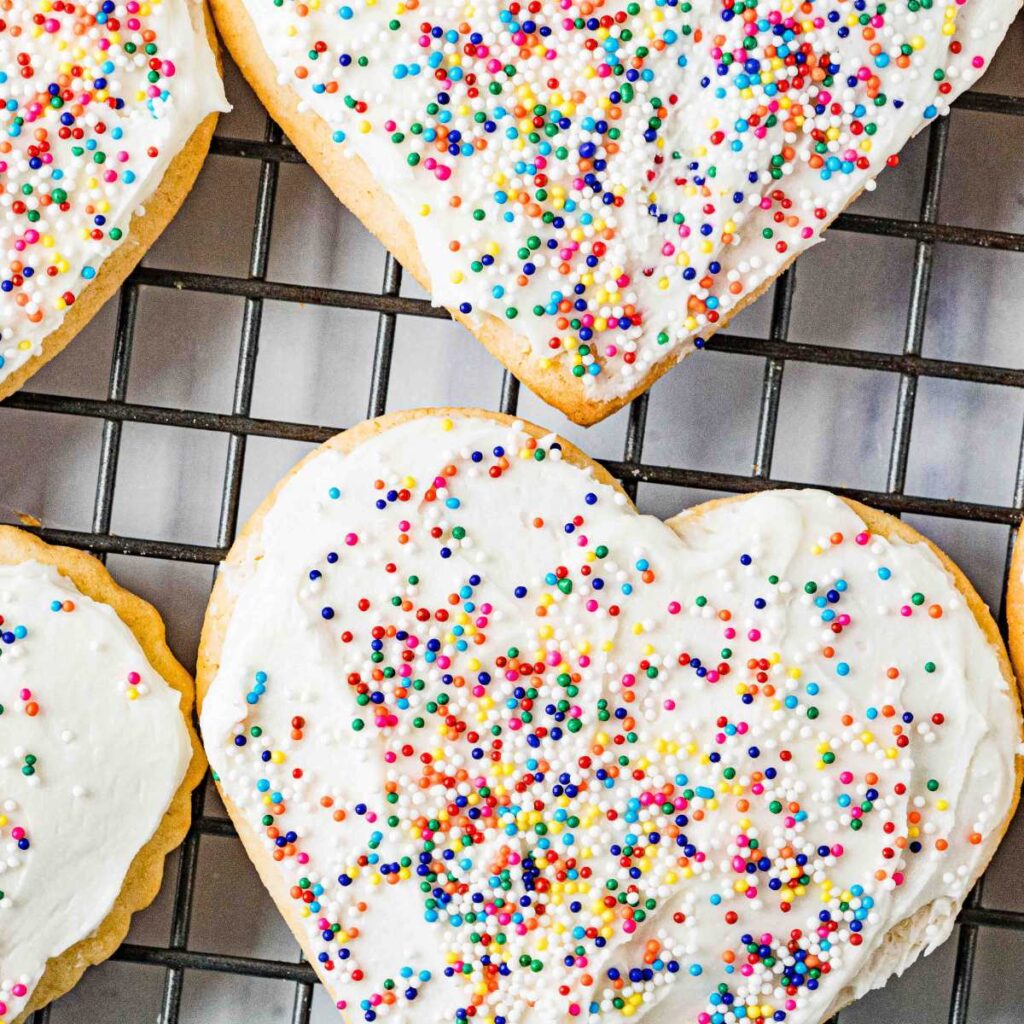
- Decorate. Frost the cooled cookies using a knife or piping bag. Add sprinkles or other decorations while the icing is still wet. Allow the icing to set completely before storing.


Notes
Cut-out cookies are a must in my kitchen, especially during the holidays, and this recipe is my go-to; we use it every year. My family loves decorating these cookies together—though some love eating them plain before the frosting comes out. And if you’re wondering, yes, the kids insist on the sprinkles, even if it means a little extra mess in the kitchen!
You’ll enjoy these Sour Cream Cookies if you want soft, classic cookies with a hint of nostalgia.
Get Access to
All my Free planners, Printables, binders and more
Get a copy of this frugal recipe binder with lots of crockpot favorites, pasta dishes, casseroles, and more inside the subscriber library. Plus SO much more.

Try this if you’ve ever struggled with cutout cookies spreading or sticking!
Key Ingredients and Tools
Some tools and ingredients in this recipe are important for getting the best results. Here are a few that might need some extra explanation:
- Unsalted butter: Using unsalted butter allows you to control the salt in the recipe. If you only have salted butter, you can use it, but cut back on the extra salt.
- Whole milk or half-and-half: These add creaminess and a nice texture to the dough. If you don’t have milk, use heavy cream mixed with water or 2% milk, but steer clear of skim milk for better texture.
- Shortening: Shortening helps the icing stay firm while still being creamy. You’ll find it in the baking aisle near the oils and lard. You can replace it with all butter, but remember that the icing will be softer and not as firm.
- Vanilla extract: Good-quality pure vanilla extract gives the cookies a rich flavor. Try to steer clear of imitation vanilla because it’s less flavorful and can taste fake. Swap it for almond, lemon, or another extract for a different flavor.
- Parchment paper or silicone baking mats: These keep the cookies from sticking and make cleaning up easier. If you don’t have either, you can lightly grease your baking sheet, but it might change how the cookie edges turn out.
- Food coloring gel: Gel coloring is brighter and won’t dilute your icing like liquid coloring. You can find it in the baking section or at cake decorating stores.
Each of these items helps make the recipe simpler to follow or improves the final result.
Muso Wood Wooden French Rolling Pin for Baking, Beech Wood Tapered Rolling Pin for Fondant Pie Crust Cookie Pastry(French 15.75-Inch)Sprinkles | Frozen in Sugar Sprinkle Mix | Blue Sprinkles | Confetti Sprinkles | Metallic Sprinkles | Snowflake Sprinkles | Cake Sprinkles (Pink)Heart Shaped Double Cut-Outs Cookie Cutter Set of 6 pcs, Stainless Steel Crinkly and Straight Edge Double Sides Fondant Cutters
Troubleshooting and Help
Lightly flour your work surface, rolling pin, and dough. Just be careful not to overdo it with the flour, or the cookies might dry.
No problem! You can use the rim of a glass to cut out circles or get creative and shape the dough by hand. It’s a fun way to make unique cookies.
Yes, absolutely! Chilling the dough makes it easier to roll out and helps the cookies hold their shape when baked. If you skip it, the dough will be sticky, and your cookies might spread too much.
That usually happens if the dough isn’t chilled enough or your oven temperature is off. Make sure your dough is cold when it goes into the oven, and use an oven thermometer to double-check the temperature. Learn more about the causes and solutions in this helpful guide.
Before baking, gently poke any bubbles with a toothpick and smooth them out with your fingers or a spatula. This helps keep the surface nice and even.
Nope! The icing tastes just as good without it. But if you want colorful cookies for a special occasion, gel food coloring is your best bet—it’s vibrant and doesn’t water down the icing.
Make sure your cookies are completely cool before frosting. If the icing is too runny, add more powdered sugar to thicken it.
You can try swapping the all-purpose flour with a 1:1 gluten-free baking flour. The texture might be slightly different, but it’s worth experimenting if you need a gluten-free option.
Store them in an airtight container with a piece of bread or a slice of apple. The moisture will help keep the cookies soft without making them soggy.
These sugar cookies are great for any occasion, whether it’s a holiday or just a weekend baking day. They’re simple to make, enjoyable to decorate, and always popular with family and friends. You can stick with the traditional buttercream frosting or try my own creative ideas—these cookies will surely become a favorite at home. I’d love to share how they turn out, so feel free to reach out!


Can these be stacked to give to people after decorating and letting them sit out awhile after decorating?
yes but the icing own’t be perfect like a hard royal icing would be.
regarding the sugar cookie recipe that you roll how thick should the dough be?
also about how many cookies can be made from this recipe?
Hey Judy,
For the sugar cookie dough, rolling it out to about 1/4 inch thick is usually perfect. That thickness gives you a sturdy cookie that holds its shape well without being too doughy. As for yield, it generally makes around 24 medium-sized cookies, but it can vary a bit based on your cookie cutter size. Happy baking, and enjoy those cookies! 🍪😊
yum
Easily understood and easy to make
Very easy steps to follow
very nice
good