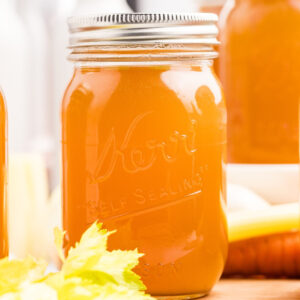
I make this about once a month because I use it constantly. Having jars on the pantry shelf means I actually reach for it (no waiting for frozen blocks to thaw), and it makes such a difference in how food tastes, particularly homemade soup. This whole process is so simple: put bones and vegetables in the slow cooker, let it do its thing overnight, then can it the next day while you’re doing other stuff around the house. Here’s exactly how I make mine.

Please stop throwing your chicken carcasses away. It’s like throwing away money! Once you have shelves full of this broth, you’ll find yourself using it for everything. Soup of course, but also reheating leftovers, cooking grains, making mashed potatoes. Don’t let pressure canning scare you. You can absolutely do this. But if you don’t have a pressure canner, freezing works absolutely fine.
Table of Contents
What You’ll Need
You can use any kind of chicken bones, raw or leftover cooked bones. The more of a mix you have, the better. The apple cider vinegar will help the bones break down to release the collagen and nutrients. The poultry herb bundle is just a mix of fresh herbs like rosemary, sage, oregano, and thyme. Just get a few fresh sprigs of each and you’ll be fine.

This will make six pints and give you about 12 cups of broth. You can double or triple the recipe by making adjustments in the recipe card at the bottom of this post. But you’ll have to work in batches depending on how big your slow cooker is.

FREE FOR SUBSCRIBERS
Canning Binder
Subscribe (free!) to my newsletter to receive this PDF + dozens of others in my printable library. You’ll also get emails you’ll truly love, with a weekly meal and so much more.
Equipment
- Slow cooker
- Pressure canner
- large bowl
- strainer
- Large pot
- small pot
Ingredients
- 2 chicken carcasses (about 3 pounds of bones)
- 3 medium carrots, roughly chopped
- 2 celery stalks, roughly chopped
- 1 medium onion, roughly chopped
- 4 cloves of garlic smashed
- 2 tablespoons apple cider vinegar
- 2 teaspoons salt
- 1 tablespoon whole peppercorns
- 1 poultry herb bundle (rosemary, sage, oregano, and thyme)
- 12 cups of water
Instructions
One thing I like to do is roast the bones in the oven before adding them to the slow cooker. It gives it a richer flavor, but it’s totally optional. You’ll also want to add cold water to the slow cooker to help extract the collagen.
Make sure you adjust your pressure if you live at a high altitude. Use this chart to help you.
Step One: Make The Broth
Put everything in your slow cooker and add water to cover.

Cook on low for 12 hours. Check at 8 hours and add more water if needed.

Strain out all the solids.

Cool the broth completely, then refrigerate overnight.

The next day, scrape off the fat layer that formed on top. Get as much as you can – it makes a difference.

Heat the broth back up in a large pot.

Step Two: Canning
Set up your pressure canner and the rack with 3 inches of water. Heat it up.
Wash your jars, fill them halfway with water, and put them in the canner to warm. Put lids and rings in simmering water.
When the broth is hot, pull out the jars, dump the water, and fill with broth using a funnel. Leave 1 inch headspace.

Wipe jar rims clean. Add lids and rings – tighten until snug, not tight.

Put your jars in the canner on high heat with the lid on. When the steam vents steadily, wait 10 minutes, then add your pressure weight.
Bring to 11 pounds pressure (adjust for altitude if needed). Start the timer: 20 minutes for pints, 25 for quarts.

If the pressure drops below 11, stop the timer and start over when it’s back up.
Turn off the heat when done. Let the pressure drop naturally. Wait 5 minutes after it hits zero, then carefully remove the lid away from your face. Remove the jars to cool for 12-24 hours.
Storage Instructions
Your sealed jars need to be stored in a cool, dark place like a pantry and will last up to a year. When you open a jar, put it in the fridge and use it within a week.
If you don’t pressure can your jars, you can freeze the broth instead for long-term storage. Let the broth cool completely, then pour it into freezer-safe containers or bags, leaving an inch of space at the top for expansion. Frozen broth keeps for up to 6 months.
For convenient smaller amounts, freeze some of it in ice cube trays first inc are you just need a tablespoon or so for ar recipe.
How to Use it
You can use this for way more than just soup.
- Add it to any slow cooker recipes that call for chicken broth.
- Use it as the base of chicken noodle soup.
- Make rice or quinoa with it instead of water.
- Use it to make mashed potatoes.
Questions and Troubleshooting
If you want to store your broth long-term without refrigeration, a pressure canner is essential. However, you can always freeze the broth if you don’t have a pressure canner.
No worries! You can simmer the ingredients in a large pot on the stove. Just keep the heat low and add water as needed to keep the bones submerged.
The broth is ready when it has a rich, golden color and the bones are soft and brittle. This usually takes between 12 and 24 hours in a slow cooker.

More Practical Pantry Staples To Make
Use my canning tips to make your day of canning go much easier.
- This tomato soup canning recipe is great to have on hand. Add a grilled cheese for a quick dinner.
- Pressure canning green beans is not the most exciting, but once you taste them, you’ll understand why I do it.
- These pressure canned potatoes are SO useful. They can be thrown into soups or quickly made into mashed potatoes.
Printable Recipe

Bone Broth for Pressure Canning
Equipment
- Slow cooker
- large bowl
- strainer
- Large pot
- small pot
Ingredients
- 2 chicken carcasses (about 3 pounds of bones)
- 3 medium carrots roughly chopped
- 2 celery stalks roughly chopped
- 1 medium onion roughly chopped
- 4 cloves garlic smashed
- 2 tablespoons apple cider vinegar
- 2 teaspoons salt
- 1 tablespoon whole peppercorn
- 1 poultry herb bundle (rosemary, sage, oregano, and thyme)
- 12 cups water
Save This Recipe
You'll join my email list which you will love. And if you don't, unsubscribe in one click. ❤️
Instructions
Make the Broth
- Add ingredients. Add all ingredients into a slow cooker or a large electric roasting pan.
- Add water and cook. Cover and set the slow cooker to low and let it to cook for 12 hours (or more as needed). Check the slow cooker after 8 hours and add more water as needed.
- Strain. Once everything has been cooked for at least 12 hours, strain the liquid from the carcass and vegetables using a fine mesh strainer into a large bowl. If you don’t have a fine mesh strainer, place a double layer of cheesecloth inside a strainer and allow it to drain.
- Cool. Let the bowl of hot broth cool, then cover and place it in the fridge overnight.
- Skim fat. Remove the bowl of broth from the fridge the next day and skim the fat layer off the top of the broth. Try to get as much of the fat layer off as you possibly can.
- Warm. Warm the broth back up in a large pot over medium-low heat.
Pressure Can
- Prep for canning. Fill the pressure canner with 3 inches of water, and place the rack in the bottom. Place over medium-high heat. Wash the jars with hot soapy water. Fill the clean jars halfway with water and place them in the pressure canner and let them warm up. Place the lids and rings in a small pot of water and let them simmer over low heat.
- Fill jars. Once the broth has started to steam, it’s time to fill the jars. Using a jar lifter, drain and remove the jars from the pressure canner. Place a canning funnel over the jar and ladle the hot broth into the jars, leaving a 1-inch headspace.
- Wipe and add lids. Once filled, wipe the rims of the jars using a clean, moist towel. Add the lids and rings and tighten the rings until they’re fingertip-tight.
- Process. Place the jars in the pressure canner with the lid on over high heat. Once a steady stream of steam starts venting out, set a timer for 10 minutes. Next, set the pressure to 11 pounds (adjusting for altitude). Once at 11 pounds of pressure, set the timer for 20 minutes for pint-sized jars and 25 minutes for quart-sized jars. (Please note that if the pressure drops below 11 pounds of pressure, stop the timer, bring the pressure back up to 11, and start the timer again.)
- Cool. Turn off the heat and let the pressure return to zero naturally. Remove the lid away from your face and let the jars sit for 5 minutes before moving them to a towel to cool for 12–24 hours.
Nutrition


More to Explore
Chicken Saltimbocca
Baked BBQ Chicken Sliders
Super-Easy Crockpot Fried Apples
Hot Pepper Jelly Glazed Wings