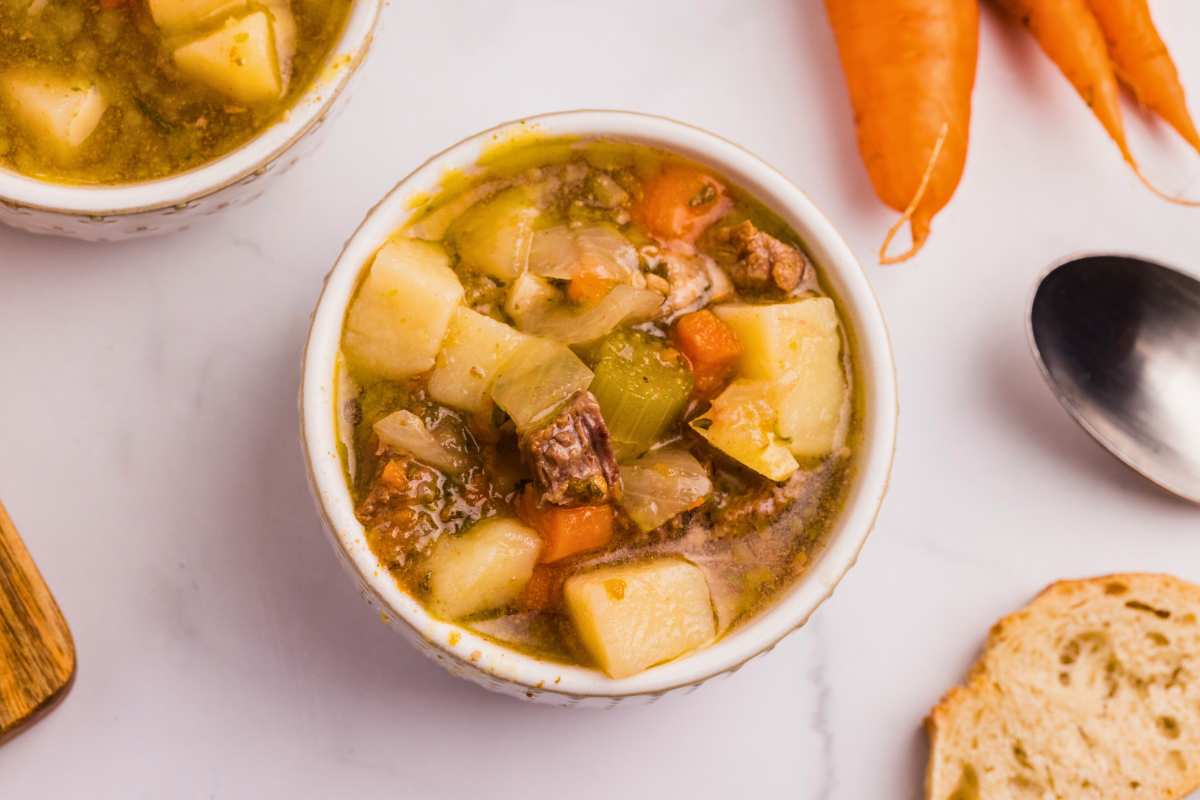
Pull this out when dinner time rolls around and you’ve got nothing planned or when you need a real lunch. Spending an afternoon canning beef stew now means you’ll have something ready to go on your shelf when you need it. This is also surprisingly good. The meat is super tender and there’s lots of flavor from the veggies and herbs.

I pull this out on days when I just want take-out (but living in the country makes that not an option). I just pull a jar or two off the shelf, heat it up, and dinner’s done. Sometimes I serve bread, sometimes I don’t. Depends on what I got. Don’t let pressure canning scare you. We are still just making a recipe, putting it in jars, and heating it up. You can do this, and I’ll walk you through each step.
Table of Contents
Ingredients and Tools You’ll Need
For your stew meat, use a cheaper cut like a chuck roast, or one that’s good for slow cooking. Use a proper pressure canner, not just a big pot. We need it to reach the high temperatures to safely preserve the meat. And you want to use fresh vegetables instead of frozen for this. The frozen ones will release more liquid and affect the seal.
This will make 10 pints. If you’d like to double or triple this recipe, you can make adjustments in the recipe card at the bottom of this post.

FREE FOR SUBSCRIBERS
Canning Binder
Subscribe (free!) to my newsletter to receive this PDF + dozens of others in my printable library. You’ll also get emails you’ll truly love, with a weekly meal and so much more.
Equipment
- Pressure canner and supplies
- Mason jars
Ingredients
- 1 tablespoon oil
- 2 pounds of beef stew meat
- 6 cups potatoes, peeled and cubed
- 4 cups carrots, sliced and peeled
- 1 ½ cups celery, chopped
- 1 ½ cups of onion, chopped
- 6 cloves of garlic, finely chopped
- 2 tablespoons salt
- 2 teaspoons oregano
- 2 teaspoons basil
- 2 teaspoons rosemary
- 2 teaspoons parsley
- 1 teaspoon pepper
How to Pressure Can Beef Stew
If you live at a higher altitude, you must adjust the pressure and processing time. Check your canner’s manual or this article for adjusting for higher altitudes.
Step One: Prep Your Equipment
Wash your jars. Put 3 inches of water in your pressure canner with a splash of vinegar. Add the jars and heat everything up on medium. Put lids and rings in a small pot of simmering water.

Step Two: Cook the Meat
Heat oil in a large pot over medium heat. Add the beef and brown it on all sides for about 3-5 minutes.

Step Three: Add Everything Else
Add potatoes, carrots, celery, onion, and garlic.

Add enough water to cover. Then, add all your seasonings and stir. Bring to a boil.

Start boiling another pot of water – you’ll need this later.
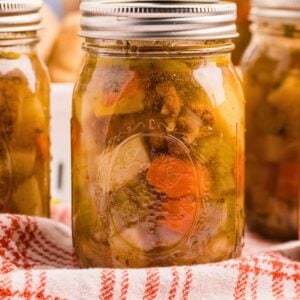
Step Four: Fill the Jars
Ladle the hot stew into the hot jars, leaving a 1-inch headspace.

Remove air bubbles with a plastic knife. Top off with boiling water to maintain 1 1-inch headspace.

Wipe jar rims clean. Put on lids and rings fingertip-tight.

Step Five: Process Them
Put the filled jars in the canner. Lock the lid and heat to medium-high. Vent steam for 10 minutes, then bring to 10 pounds pressure (11 for dial gauge). Process for 75 minutes for pints, 90 for quarts.

If pressure drops below 10 pounds, start the timer over.
Step Six: Cool Down & Check Seals
Turn off the heat. Let the pressure drop naturally. Wait 5 minutes after the pressure reaches zero, then remove the lid. Let the jars sit in the canner 10 minutes, then move to cool for 12-24 hours.

After 24 hours, make sure the lids are sealed properly. Store the sealed jars for 12-18 months. Put any unsealed jars in the fridge and use within a few days.
Storing & Serving
Once your jars have cooled and sealed, take the rings off. They can sometimes trap moisture and hide a broken seal. Store your jars in a cool, dark, and dry place like the pantry or cupboard for up to a year. Don’t freeze your stew. It will change its texture when it thaws out.
This filling dinner is good on its own, or you can add some of these if you’d like.
- Have some crusty bread on the side, like this no-knead herb and olive oil bread or apple cider sourdough bread.
- For a cozy night, finish off with some sourdough cinnamon rolls.
Questions and Troubleshooting
Yes. The dial gauge canners have a higher pressure setting. Process your jars at 11 pounds instead of 10 if you live at sea level. If you live at a higher altitude, use this article to help you adjust.
After your jars have cooled completely, press down on the center of the lid. If it doesn’t flex or move, your seal is good. If any jars haven’t sealed, store them in the fridge and use them within a few days.
More Canning Recipes To Make Dinner Easy
Having these in your pantry will make it so easy to pull dinner together.
- I make this spaghetti sauce every year with my garden tomatoes.
- Tomato soup and a grilled cheese are the perfect, cozy dinner for chilly days.
- Make some homemade pizza sauce and thin crust pizza dough for a fun pizza night.
Printable Recipe
Pressure Canned Beef Stew
Equipment
- Pressure canner and supplies
- Mason jars
Ingredients
- 1 tablespoon oil
- 2 pounds beef stew meat
- 6 cups potatoes peeled and cubed
- 4 cups carrots sliced and peeled
- 1 ½ cups celery chopped
- 1 ½ cups onion chopped
- 6 cloves garlic finely chopped
- 2 tablespoons salt
- 2 teaspoons oregano
- 2 teaspoons basil
- 2 teaspoons rosemary
- 2 teaspoons parsley
- 1 teaspoon pepper
Save This Recipe
You'll join my email list which you will love. And if you don't, unsubscribe in one click. ❤️
Instructions
- Prepare jars. Clean jars with hot, soapy water. Prepare your pressure canner by adding 3 inches of water to the bottom (or as much water as your pressure canner manufacturer recommends). Add a splash of white vinegar to the canner. Place the clean jars in the pressure canner with water inside so they don’t float around. Set the burner to medium heat and allow the jars to heat up. Add the lids and rings to a small pot over medium-low heat and allow them to simmer. Do not boil.
- Cook the meat. Add the oil to a large pot over medium heat. Once the oil warms, add the stew meat. Cook the stew meat for 3-5 minutes or until it browns on all sides.
- Add vegetables. Next, add the potatoes, carrots, celery, onion, and garlic. Stir to combine. Add enough water to cover the mixture.
- Add herbs. Add the salt, oregano, basil, rosemary, parsley, and pepper. Stir to combine. Bring the mixture to a boil, stirring often.
- Boil water. Bring a separate pot of water to a boil. Later, this will be used to fill the jars back up.
- Fill jars. Once the meat and vegetable mixture has come to a boil, ladle it into the hot jars, leaving a generous 1-inch headspace. (Cooking the vegetables down is unnecessary since they will be while the jars are processed.)
- Remove bubbles. Remove the bubbles from the jars using a debubbler, a plastic knife, or a wooden chopstick.
- Prepare jars. Fill the jars back up with boiling water (from that separate pot earlier) so they have a 1-inch headspace. Clean the rims of the jars with a clean, moist towel. Place the lids and rings on the jars, tightening them until they are fingertip-tight.
- Process jars. Transfer the jars to the pressure canner, and adjust the water level to your manufacturer’s recommendation. Place the lid on and lock it. Set the burner to medium-high heat. Allow the canner to vent steam for 10 minutes continuously. After 10 minutes, set your canner to 10 pounds of pressure. Once it hits 10 pounds of pressure for weighted (or 11 pounds for dial gauge), set your timer for 75 minutes for pints (or 90 minutes for quart jars) (adjusting for altitude). Do not start the timer until your gauge is at pressure. If the gauge drops below 10 pounds of pressure, increase the heat and start the timer over. The jars need to be processed at the correct pressure the whole time.
- Turn off the heat. Turn off the heat and allow the pressure to come down naturally. Once the gauge reads 0 pounds of pressure, you can remove the weight or reduce the dial to zero. Allow the canner to release more pressure. Wait five more minutes after the pressure is fully released before removing the lid.
- Cool the jars. Remove the lid, tilting it away from your face, and allow the jars to sit in the canner for 10 more minutes. Transfer the jars to a heat-safe area to cool for 12-24 hours. After 24 hours, check the seals. If you have confirmed a proper seal, you can store the jars for 12-18 months or per your manufacturer’s lid recommendations.
Nutrition

More to Explore
Chicken Saltimbocca
Baked BBQ Chicken Sliders
Super-Easy Crockpot Fried Apples
Hot Pepper Jelly Glazed Wings