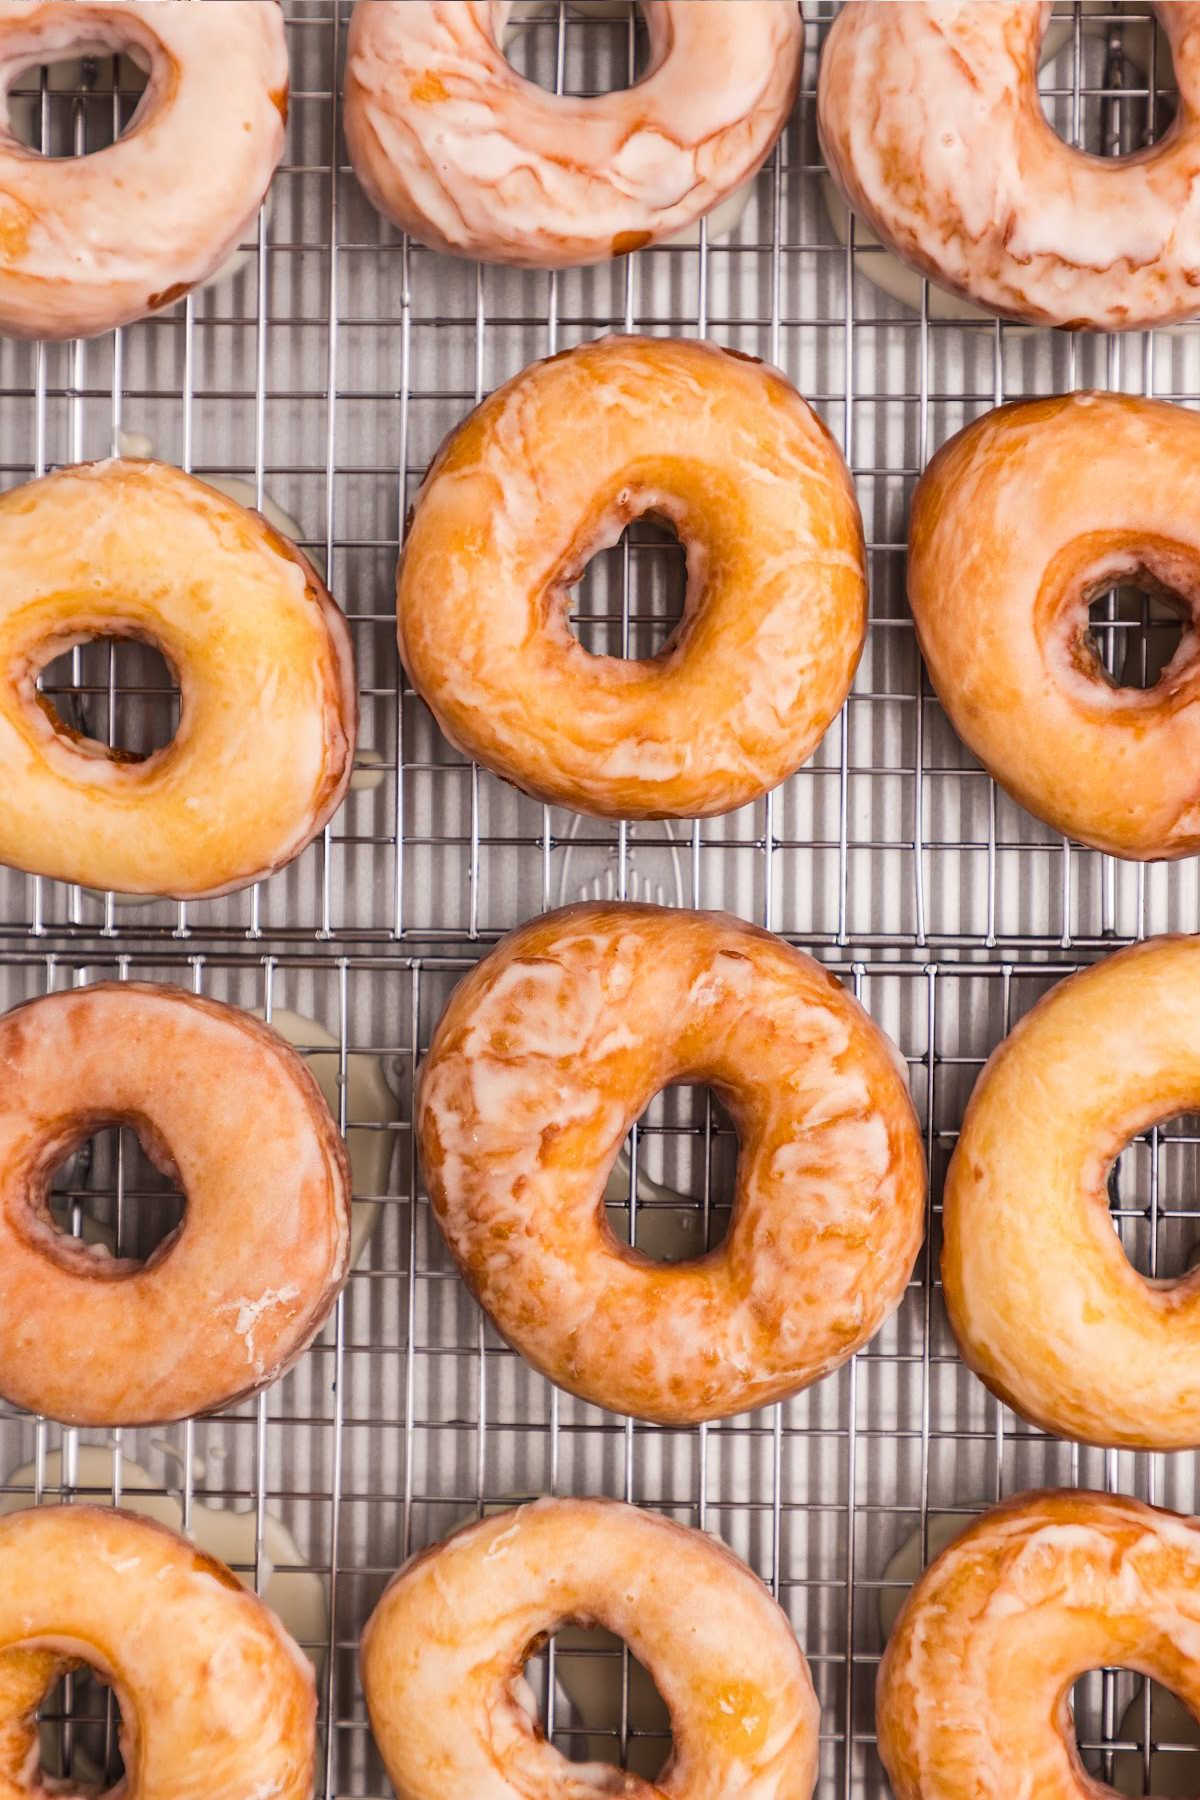
Irresistible Sourdough Doughnuts
You know that feeling when someone brings a dozen doughnuts to celebrate something special? The excitement, the feeling of a treat, the way everyone gathers around the box? Well, I’m here to tell you that you can create that exact same magic in your own kitchen for about two dollars instead of fifteen. These sourdough doughnuts are everything you remember loving about the bakery ones, but better: soft, fluffy, and with perfect subtle sourdough flavor. For less than the cost of a fancy coffee, you can make a whole batch of pillowy, perfectly glazed doughnuts right at home.
I know we have a lot of steps here, but so much of the work is just patience and waiting. We’ll mix up a soft dough, let it rise overnight, roll it out and cut your shapes, then fry them up. The whole thing takes about 30 minutes of actual hands-on work.
Table of contents
What You’ll Need
You can make these without a thermometer to check the oil temperature, but you’ll probably end up with a few doughnuts that are over-browned (because the oil was too hot), or tough (because the oil was too cold and they cooked slowly). Not the end of the world!

This recipe makes 16 doughnuts. If you’d like to double or triple it, you can! But you’ll need a huge mixing bowl. If you select the 2x or 3x option at the recipe card at the bottom of the post it will calculate everything for you.
Equipment
- Baking Sheet
- Parchment paper
- cooling rack
- 4-inch and 1-inch round cutters
- Large pot
- Kitchen thermometer
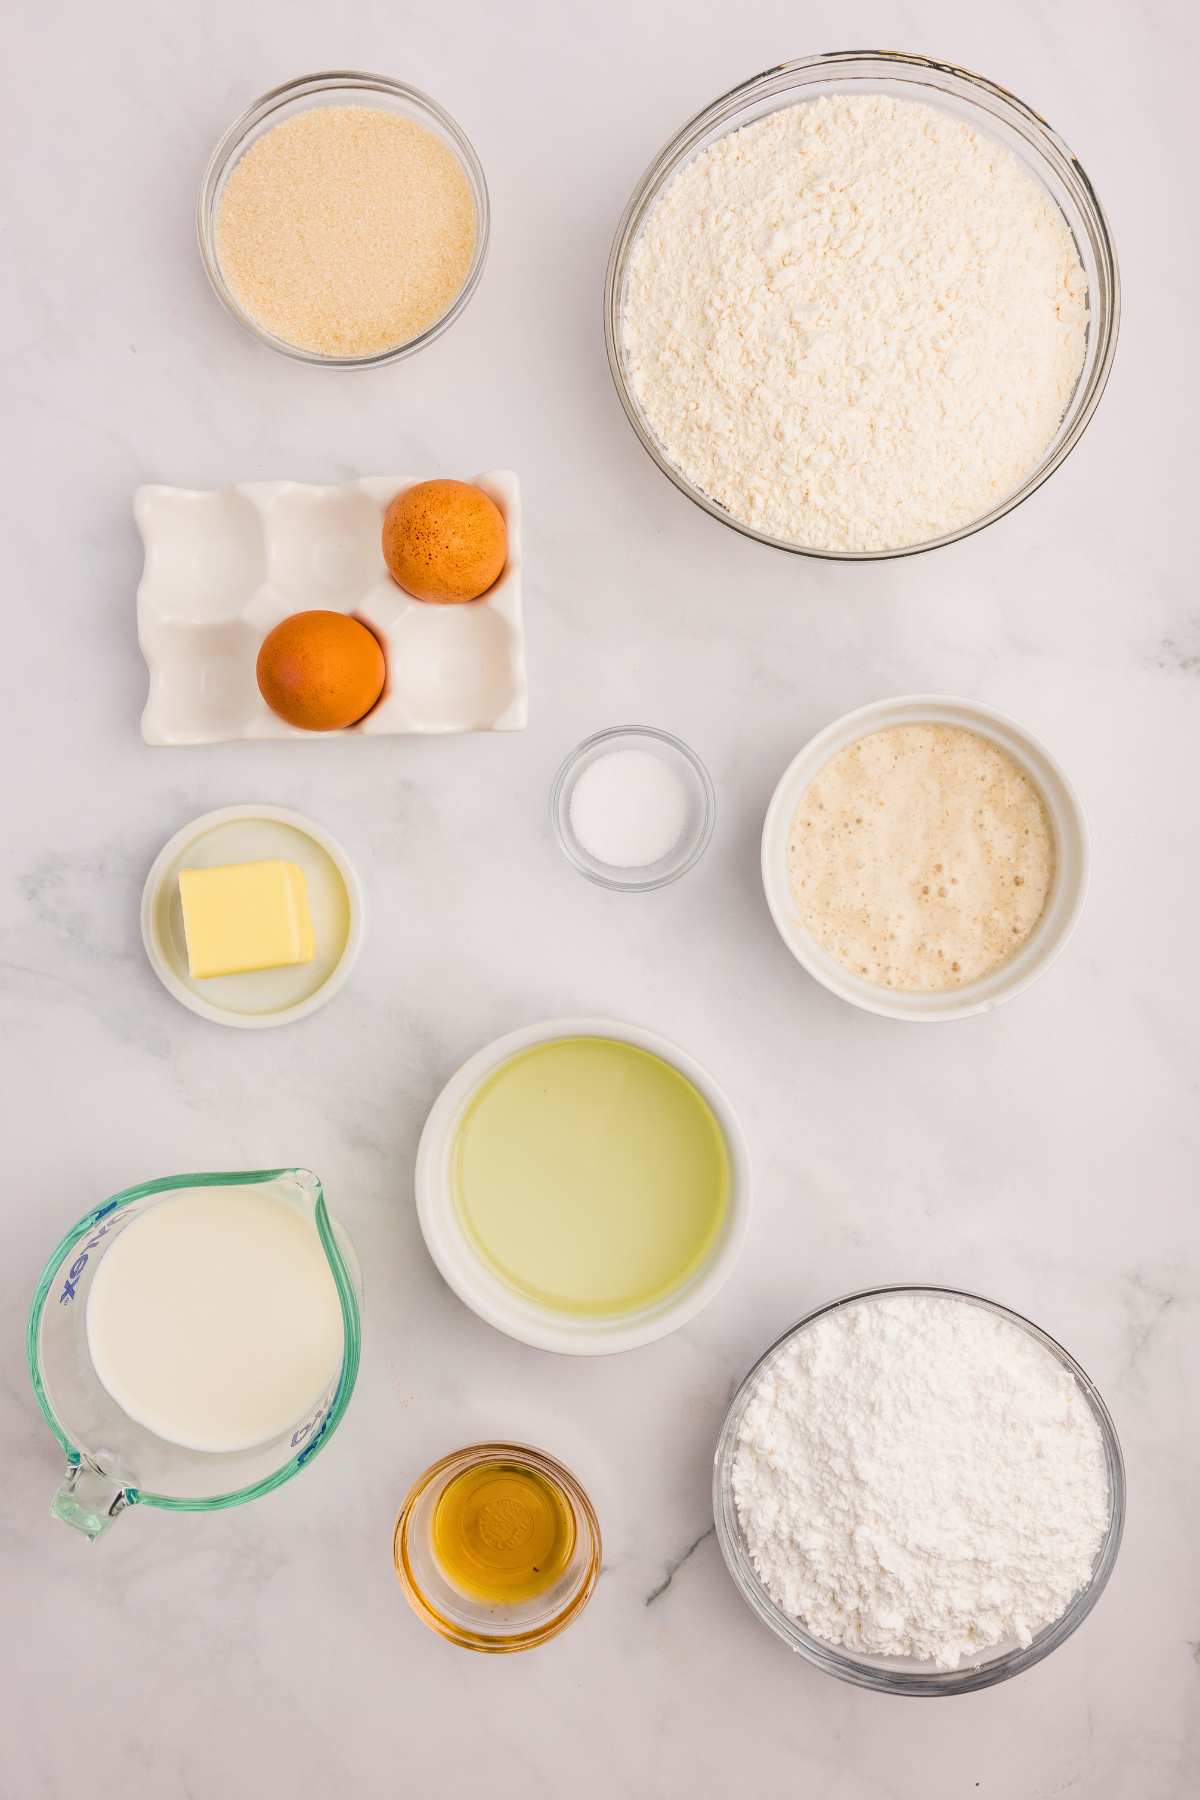
Ingredients
Doughnuts
- 1 cup active sourdough starter, 200g
- 1 ¼ cups milk
- ½ cup sugar
- ¼ cup unsalted butter
- 1 teaspoon salt
- 5 cups bread flour (all-purpose is fine, but they’ll be slightly harder to handle because they will be more delicate)
- 2 eggs, room temperature
- Oil for frying, peanut or coconut oil are my favorites
Glaze
- 2 cups powdered sugar
- ¼ cup milk
- ¼ teaspoon vanilla extract
Baker’s Schedule
Here’s a quick overview of your timeline to have have fresh doughnuts in the morning.
Friday Morning
8:00 AM – Feed sourdough starter
Friday Evening
8:00 PM – Make dough, knead, cover for overnight rise (8-12 hours)
Saturday Morning
6:00 AM – Dough should be doubled. Roll out, cut doughnuts, start 2-hour second rise
8:00 AM – Fry and serve fresh doughnuts!
How to Make Sourdough Doughnuts
Remember: we mix, we wait, we cut, we fry. Simple, right?
Step One: Activate Starter
The night before you want to make these, feed your starter with 60 grams starter, 70 grams flour, and 70 grams water. Just stir it up and leave it on the counter. Before moving on, your starter needs to be bubbly and doubled in size. That’s what we need for fluffy doughnuts.
(If you have an already active and ready-to-go starter, just measure out the full amount needed for the recipe. )
Remember, your dough will rise overnight too. So start this the night before you make them, which is 2 nights before you actually eat them!
Step Two: Make Milk Mixture
Grab a saucepan and add your milk, sugar, butter, and salt. Warm it over medium heat until the butter melts and it hits about 80-90°F. You don’t want it hot, just warm enough that the butter melts and the chill is off everything.

Step Three: Mix Milk And Starter
Pour that warm milk mixture right into your stand mixer bowl and add your bubbly starter. Hook up your dough hook and give it a stir.

Step Four: Add Half Of The Flour
Now we’re building the dough. Add 2 cups of bread flour and mix it in. Then add another cup and mix again. See how it’s starting to look like actual dough?

Step Five: Add Eggs
Crack in those eggs and mix them in. The dough will get a little looser, but that’s normal.

Step Six: Add Remaining Flour
Slowly add the rest of your flour, mixing as you go. Don’t dump it all in at once or you’ll have a flour explosion.

Step Seven: Knead Dough
Set your mixer to medium and let it work for 3-5 minutes. You’ll know it’s ready when the dough looks smooth and a little shiny – it transforms right before your eyes.

Step Eight: Rise
Cover that bowl and walk away for 8-12 hours until the dough doubles in size. If your kitchen’s warm, it’ll happen faster. If it’s cool, it’ll take longer. Just be patient.

Step Nine: Roll Out Dough
Turn your risen dough onto a clean counter and roll it out to about 1 inch thick. Don’t go thinner or your doughnuts will be wimpy. I always measure the thickness because it’s hard for me to eyeball and it’s important to the finished result.

Step Ten: Cut Out Doughnuts
Use a 3-4 inch cutter to cut your doughnuts, then a 1-inch cutter for those center holes. Don’t toss the holes – they’re going to be delicious too. If you have a special donut cutter, all the better.

Step Eleven: second rise
Put all your cut doughnuts on parchment-lined baking sheets. Cover them up and let them sit for 2 hours. They should look puffed up and feel light when you’re done waiting.
(After you’ve rolled and cut them, you can cover them tightly and stick them in the fridge overnight instead of doing the 2-hour room temperature rise.
When you’re ready to fry the next day, just take them out of the fridge and let them come to room temperature and puff up a bit – maybe 30-45 minutes depending on how cold your kitchen is. They should look a little bigger and feel lighter before you fry them.)

Step Twelve: Prep Baking Sheet
Line another baking sheet with paper towels or set up a cooling rack. You’ll need this for draining the hot doughnuts.
Step Thirteen: Make Glaze
Whisk together your powdered sugar, milk, and vanilla in a bowl. Set it aside: you’ll be glad it’s ready when those hot doughnuts come out.

Step Fourteen: Heat Oil
Put about 3 inches of oil in a large pot and heat it over medium heat to 300°F. Use a thermometer here if you have one, this temperature matters.

Step Fifteen: fry
Working in batches, drop your doughnuts into the oil and fry for 2-3 minutes until the bottom side is golden brown. Flip them over and fry another 2-3 minutes. Keep an eye on that oil temperature and turn the heat down if it’s getting too hot.

Step Sixteen: Cool
Once they’re golden brown all over, lift them onto your prepared baking sheet to drain off the oil.

Step Seventeen: Glaze
While they’re still warm, dip each doughnut in the glaze, flip it over, and dip again. Put them on a cooling rack so the extra glaze can drip off.

Step Eighteen: Cook Doughnut Holes (Optional)
Fry up those doughnut holes the same way. They’re a little trickier to flip, so use a wooden skewer to help turn them over. They cook fast, so watch them closely.

Storing Leftovers
Store any leftover doughnuts in an airtight container at room temperature for up to 2 days, or in the fridge for up to 4 days. The glaze might get a little sticky in the fridge, but they’ll still taste great.

For longer storage, freeze them for up to 3 months. Just put them on a baking sheet in a single layer, freeze until solid, then transfer to a freezer bag or container. When you’re ready to eat them, let them thaw at room temperature or pop them in a 350°F oven for about 5 minutes to warm them up. You can also microwave them for 15-20 seconds if you want them warm right now.
The doughnut holes store the same way.
Questions and Troubleshooting

No! These are specifically designed for frying. Baked “doughnuts” are really just cake shaped like doughnuts, a totally different thing.
Yep! After the first rise, you can punch it down and stick it in the fridge for up to 2 days. Just let it come to room temperature before rolling and cutting.
Your oil temperature dropped too low – keep it at exactly 300°F and don’t overcrowd the pot. Greasy doughnuts = cool oil.
Drop a small piece of dough in – it should sizzle immediately and float to the surface. If it browns in under 30 seconds, your oil’s too hot.
Either your kitchen was too cold (try a warmer spot) or your starter wasn’t active enough. The dough should feel light and airy before frying.
More Sourdough Breakfast Recipes
- For breakfast or snacking, this sourdough blueberry quick bread freezes beautifully to make on Sunday for breakfast throughout the week.
- Kids will love chocolate chip sourdough waffles (there’s no sour taste).
- Making sourdough cinnamon sugar crackers is definitely worth the trouble.
- Homemade sourdough pretzels are about to be your new favorite snack.
Printable Recipe

Sourdough Doughnuts
Equipment
- Baking Sheet
- cooling rack
- 4-inch and 1-inch round cutters
- Large pot
- Kitchen thermometer
Ingredients
Doughnuts
- 1 cup active sourdough starter
- 1 ¼ cups milk
- ½ cup sugar
- ¼ cup unsalted butter
- 1 teaspoon salt
- 5 cups bread flour
- 2 eggs room temperature
- Oil for frying vegetable or peanut
Glaze
- 2 cups powdered sugar
- ¼ cup milk
- ¼ teaspoon vanilla extract
Save This Recipe
You'll join my email list which you will love. And if you don't, unsubscribe in one click. ❤️
Instructions
- Activate starter night before. The night before, activate your sourdough starter by adding 60 grams of sourdough starter to 70 grams of flour and 70 grams of water. Stir to combine and allow the mixture to sit overnight at room temperature.
- Make milk mixture. Add the milk, sugar, unsalted butter, and salt in a saucepan. Warm the milk mixture over medium heat until it hits 80-90℉ and the butter melts. It’s important not to warm the milk mixture too much, as it can affect the sourdough.
- Mix milk and starter. Transfer the milk mixture to the bowl of your stand mixer and add the active sourdough starter. With your dough hook attached, stir to combine.
- Add half of the flour. Next, add 2 cups of bread flour and stir to combine. Add another cup of flour and stir to combine.
- Add eggs. Add in the eggs and stir to combine.
- Add remaining flour. Slowly add in the remaining bread flour, stirring to combine.
- Knead dough. Once the flour has been added, set your stand mixer to medium to knead the dough for about 3-5 minutes or until the dough is soft and shiny.
- Rise. Cover and allow the dough to rise for 8-12 hours at room temperature or until the dough doubles in size. Remember that warmer environments will see their dough rise faster than colder environments.
- Roll out dough. After the dough has doubled in size, turn the dough onto a clean, dry surface. Using a rolling pin, roll the dough out so it is about 1 inch thick.
- Cut out doughnuts. Cut the dough into round discs using a biscuit cutter (3-4 inches). Using a 1-inch cutter, cut a hole in the center of each disc.
- Rest. Transfer the cut dough onto a parchment-lined baking sheet. Cover and allow the dough to sit for 2 hours.
- Prep baking sheet. Line a baking sheet with paper towels or a cooling rack and set aside.
- Make glaze. Add the powdered sugar, milk, and vanilla extract to a bowl using a whisk and stir to combine. Set aside.
- Heat oil. In a large pot, add about 3 inches of oil. Set it over medium heat and bring the oil to 300℉.
- Cook. Once the oil is up to temperature, working in batches, add the doughnuts to the pot and cook for 2-3 minutes or until the side of the dough in the oil is golden brown. Flip the doughnuts over and cook for another 2-3 minutes. (You want to keep an eye on the temperature of the oil so it doesn’t get too hot, as it can burn your doughnuts. Turn down the heat as needed.)
- Cool. Once the doughnuts are golden brown, transfer them to the prepared baking sheet so the oil can drain off.
- Glaze. Once the doughnuts have cooked, glaze them by dipping them in the prepared powdered sugar glaze. Then, flip them over and dip them again. Transfer them to the baking sheet lined with a cooling rack so the excess glaze drips off.
- Cook doughnut holes (Optional). Follow the same steps for the doughnut holes. You may find it hard to flip them so they become golden brown on both sides. Use a wooden skewer to help flip them over.
- Serve. Serve and enjoy!
Notes
Nutrition