Homemade Sourdough Pretzels
They’re soft, they’re chewy, you can roll them in cinnamon sugar or dip them in mustard. Preztels are the best. Sourdough pretzels, slightly tangy and super soft, are even better. Make these next time you have friends over, set out a few dips, and be the hero. These are about to be your new favorite snack.
Sourdough Pretzels

Equipment
- Electric stand mixer with hook attachment
Ingredients
Dough
- ½ cup active sourdough starter 100 g
- 1 cup warm filtered water
- 2 tbsp honey
- 2 tsp salt
- 4 cups all-purpose flour
- 3/8 cup butter {melted and cooled and divided (1/4 cup + 2 tablespoons)}
- 1 tbsp pretzel salt or coarse salt
Water bath
- 6 cups water
- 2 tbsp baking soda
- 1 tbsp brown sugar
Save This Recipe
You'll join my email list which you will love. And if you don't, unsubscribe in one click. ❤️
Instructions
- Activate Starter Night Before. Add 30g of sourdough starter, 35g of all-purpose flour, and 35g of filtered room-temperature water to a pint-sized mason jar. Stir to combine, cover, and allow to sit at room temperature for 6-12 hours or until it’s doubled in size.
- Mix the Starter, Water, Honey, and Salt. Mix the active sourdough starter, water, honey, and salt. I recommend a stand mixer with a dough attachment. It will make it a lot easier.
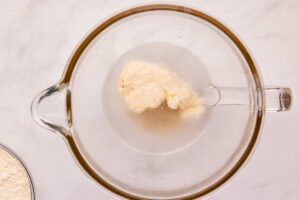
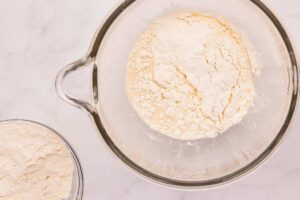
- Add Half of the Flour. Next, add in about 2 cups of the all-purpose flour. Stir to combine.

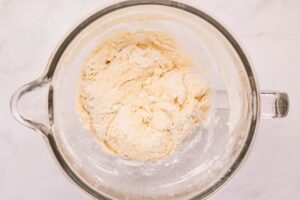
- Add the Rest of the Flour. Add the rest of the flour (2 cups) and stir until most of the dough comes together.

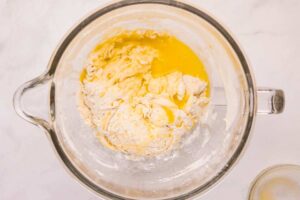
- Add Butter. Drizzle over ¼ cup of butter. Stir to combine.

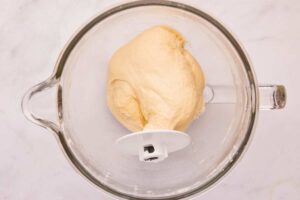
- Knead the Dough. Set your stand mixer to medium and allow the dough to knead for about 2 minutes. You will notice the dough releasing itself from the side of the bowl, and it will be soft and pliable.

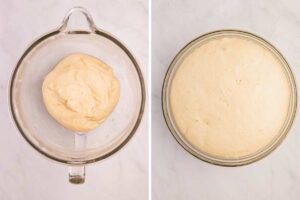
- Let the Dough Rise. Turn the dough out onto a clean, dry surface. Grease the dough with a small amount of cooking spray and place it back into the bowl (or transfer it to a different bowl). Allow the dough to sit at room temperature for about 12 hours or until the dough has doubled in size.

- Prepare Parchment Squares. Cut a piece of parchment paper into twelve 4” squares and set aside.
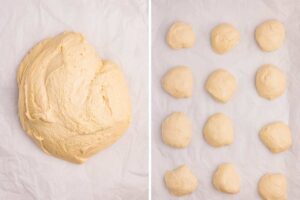
- Separate the Dough. Turn the dough out onto a clean, dry surface and divide it into 12 equal pieces.

- Shape Dough Into Pretzels. Roll the individual dough balls out into a long log shape (about 18” long). Bring the ends together to make a U shape. Twist the ends twice, then fold them to create a classic pretzel shape. Transfer the pretzel onto the precut piece of parchment paper (placing them on the piece helps easily transfer). Repeat this process until all of the dough balls have been shaped.

- Let Dough Rest. Allow them to sit for 1 hour.
- Preheat Oven and Prepare Baking Sheets. Preheat the oven to 425 degrees F. Line 2 baking sheets with a piece of parchment paper and set aside. (If you only have one, you can bake it in batches.)
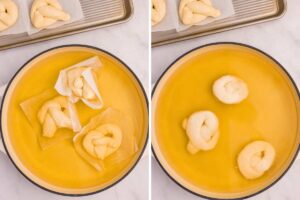
- Prepare Waterbath. Add 6 cups of water, 2 tbsp of baking soda, and 1 tbsp of brown sugar in a large pot. Place over medium-high heat and bring to a boil.

- Boil Pretzel Dough. Once boiling, working in batches, place pretzels into the prepared water bath, and remove the piece of parchment paper (it will easily release once it is in the water). Allow the pretzel to cook in the water bath for 3 minutes, flipping halfway (after 90 seconds). Transfer the pretzels to the lined baking sheet.

- Coat with Butter and Salt. Brush the tops with some melted butter (optional) and sprinkle on some coarse pretzel salt.

- Bake. Bake at 425 degrees for 12-14 minutes or until golden brown. Remove from the oven and allow them to cool for 10 minutes before enjoying.

Notes
- For this recipe, I used salted butter. You can use unsalted butter or margarine.
- I recommend measuring out the water for the water bath. If you add too much or too little water, the baking soda’s concentration will be off.
- Brushing butter over the top of the pretzels is optional, but it gives them an extra buttery flavor, which is nice!
Nutrition
Did You Make This?
I would love it if you would leave a review!These pretzels are my go-to for impressing guests (or just treating myself!). There’s something so satisfying about that chewy texture and subtle tang. Plus, they look way fancier than they actually are to make. I love serving them warm with a bit of mustard for dipping. It’s the perfect cozy snack!

My family loves these sourdough pretzels! They’re always a hit, whether it’s game day, movie night, or just an afternoon snack. The kids love helping shape the pretzels, and I love that they’re a healthier option than store-bought snacks. It’s a win-win!
Sourdough Sundays Newsletter

Every Sunday evening I’ll send you a sourdough recipe to make that week, straight from my kitchen to your inbox.
And as a thank you for signing up, I’ll send you this e-book with beautiful printable recipes right away. Simple!
You will not be added to any other email lists or my daily newsletter. But if you’re already on my newsletter, you’re welcome to join and receive both.
Key Ingredients and Tools
Let’s take a closer look at a few key tools and ingredients for making these pretzels:

- Digital Scale: Weighing your ingredients, especially the flour, is the best way to make sure you get consistent results. It might seem fussy, but trust me, it makes a difference!
- Stand Mixer with Dough Hook: This isn’t absolutely necessary, but it makes kneading the dough much easier, especially if you’re new to working with sourdough.
- Active Sourdough Starter: This is the heart of the recipe! A bubbly, active starter will give your pretzels that signature tang and help them rise beautifully.
- Pretzel Salt: Those big, crunchy salt crystals make a pretzel a pretzel. Look for them in your grocery store’s spice aisle or baking section.
Most of the tools and ingredients are helpful in many other recipes, like my blueberry sourdough bagels.
Troubleshooting and Help
While instant yeast will make your dough rise, it won’t give you that characteristic sourdough flavor. For that real sourdough taste, stick with the starter!
A few things could be at play here. First, make sure your sourdough starter is nice and bubbly before you start. A less active starter can lead to a slower rise and denser pretzels. Also, be careful not to over-knead the dough, as over-kneading can make it tough.
Absolutely! You can shape the pretzels and let them rest in the fridge overnight. Then, when you’re ready to eat, boil and bake them the next day. They also freeze beautifully! Just bake them thoroughly, cool them, and then freeze them in an airtight container.
You can use regular salt, but pretzel salt has those big, crunchy crystals that give pretzels their signature texture and flavor. If you can find it, it’s worth it!
If you have any more questions or need extra guidance, feel free to comment below – I’m always happy to help!
There’s nothing like a warm, soft, chewy, and tangy pretzel right out of the oven. They are great as an after-school or game-day snack. I know they take some time, but they are pretty simple.

Love,


