If you need a pretty little sweet for a baby shower, a wedding shower, or a Christmas cookie tray, cream cheese mints are exactly what you’re looking for. They’re easy to make in big batches and they freeze beautifully. One recipe makes 8 dozen, so you’ll have plenty to fill a tray or pack into little gift bags. You can tint them any color you need to match a theme
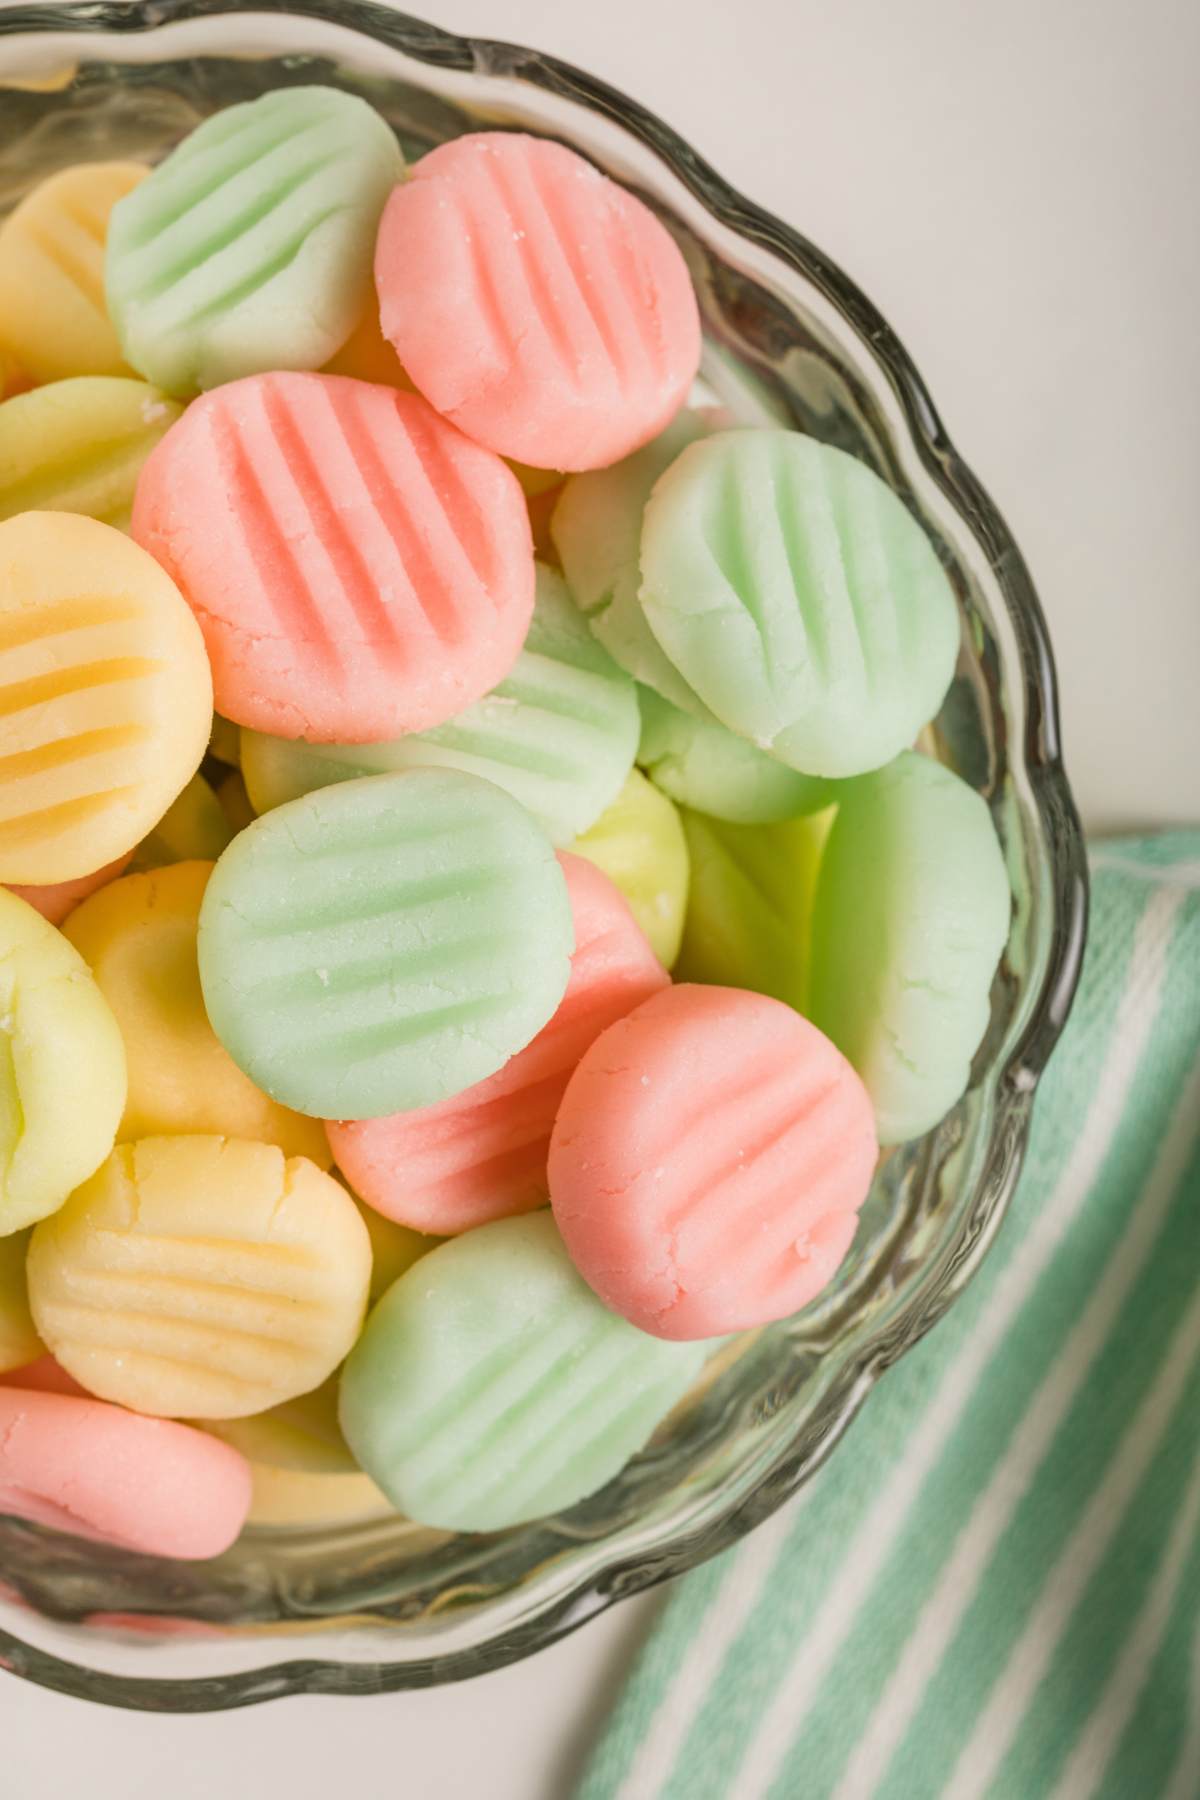
These are one of those old-fashioned recipes that your grandmother probably made, and they taste exactly like you remember… soft, creamy, and buttery with just enough peppermint
What You’ll Need
Scaling up: you can double this recipe easily by hitting the 2x button in the recipe card at the bottom of the post. One thing to keep in mind is you need a lot of space to let these set and dry out. If you double the recipe, you’ll need lots of cooling racks.
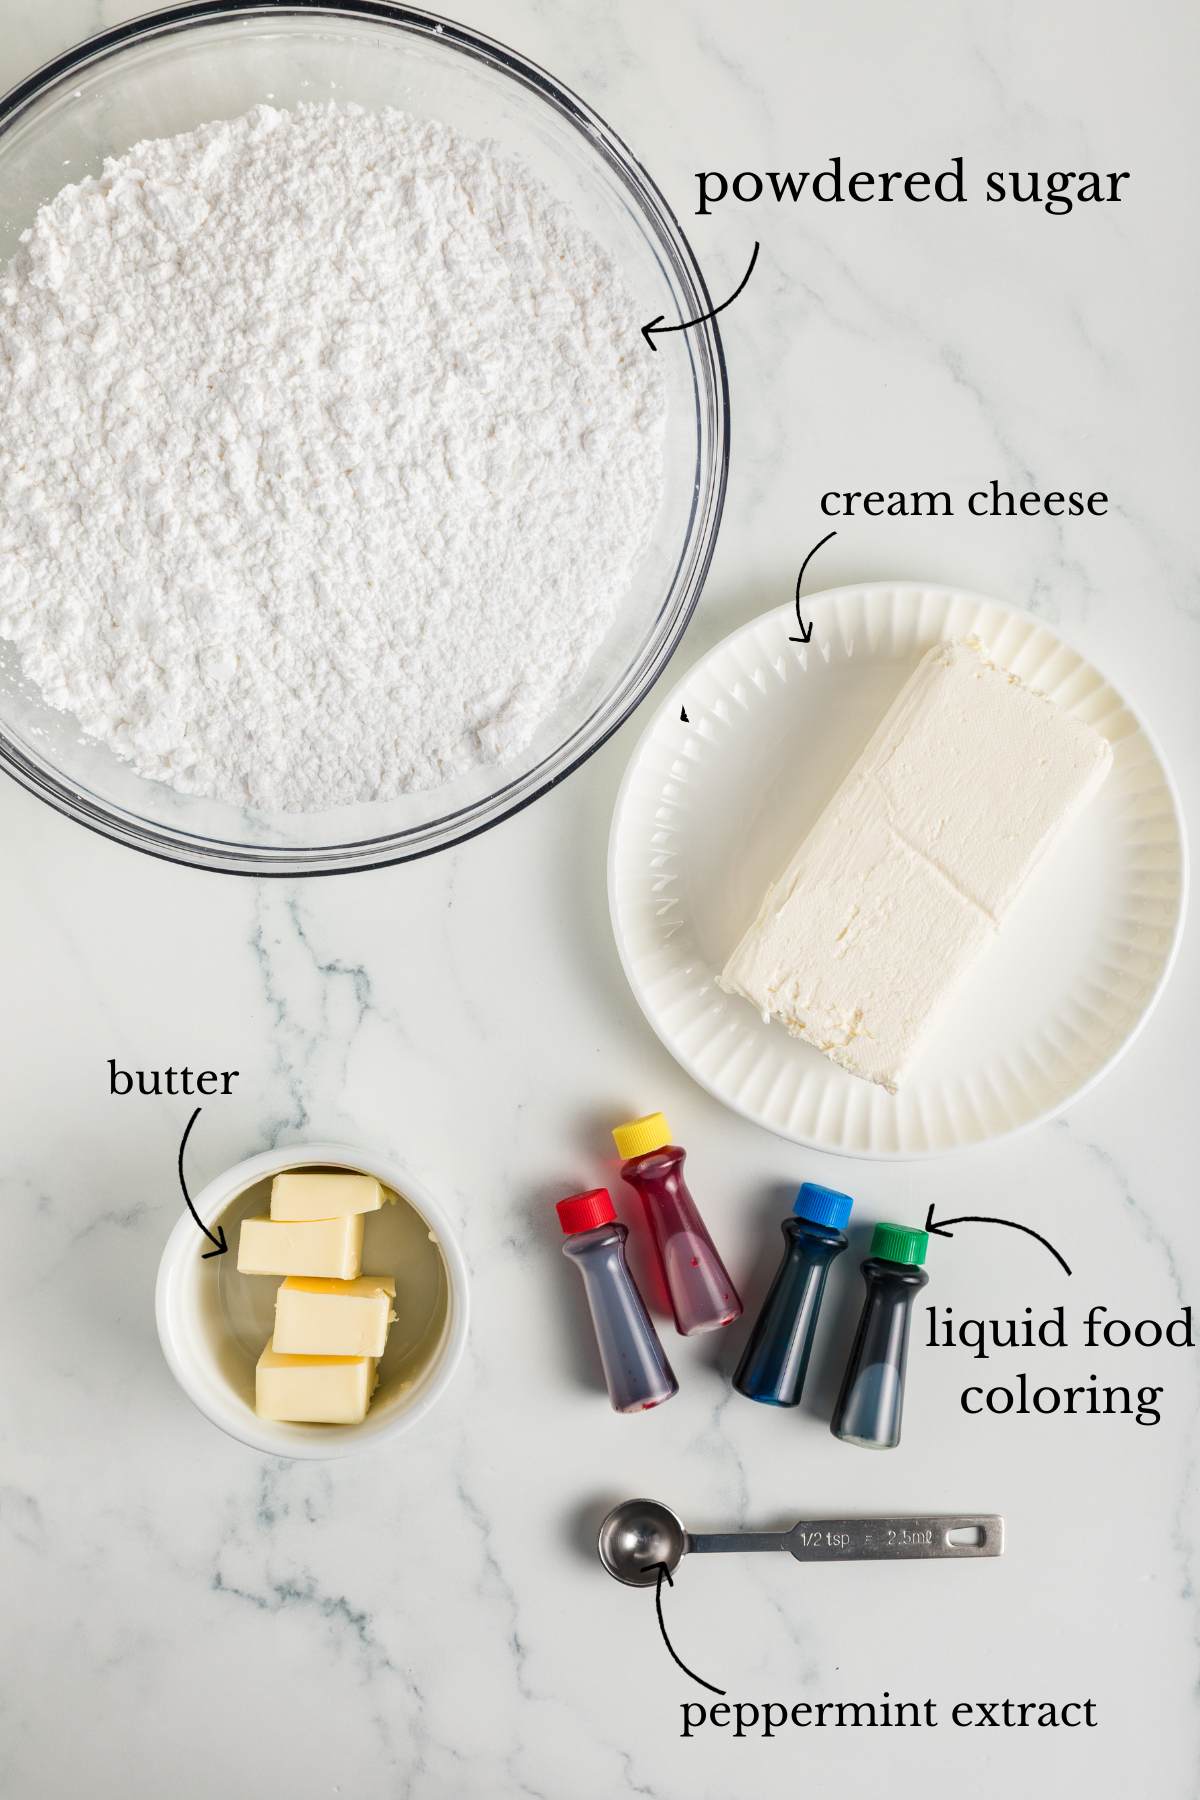
- 1 (8-oz.) package cream cheese
- ¼ cup butter, softened
- ½ teaspoon peppermint extract
- 7 ½ to 8 cups powdered sugar, plus extra for shaping. A 2-pound box works perfectly.
- Liquid food coloring, optional
Instructions
Step 1: Melt the Cream Cheese and Butter
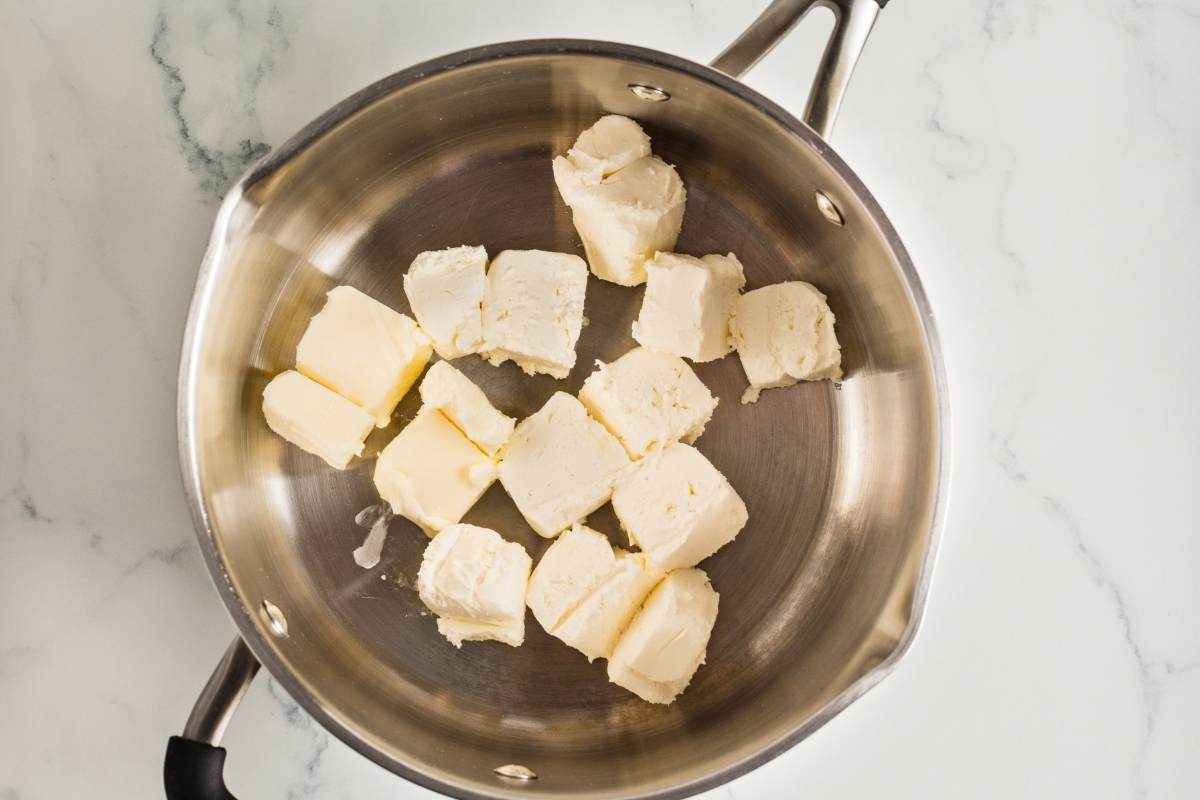
Add your cream cheese and softened butter to a medium saucepan over low heat. Keep the heat low and stay close; you want to stir this constantly. It will look a little lumpy at first, but just keep stirring and it will smooth right out. Don’t rush this step with higher heat or you risk scorching the bottom.
Step 2: Work In the Powdered Sugar
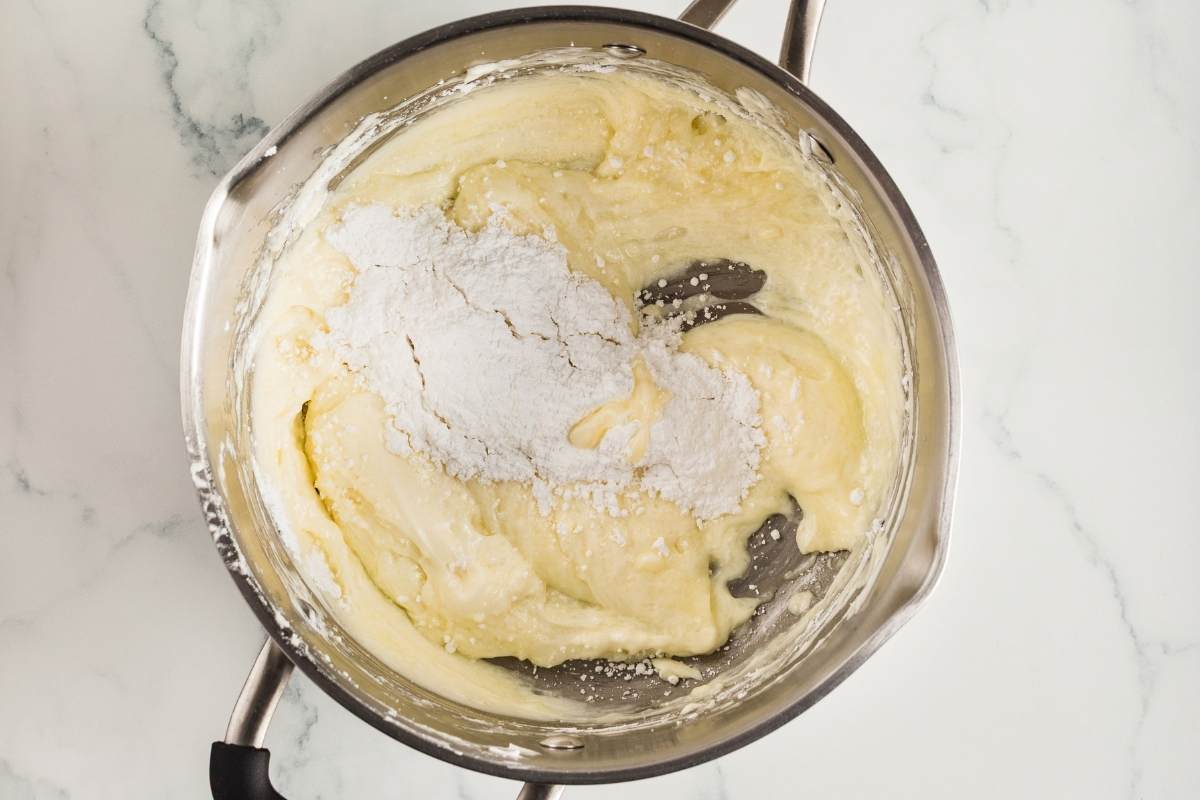
This is where it gets interesting. Gradually stir in your powdered sugar a little at a time rather than dumping it all in at once. The mixture will get very thick… that’s exactly what you want. A stand mixer makes this much easier, but if you’re doing it by hand, just take your time. Stir in your peppermint extract once everything is combined.
Get Access to
All my Free planners, Printables, binders and more
Get a copy of this frugal recipe binder with lots of crockpot favorites, pasta dishes, casseroles, and more inside the subscriber library. Plus SO much more.

Step 3: Add Color (Optional)
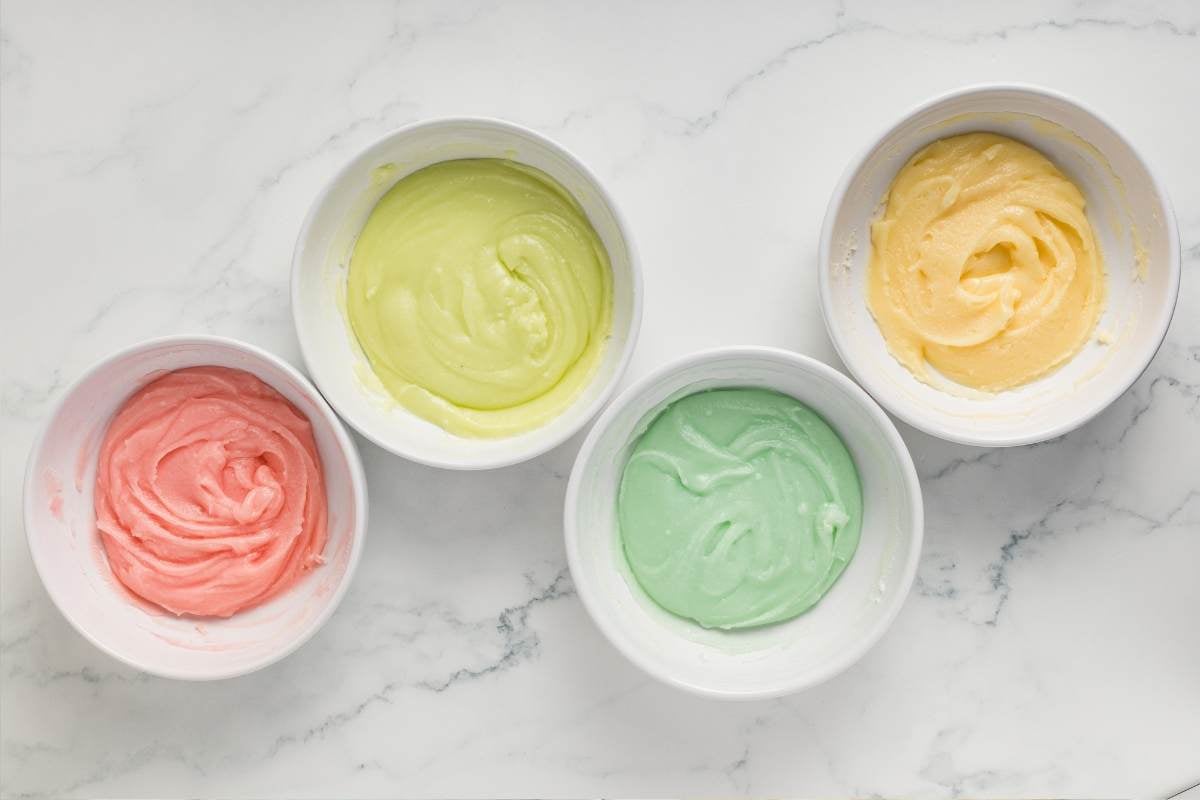
If you want the classic pink-and-white look, divide the mixture into two portions. Work 2 drops of red food coloring into one portion and 4 drops into the other for two shades of pink. You can also leave the whole batch white, or tint it all one color; this is a great recipe to customize for holidays or showers.
Step 4: Shape the Mints
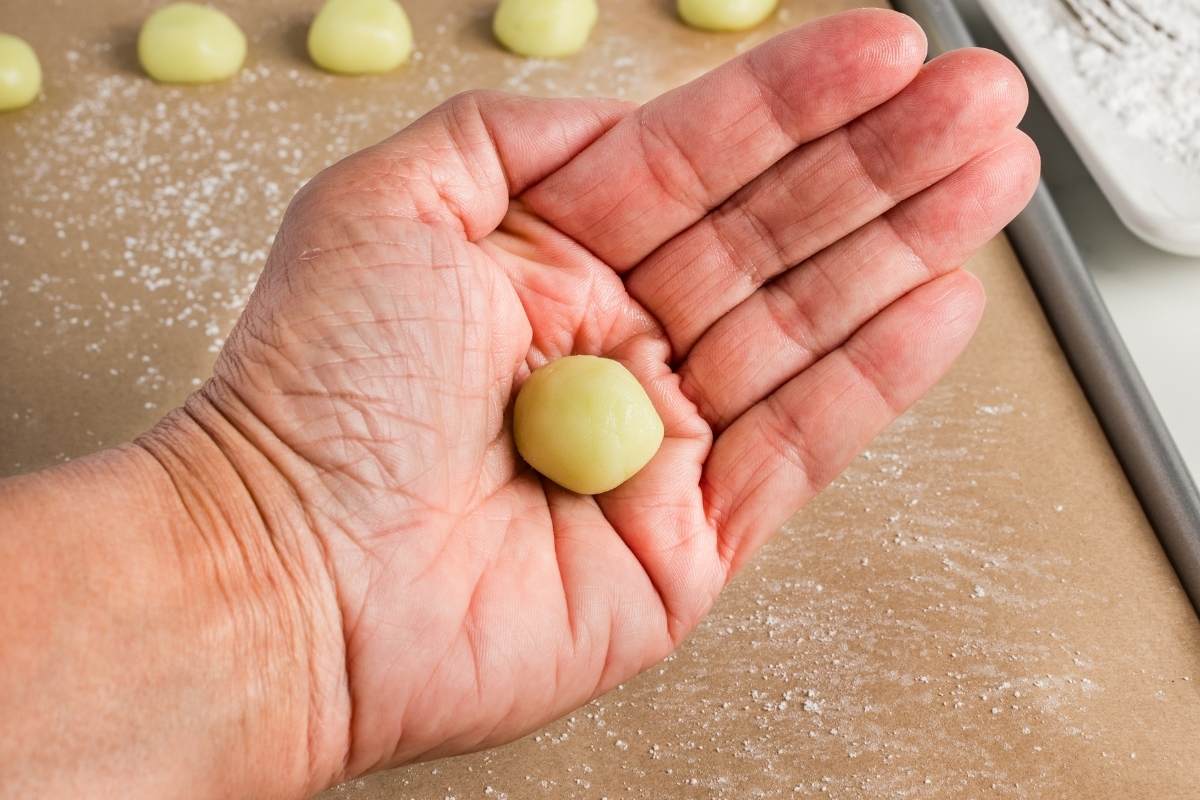
Dust your hands lightly with powdered sugar to keep the mixture from sticking. Roll the dough into 1-inch balls; they don’t need to be perfect. If the mixture feels too soft to roll, pop it in the refrigerator for 15 to 20 minutes to firm up a bit.
Step 5: Press and Flatten
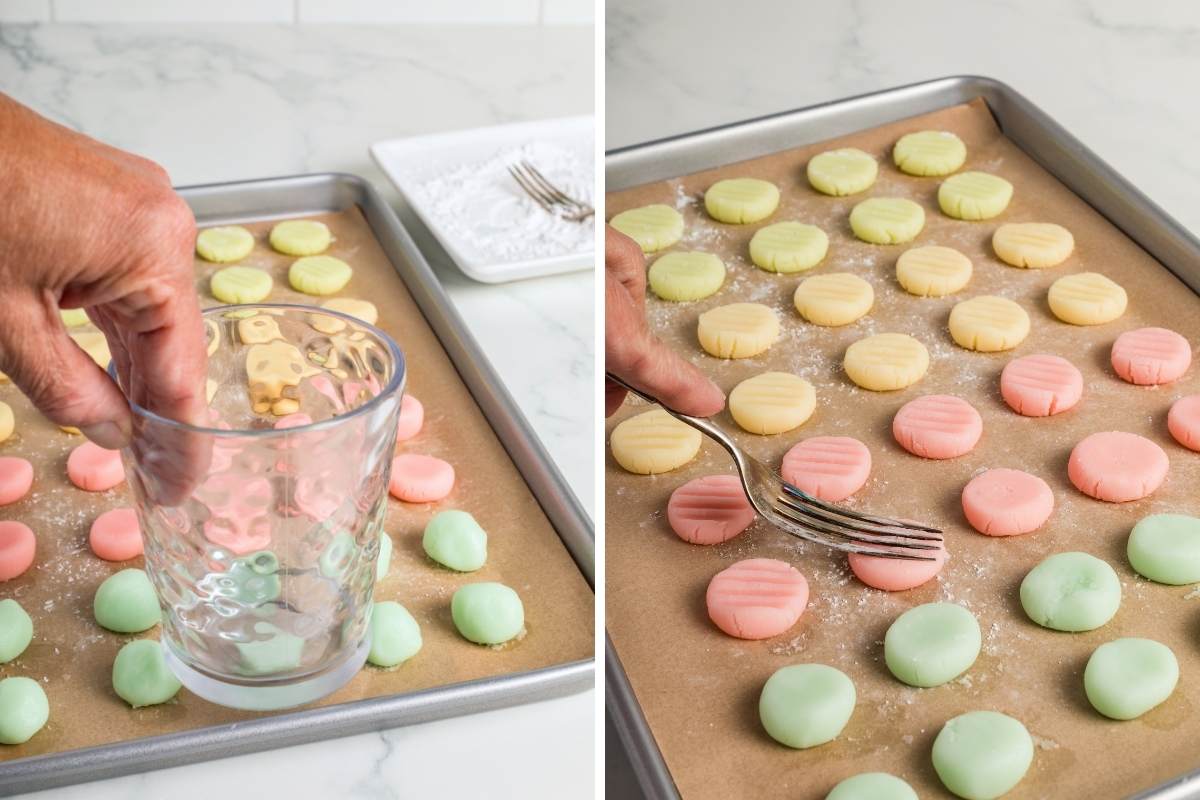
Dip your cookie stamp or the bottom of a glass in powdered sugar, then press each ball flat. You want them to be about ¼ inch thick. Re-dip your stamp in powdered sugar as needed to keep things from sticking.
Step 6: Let Them Dry
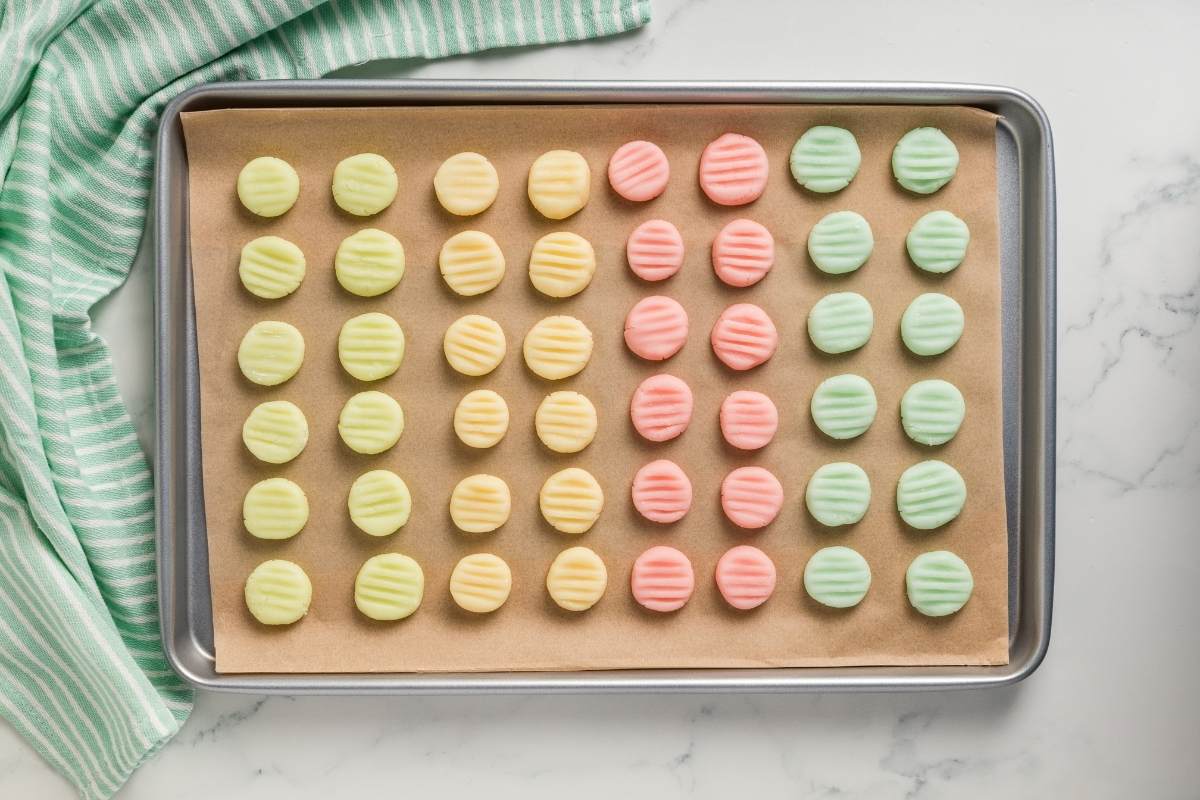
Arrange your mints in a single layer on a wire rack or parchment-lined baking sheet and leave them out, uncovered, for at least 4 hours. This drying time is what gives them that slightly firm, melt-in-your-mouth texture; don’t skip it. Once they’re dry, they’re ready to serve or layer between sheets of wax paper to freeze.
Storage Instructions
Store completely dried mints in an airtight container at room temperature for up to a week, layering between sheets of wax paper.
These freeze quite well for up to 3 months, just thaw at room temperature for about 30 minutes before serving.
Serving and packaging ideas
This is the classic bridal shower or baby shower party favor, and a little cellophane bag with a pretty pastel ribbon is really all you need.

But you can also tuck them into a cookie tin alongside other old-fashioned goodies like fudge, pralines, or chocolate truffles, or pile them into a small cellophane bag tied with ribbon for a simple homemade gift.
Simple Variations
The color here is totally customizable and flexible. It’s really up to you. Pale pink, pale yellow, pale blue, and pale green are the classics, but anything will work.
The flavor can also be tweaked. Try peppermint or almond instead of vanilla for a slightly different flavor.
Troubleshooting
Refrigerate it for 15 to 20 minutes until it firms up enough to handle. If that doesn’t work, you can add a bit more powdered sugar, just stirring in by hand.
Not really; the four-hour rest is what gives them their texture, and there’s no reliable shortcut. Plan ahead and make them the day before if needed.
This usually happens if the cream cheese and butter weren’t fully melted and smooth before the powdered sugar was added. Make sure the base is completely smooth before you start stirring it in.
Printable Recipe

Cream Cheese Mints
Equipment
- 1 Medium saucepan
- 1 stand mixer or hand mixer
- 1 cookie stamp or flat-bottomed glass
- 1 parchment-lined baking sheet or wire rack
Ingredients
- 1 8 ounce. package cream cheese
- ¼ cup butter, softened
- ½ teaspoon peppermint extract almond extract works well as a substitute
- 2 pounds package powdered sugar about 7½ to 8 cups, or look for the small package in the baking aisle
- additional powdered sugar, for shaping
- 6 drops red liquid food coloring optional (NOT gel, will be too bright!)
Save This Recipe
You'll join my email list which you will love. And if you don't, unsubscribe in one click. ❤️
Instructions
- Blend cream cheese and butter. Melt the cream cheese and butter together in a medium saucepan over low heat, stirring constantly, until completely smooth.
- Add powdered sugar and extract. Gradually stir in the powdered sugar a little at a time until fully incorporated. Stir in the peppermint extract. The mixture will be very thick.
- Add color and shape. If coloring, divide the mixture into two portions. Stir 2 drops of food coloring into one portion and 4 drops into the other. If the mixture is too soft to roll, refrigerate for 15 to 20 minutes.
- Press. Dust your hands with powdered sugar and roll the mixture into 1-inch balls. Dip a cookie stamp or the bottom of a glass in powdered sugar and press each ball flat to about ¼ inch thick, re-dipping as needed.
- Dry until firm. Arrange mints in a single layer on a parchment-lined baking sheet or wire rack. Let stand uncovered for 4 hours or until firm and dry.
Notes
Nutrition