Old-Fashioned Butterscotch Cookies
These old-fashioned butterscotch cookies start with my favorite drop cookie base recipe, with the perfect blend of white and brown sugar. No chilling is required, and the dough is easy to work with.
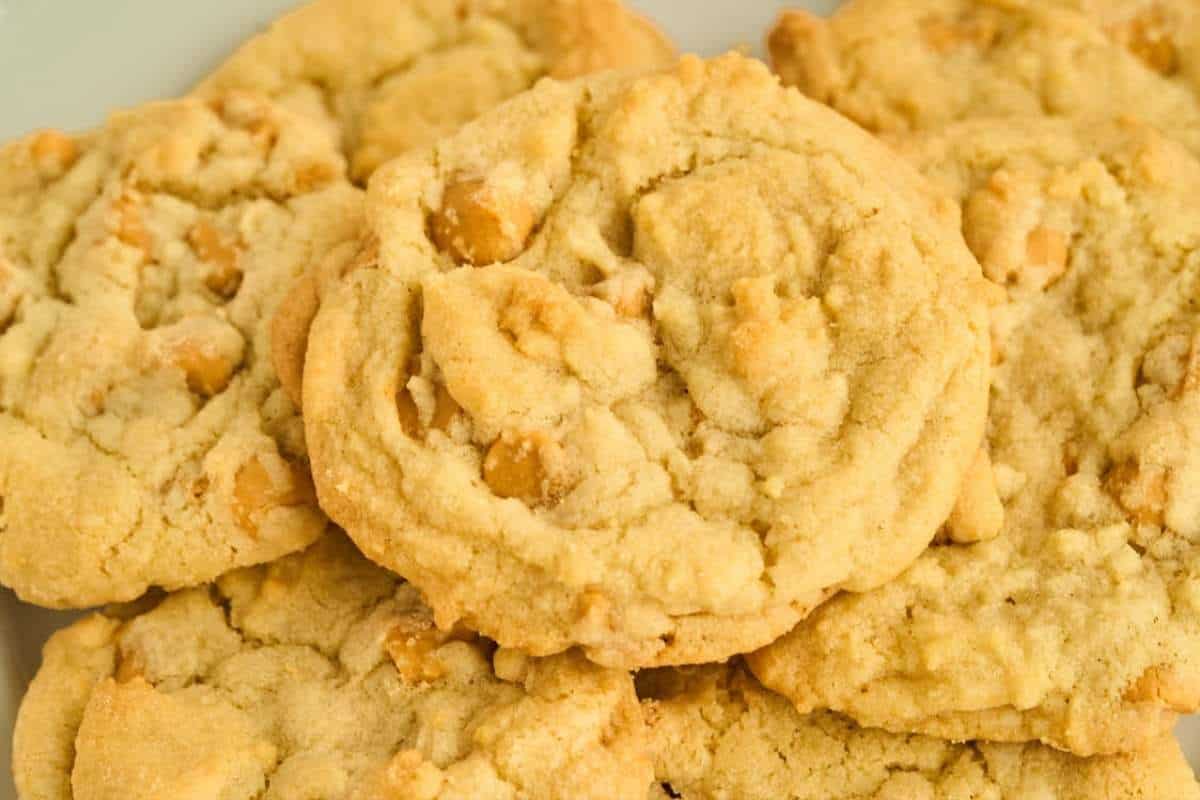
It’s one of the best cookie recipes to make when you want something besides chocolate chip.
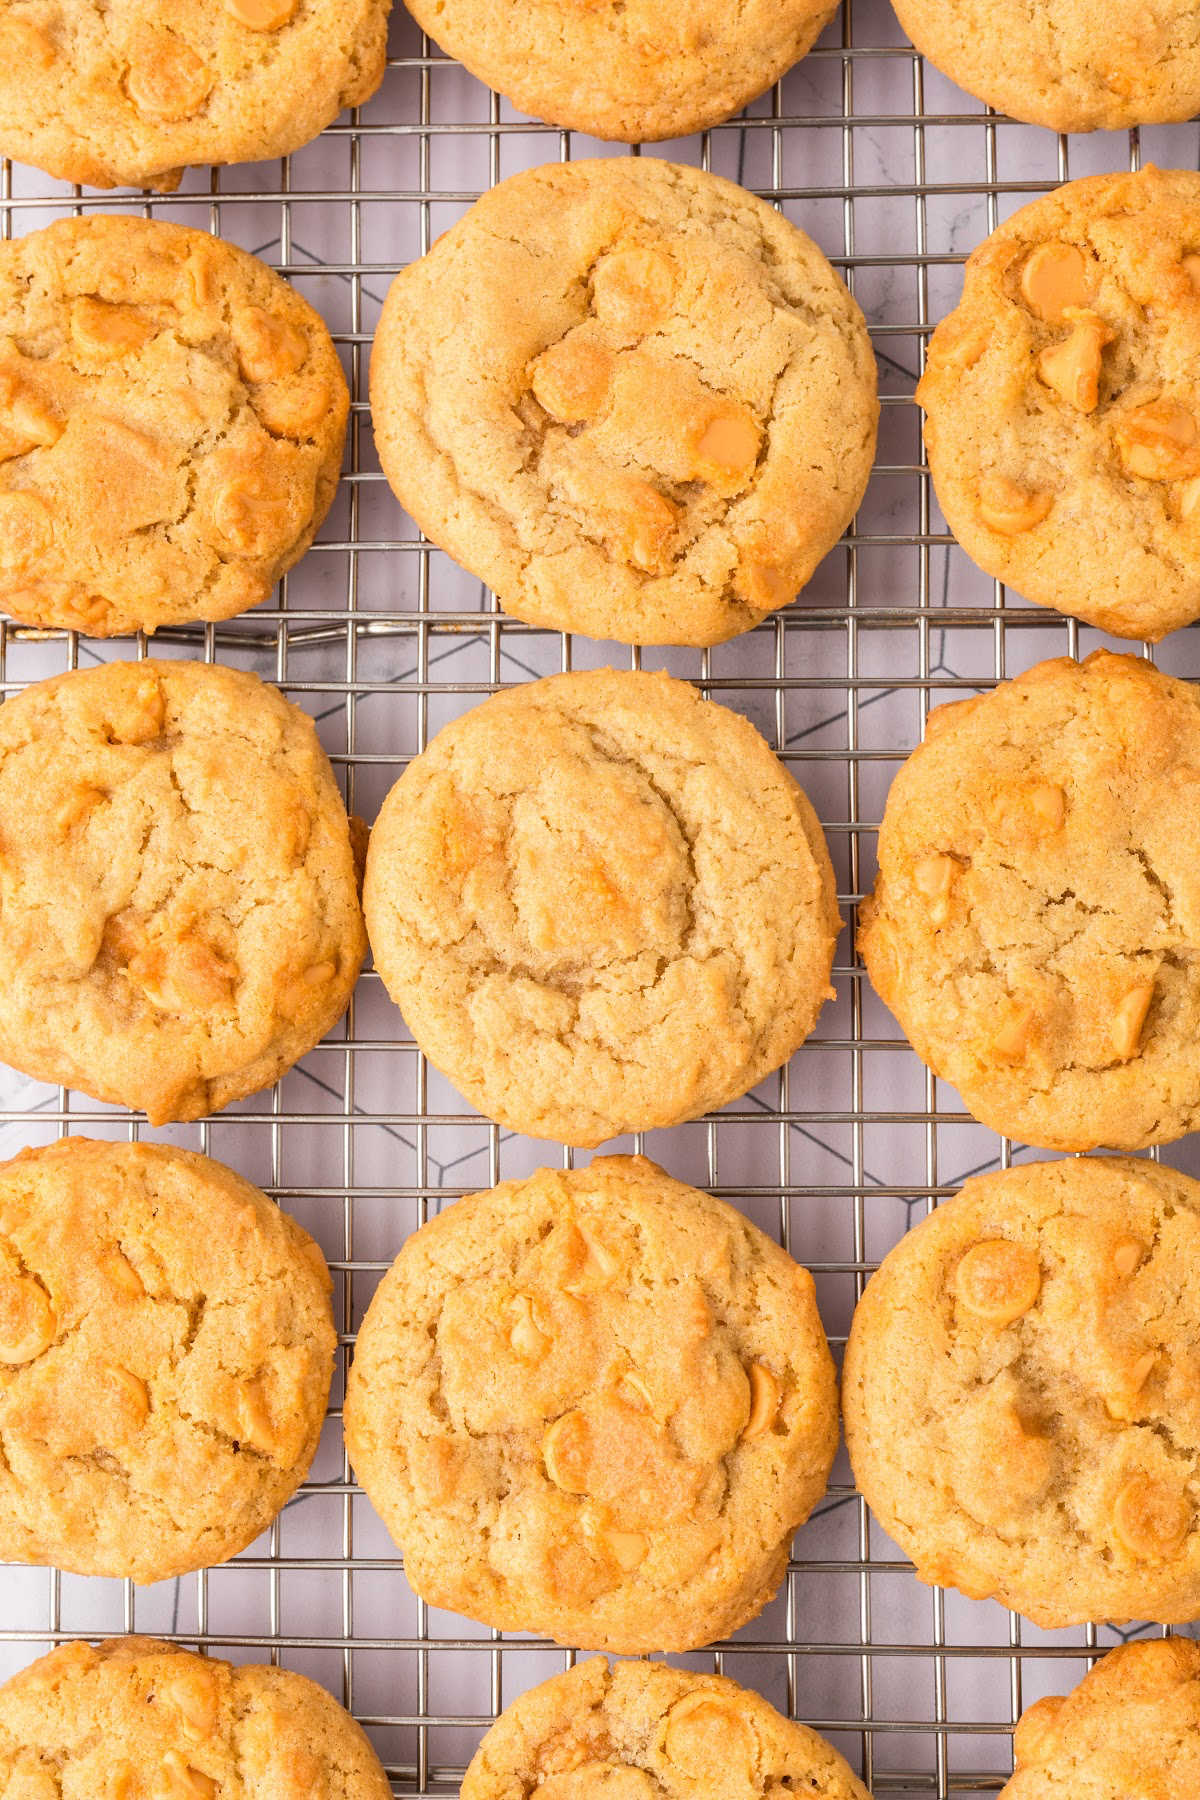
You don’t find these very often in the store, but they are so easy to make at home. Just add butterscotch chips instead of chocolate chips. Or do a mix of both!
Ingredients and Tools You’ll Need
The butterscotch chips can be found in the baking section, where you find chocolate chips. Everything else is just regular pantry items.

Heart’s Content Farmhouse is a participant in the Amazon Services LLC Associates Program, an affiliate advertising program designed to provide a means for sites to earn advertising fees by advertising and linking to Amazon.com. This means that when you click on certain links on this site and make a purchase, I may earn a small commission at no additional cost to you. I only recommend products I genuinely believe in and would use in my own kitchen. As an Amazon Associate, I earn from qualifying purchases.

Equipment
- Parchment paper or cooking spray (for lining the cookie sheets)
- Cookie Sheets
- Electric Mixer (hand mixer or stand mixer)
- Spatula
- Wire racks
Ingredients
- ½ cup salted butter (1 stick, softened to room temperature)
- ½ cup granulated sugar
- ½ cup packed brown sugar
- 1 large egg
- 1 teaspoon vanilla extract
- 1 ½ cups all-purpose flour
- 1 teaspoon baking soda
- ½ teaspoon salt
- 12-ounce package of butterscotch chips
How to Make Old-Fashioned Butterscotch Cookies
If you live at a higher altitude, check out this high-altitude baking guide from King Arthur Baking. It has everything you need to get your cookies right, no matter where you live.
Step One: Preheat The Oven
Preheat your oven to 350°F and position the oven rack in the center. Then, line two cookie sheets with parchment paper or lightly coat them with cooking spray.

Step Two: Cream The Butter And Sugar
In a large mixing bowl, beat the softened butter, granulated sugar, and brown sugar together using an electric mixer on medium speed until the mixture is light and fluffy. This should take about 3-5 minutes.

Step Three: Add The Wet Ingredients
Add the egg and vanilla extract to the creamed butter and sugar mixture. Mix until fully combined, scraping down the bowl’s sides as needed to make sure everything is evenly incorporated.

Step Four: Mix The Dry Ingredients
Whisk together the flour, baking soda, and salt in a separate bowl. Then, slowly add to the wet ingredients, mixing at low speed. Mix it in batches until it’s combined after each addition. Be careful not to overmix.

Step Five: Fold In The Butterscotch Chips
Once the dough is well mixed, use a spatula to fold in the butterscotch chips, making sure they are evenly distributed.

Step Six: Scoop The Dough
Scoop approximately 1 tablespoon of cookie dough for each cookie and place the scoops onto the prepared cookie sheets, spacing them about 2 inches apart. Each sheet should fit around 15 cookies.

Step Seven: Bake
Bake in the preheated oven for 10-12 minutes or until the edges of the cookies are golden brown. The centers should still be soft. Remove the cookies from the oven and allow them to cool on the cookie sheets for 5 minutes before transferring them to wire racks to cool completely.

Storage Instructions
These cookies will stay fresh and soft at room temperature for about 3-4 days.
To freeze the baked cookies, let them cool fully before layering them in an airtight container or freezer-safe bag. Place a piece of parchment paper between each layer to prevent the cookies from sticking together. They can be stored in the freezer for up to 3 months.
You can make the dough two days before and store it in the fridge. Just cover it tightly with plastic wrap. When you’re ready to bake, let it sit at room temperature for a few minutes if it’s too hard to scoop.
You can freeze the cookie dough as balls and bake them straight from frozen (just add 1-2 minutes of baking time).
What to Serve with Old-Fashioned Butterscotch Cookies
These cookies can go with anything, but here are some suggestions.
- A glass of milk or a cup of coffee.
- Serve vanilla ice cream with the cookies warmed up.
- Pack them with apple slices in your kids’ lunchboxes.
- Crumble them over vanilla pudding.
Questions and Troubleshooting
Yes, softened butter mixes more evenly to create that soft, chewy texture. If your butter is too cold, the cookies might not spread well and become dense.
Probably baked too long. Take them out when the edges are golden, but the centers are still soft.
If the dough feels too sticky to handle, it might need a quick chill in the fridge. But this should only happen if your kitchen is very warm.
Nope, they’ll naturally spread as they bake.
More Yummy Cookie Recipes
- Try my oatmeal butterscotch cookies for a heartier twist with chewy oats and the same great butterscotch flavor.
- These iced Amish apple cookies are perfect for cozy, fall afternoons.
- Made the same way but with lemon, old-fashioned lemon sugar cookies are just the thing for late winter or early spring.
- If you’re looking for the softest cookie ever, try my cream cheese cookies.
Printable Recipe
Old Fashioned Soft Butterscotch Cookies
Equipment
- Parchment paper or cooking spray (for lining the cookie sheets)
- Cookie Sheets
- Electric Mixer (hand mixer or stand mixer)
- Spatula
- Wire racks
Ingredients
- ½ cup salted butter (1 stick, softened to room temperature)
- ½ cup granulated sugar
- ½ cup packed brown sugar
- 1 large egg
- 1 teaspoon vanilla extract
- 1 ½ cups all-purpose flour
- 1 teaspoon baking soda
- ½ teaspoon salt
- 12 ounce package of butterscotch chips
Save This Recipe
You'll join my email list which you will love. And if you don't, unsubscribe in one click. ❤️
Instructions
- Preheat the oven. Preheat your oven to 350°F and position the oven rack in the center. Then, line two cookie sheets with parchment paper or lightly coat them with cooking spray.
- Cream the butter and sugar. In a large mixing bowl, beat the softened butter, granulated sugar, and brown sugar together using an electric mixer on medium speed until the mixture is light and fluffy. This should take about 3-5 minutes.
- Add the wet ingredients. Add the egg and vanilla extract to the creamed butter and sugar mixture. Mix until fully combined, scraping down the bowl's sides as needed to make sure everything is evenly incorporated.
- Mix the dry ingredients. Whisk together the flour, baking soda, and salt in a separate bowl. Then, slowly add to the wet ingredients, mixing at low speed. Mix it in batches until it's combined after each addition. Be careful not to overmix.
- Fold in the butterscotch chips. Once the dough is well mixed, use a spatula to fold in the butterscotch chips, making sure they are evenly distributed.
- Scoop the dough. Scoop approximately 1 tablespoon of cookie dough for each cookie and place the scoops onto the prepared cookie sheets, spacing them about 2 inches apart. Each sheet should fit around 15 cookies.
- Bake. Bake in the preheated oven for 10-12 minutes or until the edges of the cookies are golden brown. The centers should still be soft. Remove the cookies from the oven and allow them to cool on the cookie sheets for 5 minutes before transferring them to wire racks to cool completely.
Notes
Nutrition


Very tasty but I hate to say maybe fewer chips and I love butterscotch. When I make them again (and I will) I will just use maybe 2/3 s of the bag.
hi diane, another good combo is half butterscotch/ half choc chip 🙂
Can you substitute for butterscotch chips?
yes, try a mix of heath bits and choc chips!
These are simple and delicious. Great texture and shape.
thank you Cecilia!
So Delicious, Thick and Soft!
I added a half a pack of Butterfinger Bits (I crushed them into small pieces YUM!)
Thank you for this Yummy Recipe
; D
I took Photos but not sure how to post them
hey Danielle! I’m so happy to hear this! there isn’t a way to post photos here directly but if you want to email me or dm me on instagram I’d love to see, especially ho wit looks with the crushed butterfingers 🙂
very delicious recipe, but if ya have big cookie eaters at home you will need to quadruple the recipe. my guys like big cookies. but they loved the cookies.
Hey Heather, thank you so much! I’m so happy to hear that your crew loved the cookies. And I totally get it, big cookie eaters need big batches! Next time, you might have to make an extra batch just to hide a few for yourself. Thanks for trying the recipe and for your sweet comment!
Can one add oatmeal to these?
hey Ellen I have an oatmeal butterscotch on my site if you search, I am on my phone or id find it for ya! 🙂
My butter was a little too warm so they spread out a lot. They are still very tasty.I made them gluten free with cup for cup gluten free flour.
Hey Gene, I’m so glad you enjoyed them! Warm butter can cause extra spreading, but they still sound delicious. Great to know the cup-for-cup gluten-free flour worked well—thanks for sharing! If you want less spreading next time, try chilling the dough for 30 minutes.:)
So I was looking for a quick and yummy cookie recipe for a potluck I was going to, one preferably I didn’t have to chill because I didn’t have that much time, anyway, I found these and they are DELICIOUS!!! I’ve baked a ton of cookies in my lifetime and these definitely are a favorite!! They are soft and chewy and crispy on the outside! I made them a little bigger and ended up with 23 cookies! I also love to put less chips in the dough then press some chips on top! I also added a little extra vanilla cuz I love vanilla haha but these really are absolutely perfect!! 11/10! Perfect for any season! Thank you for the recipe!!
Some of the best cookies I’ve had in my life. ⭐️⭐️⭐️⭐️⭐️
Just made these today. Simple and delicious. Stuck a pecan half in the center of each and they came out great.
i’m so glad. pecan idea is great! thanks :
Sooooooo good😃
I made a batch of these cookies and the only complaint I have is that they didn’t even last a full day! My husband said they were the best cookies he’s ever had 😋 Next batch will probably need to be doubled so my kids can have more than just one or two cookies lol!
hi becky! thank you so much for letting me know! to be fair, it is a a smallish batch. you should double 😉
My sons and I have been making this recipe since finding it. We love them with both butterscotch and chocolate chips. Thank you for sharing!
heidi i’m so happy you both love it! we use the base dough for almost everything! happy holidays ❤️
just trying double batch wish me luck
I make a lot of cookies and these were amazing. I highly recommend them. Simple and delicious!
thanks tabby! i love them too 🙂
I want to make these but your recipe states “1 large eggs”. The step two says beat butter, sugars and “egg”. But the next step is to add egg and vanilla until combined. So is it 2 eggs total?
I’m having that same confusion too. But earlier in the explanation of the process, Katie says it’s important to mix the egg with the butter and sugars. So I tried with 1 egg added with butter and sugar, then added the vanilla alone, and the cookies were terrific – as advertised! Hope that helps.
I would say there is one egg in this recipe. Usually you beat the butter and sugar until light and fluffy. Then add the egg and vanilla.
Great cookies and recipe! Kids highly approved ✔
I usually steer clear of making cookies that don’t come already mixed together in a pull apart fashion but these were easy and a hit! I have a batch with chocolate chips now! Thanks for giving me an easy recipe!
thanks heidi! this is my fave base cookie recipe for mixing in anything. glad you liked it 🙂
Just made these this morning and they are delicious!
angela i’m so glad to hear it! think i will make a batch tomorrow 🙂