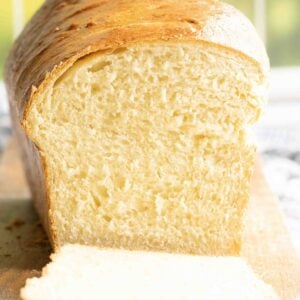
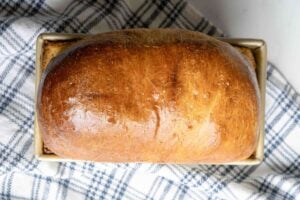
The Farmhouse Potato Bread Recipe That Will Become a Weekly Staple
Bake something truly comforting with this soft farmhouse potato bread recipe. Soft, fluffy, and easy to make, you’ll see right away why it’s a family favorite. Dive into this simple guide and discover how easy it is to bring this wonderful loaf into your kitchen.
Farmhouse Potato Bread Recipe
Equipment
- Stand mixer with dough hook attachment
- Loaf pan 9×5 inches
- oven
Ingredients
- 3 cups all-purpose flour plus extra for dusting
- ¾ cup instant potato flakes
- 3 tablespoons sugar
- 2 teaspoons instant yeast
- 1 ½ teaspoons salt
- 1 ¾ cup water
- 3 tablespoons melted butter or vegetable oil
- 1 egg room temperature
- egg optional: additional beaten egg, for brushing the top
Save This Recipe
You'll join my email list which you will love. And if you don't, unsubscribe in one click. ❤️
Instructions
- Combine Ingredients: In the bowl of your stand mixer, add all dough ingredients. Attach the dough hook to the mixer and begin to mix at a low speed until the ingredients start to come together.
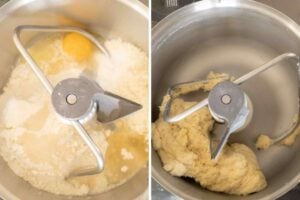
- Knead the Dough: Increase the speed to medium and knead the dough for about 7-8 minutes, or until it is smooth and elastic. If the dough is too sticky, add additional flour, 1 tablespoon at a time, until the dough comes away from the sides of the bowl.

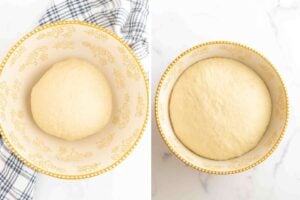
- First Rise: Transfer the dough to a lightly greased bowl, turning once to coat all sides. Cover the bowl with greased plastic wrap and let the dough rise in a warm, draft-free place until doubled in size, about 1 hour.
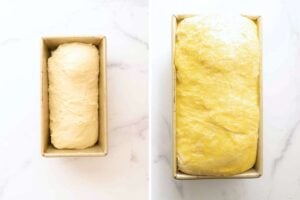
- Shape the Loaf: Gently deflate the risen dough and transfer it to a lightly floured surface. Shape the dough into a sandwich loaf by flattening it into a rectangle, rolling it up tightly, and pinching the seams closed. Place the shaped dough into the greased loaf pan, seam side down.
- Second Rise: Cover the loaf pan with greased plastic wrap and let the dough rise again in a warm place until it's about 1 inch above the rim of the pan, approximately 30 minutes.
- Bake: Preheat the oven to 375°F. Remove the plastic wrap and bake the loaf for 35 minutes, or until the top is golden brown and the loaf sounds hollow when tapped.
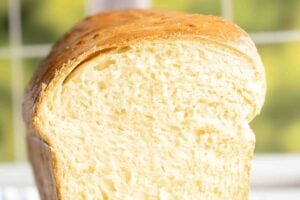
- Cool and Serve: Remove the loaf from the oven and allow it to cool in the pan for 10 minutes. Then, transfer it to a wire rack to cool completely before slicing. Slice the bread and enjoy it as the foundation for your favorite sandwiches, or simply spread it with butter and enjoy it as is.


Notes
Nutrition
Every time I pull this Soft Potato Bread Sandwich Loaf out of the oven, the smell takes me straight back to my grandma’s kitchen. She used to make a similar potato bread that was my absolute favorite, especially warm from the oven and slathered with her homemade raspberry jam. I’ve tweaked her recipe by using potato flakes to simplify the process, and it’s been a hit at every family gathering. It’s that perfect, comforting taste of home in every slice.

I bake this loaf almost weekly, and it never lasts long on the counter—everyone in the house loves it just as much as I do!

Key Ingredients and Tools
Here are a few key tools and ingredients that play an essential role in the success of your Soft Potato Bread Sandwich Loaf. Paying attention to these can make a big difference in your baking experience.
- Instant Potato Flakes. These add moisture and a subtle flavor to the bread. They can be found in the dried foods aisle of most grocery stores, usually near instant mashed potatoes. Make sure to use unflavored potato flakes to keep the bread’s taste authentic.
- Stand Mixer with Dough Hook. This tool is crucial for efficiently kneading the dough to the right consistency, which can be challenging to achieve by hand. A good stand mixer speeds up the process and ensures that the dough is perfectly elastic.
- Loaf Pan (9×5 inches). The size of the pan affects how the bread bakes and rises. Using the specified size helps achieve the ideal shape and texture for sandwich slices.
Understanding these specific aspects will help you bake a loaf that’s just right and might even become a new favorite in your household.
Troubleshooting and Help
You can use fresh potatoes! Just cook and mash them until smooth. Keep in mind that fresh potatoes might introduce more moisture, so you might need to adjust the amount of water in the recipe.
Yes, you can substitute the egg with a “flax egg” (1 tablespoon of ground flaxseed mixed with 3 tablespoons of water, left to thicken for a few minutes) or use ¼ cup of unsweetened applesauce. Both options work well for binding.
That can happen if the room is too cool or if the yeast isn’t active anymore. Make sure your yeast is fresh and that the dough is kept in a warm, draft-free place. Sometimes, placing it in an off oven with the light on provides enough warmth.
This bread keeps well at room temperature for several days if it’s wrapped tightly. You can also freeze it for up to a month, just make sure to wrap it well or store it in a freezer bag.
If you have more questions as you go along, feel free to ask. Happy baking!
Whether you’re pairing it with your favorite sandwich fillings or enjoying a slice with butter, this bread is sure to be a comforting addition to your table. Happy baking, and enjoy the fruits of your labor!


hi again make 2 loaves of this fantastic bread each week put one in the freezer until needed
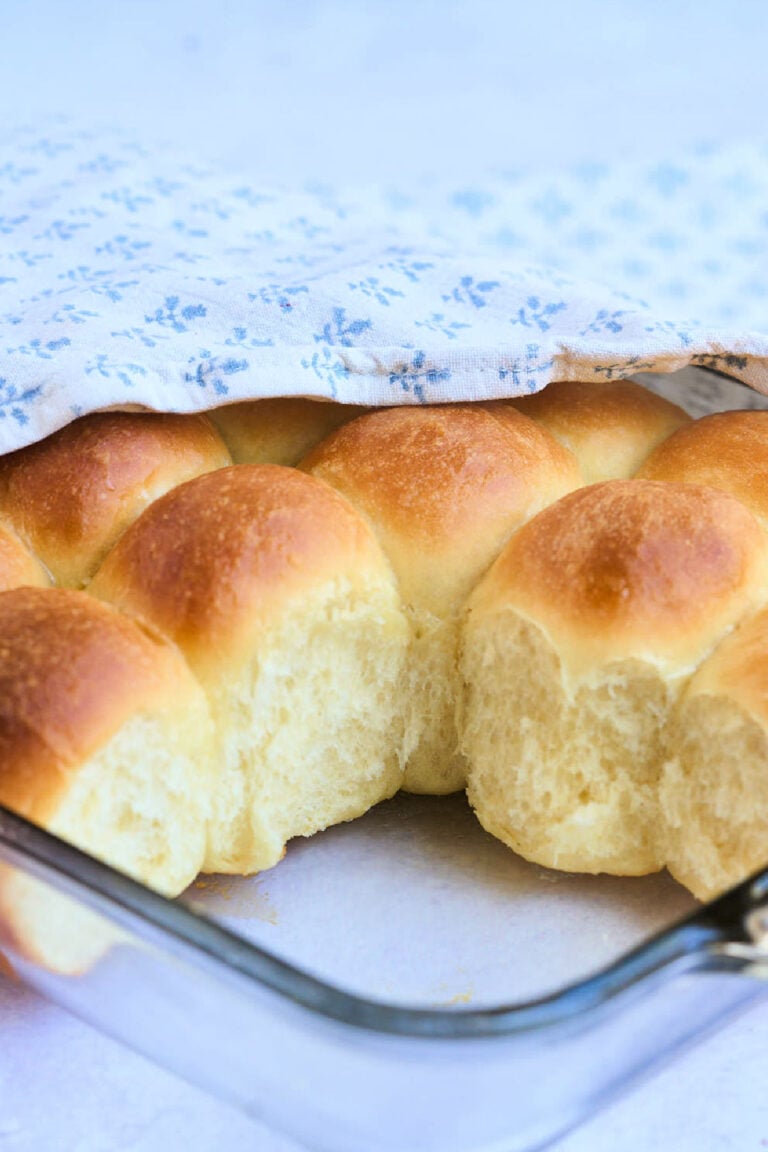
also made cinnamon rolls using same dough just added a little more sugar to make a sweet dough. they were great. cant say enough about this recipe. I will follow you from.now on.thankyou so much for sharing this recipe.
okay made 2 loaves, hand kneaded the dough cut in half kneaded more roll3d and put into pans baked j7st came out of oven so good so far they look and smell wonderful. would send pictures if I could.thankyou for recipe. when they cool hubby will test my bead. he loves homemade bread.
hi Margaret! I am so very happy to hear this. you are always welcome to email me pictures katie@heartscontentfarmhouse.com and I love to see them. ❤️
hi again make 2 loaves of this fantastic bread each week put one in the freezer until needed
also made cinnamon rolls using same dough just added a little more sugar to make a sweet dough. they were great. cant say enough about this recipe. I will follow you from.now on.thankyou so much for sharing this recipe.
hi Margaret! I am so glad to hear this 🙂 yes the potato flakes make all the difference
well I will make the bread today have to do it by hand no stand mixer
wish me luck.
Hi just wanted to say I love this recipe for potato bread my family loves it I make it every week so glad I came across it thank you for sharing it.
hi Christine! I am so very glad to hear this. Thanks so much for letting me know.
I don’t have a stand mixer ,can I use my hand mixer to start then do it by hand?
no I don’t think that would work 🙁
This loaf was the most beautiful loaf of bread I think I’ve ever baked and it was delicious too! Thank you for sharing! The whole family absolutely loved it!
hi paula! i am so VERY happy to hear this. thanks for coming back to let me know.
This would only be my go to if it had REAL potatoes in it
Have you tried using bread flour in this recipe?
yes, it works but it’s not as super-soft. still good, though! you’ll need a TAD more liquid.
Hi. Are the nutrition numbers for the entire loaf? Thanks.
Hey Vanessa, the nutrition numbers are for one slice if the loaf is cut into about 12 slices.
The bread had a great taste to it, but was kind of doughy even though I baked it a lot longer than stated in recipe. I did put aluminum foil over the top as it was getting brown before it was done inside to keep it from burning. Any suggestions?
this tends to happen if your dough under-rises. basically it’s too dense at the time of baking and has a harder time baking through. I’d make sure it’s truly nice and fluffy before shaping and that it’s risen an inch over the edge of the pan before baking. it could also just be personal preference since this is a very soft, almost “squishy” bread!
I made this recipe, I probably used 4 cups of flour in order for it to stop being so sticky and come together properly. I still felt the dough was on the moist side as I didn’t want to overdo the flour and have a dry loaf.
I absolutely LOVED the softness of this bread I made 2 smaller loaves from this recipe and baked them less time.
hi rita! i am so happy it turned out well for you. bread is so funny with the flour amounts, I swear the amount is different every day. I’m so happy it worked out 🙂
Hi Katie..I was wondering if I can make this in my bread maker. Just the kneading part as I don’t bake the bread in mine.
hi sheri, absolutely. it will do great in there.
I made this recipe for the first time this afternoon and it was easy-peasy. It came out wonderfully. I brushed about 1 TB melted butter over the top after it came out of the oven. I let it cool, sliced it up, and bagged it, but my family came along and gobbled up 3 pieces right away- they said it is delicious! Thank you for offering such an easy bread recipe. Blessings!
hi jennifer! i’m so happy you liked it!