Flipping individual pancakes on a busy Saturday morning with kids asking “when will they be ready?” every thirty seconds is NOT my idea of a good time. But baked in a sheet pan, you’ll find all the fluffy, tender goodness of homemade pancakes that feeds your whole family at once. The sourdough starter adds this lovely subtle tang (and it’s the perfect way to use up that discard sitting in your fridge), while the sheet pan method means you’re done in 20 minutes instead of standing over the stove for an hour.
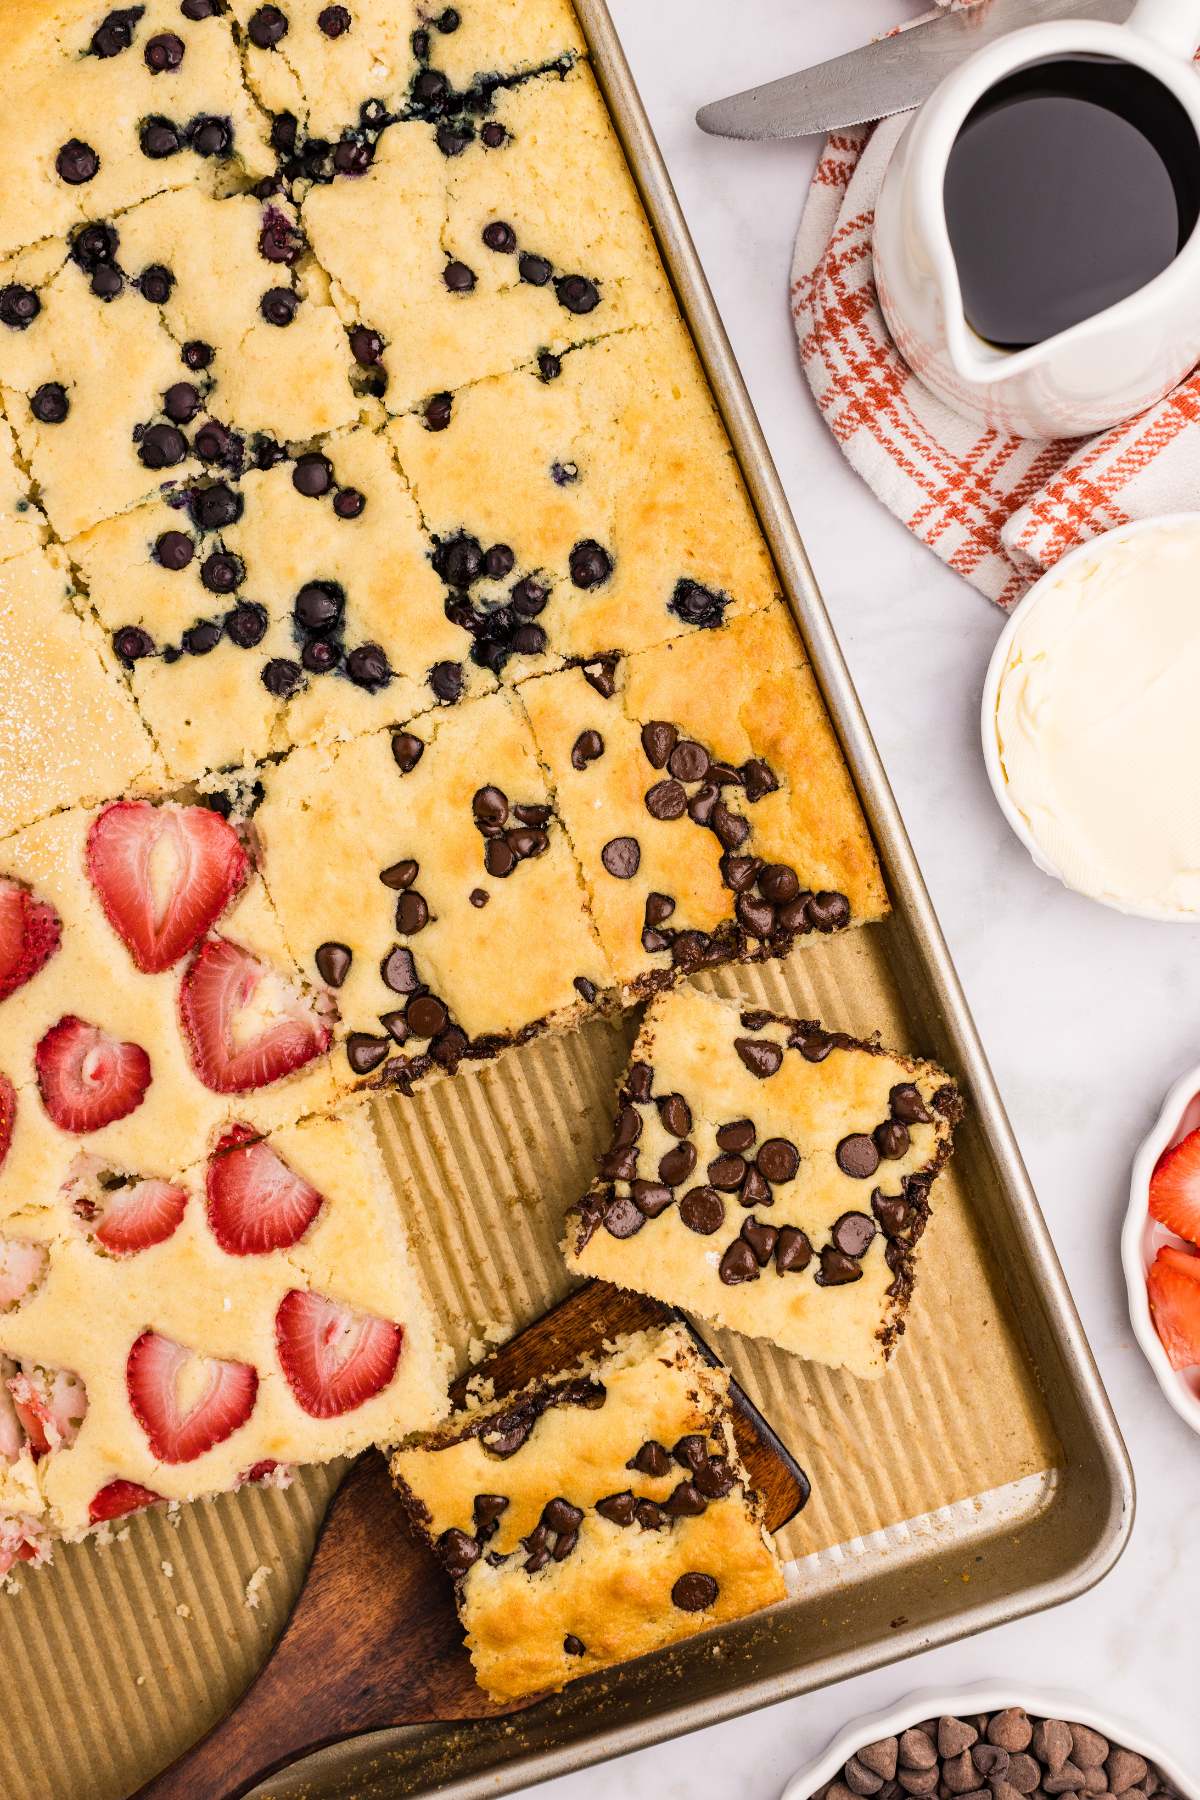
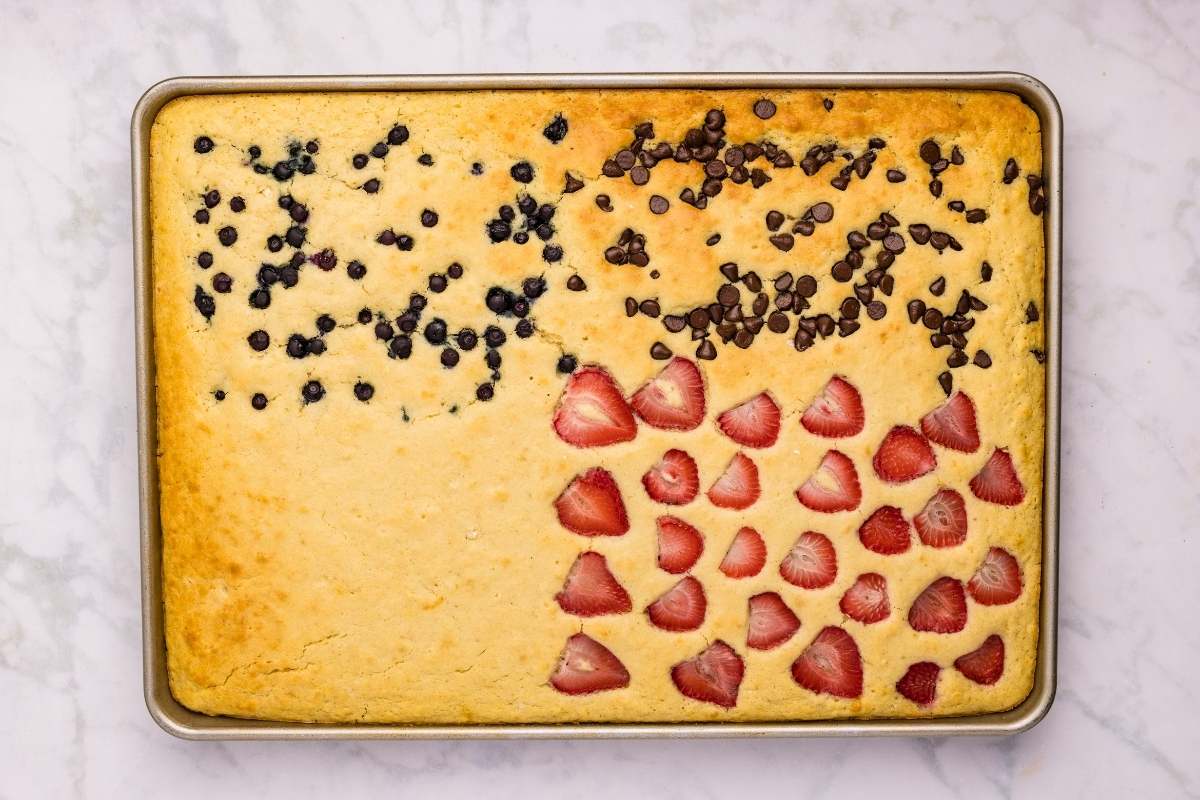
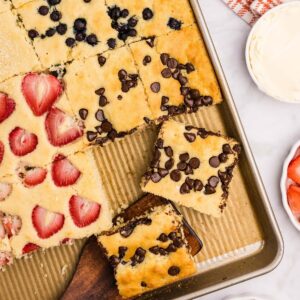
My favorite thing about this is being able to customize them however your family likes. Throw in some blueberries for the kids, add chocolate chips for yourself, or go simple with just a drizzle of real maple syrup. I love making a big batch on Sunday and cutting them into squares for grab-and-go breakfasts all week. They reheat beautifully and taste just as good as fresh
Table of Contents
What You’ll Need
I prefer these with whole milk but I wouldn’t rush out any buy it for this, 2% or even skim will work fine.
Get a Free + Pretty PDF Recipe Book
Sourdough Sunday Newsletter

Every Sunday evening I’ll send you a sourdough recipe to make that week, straight from my kitchen to your inbox.
And as a thank you for signing up, I’ll send you this e-book with beautiful printable recipes right away. Simple!
You will not be added to any other email lists or my daily newsletter. But if you’re already on my newsletter, you’re welcome to join and receive both.
For the Pancakes:
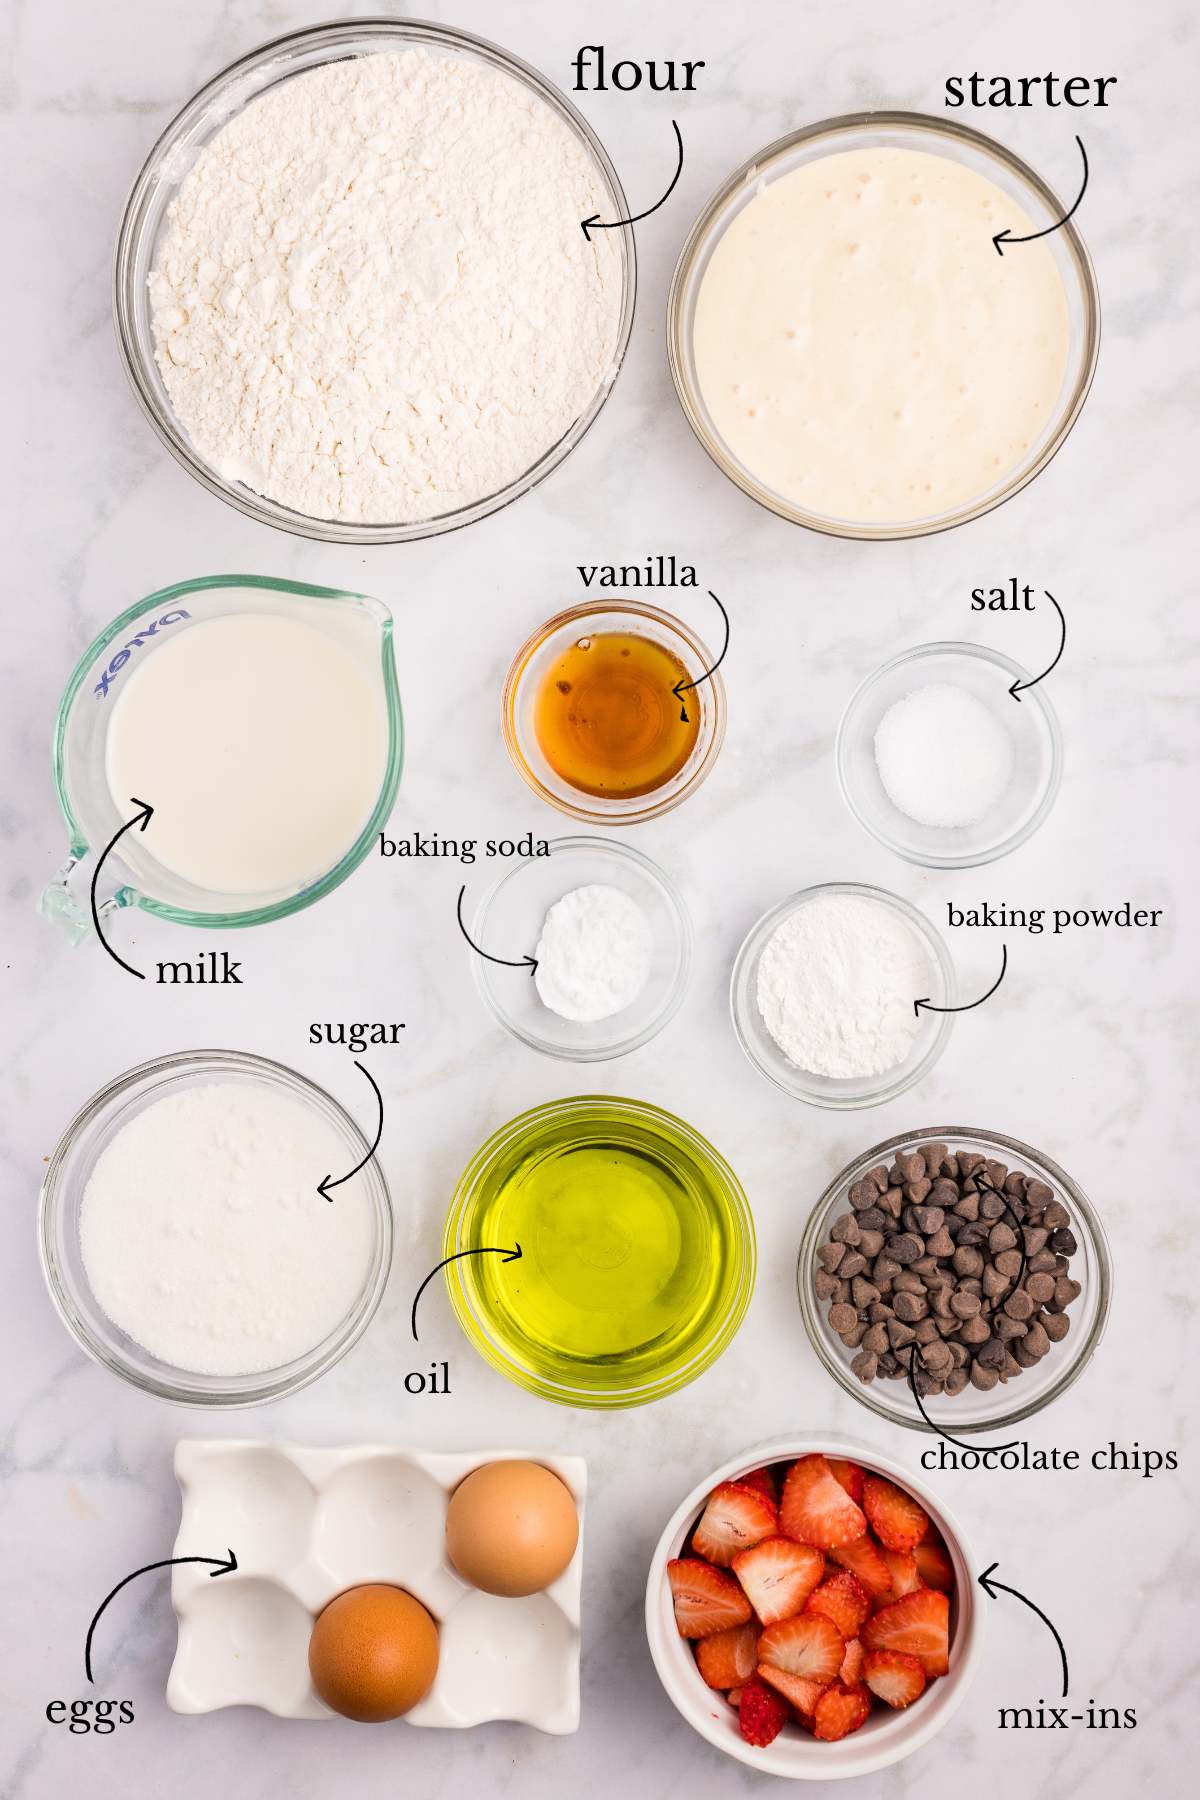
- 1 ½ cups all-purpose flour
- 1 tablespoon baking powder
- ½ teaspoon baking soda
- ½ teaspoon salt
- ½ cup sourdough starter (discard works perfectly, but active starter is fine too, just stir down the bubbles first)
- 1 cup milk, any kind you have works
- 1 egg
- ¼ cup granulated sugar
- 2 teaspoons vanilla extract
- ¼ cup avocado oil (or any vegetable oil)
Optional Toppings:
- Homemade fruit syrup
- Fresh or frozen berries (blueberries, chopped strawberries, raspberries)
- Chocolate chips
- Cinnamon sugar
- Whipped cream
- Butter
- Maple syrup
As written, this recipe makes about 8 servings. If you’d like to double it, just use two pans and double all the ingredients. The baking time stays the same at 18-22 minutes. This is perfect if you’re feeding a big crowd, doing serious meal prep, or want to freeze a whole batch for later. Just rotate the pans halfway through if one seems to be browning faster than the other.
Instructions
Get Everything Ready First
Start by preheating your oven to 425°F.
Grab a half sheet pan (that’s the 13×18 inch one) and give it a good spray with baking spray. I always line mine with parchment paper too, even after greasing, because these can stick.
Mix Your Dry Ingredients
In your largest mixing bowl, whisk together the flour, baking powder, baking soda, and salt.
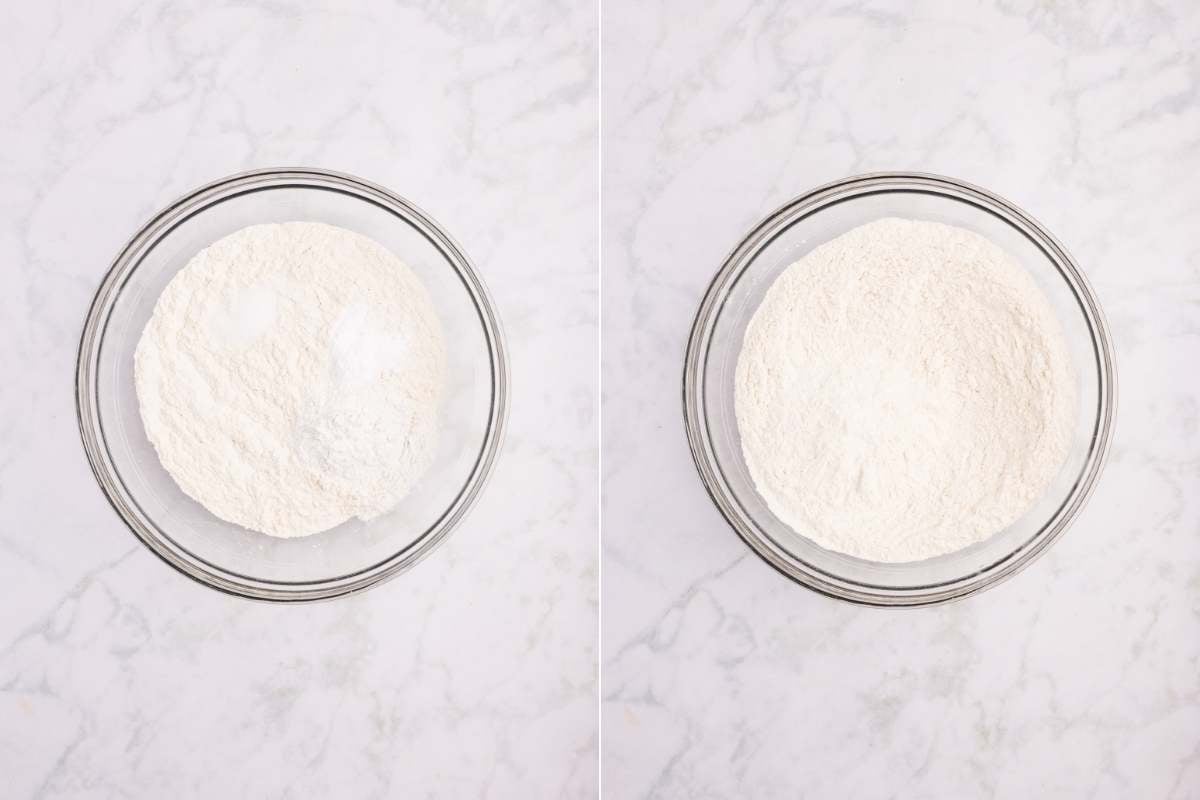
This is your chance to make sure there aren’t any lumps of baking powder hiding in there since they’ll make weird bitter spots if you don’t break them up now.
Combine the Wet Ingredients
In a separate bowl, stir together your sourdough starter, milk, egg, sugar, vanilla, and oil. Make sure that starter is well-stirred before you measure it – if it’s been sitting in your fridge, it probably has liquid on top that needs mixing back in.
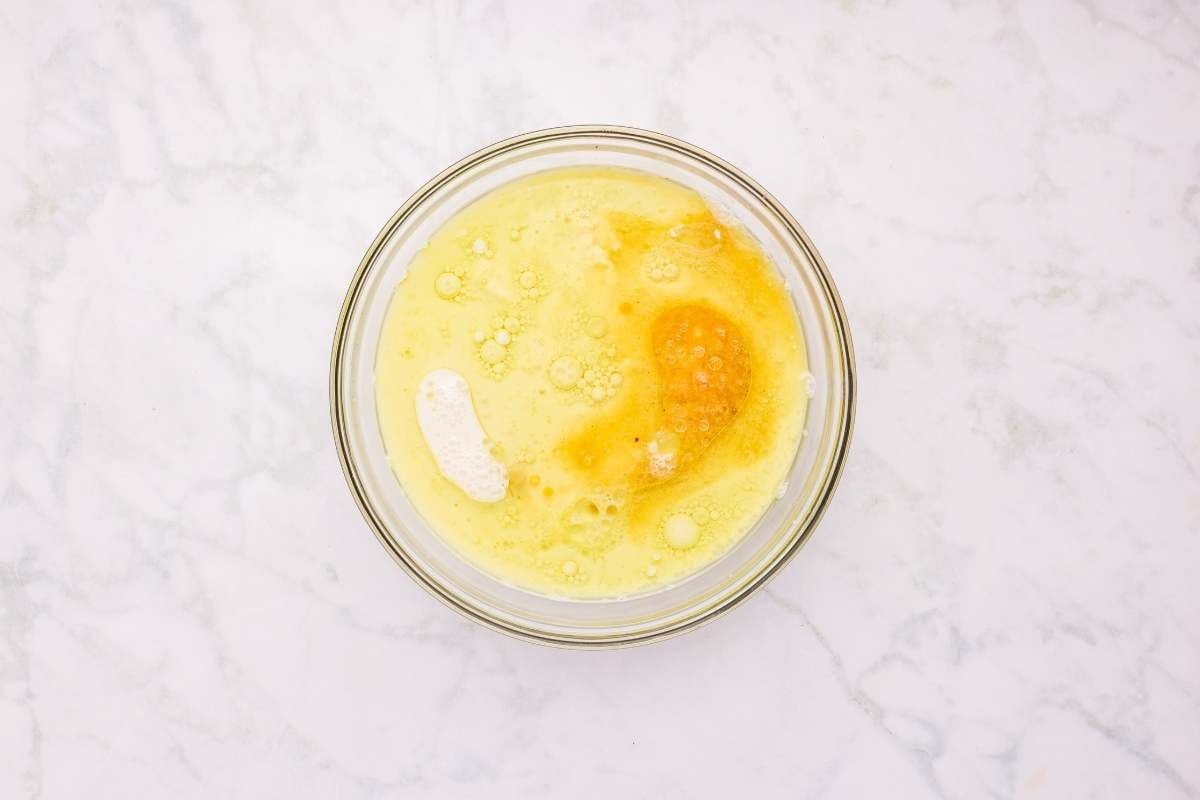
The egg should be at room temperature if you can remember to pull it out ahead of time, but honestly? I forget half the time and it still works fine.
The Most Important Step: Don’t Overmix!
Pour your wet ingredients right on top of the dry ones. Now here’s where people mess this up – you want to stir just until you can’t see dry flour anymore. Some lumps are GOOD.
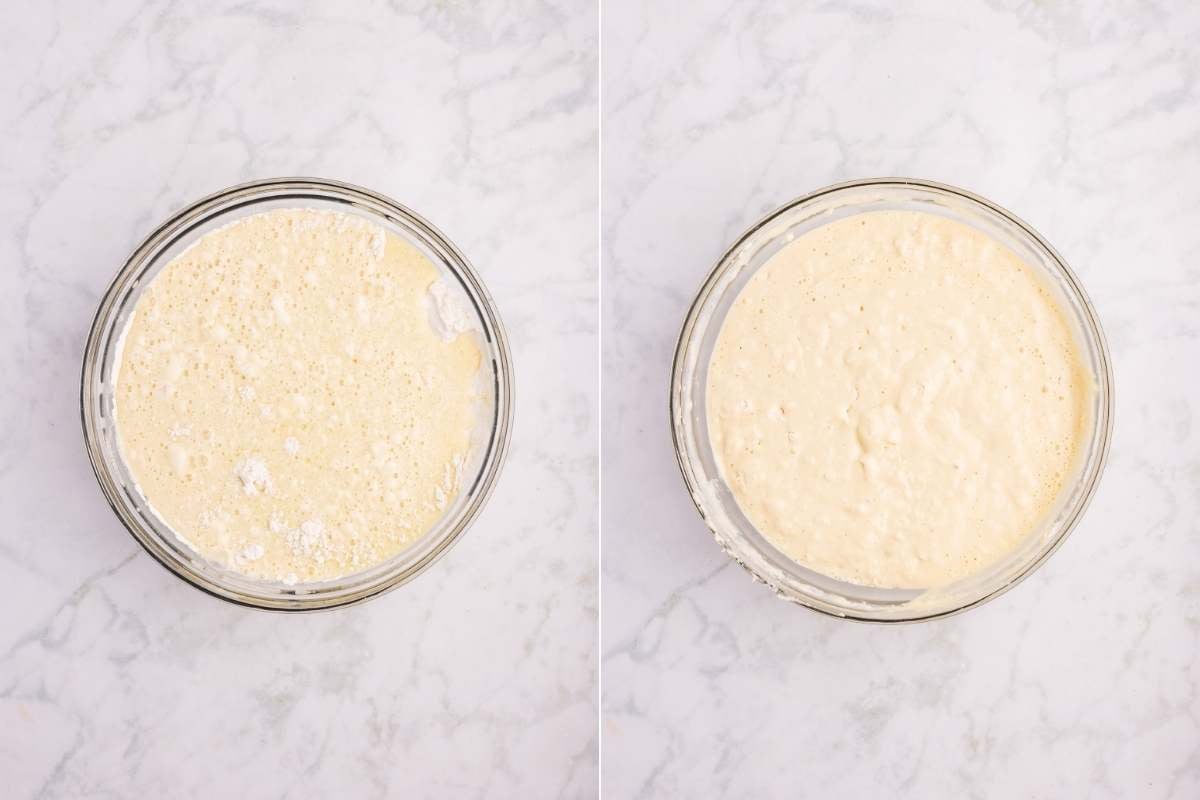
I use a rubber spatula and do maybe 15-20 gentle folds, then I’m done. It should look a little messy and rough, not smooth like cake batter.
Pour and Top
Dump all that batter right onto your prepared sheet pan and use your spatula to spread it evenly to the corners. It doesn’t have to be perfect, it will even out in the oven.
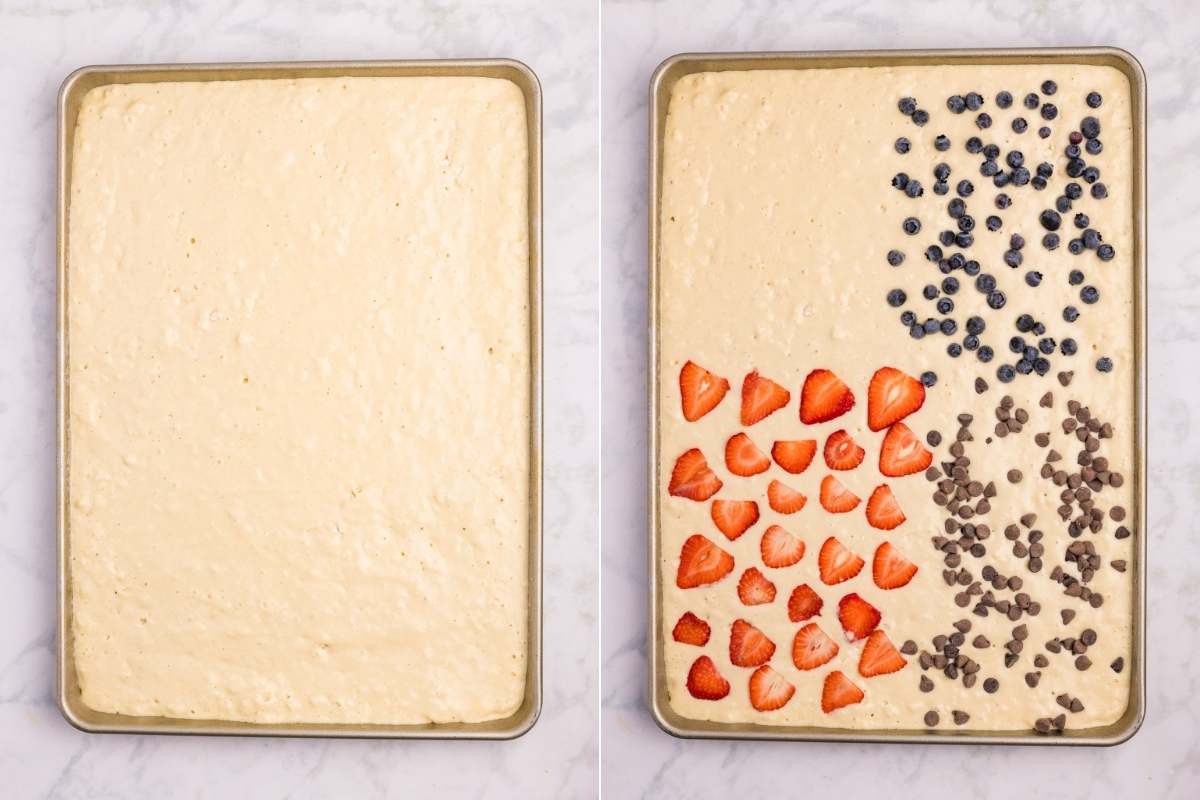
NOW is when you add your toppings. Sprinkle berries, chocolate chips, or whatever you’re using right on top of the batter. They’ll stay put during baking and look way prettier than if you mixed them in.
Bake Until Golden
Pop that pan in your hot oven for 18-22 minutes. You’re looking for golden brown on top and a toothpick that comes out with just a few moist crumbs (not wet batter, but not completely clean either).
Every oven runs a little different, so start checking at 18 minutes. If the top isn’t golden yet, give it a few more minutes. If the edges are getting too dark, your oven might run hot – just pull them out.
Cool and Slice
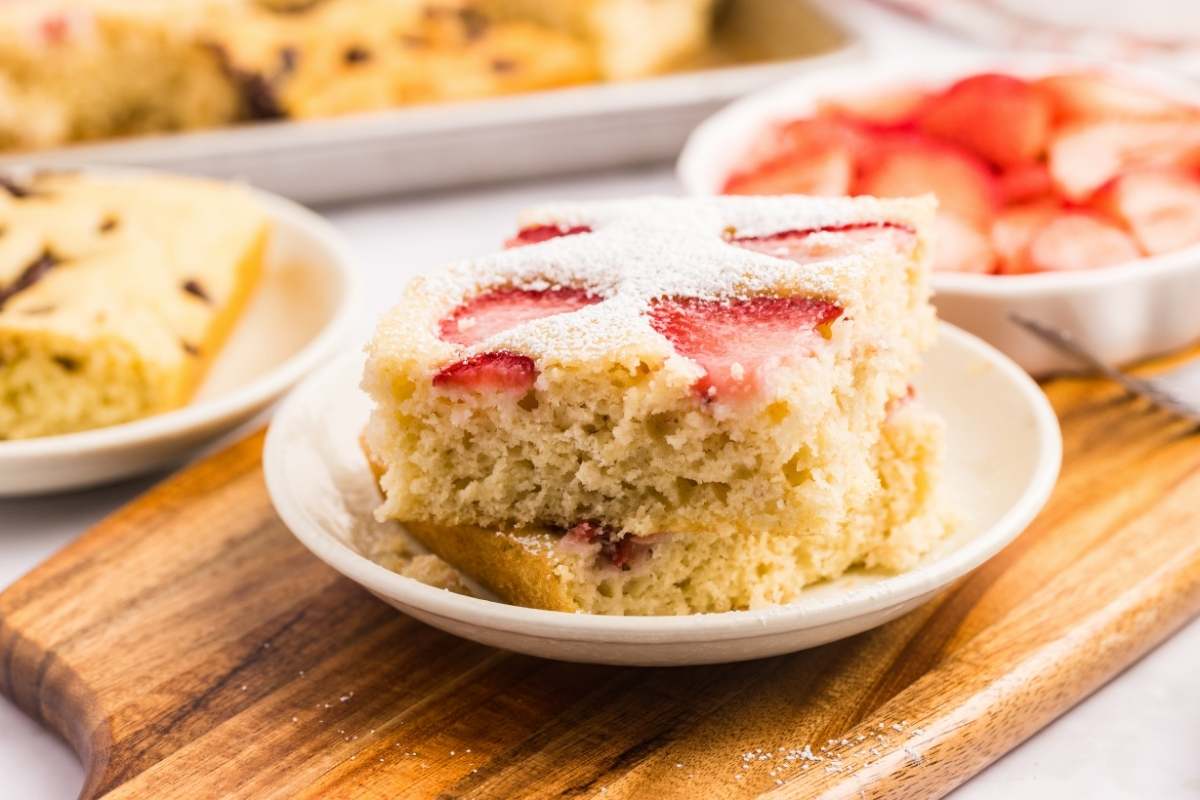
Let them cool for about 5 minutes before you try to cut them.
Use a sharp knife or bench scraper to cut into squares. I usually do a 4×6 grid for nice portion sizes, but cut them however makes sense for your family.
Storage & Reheating
On the counter: Store covered for up to 2 days. Leave the parchment on and wrap the pan in foil, or cut and store in an airtight container.
In the fridge: Cut into squares and store in an airtight container for up to 4 days.
In the freezer: Cut into portions, freeze on a baking sheet first, then transfer to a freezer bag. Keeps for up to 3 months.
To reheat: Microwave for 30-45 seconds, or warm in a 300°F oven for 5-8 minutes until heated through.
For meal prep: Make on Sunday, store cut squares in the fridge, and reheat individual portions throughout the week.
Questions and Troubleshooting
Yep! Mix everything up, cover the bowl, and stick it in the fridge overnight. Let it sit out for about 30 minutes before pouring onto the pan and baking as usual. There will be a deeper sourdough flavor. I like it, but not everyone does!
A 9×13 pan works great and gives you thicker, more cake-like squares. Just keep the same baking time and check with a toothpick.
Look for golden brown on top and a toothpick that comes out with just a few moist crumbs…not wet batter, but not completely clean either.
Yes! An active starter will give you a slightly lighter texture, while discard adds a nice tang. Both work great. If you are using an active starter, make sure to stir down the bubbles so you get an accurate measurement.
Nope! Just sprinkle them on frozen—no need to thaw. They might add a couple of minutes to the bake time, so check for doneness.
More Breakfast Recipes For Sourdough Starter
Sourdough discard recipes and breakfast are a match made in heaven. I always discard and feed in the morning so it just makes sense. Right? Right.
- If you enjoy all the flipping, these discard pancakes are our favorite.
- Sourdough waffles are better for the freezer and I love them.
- But there’s NOTHING like a delicious sourdough blueberry muffin. My favorite!
Printable Recipe
Sourdough Sheet Pan Pancakes
Equipment
- 1 half sheet pan (13×18 inch)
- 2 Mixing Bowls
Ingredients
- 1 ½ cups all-purpose flour
- 1 tablespoon baking powder
- ½ teaspoon baking soda
- ½ teaspoon salt
- ½ cup sourdough starter discard or active, stirred well
- 1 cup milk
- 1 large egg
- ¼ cup granulated sugar
- 2 teaspoons vanilla extract
- ¼ cup avocado oil or vegetable oil
- fresh or frozen berries, chocolate chips, or other toppings optional
Save This Recipe
You'll join my email list which you will love. And if you don't, unsubscribe in one click. ❤️
Instructions
- Prep. Preheat oven to 425°F. Grease a half sheet pan and line with parchment paper.
- Mix dry ingredients. In a large bowl, whisk together flour, baking powder, baking soda, and salt.
- Mix wet ingredients. In another bowl, stir together sourdough starter, milk, egg, sugar, vanilla, and oil until combined.
- Combine. Pour wet ingredients over dry ingredients and stir gently until just combined: don't overmix. Lumps are fine.
- Pour and top Pour batter onto prepared sheet pan and spread evenly. Sprinkle with desired toppings.
- Bake. Bake 18-22 minutes until golden brown and a toothpick inserted in center comes out with a few moist crumbs.
- Cool and serve. Cool 5 minutes before slicing into squares. Serve with maple syrup.
Notes
Nutrition