Every summer I tell myself I’ll just make one batch of cherry jam, and every summer I end up making three because people keep asking for more. There’s something about this particular recipe I love… the color, the sweetness, the flavor. It’s one of the easiest jams, so even if you’re a beginner, I hope you try it.
Here’s why cherry jam should be your first canning project: cherries are forgiving. They want to turn into jam, thanks to all that natural pectin, so even if you’re fumbling around with your first water bath or worried about proper headspace, you’ll still end up with something delicious. If this is your first time canning, read this first so you’re comfortable with the process.
Table of Contents
What You’ll Need
I make this with sweet cherries but you can use tart cherries too. It will just be, um, obviously… more tart.
I don’t recommend doubling this recipe because larger batches often won’t set properly: the pectin can get deactivated when it takes too long to return to a boil.
If you want more jam, just make multiple single batches back-to-back instead of trying to double the recipe. You can prep all your cherries at once, then cook them in separate batches.
As written, this makes 6 half-pint jars. To double the quantities, use the 2x button in the recipe card at the bottom of the post.

FREE FOR SUBSCRIBERS
Canning Binder
Subscribe (free!) to my newsletter to receive this PDF + dozens of others in my printable library. You’ll also get emails you’ll truly love, with a weekly meal and so much more.
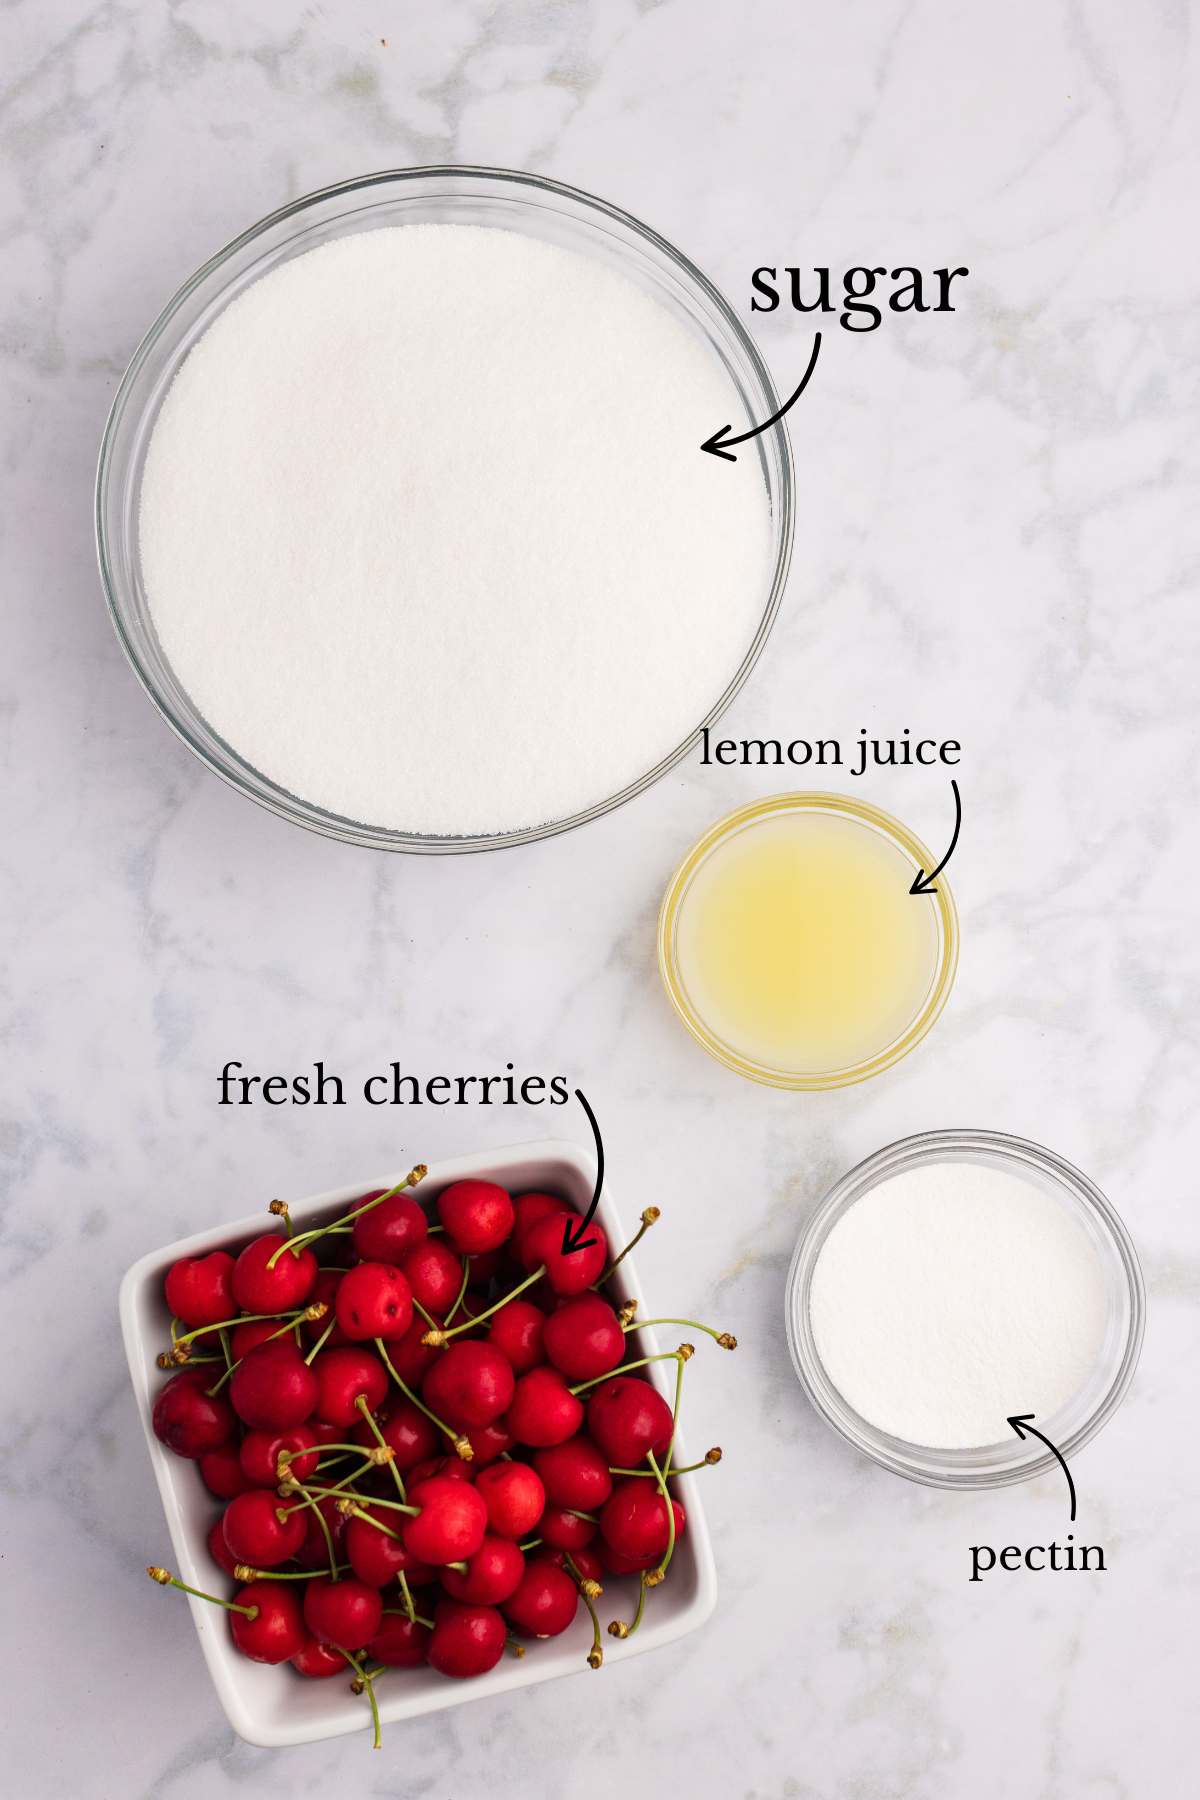
- 4 cups cherries (stemmed, pitted, and chopped) this is about 6 cups whole cherries before prep Sweet cherries were used for testing, but tart cherries work too. Frozen cherries are fine – just thaw completely and drain the liquid first.
- ¼ cup bottled lemon juice
- 1 package (1.75 oz) powdered pectin, don’t substitute liquid pectin or reduced-sugar pectin without changing the measurements
- 5 cups sugar
- ¼ teaspoon butter, optional, helps prevent foaming during cooking
Step-by-Step Cherry Jam
If you’re new to canning, start with this recipe. Cherries are naturally high in pectin, so you’re almost guaranteed to get a good set even if your timing isn’t perfect.
Getting Your Jars Ready
Start by washing all your jars, lids, and rings in hot soapy water. I always do this first because once you start cooking the jam, things move pretty fast.
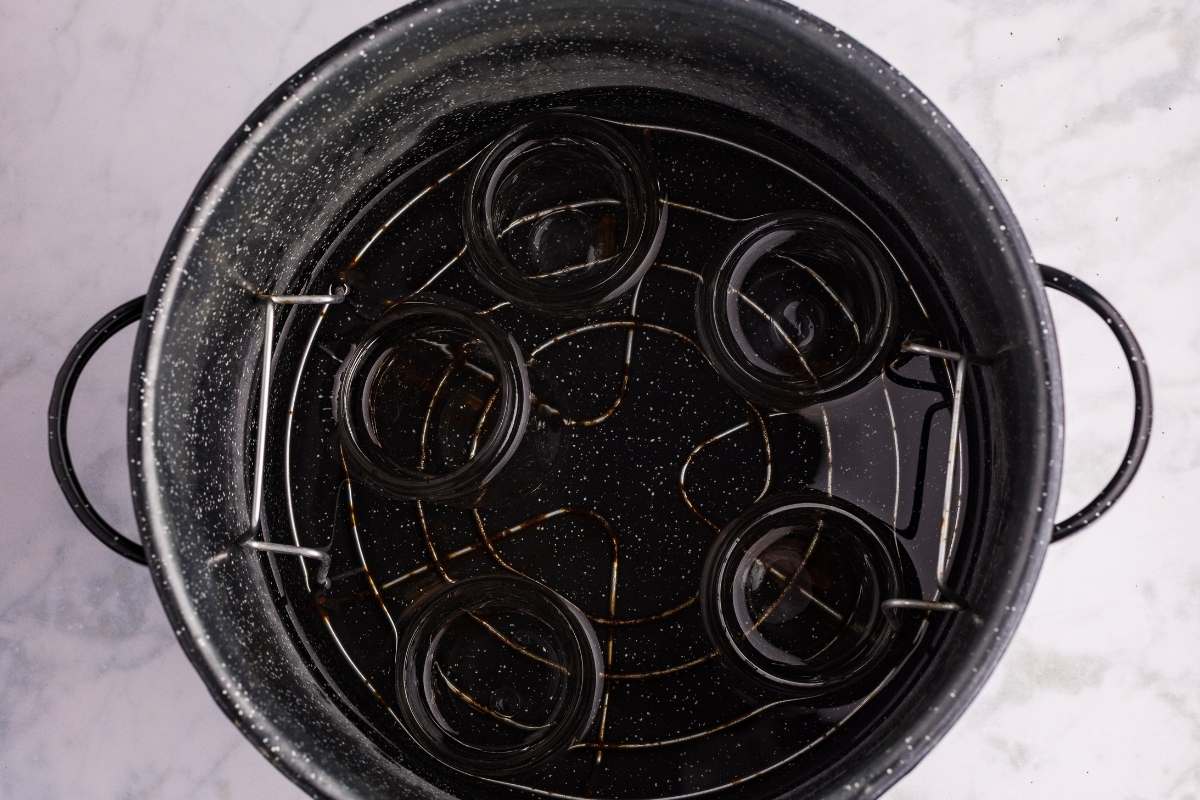
Get your water bath canner going with the jars inside; you want them hot when you’re ready to fill them. Keep the heat at medium so they come to a gentle simmer, not a rolling boil.
Prepping the Cherries
This is honestly the most time-consuming part! You’ll need to stem, pit, and chop about 6 cups of whole cherries to get your 4 cups of chopped fruit. I like to chop them into chunky pieces, not tiny bits, but not huge chunks either.
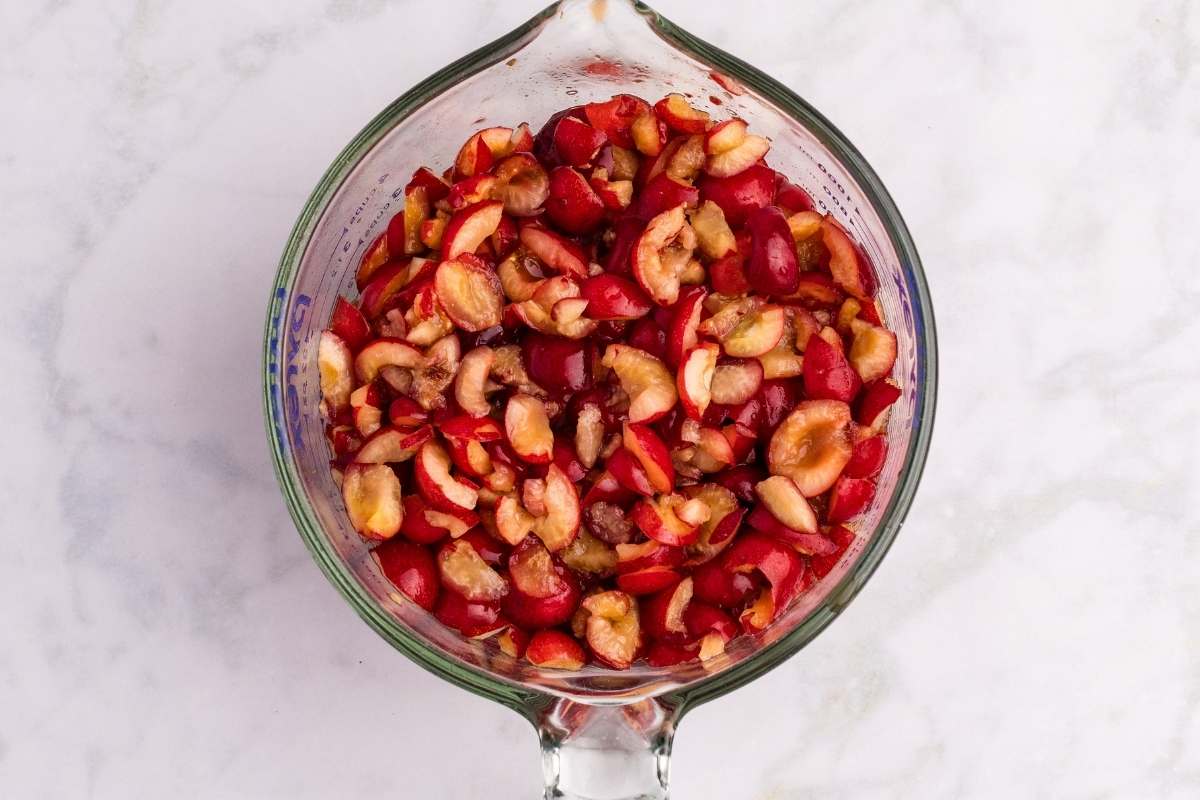
The chopping helps them break down evenly and gives you the best spreadable texture.
Starting the Jam Base
Toss your chopped cherries into a large, heavy-bottomed pot along with the lemon juice and powdered pectin. Make sure you use a pot that’s bigger than you think you need.
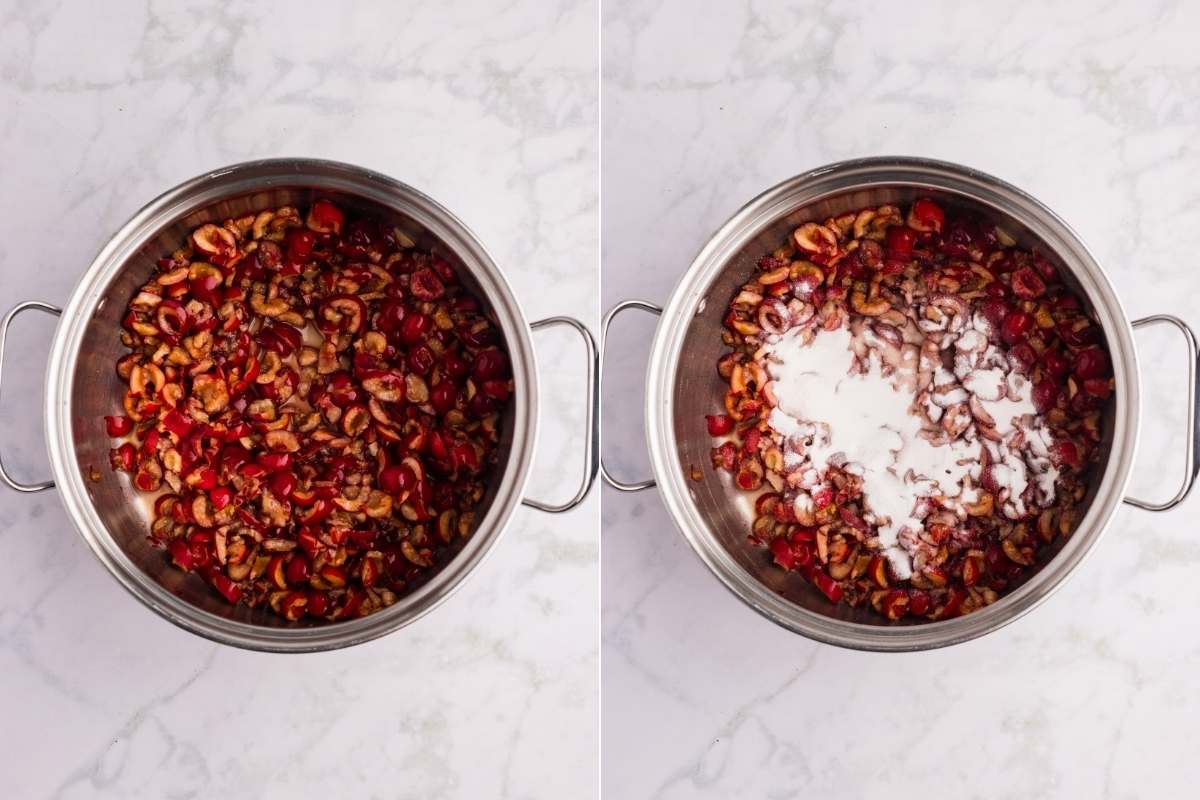
This will bubble up like crazy once it gets going! Stir everything together before you even turn on the heat so the pectin gets evenly distributed.
The First Boil
Set your burner to medium heat and stir constantly as the mixture heats up. You’re looking for a full rolling boil, one that doesn’t stop bubbling when you stir it.
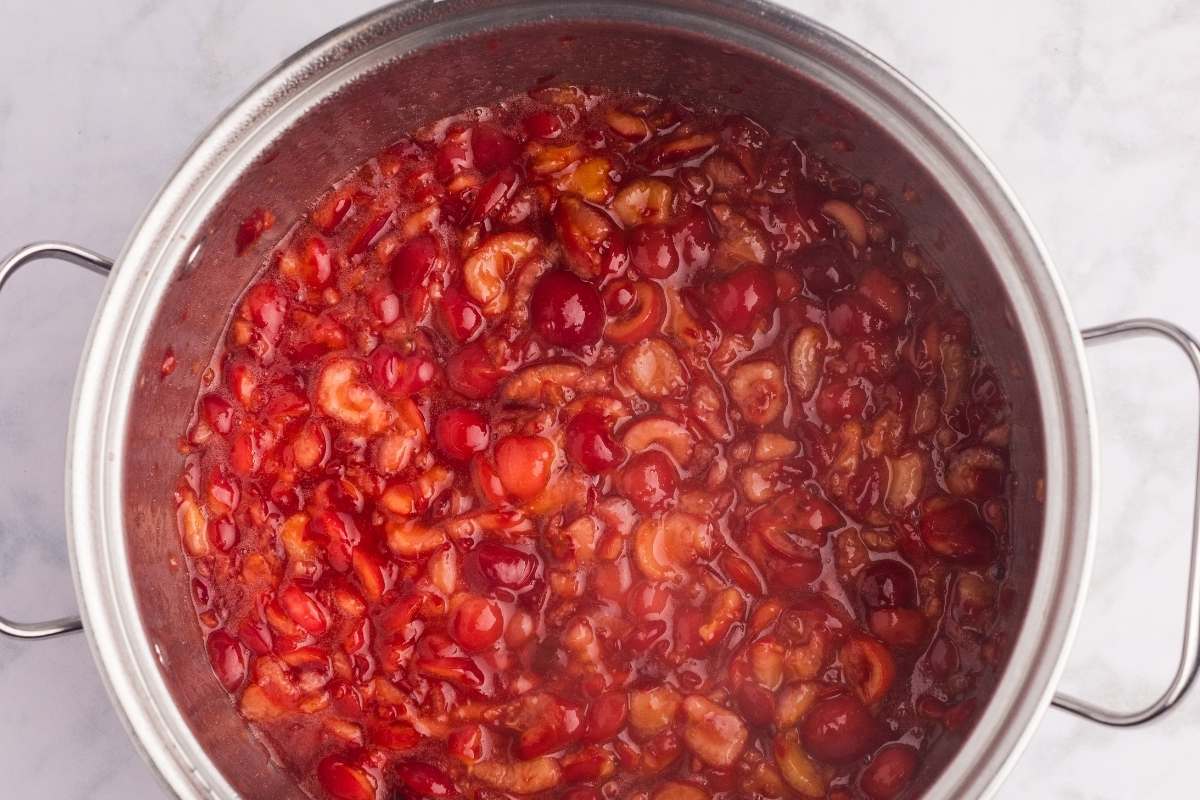
Once you hit that boil, keep stirring and let it bubble for exactly 1 minute. This step activates the pectin.
Adding the Sugar
Here’s where things get exciting! Add all 5 cups of sugar at once and stir like your life depends on it. The mixture will look super weird at first, but trust the process.
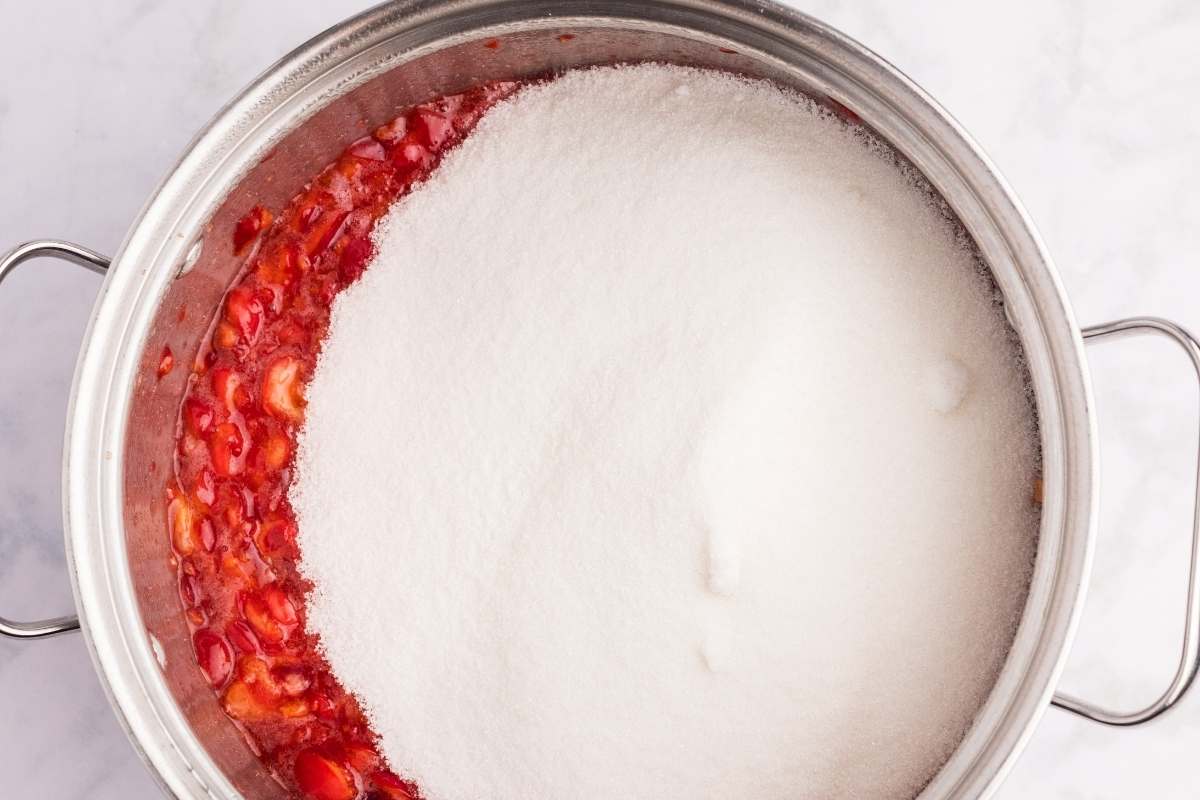
If you want to add that quarter teaspoon of butter to reduce foaming, now’s the time.
The Final Boil
Bring everything back up to the same rolling boil. This is the critical moment… once you hit that hard boil again, set a timer for exactly 3 minutes.
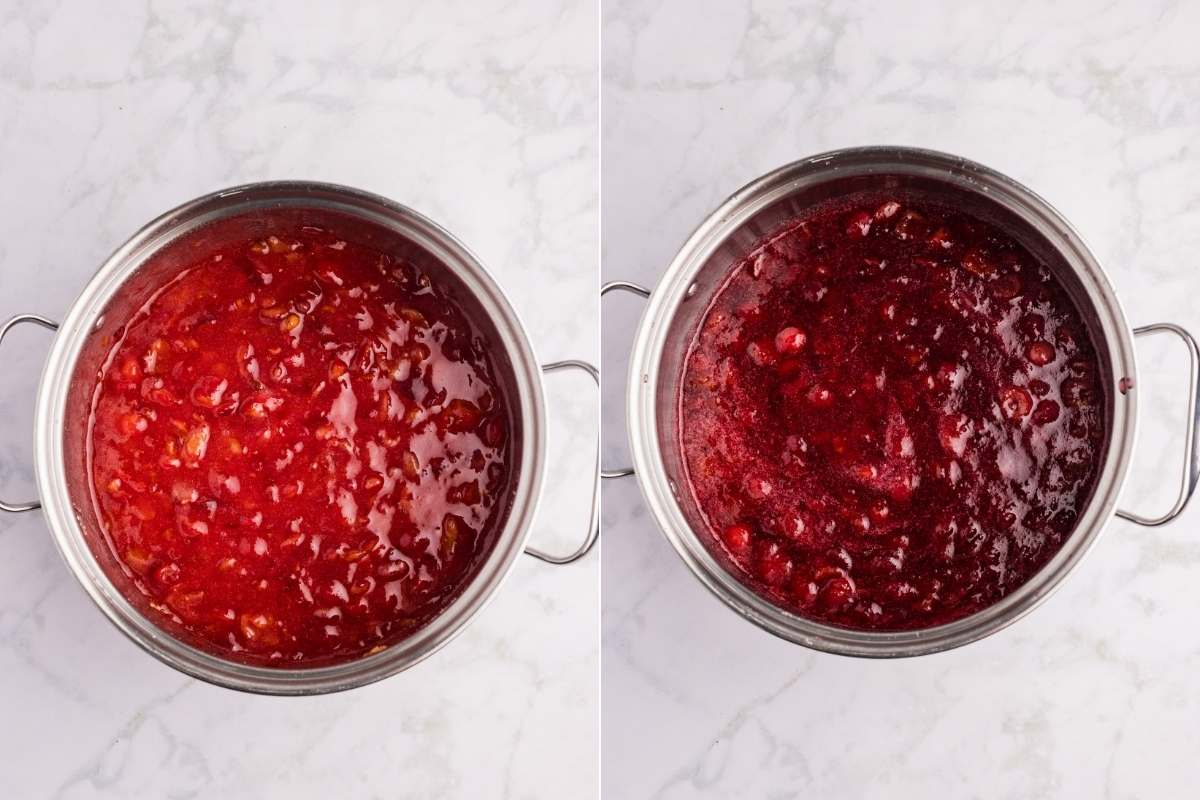
Keep stirring to prevent sticking and watch for splattering. The jam will thicken and get that gorgeous glossy look.
Filling the Jars
Work quickly but carefully here. Ladle the hot jam into your hot jars, leaving exactly ¼ inch of headspace at the top.
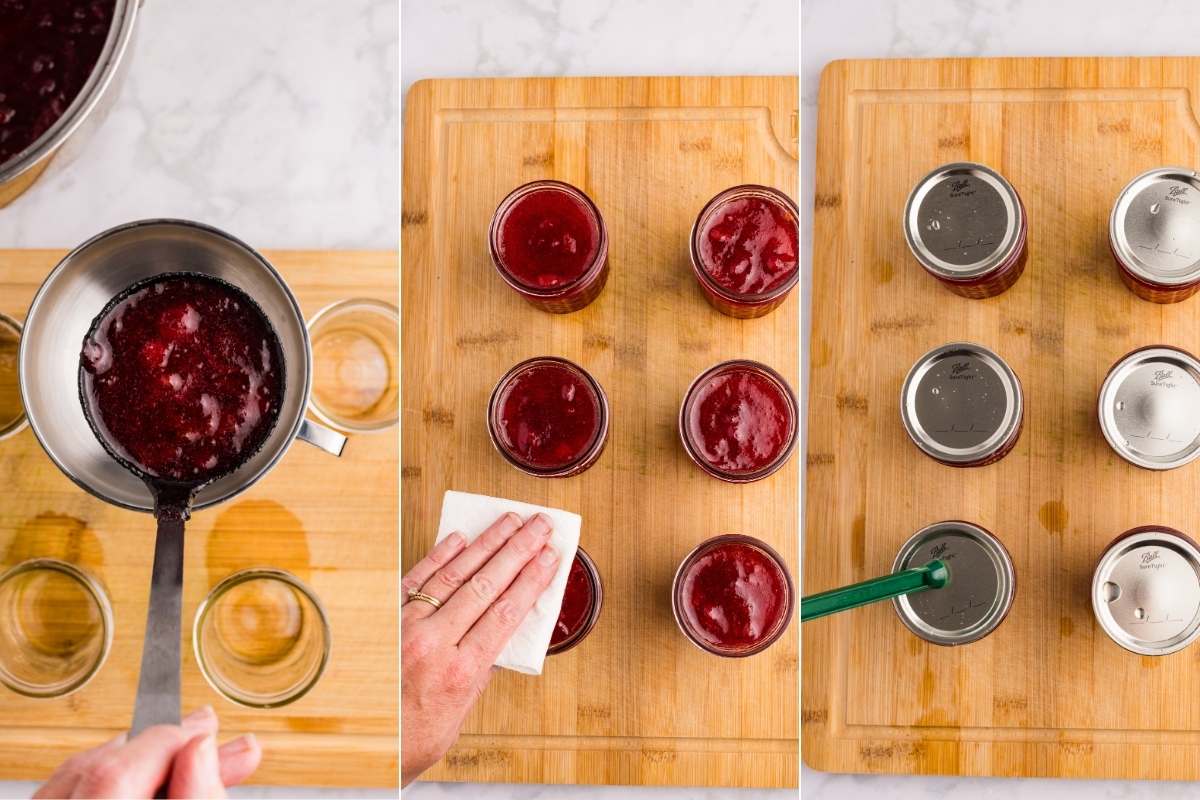
Use your debubbler tool (or a clean knife) to remove any air bubbles, then wipe the jar rims with a clean, damp cloth. Any jam residue on the rim can prevent a proper seal.
Processing in the Water Bath
Put your lids on and screw the rings down fingertip tight, snug but not cranked down hard. Lower the jars into your boiling water bath, making sure they’re covered by at least an inch of water.
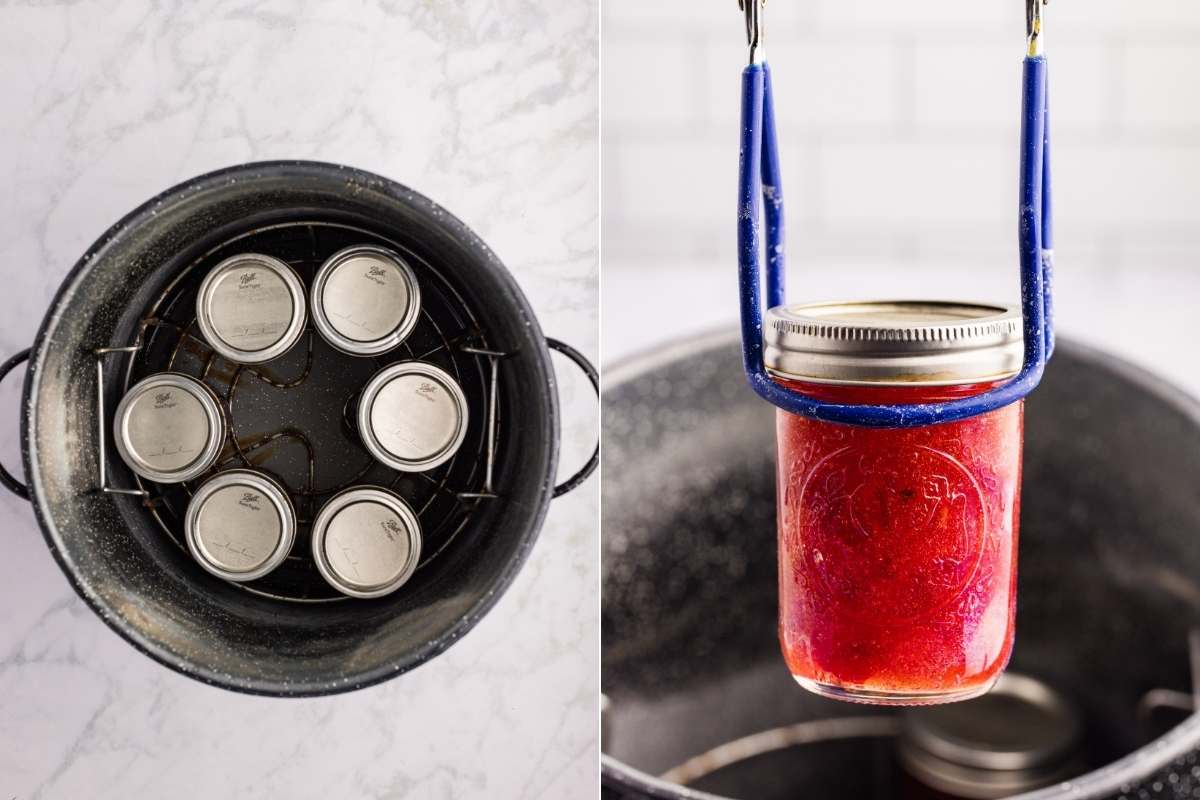
Process for 10 minutes once the water returns to a boil.
Cool
After processing, let the jars sit in the canner for 5 minutes before lifting them out. Then let them rest until they seal.
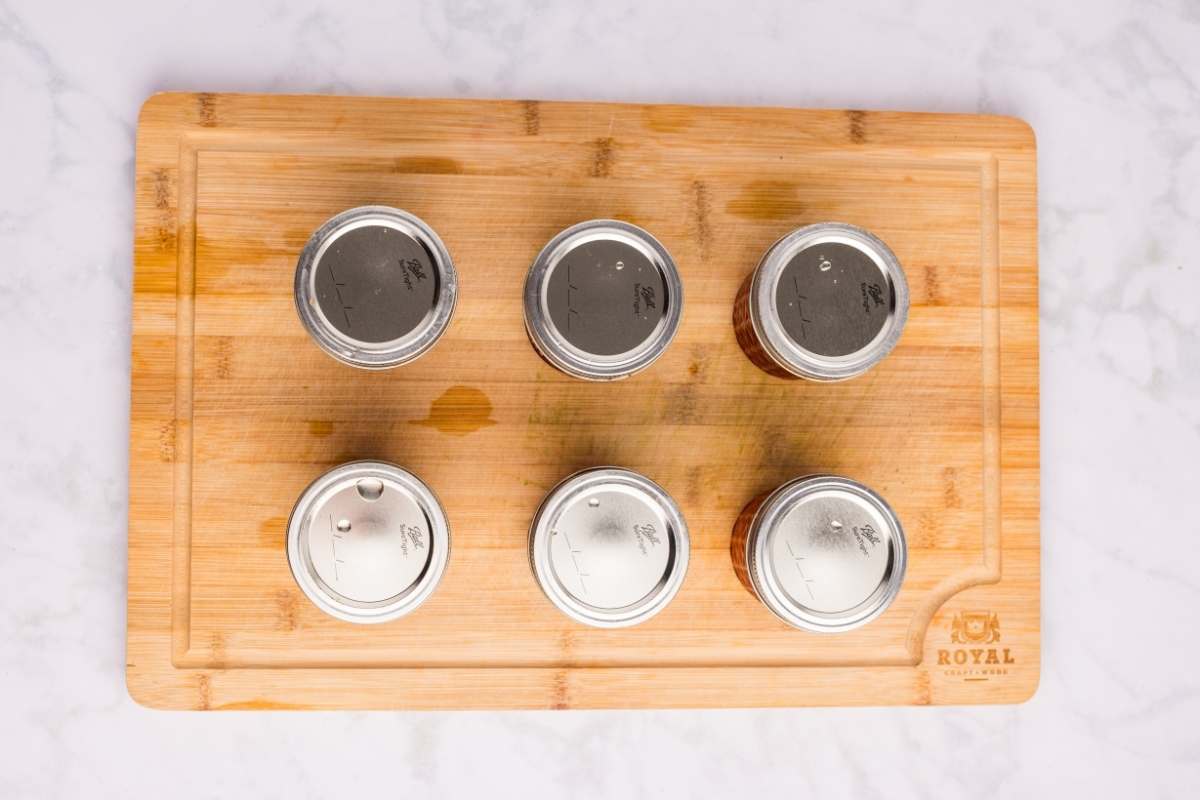
This can take up to 12-24 hours but usually it’s faster. You’ll hear those satisfying “pop” sounds as the lids seal. Once you hear it, you’ll know it.
Storage Instructions
Once your jars have cooled completely (12-24 hours), check the seals by pressing down on the center of each lid. If it doesn’t pop back up, you’ve got a good seal. Properly sealed jars can be stored in a cool, dark place for 12-18 months.
If any lids pop back up when pressed, just pop those jars in the refrigerator and use them within 3 months.
Our Favorite Ways to Use Cherry Jam
If strawberry or raspberry jam will work, so will cherry. Here are some ideas:
- Use as a filling for classic thumbprint cookies.
- Add cherry soda and spices for homemade cherry barbecue sauce.
- Fill a homemade pie crust, crimp the edges, and bake for a homemade toaster pastry.
Questions and Troubleshooting (if it makes sense)
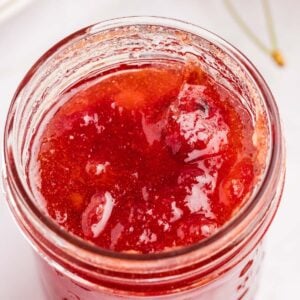
After the 3-minute boil, the jam should coat the back of a spoon and drop off in a sheet rather than individual drips. If you’re unsure, it’s better to slightly overcook than undercook.
Just stick them straight in the fridge and use them first. They’ll keep for about 3 months and taste exactly the same as the sealed ones..
Yes, you can freeze it. Just let the cooked jam cool completely, then pour it into freezer-safe containers leaving about ½ inch of headspace for expansion. It’ll keep in the freezer for up to a year and tastes just as good as the canned version.
Printable Recipe
Cherry Jam for Canning
Equipment
- 1 large heavy-bottomed pot
- 6-7 half-pint mason jars with lids and rings
- 1 Ladle
- 1 debubbler tool
Ingredients
- 4 cups cherries stemmed, pitted, and chopped (about 6 cups whole)
- ¼ cup bottled lemon juice
- 1 package powdered pectin 1.75 oz
- 5 cups sugar
- ¼ teaspoon butter optional, to prevent foaming
Save This Recipe
You'll join my email list which you will love. And if you don't, unsubscribe in one click. ❤️
Instructions
- Prep jars. Wash jars, lids, and rings in hot soapy water. Place jars in water bath canner, cover with water, and bring to a simmer.
- Cook fruit, lemon juice, and pectin. Combine chopped cherries, lemon juice, and powdered pectin in a large pot. Heat over medium heat, stirring constantly, until mixture reaches a rolling boil. Boil for 1 minute, stirring constantly.
- Add sugar and stir.. Add sugar and optional butter, stir to combine. Return to a rolling boil and boil for 3 minutes, stirring constantly to prevent boiling over.
- Fill jars. Remove from heat. Ladle hot jam into hot jars, leaving 1/4 inch headspace. Remove air bubbles and wipe jar rims clean.
- Process. Place lids and rings on jars, tightening to fingertip tight. Process in boiling water bath for 10 minutes, ensuring jars are covered by 1 inch of water.
- Cool and store. Remove from canner and cool for 12-24 hours. Check seals before storing in a cool, dark place for 12-18 months.
Notes
Nutrition


I had most of a bag of pitted sweet cherries from Costco taking up space in my freezer that I had to use so I made a batch of this jam. It is SO good! It jelled up really well and the flavor is A+. I will definitely make this again!
hi Beth! so glad to hear this. I miss cherry season.