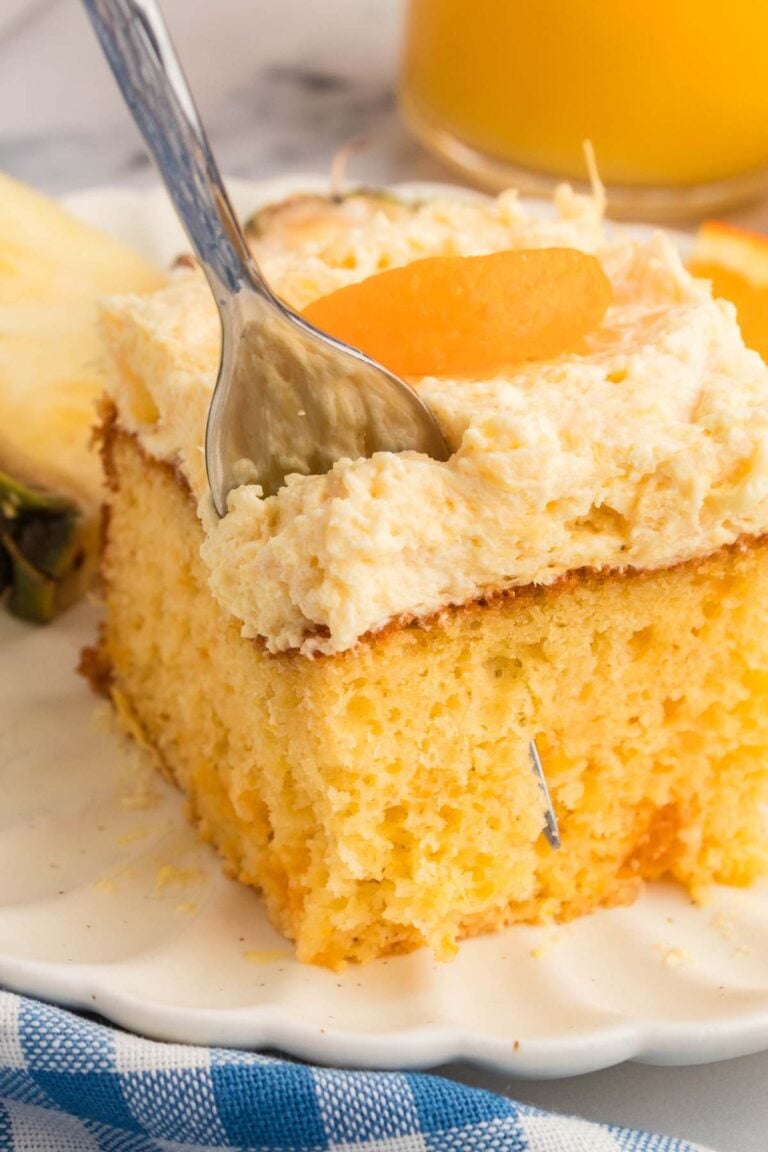
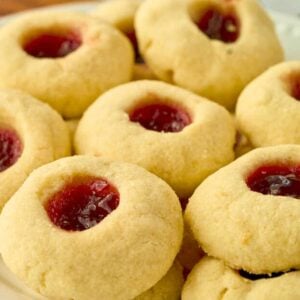
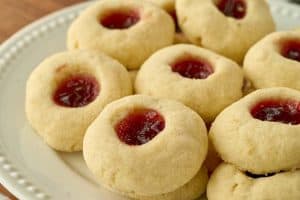
Old-Fashioned Jam Thumbprint Cookies
The old-fashioned thumbprint cookies are the perfect treat: easy, fun, and delicious. It’s —perfect for holidays, cozy afternoons, or whenever you want a taste of something comforting. The best part? You can customize them using fruit jams, icing, or caramel sauce. Choose something you love. ❤️
We also love how simple this recipe is—no fancy ingredients or tools are needed. I make them every Christmas, but they are one of my husband’s favorite cookie recipes year-round.
Old Fashioned Thumbprint Cookies with Jam
Equipment
- Stand mixer
- small mixing bowl
- Measuring cups and spoons
- Plastic Wrap
- Cookie scoop
- Baking sheets
- Wire rack
- Small spoon or piping bag
Ingredients
Cookie dough
- 1 cup unsalted butter (room temperature)
- ½ cup granulated sugar
- 2 egg yolks
- 1 teaspoon vanilla extract
- 2¼ cups all-purpose flour
- ½ teaspoon salt
Putting cookies together
- ¼ cup granulated sugar (for rolling the cookies)
- ½ cup fruit jam of your choice (strawberry and raspberry are a good choice)
Save This Recipe
You'll join my email list which you will love. And if you don't, unsubscribe in one click. ❤️
Instructions
- Prep the oven and baking sheets. Preheat the oven to 350°F. Position two racks evenly spaced in the oven. Then, line two large baking sheets with parchment paper and set aside.
- Cream the butter and sugar. In the bowl of a stand mixer fitted with the paddle attachment (or using a handheld mixer in a large bowl), cream the softened butter and sugar on medium speed until light and fluffy, about 2-3 minutes. Then, add the egg yolks and vanilla extract and beat for 1-2 minutes until the mixture is pale and creamy.
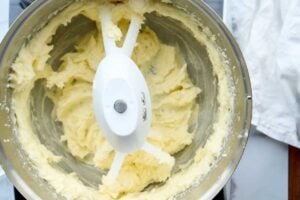
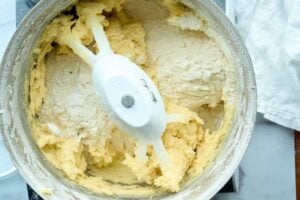
- Add the dry ingredients. In a separate small mixing bowl, whisk together the flour and salt. Gradually add the dry ingredients to the butter-sugar mixture, one cup at a time, mixing at a low speed after each addition. Mix just until combined—avoid overmixing.

- Chill the dough. Cover the bowl tightly with plastic wrap and refrigerate the dough for 30 minutes to firm up. This step helps the cookies maintain their shape while baking.
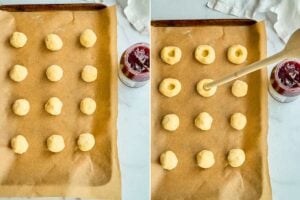
- Roll into balls and coat with sugar. Pair the chilled dough with a cookie scoop or tablespoon and roll into 1-inch balls. Then, roll each ball in the additional granulated sugar, ensuring an even coating. Place the balls on the prepared baking sheets, spacing them 1 inch apart.
- Make indentations and add jam. Using your thumb or the handle of a wooden spoon, gently press into the center of each dough ball to create a well. Be careful not to press all the way through.
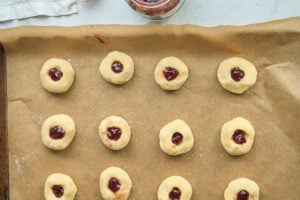
- Add the jam. Fill each indentation with approximately ¼ teaspoon of jam using a small spoon or a piping bag for precision. Avoid overfilling, as the jam can overflow during baking.
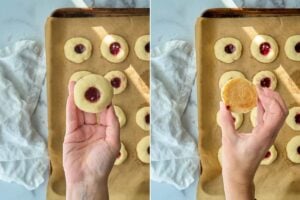
- Bake the cookies. Bake the cookies in the oven for 12-14 minutes or until the edges and bottoms are lightly golden brown. The jam will be bubbly, and the cookies will appear set.
- Let it cool. Remove from the oven and let the cookies cool on the baking sheets for 5 minutes before transferring to a wire rack to cool completely. Be cautious—the jam filling will be hot from the oven.
Notes
Nutrition
My kids love getting their hands messy rolling the dough and poking their thumbs into it – it’s become a fun little tradition for us. Plus, who doesn’t love the combo of buttery shortbread and sweet jam? It’s the perfect little bite of happiness.

If you love thumbprint cookies, try these Apple Butter Thumbprint Cookies—a delicious twist on the classic, made with rich and spiced apple butter.

I hope it becomes a favorite for you, too. You can also try these Buttercream Thumbprint Cookies, filled with a luscious and creamy frosting instead of jam.
Key Ingredients and Tools
To make sure your cookies come out just right, there are some important tools and ingredients you should use. Here are the essentials and simple tips to help you feel confident while baking.

- Unsalted Butter: This gives you control over the salt level in your cookies, which helps with flavor. Make sure it’s softened to room temperature so it mixes easily. You can use salted butter instead, but cut back or remove any extra salt in the recipe.
- Fruit Jam: Choose thick and high-quality jams or preserves for the filling. Avoid jelly because it can get too runny when baking and might spill out of the thumbprint. You can find these in the baking aisle or specialty food section. You can also consider using lemon curd, Nutella, or caramel sauce for a different taste.
- All-Purpose Flour: This is what holds the cookies together. Be sure to measure it correctly—scoop lightly and level it off to prevent using too much, which could make the cookies dense. Switch it out for a 1:1 gluten-free baking flour if you want a gluten-free version.
- Granulated Sugar: You’ll use this in the dough and for rolling the cookies. It adds sweetness and a nice crunch. Try using coarse sugar for extra crunch, or skip it for a simpler cookie.
- Vanilla Extract: Quality vanilla extract enhances the flavor of the dough. If you run out, you can substitute with almond or another flavored extract for a fun change.
- Parchment Paper: Lining your baking sheets with parchment paper stops the cookies from sticking and makes cleaning up easy. If you don’t have parchment, a silicone baking mat works well too.
- Cookie Scoop: A cookie scoop helps you make evenly sized dough balls. This way, the cookies bake evenly and look good.
With these tools and ingredients, your cookies will always look great and taste delicious!
Troubleshooting and Help
The cookies should be set and light golden at the edges but look soft in the center. Don’t worry—they’ll firm up as they cool, so do not overbake them.
Yes, absolutely! Chilling the dough helps the cookies hold their shape while baking and makes them easier to handle. If you skip this step, the cookies might spread too much in the oven.
You probably added a bit too much jam. A small amount—about ¼ teaspoon—is all you need. It might not look like much, but trust me, it’s plenty once the cookies bake.
Absolutely! Homemade jam works beautifully in these cookies and adds a personal touch. If you don’t have a recipe, try making a batch of Christmas Jam—it’s sweet, spiced, and perfect for baking.
Store them in an airtight container and add a small piece of bread to keep them soft. The bread helps retain moisture and keeps the cookies fresh.
This can happen if the dough is too cold. Let the chilled dough sit out for a few minutes to warm up slightly, or press gently to avoid cracking.
Yes, you can use a 1:1 gluten-free baking flour as a substitute for the all-purpose flour. They might be slightly crumbly, but they’ll still taste great.
Absolutely! This recipe doubles beautifully. Make sure your mixing bowl is large enough to handle the extra dough, and bake in batches if your oven can’t fit all the cookies simultaneously.
These cookies are easy to make, classic, and always popular. You can add your favorite fillings, making them great for holiday trays or snacks. Whether you’re baking for family, friends, or just for yourself, they surely will become a favorite. I hope you enjoy this recipe as much as we did.