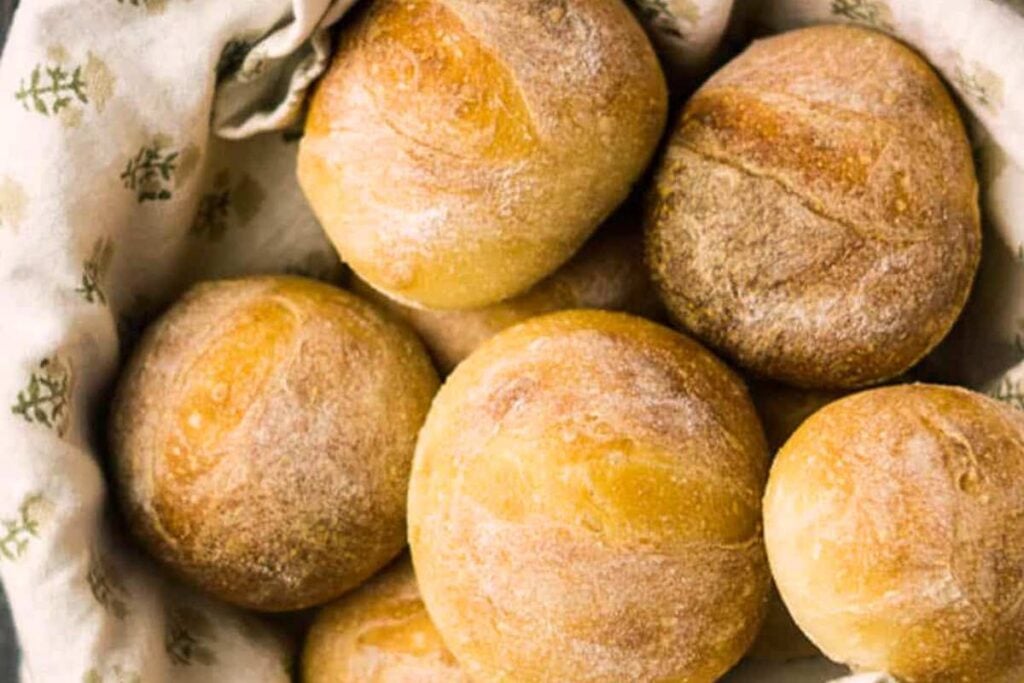
I have made these rolls every week of my life for fifteen years. We use them for everything. They are not authentic, artisan style sourdough. But they are delicious, beautiful and foolproof. Yes, when I make these, I use a pinch of instant yeast. You can leave it out and just extend the rising times.

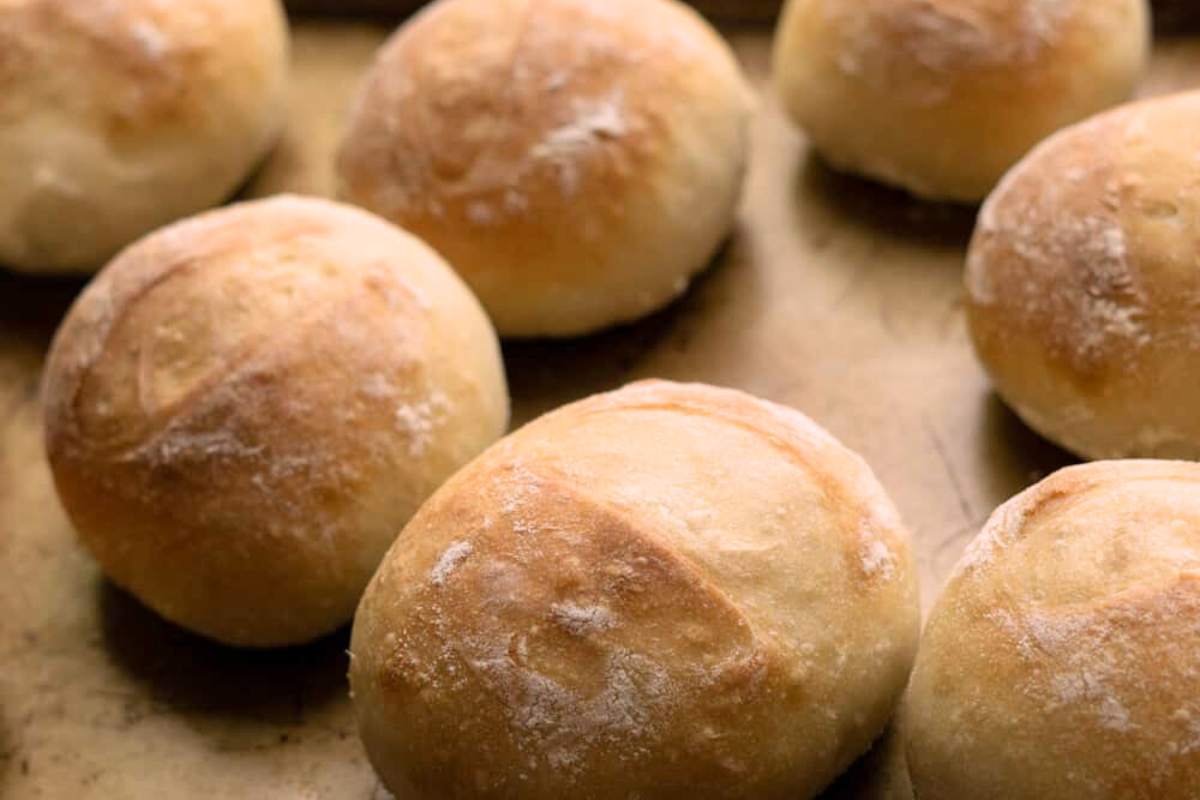
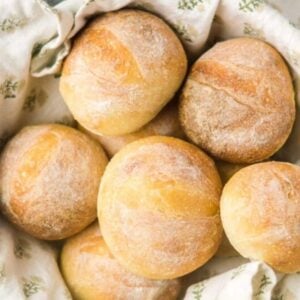
There is a time and a place for recipes involving many tools with French names. This is not it. This recipe is for when you just want some really good rolls. They have a crisp crust, soft interior, and good flavor. There is a slight sourdough tang, but it is totally undetectable by my kids. More of just a depth of flavor. They’re the perfect sandwich roll! It only took me a million different tries to get this recipe right. I really hope you like them.
Table of Contents
What You’ll Need
I’ve made these every which way…with the yeast, without it, with all-purpose flour, etc. I recommend that you make them exactly as written, but I’ve included notes about what substitutions you can make.
Get a Free + Pretty PDF Recipe Book
Sourdough Sunday Newsletter

Every Sunday evening I’ll send you a sourdough recipe to make that week, straight from my kitchen to your inbox.
And as a thank you for signing up, I’ll send you this e-book with beautiful printable recipes right away. Simple!
You will not be added to any other email lists or my daily newsletter. But if you’re already on my newsletter, you’re welcome to join and receive both.
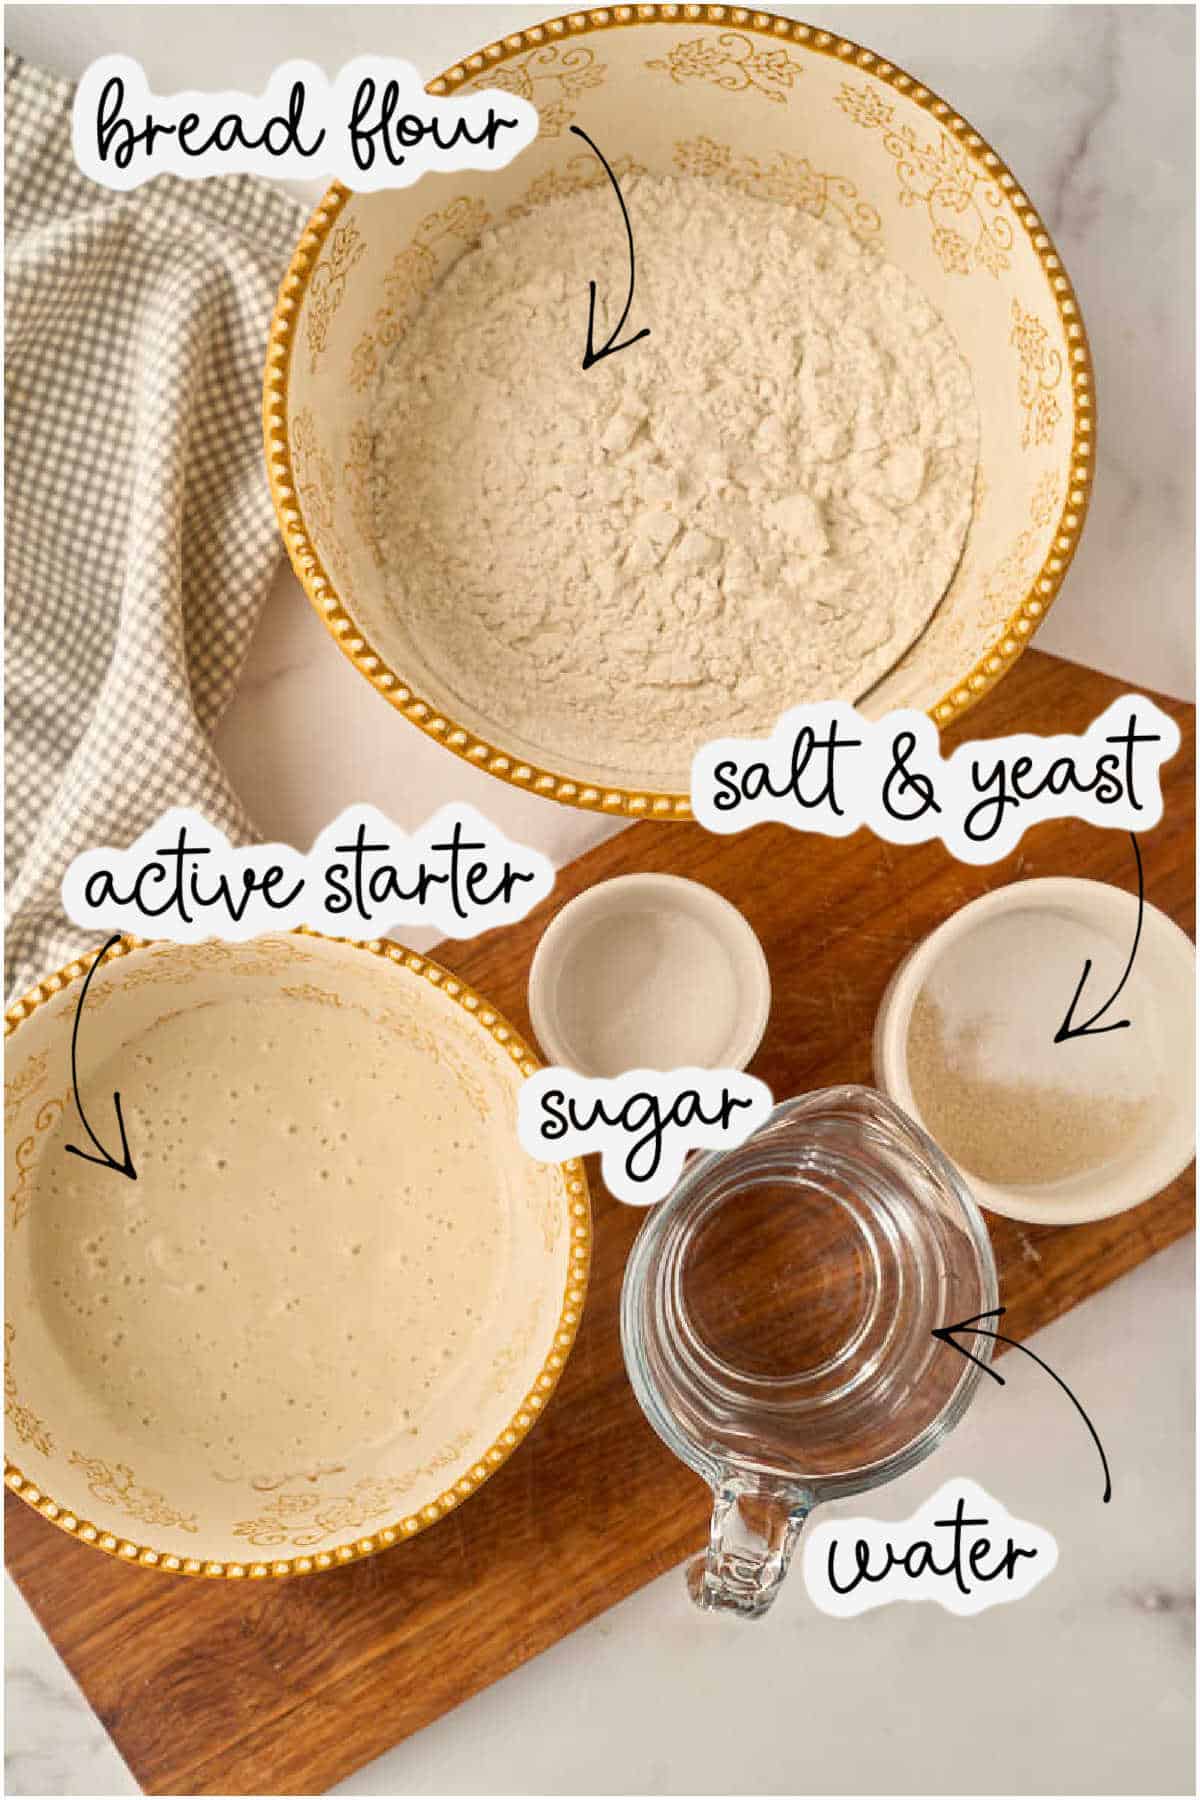
Main Ingredients:
- 7 ounces active sourdough starter (1 ¼ cups / 200 grams) should be bubbly and pancake batter consistency
- 13 ounces bread flour (2 ½ to 3 cups / 370 grams) bread flour is important to get the a crusty, chewy texture. If you are using all purpose flour, the texture won’t be quite the same, and you’ll need to use a little more flour.
- 6.5 oz water (¾ cup plus 1 tablespoon / 185 grams)
- ½ teaspoon sugar
- 1 ½ teaspoons salt
- ½ teaspoon yeast – yes, even though it’s sourdough! This helps with consistent rise and texture
For Assembly:
- Cornmeal for dusting
- Extra flour for dusting tops of rolls
As written, this recipe makes 8 large sandwich rolls or 12 smaller dinner rolls.
It doubles quite well, but you’ll likely need to bake in batches because you need one rack for the steam and one for the rolls.
If you’d like to double (or triple!) the amounts, use the 2x or 3x button on the recipe card at the very bottom of this post.
Instructions
Let’s do this! It’s easy!
Mixing the dough
Weigh out your ingredients with a digital scale and add everything except the yeast and salt to a bowl.
Stir with a spoon to form a rough, slightly dry looking dough. If you are used to baking artisan sourdough, the dough will probably seem very dry to you. Since we are forming it into rolls, it needs to keep its shape. So the texture is more like a traditional bread dough.

Allow it to rest, covered, at room temperature, for 20-40 minutes, then come back and knead in the salt and yeast.
Kneading Options
Knead the dough by hand, bread machine, or stand mixer with dough hook until smooth and slightly sticky. The dough is done kneading when it passes the windowpane test. All you need to do is take a golf ball-sized piece of dough and stretch it out. Look for translucent “windows” in the dough. If the dough tears instead of stretching thin, it’s not ready yet.
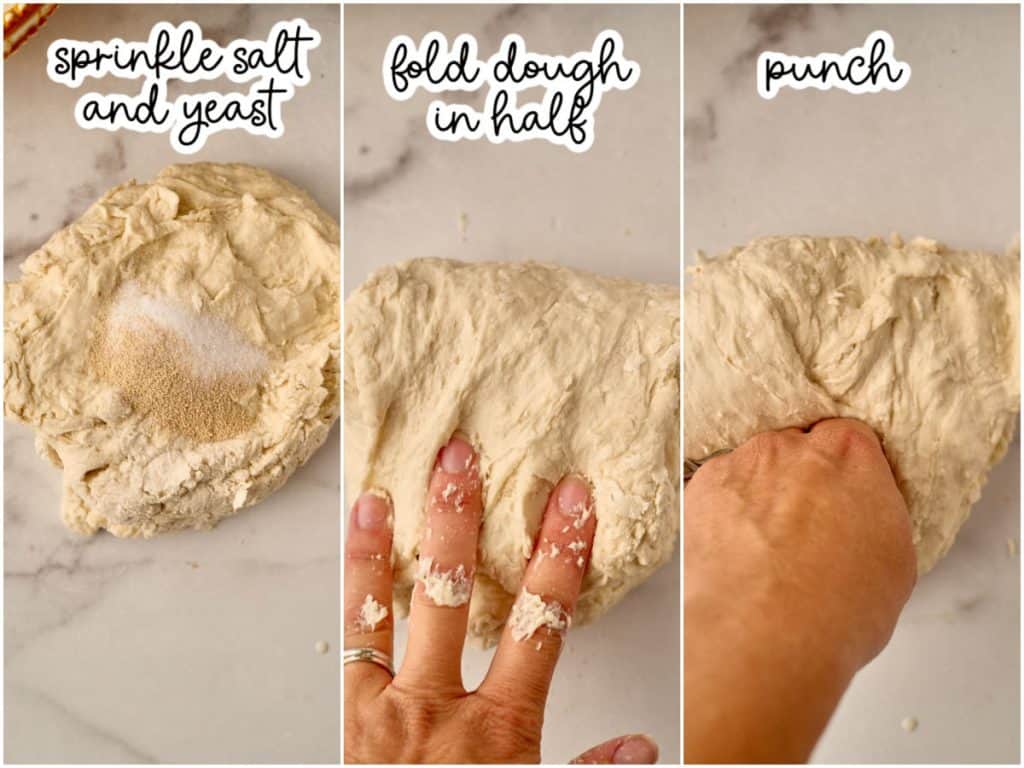
By hand: fold the dough in half, then punch it down. Stretch it out again, fold, and punch. Repeat this process for at least five minutes, until the dough is stretchy and smooth. You should be able to pull it flat without tearing it.
With a mixer: Place the dough in your mixer bowl with the dough hook and let it run on low for five to ten minutes.
Bread machine: Simply add everything to the bucket and select the dough cycle. When the machine beeps, you’ll have a risen dough that’s ready to shape. I use this method the most.
After a few minutes of kneading, the dough may be a little sticky, but it should not be wet or impossible to handle. Add more flour, a tablespoon or two at a time, until it forms a workable dough.
The first rise
Place the dough in a clean, lightly oiled bowl and cover. Allow to rise for 1 hour in a warm place, such as a slightly warmed but turned-off oven, until doubled in size.
Shaping and rising again
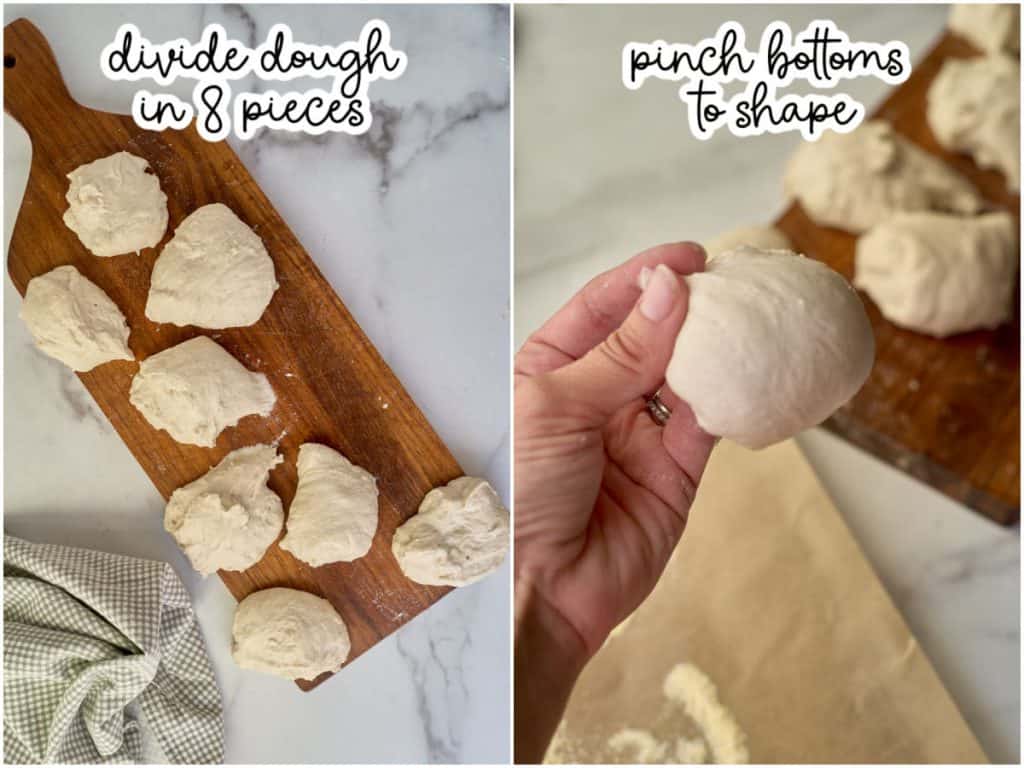
Then divide and shape into 8 rolls, placing them on a parchment- lined baking sheet sprinkled with cornmeal.
Cover with greased plastic wrap and allow to rise for 45- 60 minutes at room temperature. Halfway through the rising time, preheat your oven to 450 degrees. Put an empty, rimmed baking sheet on a lower rack.
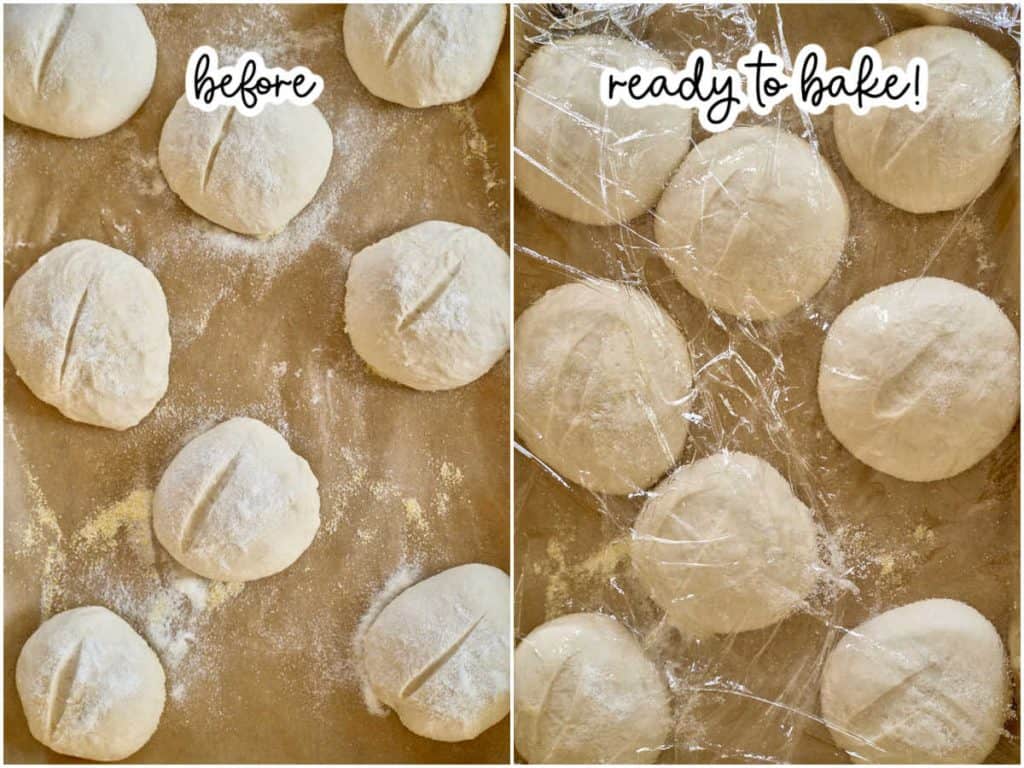
When the rising time is up, the rolls should be puffy.
Baking With Steam
Pour 1 cup of water on the empty baking sheet to create steam.
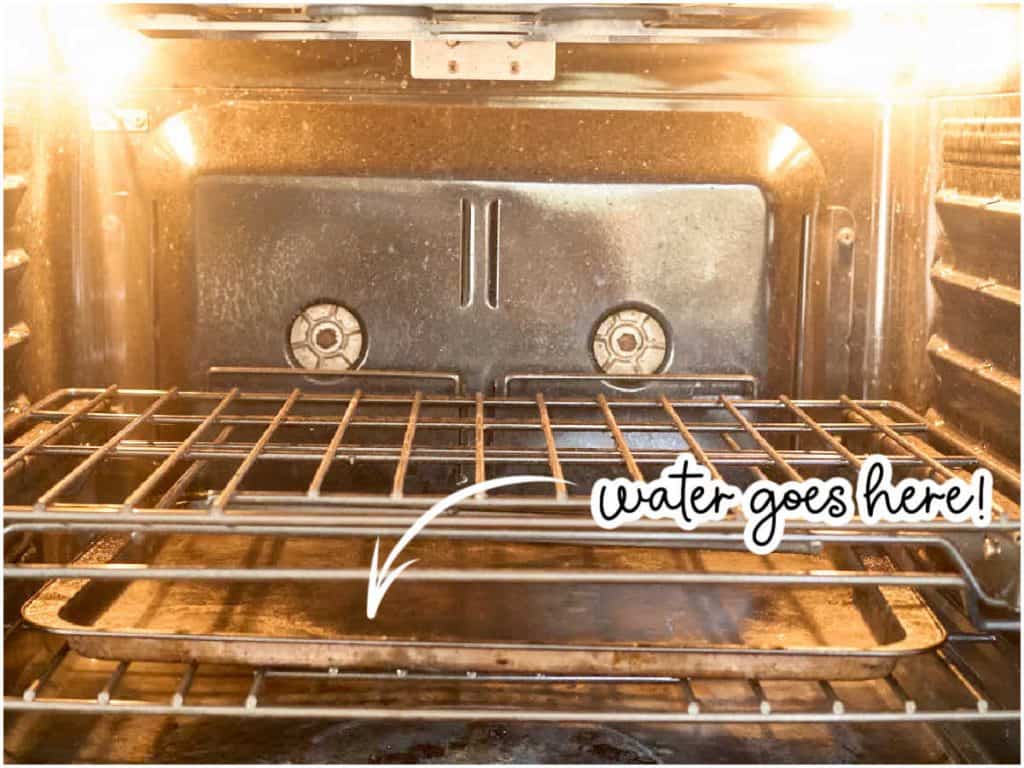
Bake for 17-21 minutes until browned. The baking time varies widely with this recipe because of the steam. The steam lowers the oven temperature and depending on how quickly your oven gets back up to temperature, some ovens will bake much faster than other.
Cool on a wire rack.
Storage Instructions
These freeze very well. After cooled to room temperature, pack them up in a freezer bag and they will keep fine for at least a month.
To reheat rolls without drying them out, defrost for a minute or so in the microwave at the defrost setting. Then wrap them in foil and place them in a warm (not hot!) oven for 5-10 minutes.
Customizing this recipe
This is a reader favorite and you all have made it many different ways!
Garlic-herb version: add a full tablespoon of dried herbs (any blend equaling one tablespoon), then half a teaspoon of garlic powder to the dough and knead it all together.
Seeded sourdough rolls: add seeds the dough and press some on top.
Italian sourdough rolls: slightly less water for even more chew and sesame seeds on top!
Questions and Troubleshooting
Yes! Cover the dough or the shaped, unbaked rolls very tightly with greased plastic wrap and pop it in the fridge. Then pick up the process when you’e ready.
Yes, divide the dough into 6 portions for big sandwiches or 12 for smaller dinner rolls. Adjust the baking time ups or down a few minutes.
It’s okay :). Just use the cup measurements, but start with less flour and add more if the dough feels too wet. The dough should clear the bowl sides but still feel slightly tacky.
They should sound hollow when you tap the bottom and be golden brown all over. If they’re pale, give them another few minutes.
You probably used all-purpose flour or measured it differently. Add some more flour. You’ll be okay.
Printable Recipe
Crusty Sourdough Rolls
Ingredients
- 1¼ cups active sourdough starter 7 ounces
- 2½-3 cups bread flour 13 ounces
- ¾ cup plus 1 tablespoon water 6½ ounces
- ½ teaspoon sugar
- 1 ½ teaspoons salt
- ½ teaspoon yeast
Save This Recipe
You'll join my email list which you will love. And if you don't, unsubscribe in one click. ❤️
Instructions
- Mix all ingredients except salt and yeast. Combine the starter, flour, water, and sugar in a large bowl. Stir well, using your hands if needed to incorporate all ingredients. The mixture may look dry but will feel slightly sticky to the touch. Cover and allow to rest at room temperature for thirty minutes.
- Knead in the salt and yeast. Add the salt and yeast on top of the dough, and knead until smooth, stretchy, and elastic. (If using a bread machine, set it on the dough cycle. For a stand mixer, set it on low about 5 minutes. If kneading by hand, knead for about 10 minutes.) Check the consistency of the dough after a few minutes of kneading. It may seem sticky, but should clear the sides of the bowl and should not be too difficult to work with. If it seems very wet, add more flour a few tablespoons at a time.
- The first rise. When the dough is kneaded, cover it and put in in a warm place to rise between 60-90 minutes, until nearly doubled in size.
- Shape the rolls. Turn the dough out onto a clean counter or a cutting board. Prepare a baking sheet with parchment paper or oil and flour. Dust the top of the parchment with cornmeal. Divide the dough into 8 equal pieces, either by dividing into half, then quarters, then eighths, or by. using a kitchen scale. Shape the pieces into rolls by pinching the bottoms. Place on the cornmeal dusted parchment. Rub the tops with flour. Slash, if desired, using a lame or sharp knife.
- The second rise. Cover the rolls with heavily greased plastic wrap and let rise in a warm place for 45-60 minutes, until puffy. Towards the end of the rising time, preheat your oven to 450 degrees. Place one rack in the center, and one in the lower middle area. Place an empty baking sheet on the lower rack to get hot while the oven preheats.
- Bake with steam. When the oven has heated and the rolls have risen, pour one cup of water on the hot baking sheet to create steam. (It may buckle, this is ok.). Place the rolls inside and bake for 17-21 minutes, until browned outside. Cool rolls on wire rack for at least 30 minutes before serving.
Video
Notes
Nutrition


Easy to follow recipe, and oh my gosh, are they delicious! Turned out perfectly, and the texture is spot-on. Yum! Thanks for sharing this wonderful recipe.
You are very welcome, Wendy! So glad you liked them 🙂
Made these rolls tonight to go with a smoked pulled pork my boyfriend worked on all day…delicious!!! Crusty and soft, they didn’t get soggy by the end of the meal either. This is a keeper recipe. My only problem was kneading without adding extra flour, so I added just enough to get the job done. Thank you do much for pistong this recipe.
So glad you liked them them Doreen! Thanks for letting me know 🙂
This recipe is great, thank you! I was a little worried about how little the rolls rose before baking, but they baked up beautifully with lots of lovely air pockets inside. I served the rolls as a side with a turkey wild rice soup and my family loved it!
So glad you liked it Annie!
These rolls were delicious. Lightly chewy on the outside but soft on the inside. Lovely flavor. I live in the desert, so my flour is always dry, and everything takes more liquid. I started out as recommended, but used 1.25 c. starter rather than 7 oz. Also I don’t have bread flour so I used all-purpose. All great until time to knead. This was seriously — how do you knead dough without adding flour? I tried. Picture my hands dripping with dough, the cutting board gripping tightly, a big sloosh, sloosh as I attempted to ‘knead’ this dough-that-is-more-like-batter. Probably my error. Eventually gave up and scraped all the dough together and added flour and kneaded properly. All else went perfectly. I did use the convection setting on my oven and would drop the temp if I did like that again … just thought the steam was important, but could drop the temp to 425 after putting the rolls in. Anyway, really delicious and wanted to say thank you and share my geographic issues.
Hi Ann, I’ve found that for some reason with this dough it looks dry at first and then gets wetter over time, which is kind of weird! I’m glad it all worked out for you in the end and thanks for letting me know.
The dough looked dry to me, as well, but after it rested for the first 20 min. period, it absorbed all the flour. Yes, it was a very loose dough, however – I found a tip on another site that recommended pulling and “folding” the dough instead of standard kneading. To do this, you grab an edge of the dough in the bowl and pull it up, then lay it on top of the dough. Turn the bowl a quarter turn and repeat. You keep pulling and folding the pulled section over the dough for five minutes. Let it rest for five, then repeat pulling and folding for five. I never took the dough out of the bowl until it was time to form the balls. It became easier and easier to work with, and eventually didn’t stick to my hands at all. And it rose beautifully!
I was wondering if I can use the metal bowl for my stand mixer. I know metal is no good for the starter but can I use it for kneading the dough?
Yes that is absolutely fine, I would just transfer it to different bowl for rising (although to be honest I think that would be fine too)
I live in Colorado at a little over 5000 feet above sea level and I’m going to try this recipe on Sunday. Do you think I need to make any adjustments for my altitude? Also, thanks for your educational tips.
I never knew what a lame was and now I am going to get one.
Hmmm I wish I knew more about high altitude baking! My FIL lived in Colorado during grad school and said he always had to add a little more liquid to recipes and bake them at a higher temperature for a shorter time. I found this website which might be helpful to you. Good luck! https://www.culturesforhealth.com/learn/sourdough/how-altitude-affects-sourdough-baking/
I live in Utah at just under 6000 ft elevation, and these rolls turn out awesome every time! I do the weights just as written. I let my stand mixer do the kneading for almost 10 minutes, and the dough is lovely.
Cynthia thank you so much for adding this! I always wonder about higher elevations. I’m glad you like them.
OMG, I have been making sourdough bread for a number of years, some good, some not so. THIS recipe and method are so awesome, THANK you for all your efforts and for sharing you recipe!!! I made one small change because I love the sour flavour, I subbed 1/4 t citric acid as part of the salt…AWESOME!!
Geri this comment makes me so happy!! So glad you enjoyed it and I love the tip about the citric acid!
I’m asking these tonight!! I appreciate how easy to understand your recipe is.
I’m so excited! and thank you!
These are amazing! Thank you!
You are welcome! Glad you liked them!
Definitely need to try this! My hubby will eat the whole batch. Thanks for the tip in weighing:)
Thanks Angela! My husband is a bread monster too.
I am making these! Yum!
At some point I am going to have to jump on this sourdough wagon. I love bread, and those rolls look a little too perfect to eat… who am I kidding perfection has NEVER stopped me from eating!
Ha! Love it. I love sourdough, and I don’t care about the health benefits. I am just a bread lover too.
These look simply delicious! Will need to try to make them to go with some homemade soup!
Perfect thing to pair them with, thanks for the idea
These look amazing! I love the unique taste sour dough bread has!
Love this! I’ve been wanting to make my own starter for a while now. Can’t wait!
thanks alleigh!
Good luck! You’ll get addicted.
My husband is always looking for ways to use his sour dough starter. I’m printing this recipe for him to to try! Thank you for sharing.
Hope he likes it! ??
Have made these several times….LOVE them! Quick question ~ family campout next week and I have couple days cooler weather coming at the end of the week so turning the oven up high and adding steam won’t cook us out! ???? Assuming I can double the recipe without any adjustments? Thanks!
yes I’ve doubled them many times! ????
I just bought a lame but never thought to use it on rolls. These look amazing! I grind my own flour and use hard white for bread and rolls.
Wow! I am all about white flour. It’s just…better!
Yum! They look delicious.
Thanks Jenny!
Those look absolutely delicious!!
Thank you! I hope you try them!
These look delicious!
Thanks Jayme! ????