I have made these rolls every week of my life for fifteen years. We use them for everything. They are not authentic, artisan style sourdough. But they are delicious, beautiful and foolproof. Yes, when I make these, I use a pinch of instant yeast. You can leave it out and just extend the rising times.

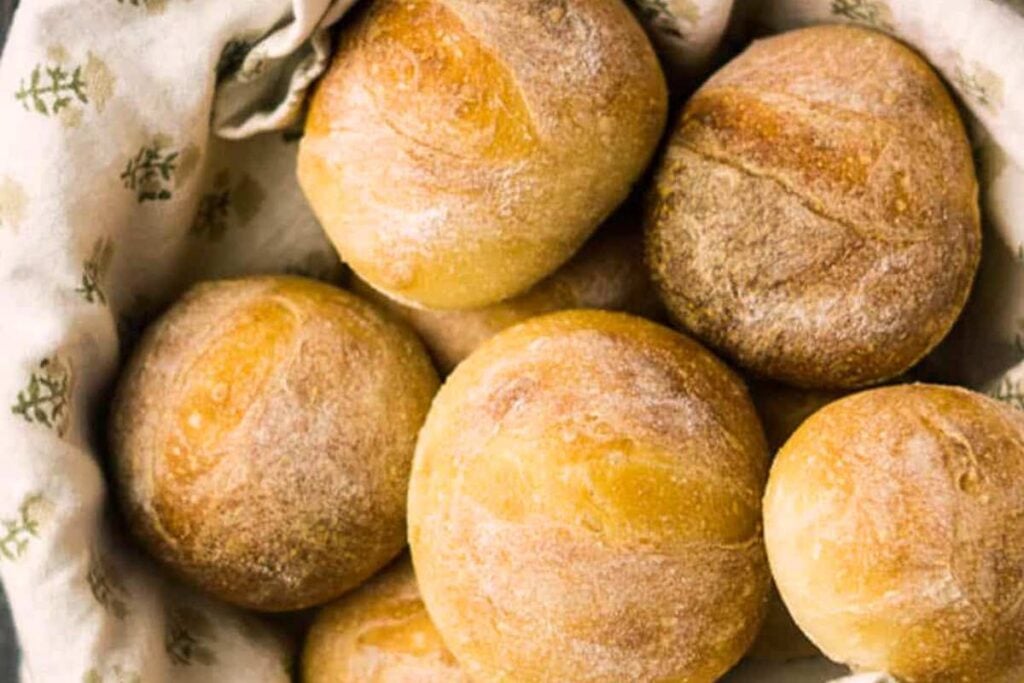
There is a time and a place for recipes involving many tools with French names. This is not it. This recipe is for when you just want some really good rolls. They have a crisp crust, soft interior, and good flavor. There is a slight sourdough tang, but it is totally undetectable by my kids. More of just a depth of flavor. They’re the perfect sandwich roll! It only took me a million different tries to get this recipe right. I really hope you like them.
Table of Contents
What You’ll Need
I’ve made these every which way…with the yeast, without it, with all-purpose flour, etc. I recommend that you make them exactly as written, but I’ve included notes about what substitutions you can make.
Get a Free + Pretty PDF Recipe Book
Sourdough Sunday Newsletter

Every Sunday evening I’ll send you a sourdough recipe to make that week, straight from my kitchen to your inbox.
And as a thank you for signing up, I’ll send you this e-book with beautiful printable recipes right away. Simple!
You will not be added to any other email lists or my daily newsletter. But if you’re already on my newsletter, you’re welcome to join and receive both.
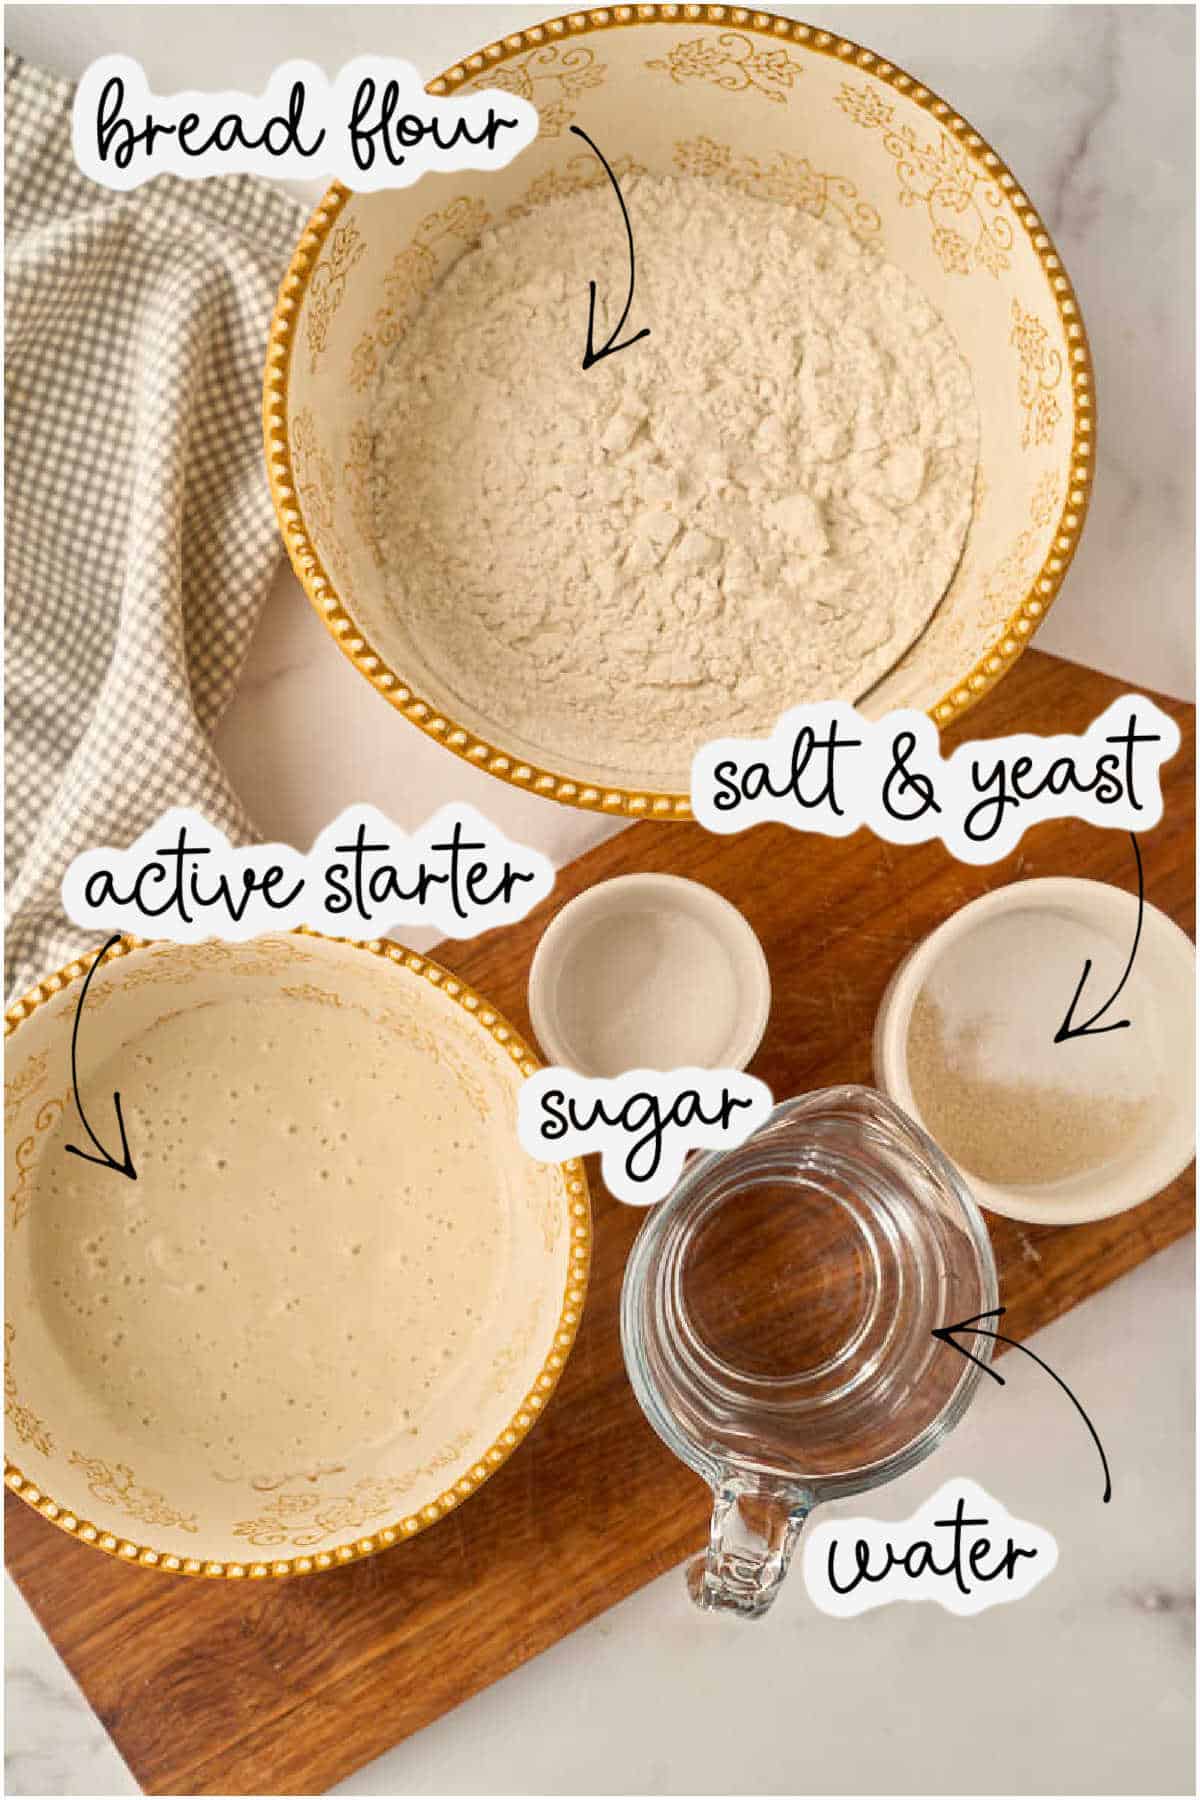
Main Ingredients:
- 7 ounces active sourdough starter (1 ¼ cups / 200 grams) should be bubbly and pancake batter consistency
- 13 ounces bread flour (2 ½ to 3 cups / 370 grams) bread flour is important to get the a crusty, chewy texture. If you are using all purpose flour, the texture won’t be quite the same, and you’ll need to use a little more flour.
- 6.5 oz water (¾ cup plus 1 tablespoon / 185 grams)
- ½ teaspoon sugar
- 1 ½ teaspoons salt
- ½ teaspoon yeast – yes, even though it’s sourdough! This helps with consistent rise and texture
For Assembly:
- Cornmeal for dusting
- Extra flour for dusting tops of rolls
As written, this recipe makes 8 large sandwich rolls or 12 smaller dinner rolls.
It doubles quite well, but you’ll likely need to bake in batches because you need one rack for the steam and one for the rolls.
If you’d like to double (or triple!) the amounts, use the 2x or 3x button on the recipe card at the very bottom of this post.
Instructions
Let’s do this! It’s easy!
Mixing the dough
Weigh out your ingredients with a digital scale and add everything except the yeast and salt to a bowl.
Stir with a spoon to form a rough, slightly dry looking dough. If you are used to baking artisan sourdough, the dough will probably seem very dry to you. Since we are forming it into rolls, it needs to keep its shape. So the texture is more like a traditional bread dough.

Allow it to rest, covered, at room temperature, for 20-40 minutes, then come back and knead in the salt and yeast.
Kneading Options
Knead the dough by hand, bread machine, or stand mixer with dough hook until smooth and slightly sticky. The dough is done kneading when it passes the windowpane test. All you need to do is take a golf ball-sized piece of dough and stretch it out. Look for translucent “windows” in the dough. If the dough tears instead of stretching thin, it’s not ready yet.
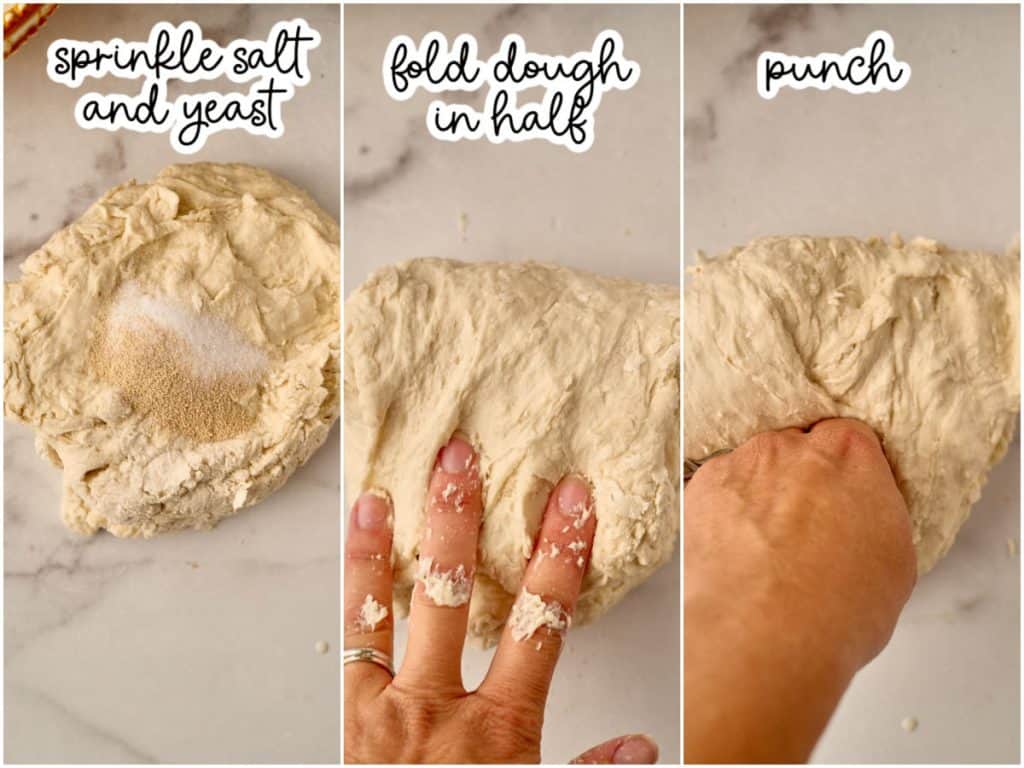
By hand: fold the dough in half, then punch it down. Stretch it out again, fold, and punch. Repeat this process for at least five minutes, until the dough is stretchy and smooth. You should be able to pull it flat without tearing it.
With a mixer: Place the dough in your mixer bowl with the dough hook and let it run on low for five to ten minutes.
Bread machine: Simply add everything to the bucket and select the dough cycle. When the machine beeps, you’ll have a risen dough that’s ready to shape. I use this method the most.
After a few minutes of kneading, the dough may be a little sticky, but it should not be wet or impossible to handle. Add more flour, a tablespoon or two at a time, until it forms a workable dough.
The first rise
Place the dough in a clean, lightly oiled bowl and cover. Allow to rise for 1 hour in a warm place, such as a slightly warmed but turned-off oven, until doubled in size.
Shaping and rising again
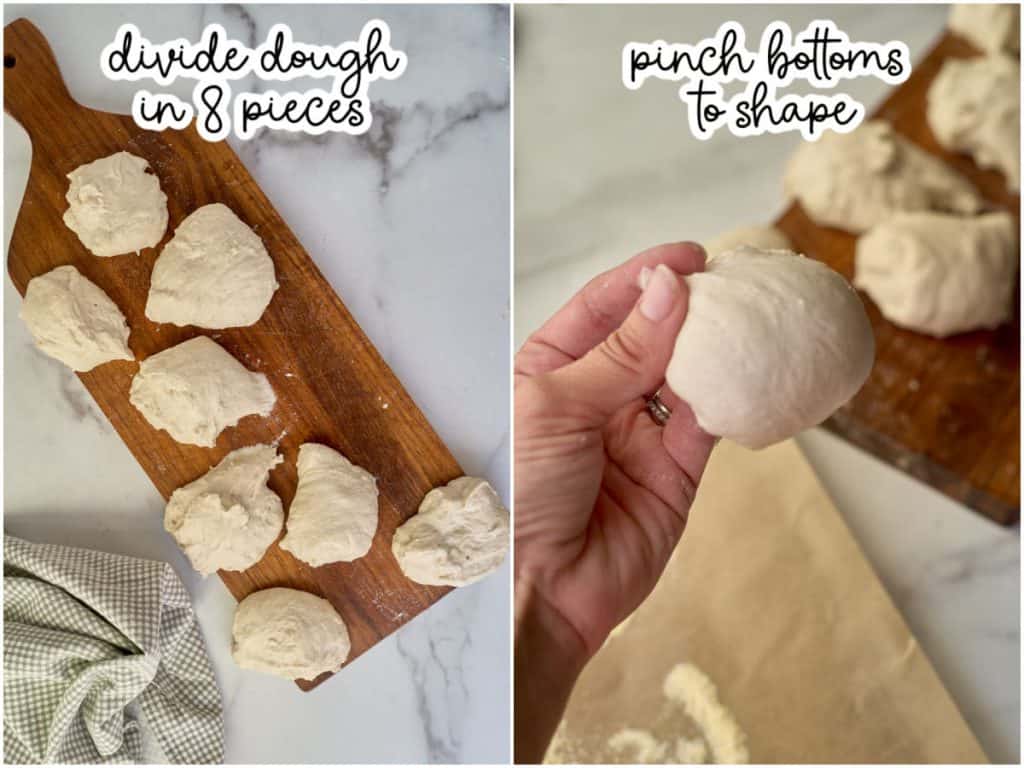
Then divide and shape into 8 rolls, placing them on a parchment- lined baking sheet sprinkled with cornmeal.
Cover with greased plastic wrap and allow to rise for 45- 60 minutes at room temperature. Halfway through the rising time, preheat your oven to 450 degrees. Put an empty, rimmed baking sheet on a lower rack.
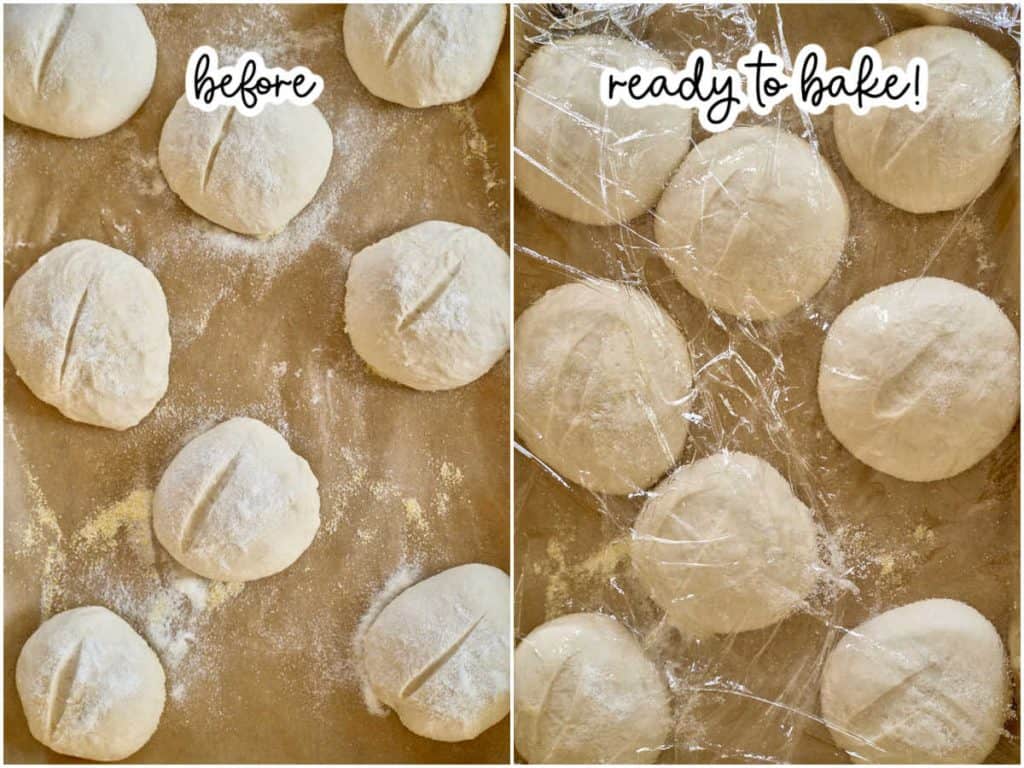
When the rising time is up, the rolls should be puffy.
Baking With Steam
Pour 1 cup of water on the empty baking sheet to create steam.
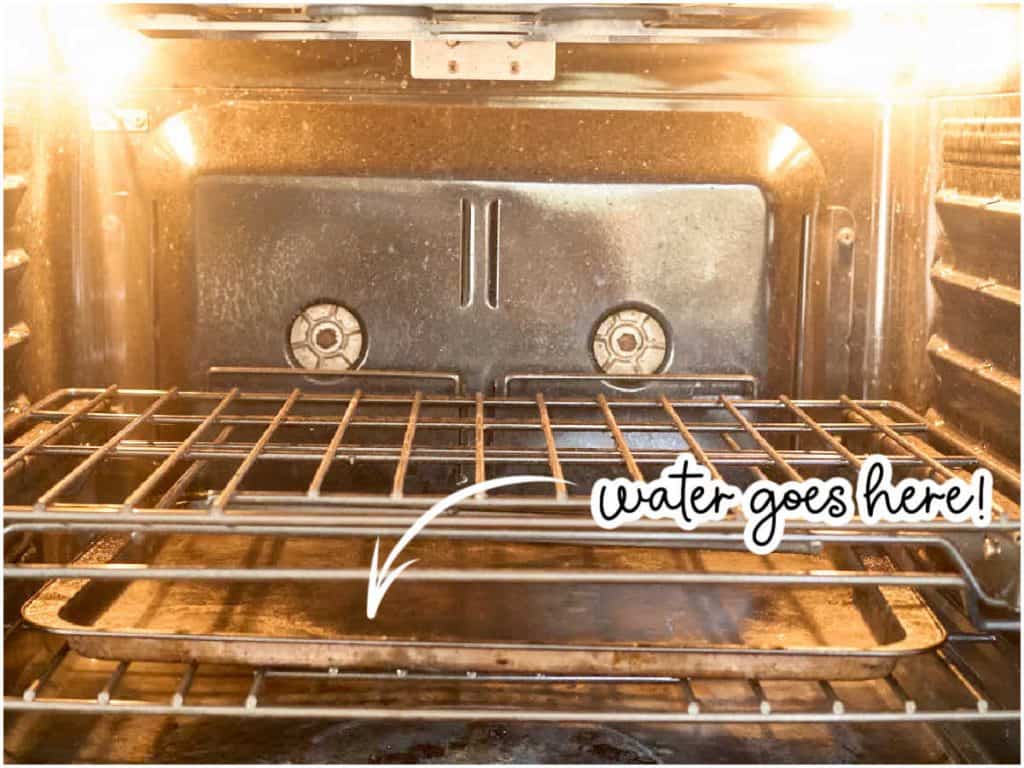
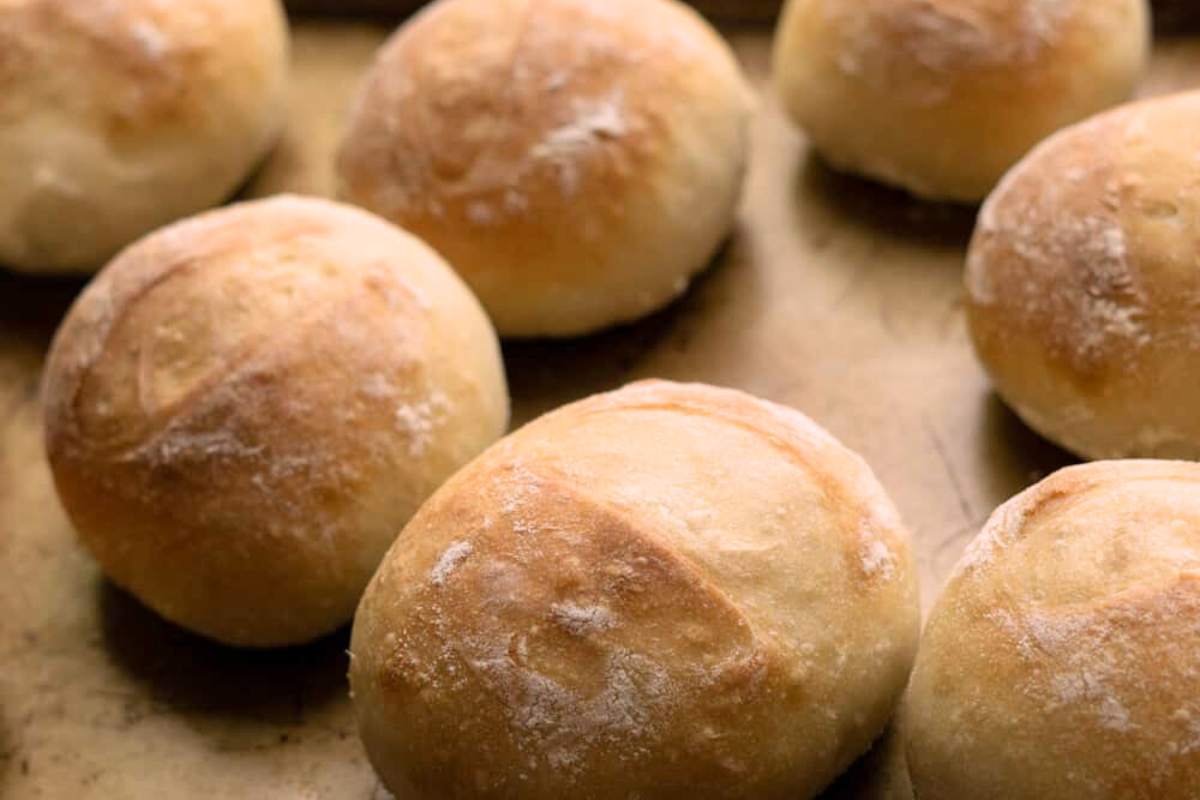
Bake for 17-21 minutes until browned. The baking time varies widely with this recipe because of the steam. The steam lowers the oven temperature and depending on how quickly your oven gets back up to temperature, some ovens will bake much faster than other.
Cool on a wire rack.
Storage Instructions
These freeze very well. After cooled to room temperature, pack them up in a freezer bag and they will keep fine for at least a month.
To reheat rolls without drying them out, defrost for a minute or so in the microwave at the defrost setting. Then wrap them in foil and place them in a warm (not hot!) oven for 5-10 minutes.
Customizing this recipe
This is a reader favorite and you all have made it many different ways!
Garlic-herb version: add a full tablespoon of dried herbs (any blend equaling one tablespoon), then half a teaspoon of garlic powder to the dough and knead it all together.
Seeded sourdough rolls: add seeds the dough and press some on top.
Italian sourdough rolls: slightly less water for even more chew and sesame seeds on top!
Questions and Troubleshooting
Yes! Cover the dough or the shaped, unbaked rolls very tightly with greased plastic wrap and pop it in the fridge. Then pick up the process when you’e ready.
Yes, divide the dough into 6 portions for big sandwiches or 12 for smaller dinner rolls. Adjust the baking time ups or down a few minutes.
It’s okay :). Just use the cup measurements, but start with less flour and add more if the dough feels too wet. The dough should clear the bowl sides but still feel slightly tacky.
They should sound hollow when you tap the bottom and be golden brown all over. If they’re pale, give them another few minutes.
You probably used all-purpose flour or measured it differently. Add some more flour. You’ll be okay.
Printable Recipe
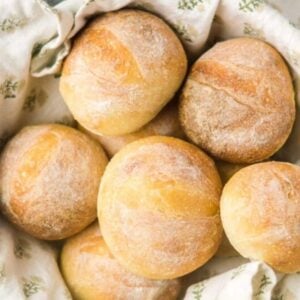
Crusty Sourdough Rolls
Ingredients
- 1¼ cups active sourdough starter 7 ounces
- 2½-3 cups bread flour 13 ounces
- ¾ cup plus 1 tablespoon water 6½ ounces
- ½ teaspoon sugar
- 1 ½ teaspoons salt
- ½ teaspoon yeast
Save This Recipe
You'll join my email list which you will love. And if you don't, unsubscribe in one click. ❤️
Instructions
- Mix all ingredients except salt and yeast. Combine the starter, flour, water, and sugar in a large bowl. Stir well, using your hands if needed to incorporate all ingredients. The mixture may look dry but will feel slightly sticky to the touch. Cover and allow to rest at room temperature for thirty minutes.
- Knead in the salt and yeast. Add the salt and yeast on top of the dough, and knead until smooth, stretchy, and elastic. (If using a bread machine, set it on the dough cycle. For a stand mixer, set it on low about 5 minutes. If kneading by hand, knead for about 10 minutes.) Check the consistency of the dough after a few minutes of kneading. It may seem sticky, but should clear the sides of the bowl and should not be too difficult to work with. If it seems very wet, add more flour a few tablespoons at a time.
- The first rise. When the dough is kneaded, cover it and put in in a warm place to rise between 60-90 minutes, until nearly doubled in size.
- Shape the rolls. Turn the dough out onto a clean counter or a cutting board. Prepare a baking sheet with parchment paper or oil and flour. Dust the top of the parchment with cornmeal. Divide the dough into 8 equal pieces, either by dividing into half, then quarters, then eighths, or by. using a kitchen scale. Shape the pieces into rolls by pinching the bottoms. Place on the cornmeal dusted parchment. Rub the tops with flour. Slash, if desired, using a lame or sharp knife.
- The second rise. Cover the rolls with heavily greased plastic wrap and let rise in a warm place for 45-60 minutes, until puffy. Towards the end of the rising time, preheat your oven to 450 degrees. Place one rack in the center, and one in the lower middle area. Place an empty baking sheet on the lower rack to get hot while the oven preheats.
- Bake with steam. When the oven has heated and the rolls have risen, pour one cup of water on the hot baking sheet to create steam. (It may buckle, this is ok.). Place the rolls inside and bake for 17-21 minutes, until browned outside. Cool rolls on wire rack for at least 30 minutes before serving.
Video
Notes
Nutrition


These came out perfect the first time. Thanks.
Worked beautifully for me! Thank you for this great recipe. The only thing I did differently is heat up a baking tray in the oven and then slide the parchment paper with the rolls on it for that lil bit extra spring.
I’m a newbie to sourdough, getting sucked into the Sourdough Vortex during the pandemic. Made this today with some still pretty *active* discard. Misread directions, but still came out fabulous!! I used about 3/4 teaspoon yeast to be sure but dissolved it in some of the water and put it in at the beginning. No cornmeal, but very lightly greased my parchment paper. Still worked out okay…..turned a bit chilly here in the Pacific Northwest so a pot of chicken soup and your fantastic rolls for dinner! Thanks for doing the hard work!
I’m so happy to hear this :). We are still chilly too. (but happy to extend the bread baking season) 🙂
I made these rolls yesterday. Taste was good but turned out flat in shape. wanted a bigger roll for a sandwich could this have been the problem? made five rolls instead of 8 first raise was beautiful. second raise after roll were formed spread out rather than raised. looking for answers. also no browning at all. they actually were probably too done while i waited to see if the crust would brown a little, crust was very hard.
trying desperately to find a good crusty roll recipe as where i live in florida they do no exist.
thanks!
hi Mary Beth! I don’t think making them too big was the problem. I’m assuming you used the steam, bread flour, and the yeast? if you did, I would guess that they might need a little less water. this will help them keep their shape during the second rise and puff up better when they hit the steam. (I have actually had this happen with mine too and its because my kitchen got very humid and my flour wasn’t absorbing. water very well). the dough should be slightly sticky as you knead but not floppy or too hard to work with. add more flour until it seems right. it’s a great recipe I promise 🙂
Yes I did use steam bread flour and yeast, and a “wet” stater at the beginning , however was very worried on making them too dry. thank you I will try again! the taste was good!
Looking forward to trying bread and rolls
I just got a brown sourdough starter but I don’t have any reliable recipe. Can you help
when you say “brown starter” do you mean one with whole wheat flour or rye flour? if you want to transition it, you can just start feeding it all purpose flour.
Hi! Love these rolls! I was wondering if I could make the dough and do an overnight rise in the fridge? its just too hot to have the oven on and prefer to bake in the early morning.
Thanks!
yes that would work great! make sure they are tightly covered 🙂
Made these for dinner tonight. I really like these rolls. There is just enough for a couple of meals, recipe was easy to follow and photos are always nice for comparison. I added an extra 1/4tsp salt because my dough was bland. I baked mine on a baking stone and they came out perfect. This recipe moves from my Breads to Try pins into Best Breads file. Thank you for sharing.
oh I love the idea of the baking stone. I am so glad you like the recipe 🙂
Quick question. I’m planning on making these tomorrow and was wondering if the discard should be fed before (and if so how much time before) or not fed? Looking forward to them. Thanks!
yes you will need an active, recently fed starter! I feed mine about 4 hours before I need it, but its super variable depending on the temperature of your room and the volume of starter you have. check out this post if you need more help: https://heartscontentfarmhouse.com/maintaining-a-sourdough-starter-on-the-counter/
Hello! I want to make this with dinner. I wanted to find out where in the process the sourdough needs to be to bake these? I have discard from early this AM (from my starter I took out of fridge to feed) that I have just fed so thinking by the early afternoon I can use it to make the sourdough rolls?. Let me know if this is what you recommend. Thanks!
yep, as long as its active and bubbly it will be great. if you are using the yeast the recipe calls for it will make up for any issues with the starter.
I have made these several times now to RAVE reviews from my family. I use ap flour and yes, I add more. I always figured bread recipes are based on texture, not measurements. Goodness, I don’t even measure my starter feeding. I dump in a scoop of flour and add water to get the right texture. It’s very happy! This before balance out variations in humidity, flour varieties, etc. These are incredible!!! (literally sneaked out of bed at 2am to eat another one!)
thank you Janelle! we love them too!
So, I added an extra 2/3 cup flour, poured the sticky, stringy dough into a bowl, which I’d coated with a thin layer of EVOO. I left it for about 3 hours. It turned into a workable dough! In the oven now… fingers crossed!! (AP flour… no bread flour at the market these days!)
Laura thank you for the update! I think the AP flour is part of the issue, it definitely absorbs less water than bread flour. thank you for the feedback, I’m going to update the recipe to include some troubleshooting because I know bread flour is hard to get AND. I would just HATE for people to waste their flour on something that doesn’t work for them!
I’ve made these twice now and both times I had to add significant more flour before starting the kneading to get the correct consistency. Perhaps the water in the recipe is too high?
Regardless, I’m a beginner to bread baking and I really really appreciate your recipe and directions. Also, thank you for the info linked here to kneading in a stand mixer. I just got one and followed your directions for kneading. I’m concerned, like you mentioned, that it is really hard on the motor. What do people think? (I just bought a Kitchen Aid and want it to last for many many years!)
hi Laura,
I would love to help you with this… I know many people have tried the recipe with success. are you using bread flour? did the dough seem like normal dough and then turned runny after rising? or did it never quite come together?
sorry the recipe didn’t work for you!
These are awesome! My oven broke recently and I only have a little toaster oven for baking. these worked great in it. I just sprinkled water droplets on them when I put them in the oven. crisp on the outside and chewy on the inside, perfect rolls for a stew or roast.
that’s a great trick with your toaster oven, I’ll have to try that! glad you enjoyed them!
Very new to sourdough baking. Can I use my discard on this recipe?
yes, actually you can! most breads don’t work as well with discard. since this one has yeast, it will still work.
I need help. I have made these two times and they never get color. They are dense and chewy. I don’t think they are rising enough on the cookie sheet before going into the oven.
lilliet are you using the steam? they should rise really well in the oven with that. if you don’t want to do the steam for some reason then they will need a longer second rise until they are nice and puffy. as far as they color… mine usually brown in the last few minutes, sometimes I do bake them a few extra minutes if they aren’t browning quickly.
It looks like you use instant yeast. Can I use active dry yeast? What changes would I have to do?
yes that’s fine! add it with the flour, water, etc since it doesn’t dissolve as easily. and increase it to a 1 teaspoon. (you always leave it out and just it rise longer, but it will be a four hour rise both times)
These were so good and don’t take two days to make. It’s the recipe that I’ve been looking for. Reminded us of our favorite rolls from our favorite restaurant. Thank you for doing the hard work and coming up with the perfect recipe.
I’m glad glad you liked the recipe!!! if you ever run out of yeast, you can always leave it out and just let them rise a lot longer. 🙂
Amazing rolls. I make these all the time.
so glad you like them 🙂
Thank you for this easy and delicious recipe 🙂
I am new to sourdough and this recipe turns out perfect every time!
I have made it probably 10 times and friends are so thankful for them.
Now that I have the rolls down do you have other sourdough recipes like the round boules?
hi Jennifer!
So glad you liked them!
I have a very easy, hands off sourdough boule here: https://heartscontentfarmhouse.com/bread-machine-sourdough/
And one that’s a little more work folded by hand here: https://heartscontentfarmhouse.com/artisan-sourdough-bread-tutorial-and-recipe/
Would it be possible to make these rolls without the yeast and only use sourdough starter?
Yes! The rising times will be a lot longer, as I’m sure you know. I have done it a few times and done 4 hours for each rise at room temp