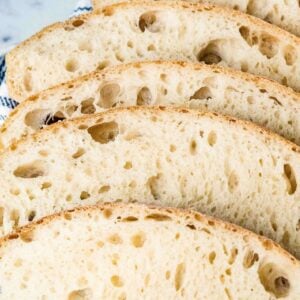
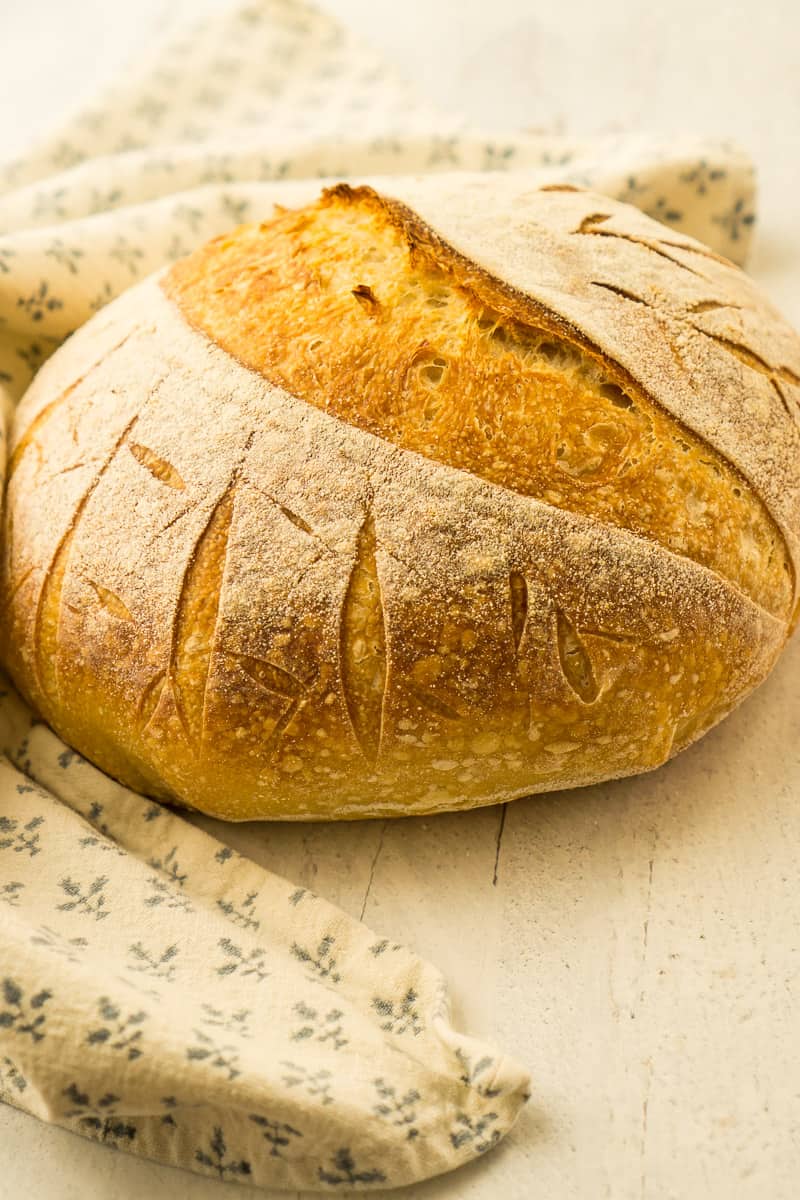
Artisan Sourdough Bread (But Easy)
Just a heads up that this recipe, although easy, needs some planning. It takes around 24 hours from start to finish, but most of that time doesn’t require hands-on work. After the recipe, there’s a timetable and more tips for making it successful. It’s a great sourdough recipe for beginners.
Easy Artisan Sourdough Bread
Equipment
- Large mixing bowl
- Spatula
- Plastic Wrap
Ingredients
- 7 ounces bubbly, fed sourdough starter (¾ cup + 1 tablespoon)
- 15 ounces bread flour (3 cups)
- 9 ounces room temperature water (1 cup + 2 tablespoons)
- 1 teaspoon granulated sugar
- 1½ teaspoons salt
Save This Recipe
You'll join my email list which you will love. And if you don't, unsubscribe in one click. ❤️
Instructions
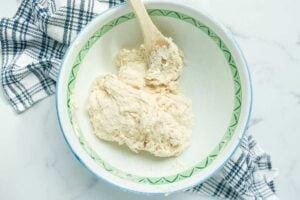
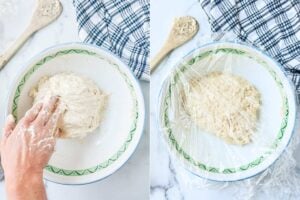
- Mix and autolyze. Combine all ingredients except the salt in a large mixing bowl. Then, stir with a spoon or spatula to create a sticky dough. Cover with a damp tea towel or plastic wrap and rest for 30-60 minutes. (Autolyze: This rest period allows the flour to hydrate and begin developing gluten fully.)
- Knead in the salt. After the resting period, measure and add the salt to the dough. Gently knead on the counter (or in the bowl) until the salt is mixed in. Put the dough in a clean, lightly greased bowl. Cover and let it rest at warm room temperature (80-90 degrees) for 1 hour.

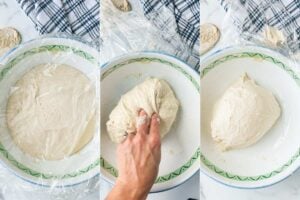
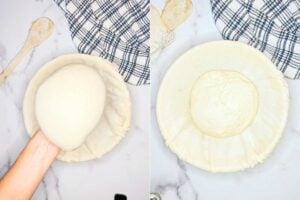
- Stretch and fold. After letting the dough rest for an hour, gently stretch and fold it, either in the bowl or on the counter. Then, shape the dough into a round ball again, cover it, and let it rest for another hour. Repeat this process two more times, with an hour between each fold. Finally, cover the bowl and let the dough rest for a final hour at warm room temperature.
- Cool proof. Your dough should now have risen a bit, but it might not have doubled in size. It's time for the second proof, which means letting it rise in the fridge overnight. Sprinkle flour (especially rice flour) generously in a banneton or a bowl lined with a tea towel, and put the dough in it. Cover it tightly with plastic wrap and place it in the fridge for 12-18 hours.
- Dutch oven technique for steam. The next part of the recipe that helps the wet dough's tendency to flatten out is steam. A Dutch oven is perfect for this as it traps the steam created by the bread as it bakes. If you don't have a Dutch oven, you can preheat a baking sheet in your oven and pour water on it to create steam.And finally, a secret ingredient called diastatic malt powder helps the dough spring up even more in the oven. It also helps brown the crust.
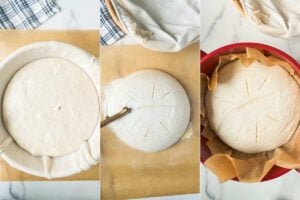
- Slash. Remember to preheat your oven to 425 degrees in the morning. You can either heat up a Dutch oven or use it cold. Sprinkle some parchment paper with cornmeal, then put your dough in the middle. Carefully remove the basket or bowl. You should have a round loaf with the bottom coated in cornmeal on the parchment. Sprinkle with flour again and make a few cuts with a sharp knife. Put the parchment sheet into a Dutch oven, whether it's hot or cold, and cover it with the lid.
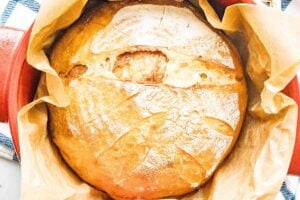
- Bake. Bake with the lid on for 30 minutes, then remove the lid and bake for 20 minutes more.
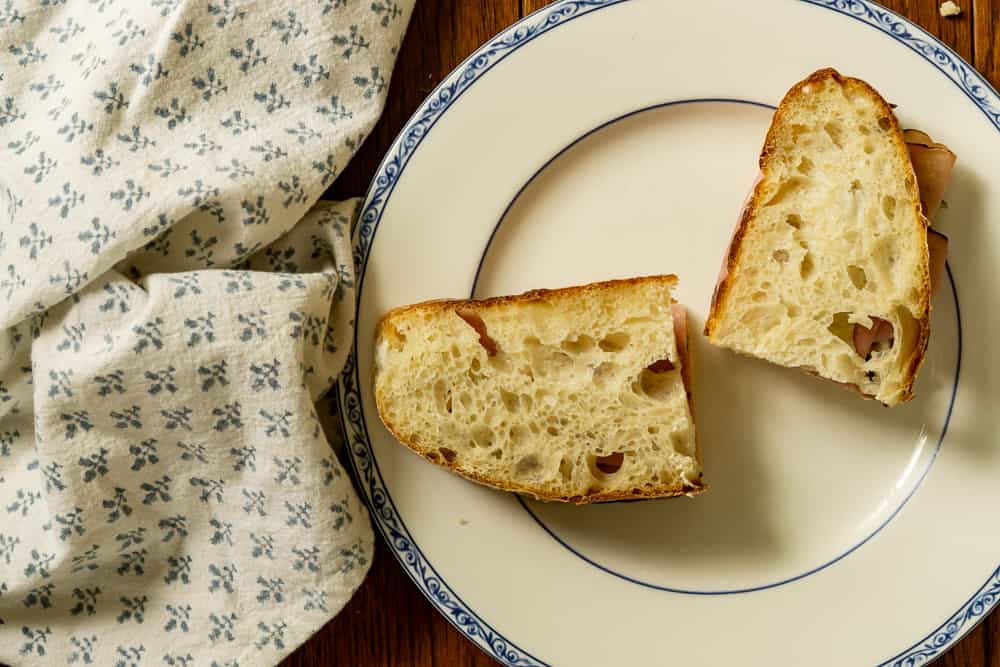
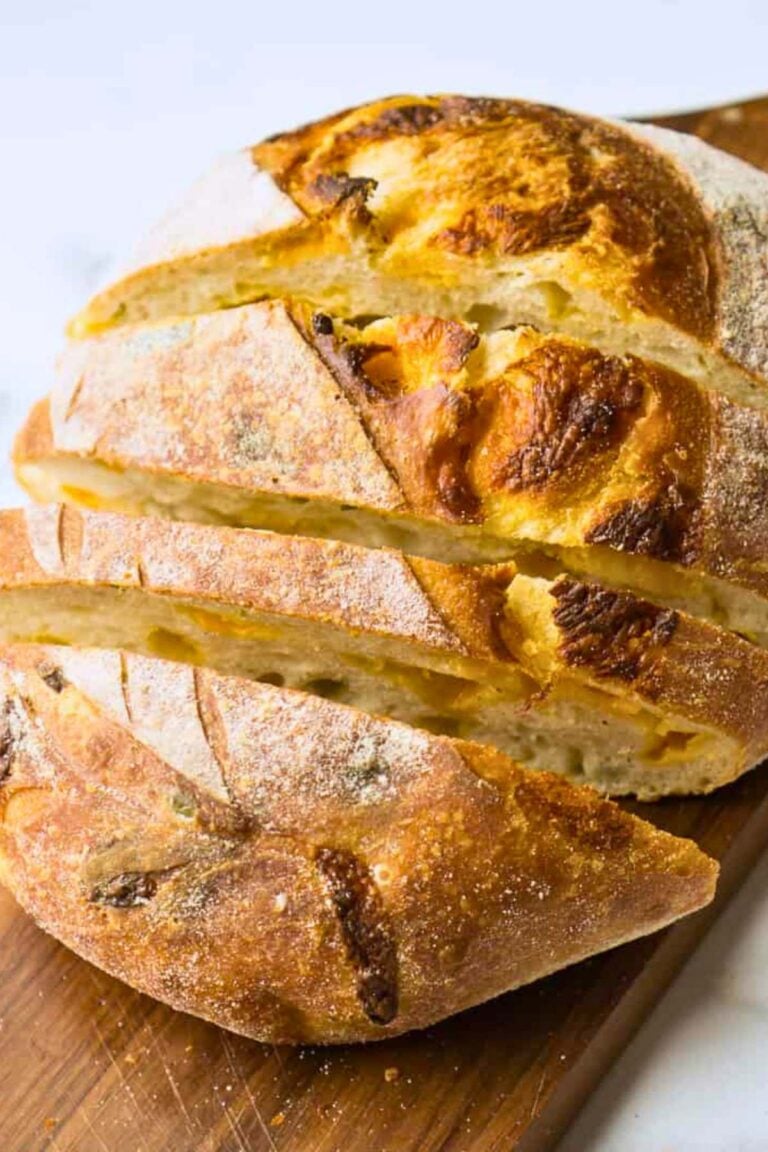
- Cool. Take the bread out of the Dutch oven and remove the parchment. Let it cool for at least 3 hours before cutting.

Video
Notes
Nutrition
If you’re new to baking bread, it’s best to start with an easier recipe before moving on to sourdough. This recipe needs a mature starter at least a few months old.
Make sure it’s well-fed and bubbly before you begin. I usually feed mine the night before I want to make this bread and again first thing in the morning.

By the way, this takes a long time. It’s so long that there’s a schedule for it.
Day One
5 AM: Wake up and feed the starter.
9 AM: Autolyse (mix everything except salt in a bowl and let it sit for 30 minutes.)
9:30 AM: Knead in salt.
10:30 AM: First fold.
11:30 AM: Second fold.
12:30 PM: Third fold.
1 PM: Shape the loaf, place it in Banneton, and put it in the fridge.
Day Two
9 AM: Preheat oven and remove dough from the fridge.
10 AM: Place dough in Dutch oven and bake.
11 AM: Remove from oven and allow to cool.
5 PM: Serve with dinner.
More Tips:
Using a scale to measure ingredients provides accuracy, especially for the flour and water. This helps you achieve the correct dough consistency every time.
The temperature of your room can impact how your dough rises. If your home is cooler, it may take longer for the dough to proof. An oven with the light on (but no heat) can serve as a warm spot.
When preparing the banneton or bowl for the cold-proof, make sure to use enough flour to prevent sticking and make it easier to transfer the dough to the Dutch oven.
Using a sharp knife or lame, make a clean, quick cut on the dough to allow the bread to expand properly in the oven and give it that beautiful artisan look.
Key Ingredients and Tools
Sourdough starter. You’ll need a bubbly, fed sourdough starter to give the bread its tangy flavor and airy texture.
Banneton. A proofing basket, or a banneton, helps the dough maintain its shape during the final rise. Use a bowl lined with a heavily floured tea towel if you don’t have one.
Lame or sharp knife. You’ll also need a sharp knife or a lame to score the dough before baking, allowing the bread to expand properly and giving it an artisan appearance.
Dutch oven. A Dutch oven is essential for creating the perfect baking environment with steam, producing a crisp crust. If you don’t have a Dutch oven, can you preheat a metal rimmed baking sheet and pour water in, which creates the same steamy atmosphere in your oven.

I firmly believe that everyone has their own way of making sourdough bread. Although there is nothing like a good recipe that can be followed exactly, for some reason sourdough bread is different. It is probably something to do with the fact that everyone’s starter is a little bit different, and that technique is so important.
I’m sharing my method and recipe as a starting point for you, in the hopes that you will eventually tweak it and make it your own. I guess that’s why it is called “artisan” not “scienceisan.” It’s more about art than science.
With a bit of patience and following these easy steps, you can have fresh, homemade bread whenever you want. Just take it slow and follow each step carefully for the best results.


I have made this recipe many times. It’s great. Today I find myself in a time crunch and I’m wondering how it is going to affect the bread if I do not do all the stretches?
Making your recipe today. In your video you say 13 ounces of bread flour but your recipe says 15 ounces of bread flour. Does it make a difference if use 13 ounces or 15 ounces?
Hey Diane, I used to make this with 13 oz of flour. Now I do 15. I find it slightly less wet, easier to handle, and I get more consistently good results so I do 15 now. 13 will absolutely work, though 🙂
Thanks for the recipe. You mention diastatic malt powder but I don’t see instructions on how to incorporate it?
hey Christy, I don’t actually use it much any more. but you’d just substitute for the sugar and add it then.
hi, ive looked several times and i cant see the ingredients and how to make this sourdough bread that uses diastatic malt, could you send it to my email please
thanks for giving it out, ive been wanting to use this bag of diastatic malt i sent for, linda
linda it’s just like this one but substitute diastatic malt for the sugar 🙂
Wonderful recipe! I’ve tried several others found on the web, and yours by far gave me the best results. You’ve got a great way of explaining the steps, and easy to follow. Thank you so much!
Thank you for this amazing recipe and most importantly the instructions. I have been making loaves for about 2 months and this is the first time it’s come out like it should. I’m so proud and excited to try more of your recipes.
hi maggie!! i am so happy you finally found success! I hope you love all my recipes and good luck! if you’re looking for something more hands off, try the stand mixer sourdough next! 🙂
Can you double or triple the recipe to make numerous loaves at a time?
Yes that will work fine! Just keep in mind you’ll need to have a lot of starter ready at once. It can do thhe first rise all together, then divide and shape.
After trying many pandemic recipes for Artisan Sourdough I settled on your version with the printed ingredient amounts of 7 oz starter, 9 oz water and 15 oz bread flour. Many many loaves later I watched the video to see how it explained stretch and fold (trying to teach DH remotely!) for the recipe. Surprisingly it has differing amounts of water and flour that makes a much wetter dough. Which do you recommend?
I recommend the one you are using! I changed it to become less wet. I find the wetter dough has big holes but is flatter overall, sort of hit or miss, and not worth the trouble. 🙂
I have this recipe hanging on my fridge because I make it that often. I just noticed that it only has 2 votes, but this bread deserves some more ratings. It’s a staple at our house. I’m currently a mother of 2 kids under the age of 2. That hardly leaves me time to do too much, let alone bake sourdough. Finding a recipe that truly is easy while also appearing as if I broke my back in the kitchen to make this BEAUTIFUL loaf is exactly what this recipe is. It’s near effortless and yields quite a stunning loaf. I’ve looked at other recipes, but always come back to Heart’s Content because I can’t seem to find a recipe that doesn’t require so many steps and scheduling. My mom brain doesn’t really put sourdough as a priority. One day, I’d love to delve into more challenging recipes, but this one fits perfectly into my current lifestyle.
Hi Sydney! Thank you so much for the nice comment. :). I’m glad you’re enjoying the recipe and that it’s making your sourdough life easier. Keep baking!
Do you heat the Dutch Oven as the oven is preheating or put the dough into a cold Dutch Oven?
you can do either. I have a found a better rise when I preheat the dutch oven, but it’s not necessary.
Some people heat them I don’t.
I’ve been trying my hand at sourdough since the start of pandemic….reading recipes….looking for something I like but not too complicated. I made this recipe and it was the BEST loaf I’ve made yet! I was so pleased with it…it was beautiful on the outside and the inside, and raised wonderfully! I’m so excited. It was VERY crusty, and was a bit of a chore to cut, but I stood it on end, and I have a good knife! Thanks so much. I also use your pizza recipe and am addicted!
hi Yvonne! thank you so much. this is one of my favorite recipes 🙂
Thank you for this recipe! It’s the best one I’ve found looking anywhere on the internet, even bread books (although I only have one or two that I’ve referenced, but whatever, I need look no further).
I’m able to make really great sourdough loafs (big holes, great flavor) as a beginner without a whole lot of maintenance. I also love how it fits into a working schedule.
Will continue to use this as long as I’m working from home during SIP 🙂
Thanks a bunch!
Meg I’m so happy you let me know it’s working for you! Hope you keep baking whatever life brings. ????
What size is the dutch oven that you use for this?
Thank you!
mine is 4.2 quarts 🙂
Where can I get the sourdough starter recipe. I want badly to try your recipes! Thank You~
Hi sue I actually bought my starter from King Arthur flour. It comes in a small jar and is ready to use in a few days. If you want to make your own, they have a nice tutorial on their website as well!
I did sourdough for a while, and then it began to feel like another child that had to be fed and tended to. We went out of town and of course it died. My son is interested in learning, and has given it a try with sad results. I will show him your instructions and see if he wants to give it a go!
Your loaf is so incredibly gorgeous! It’s a work of art!!
????
Your photos are amazing! Great post! My sourdough died. I’m not giving up! This artisan sourdough is my goal!
Never give up Angela! P.s. don be afraid to just buy one from King Arthur flour… it is awesome!