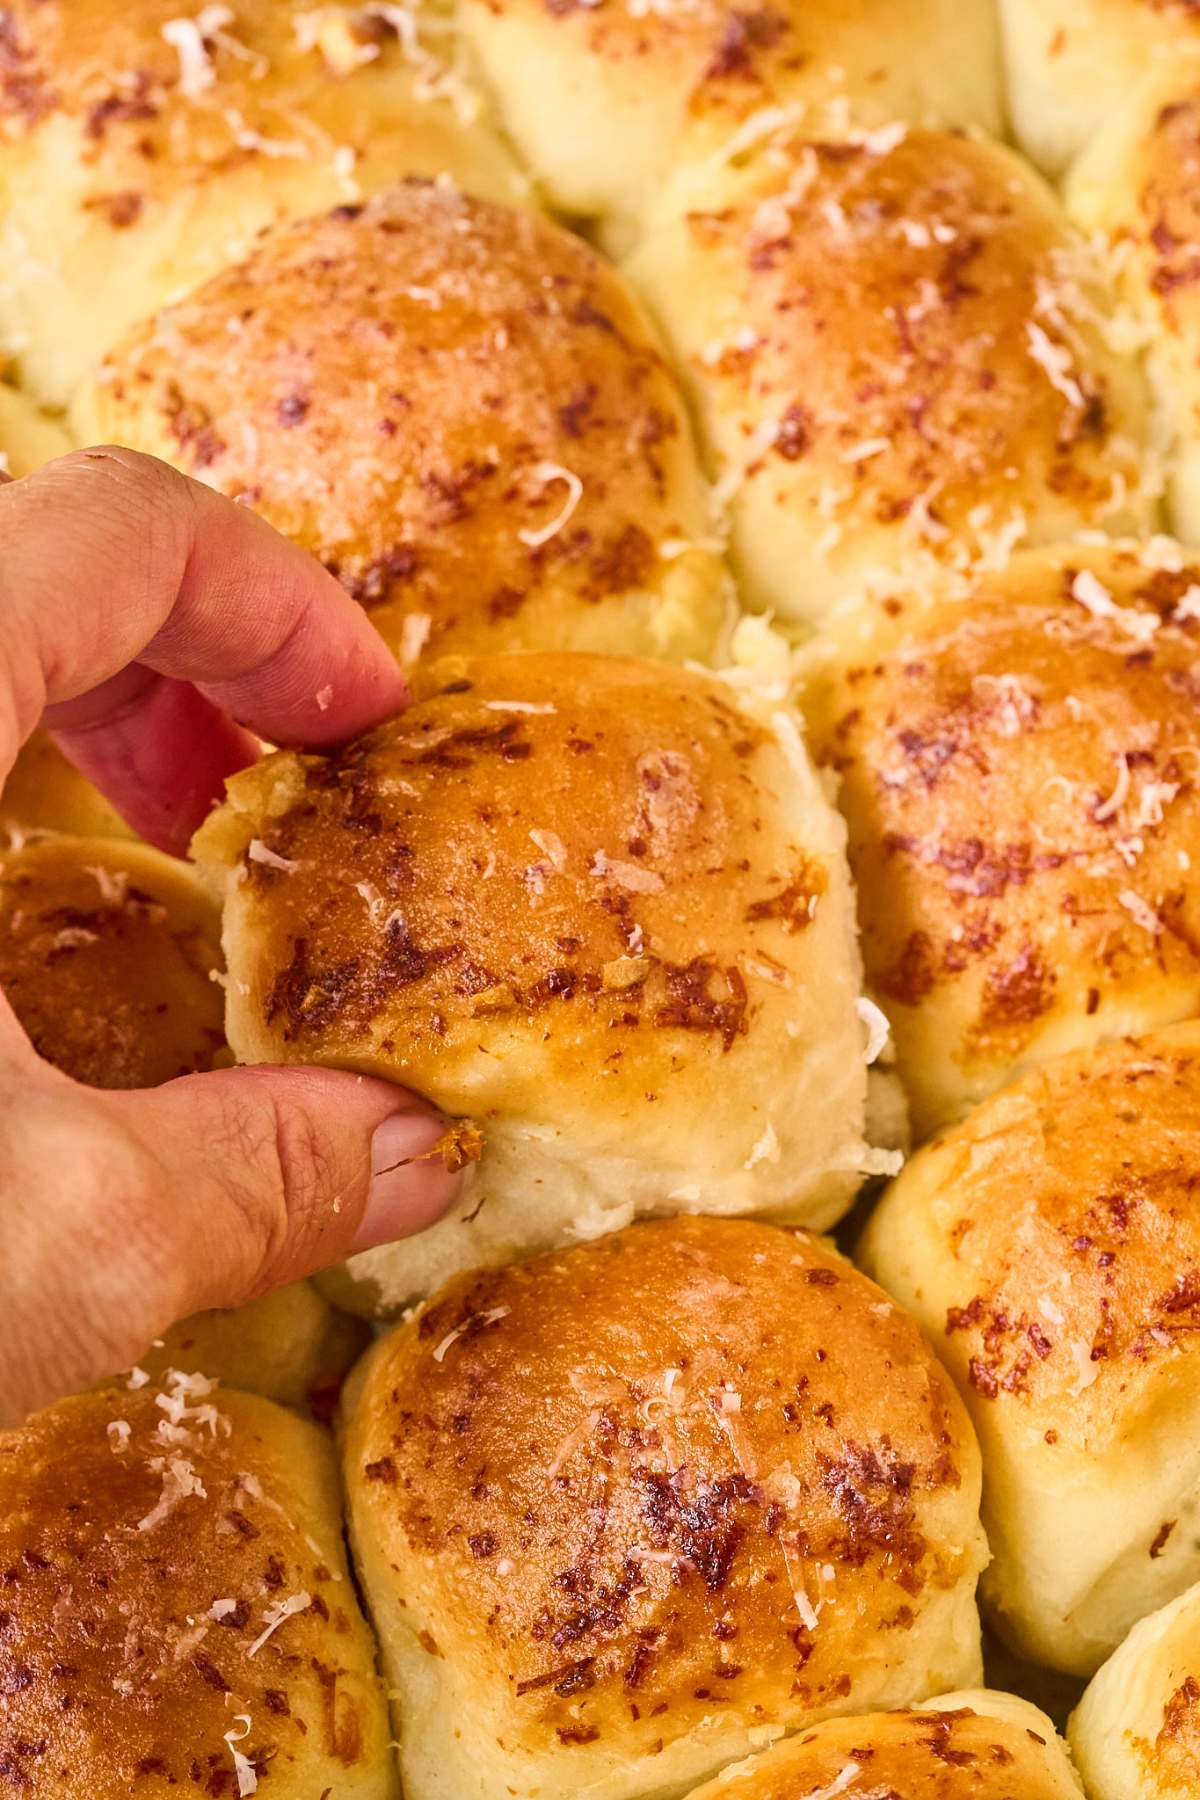
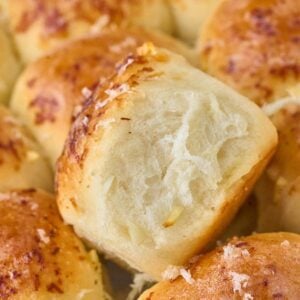
These rolls are more than just a flavorful topping… the base roll recipe is one of the best out there. It might seem like a lot of butter and sugar, but they don’t taste sweet, just soft and impossibly fluffy. The powdered milk helps them rise as high as possible. I always knead and rise the dough in my bread machine then remove it to shape and do the final rise.
If you have family members who don’t like garlic, you could leave one pan of the rolls without the garlic and just brush them with plain butter before baking. They have plenty of flavor to stand on their own as a plain roll.
Table of Contents
Ingredients and Tools You’ll Need
If you don’t have powdered milk, you can substitute 2 tablespoons of regular milk and reduce the water by 2 tablespoons. The powdered milk adds extra softness, though, and I recommend. having some on hand. It’s in the baking aisle usually near the cornstarch and it’s super cheap.
You can double or triple this recipe if you have a strong mixer and a lot of pans. Use the 2x or 3x button on the recipe card at the bottom of the post.
Get Access to
All my Free planners, Printables, binders and more
Get a copy of this frugal recipe binder with lots of crockpot favorites, pasta dishes, casseroles, and more inside the subscriber library. Plus SO much more.

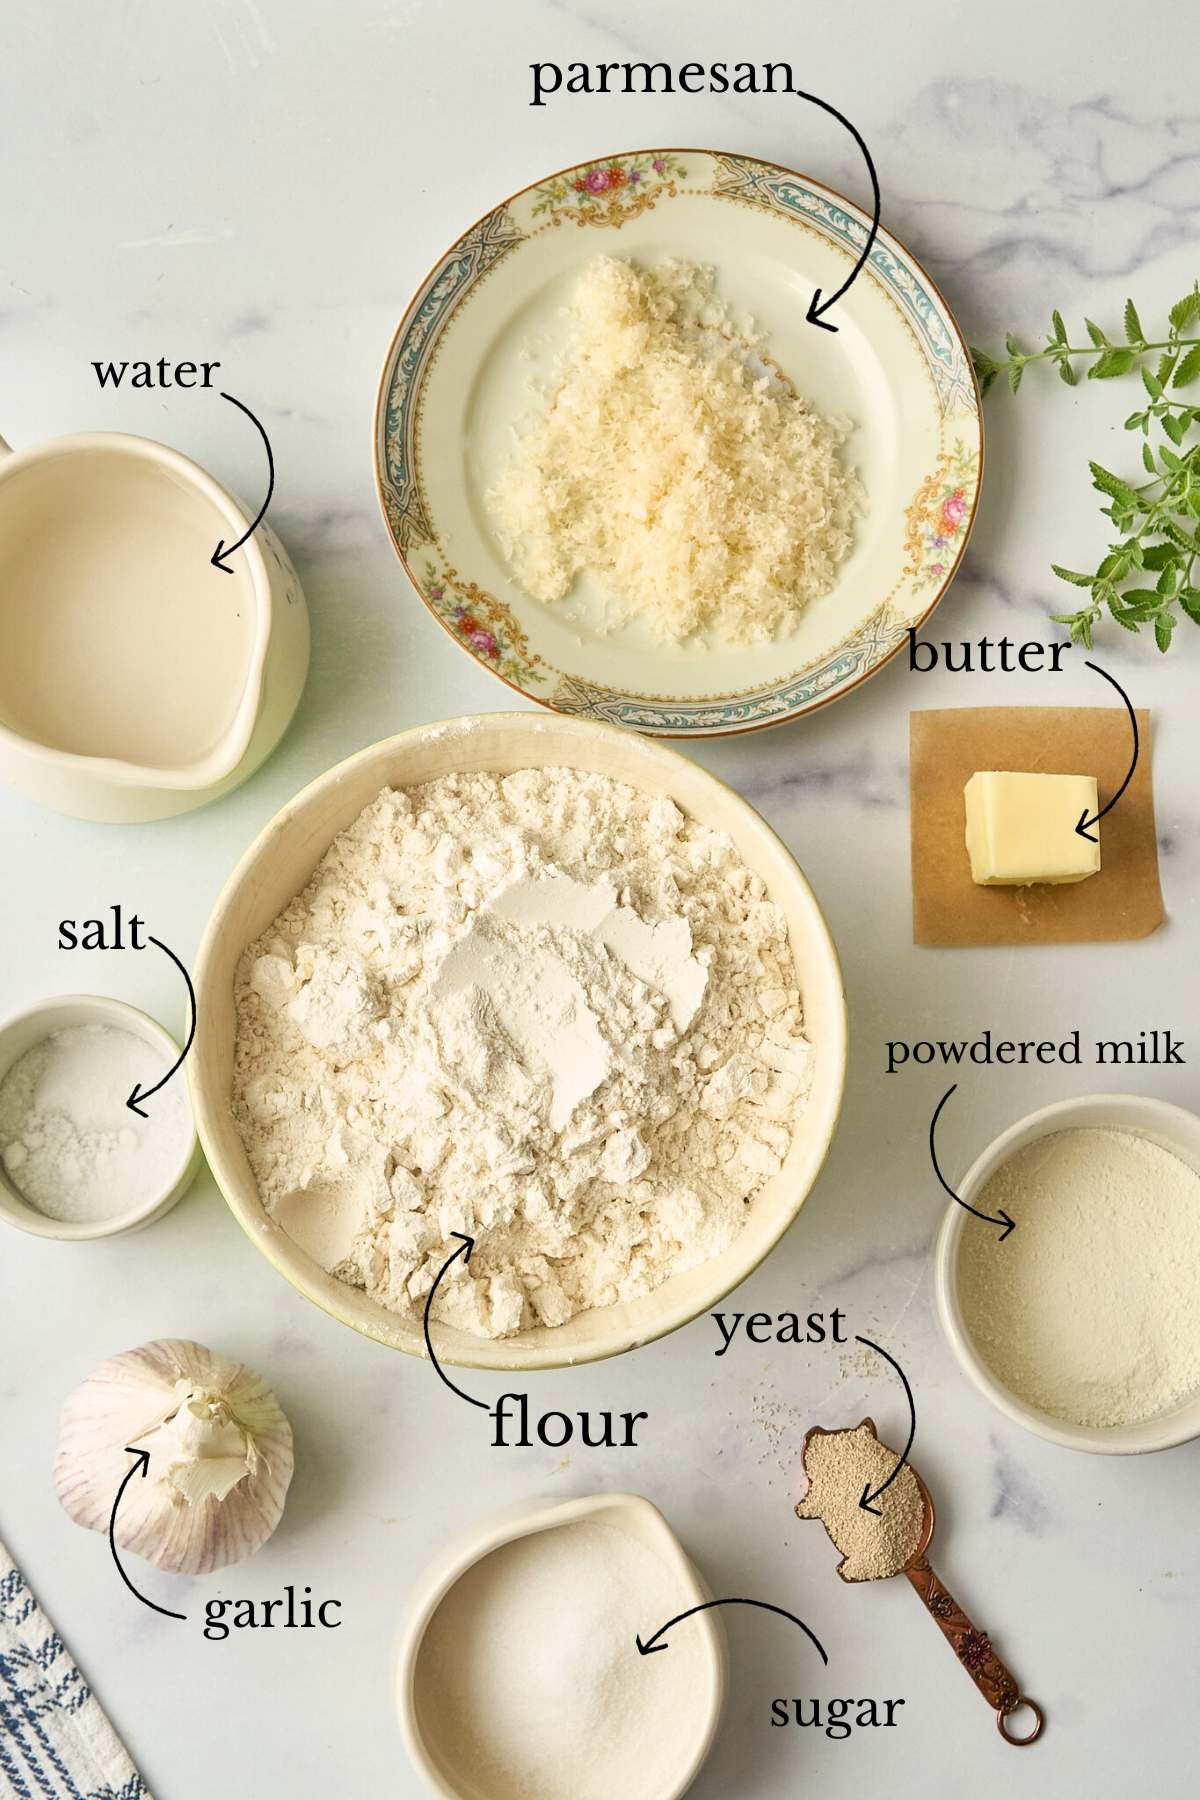
- Dough:
- 1 cup water
- 1 ½ teaspoons salt
- 1 ½ tablespoons softened butter
- 3 tablespoons sugar
- 3 cups all purpose flour
- 2 tablespoons powdered milk
- 1 ½ teaspoons instant yeast (SAF brand is my favorite. If all you have is regular active dry that works too, and no, you don’t need to activate it first.)
Topping
- 4 tablespoons melted butter
- 1 crushed garlic clove
- 3 tablespoons grated parmesan cheese
Instructions
The method here is the same as any other yeast bread: mix, knead, rise, shape, rise, bake.
Making the Dough
Dump all your dough ingredients into a bowl or bread machine bucket and mix until everything comes together.
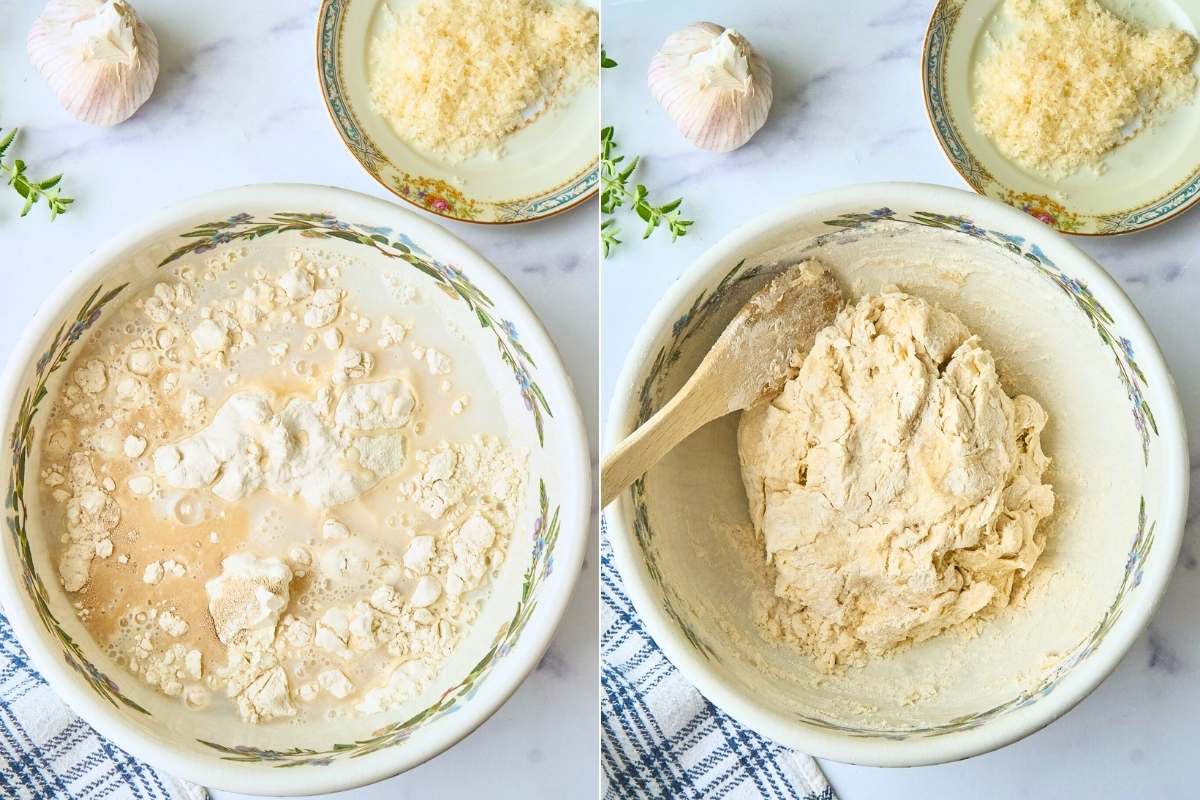
After everything is mixed, take a look at your dough. It should feel slightly sticky but not wet enough to stick to your hands. If it’s too wet, add flour one tablespoon at a time. Too dry? Add water the same way.
Kneading
Now comes the fun part! Knead for 8-10 minutes until the dough is smooth and elastic.
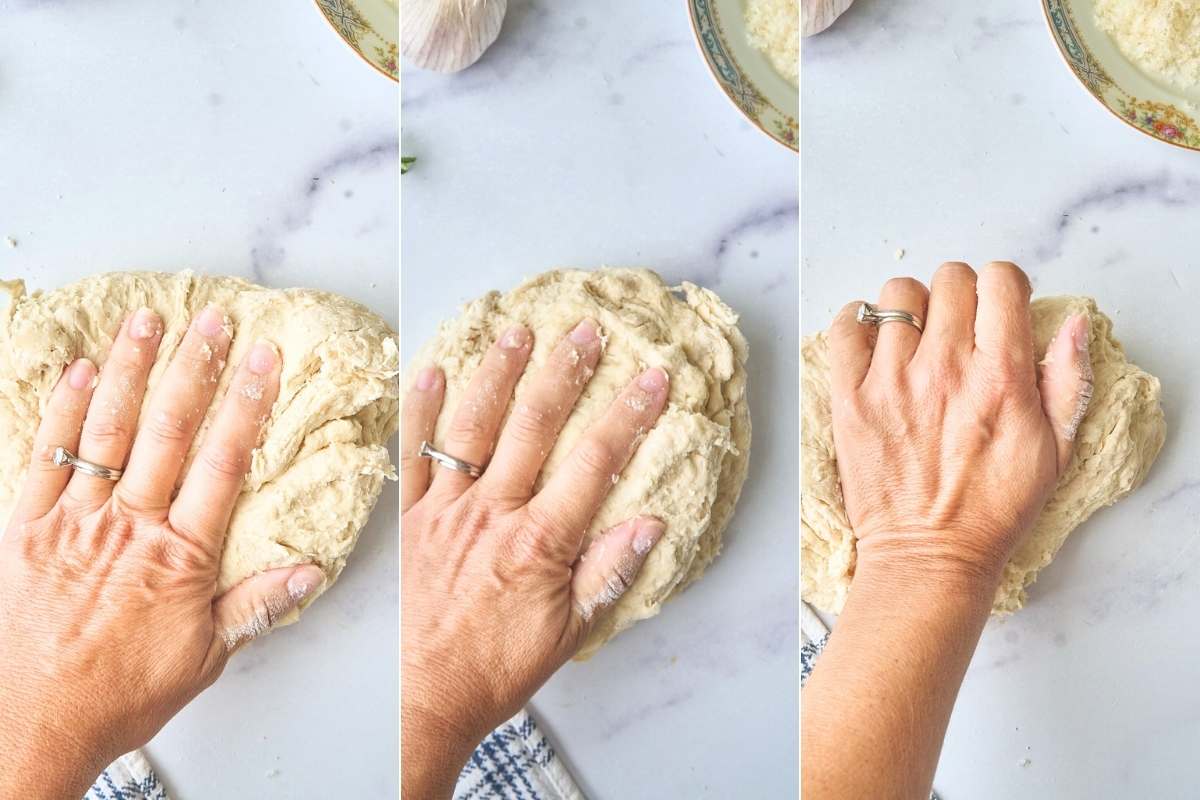
The best way to know if you’re kneaded enough is the windowpane test.Take a small piece of dough and gently stretch it between your fingers. If you can stretch it thin enough to see through without it tearing, you’re done kneading.
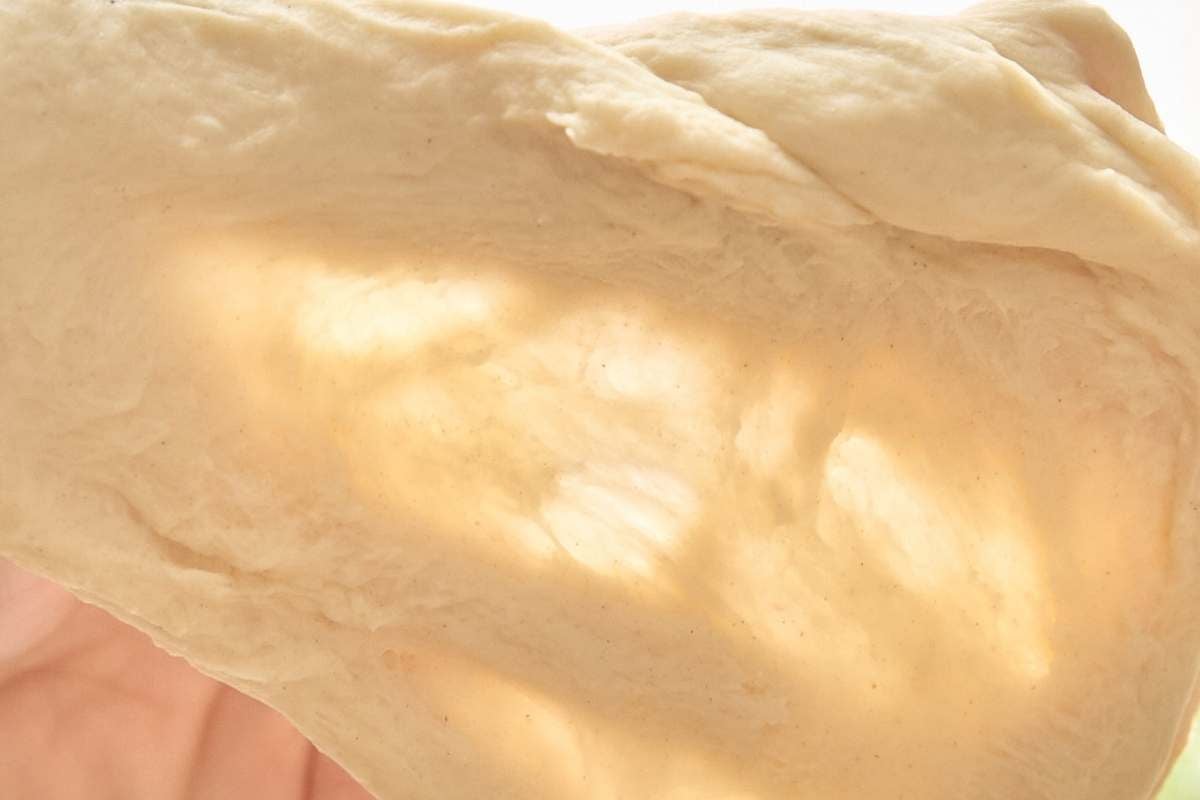
If it breaks easily, keep going for a few more minutes. This takes all the guesswork out of knowing when your dough is ready.
First Rise
Cover your dough and let it rise somewhere warm for about 60 minutes until it doubles in size.
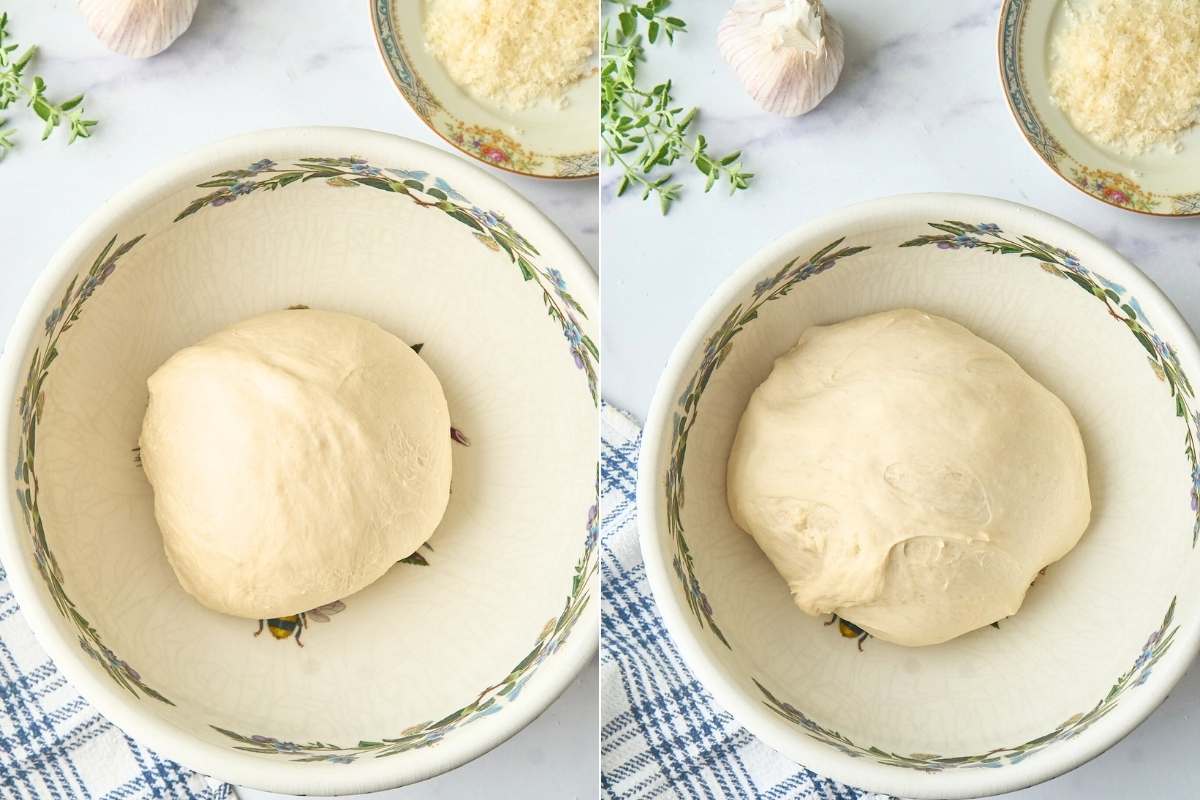
Cold kitchen? Turn your oven on for just a minute, then turn it off. It’s the perfect rising spot.
Shaping the Rolls
Turn the dough out and divide it into 24 pieces. Here’s my trick: cut the dough in half, then cut each half in half again until you have 8. Then divide those 8 into 3. Are you with me? Half to quarters to eighths, then each those cut in 3.
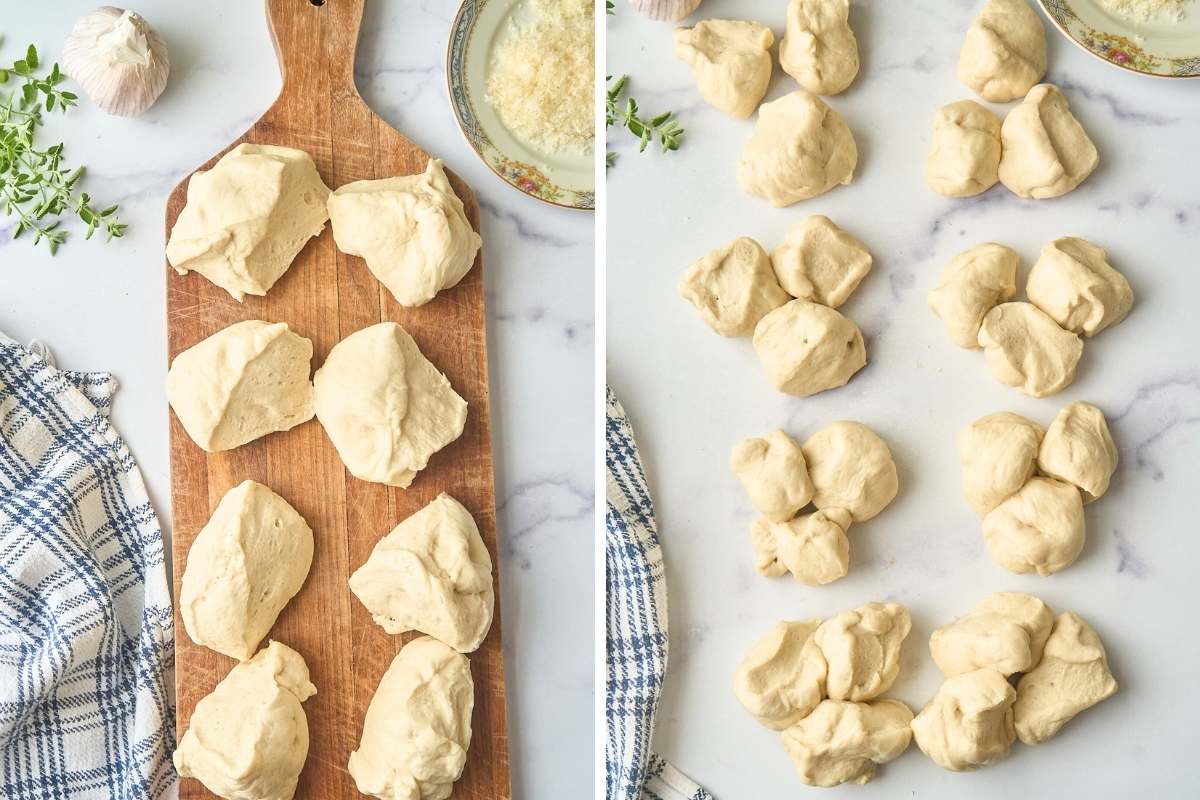
To shape each roll, pull the edges down and under, then pinch the bottom. This creates that smooth, round top that looks so professional. Don’t overthink it.
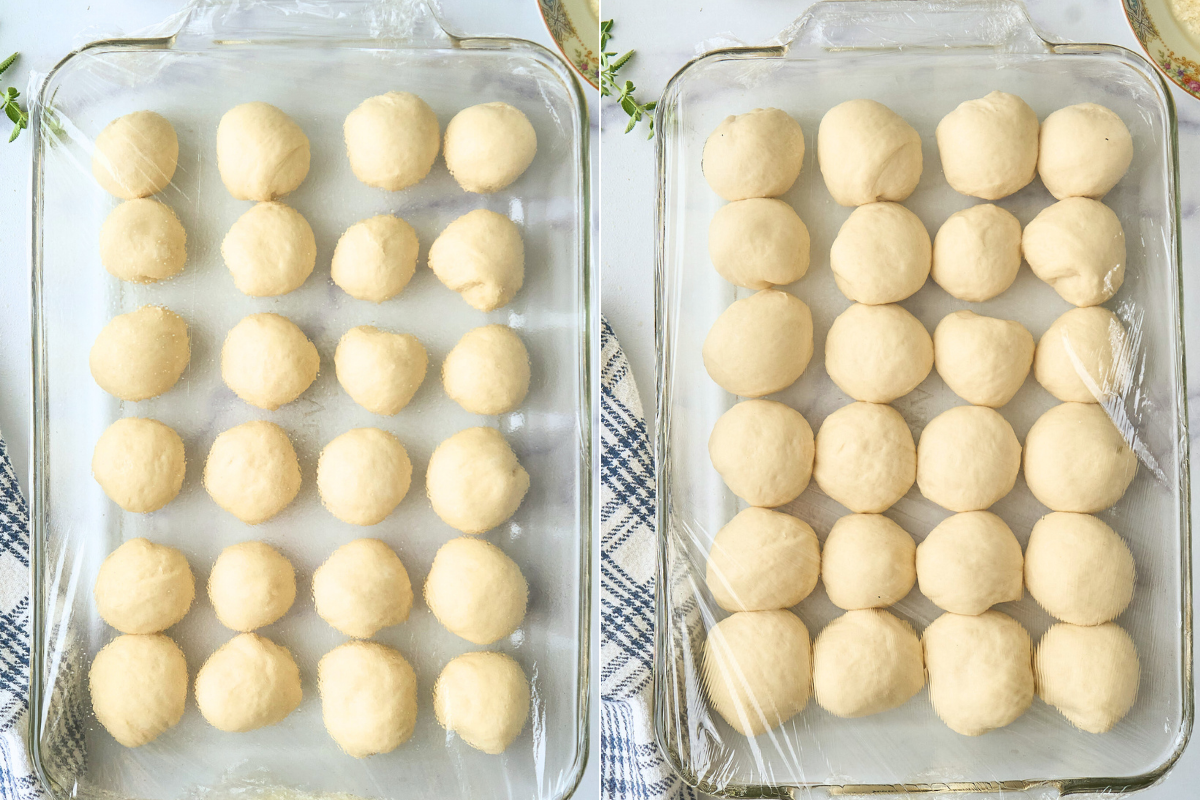
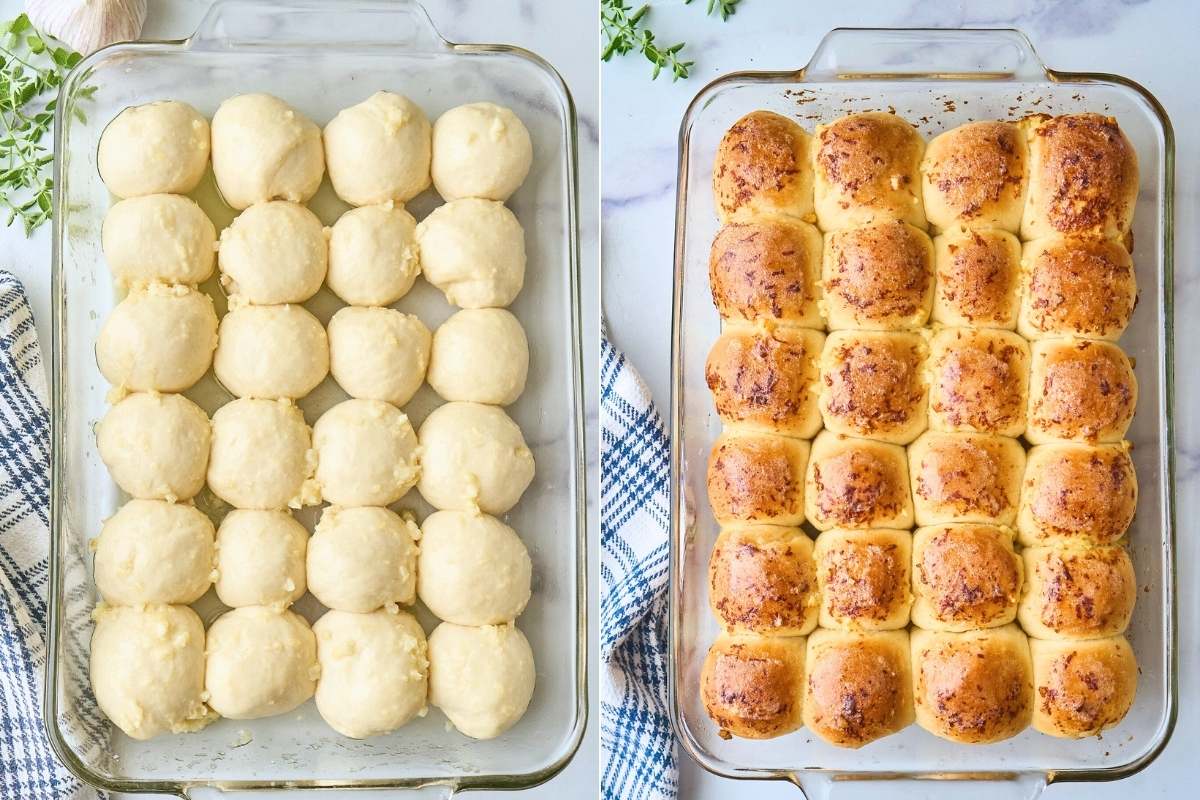
Arrange them in two pie plates (12 each) or in a 4×6 grid in a 13×9 pan. They should be touching but not squished.
Second Rise
Cover with greased plastic wrap (trust me on the grease – you don’t want it sticking) and let them puff up for about 45 minutes. They won’t quite double this time, but they’ll get noticeably puffy and should. just about touch.
Start preheating your oven to 375°F about 10 minutes before they’re done rising.
The Topping
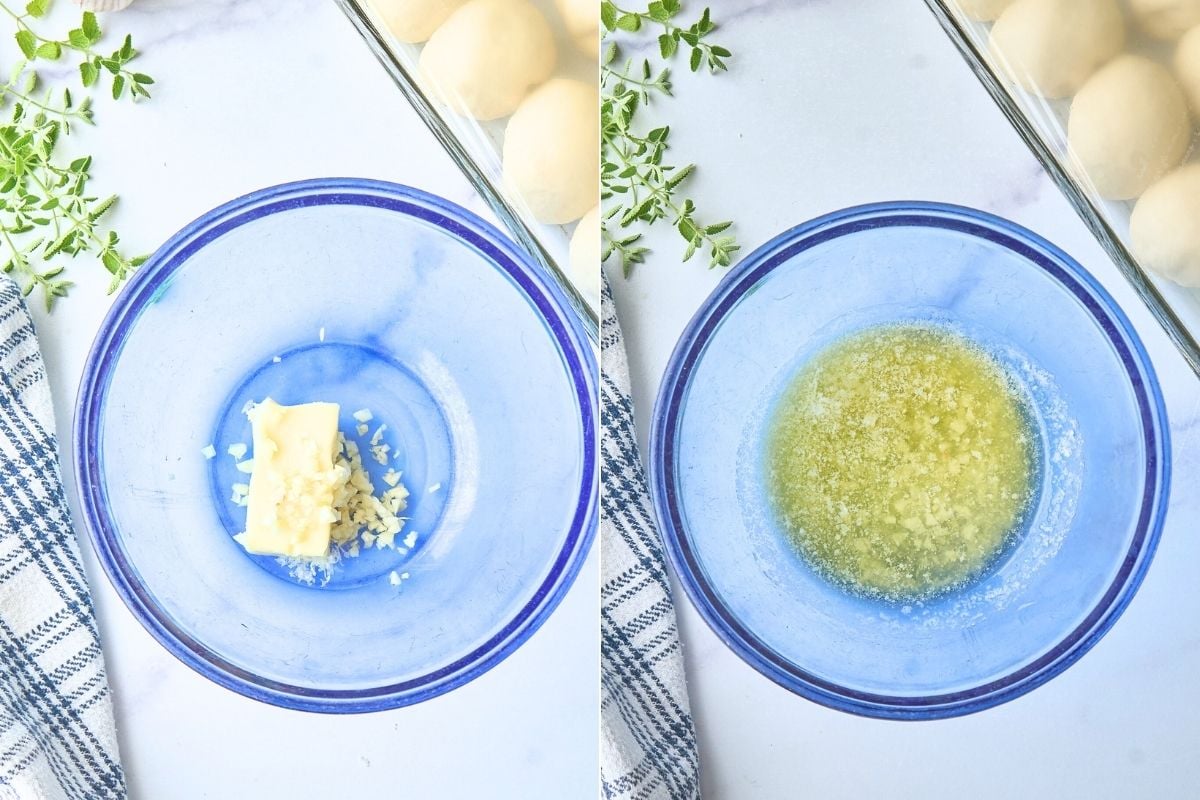
Mix your melted butter, crushed garlic, and parmesan in a small bowl.
Use a soft pastry brush to gently brush this over the tops.
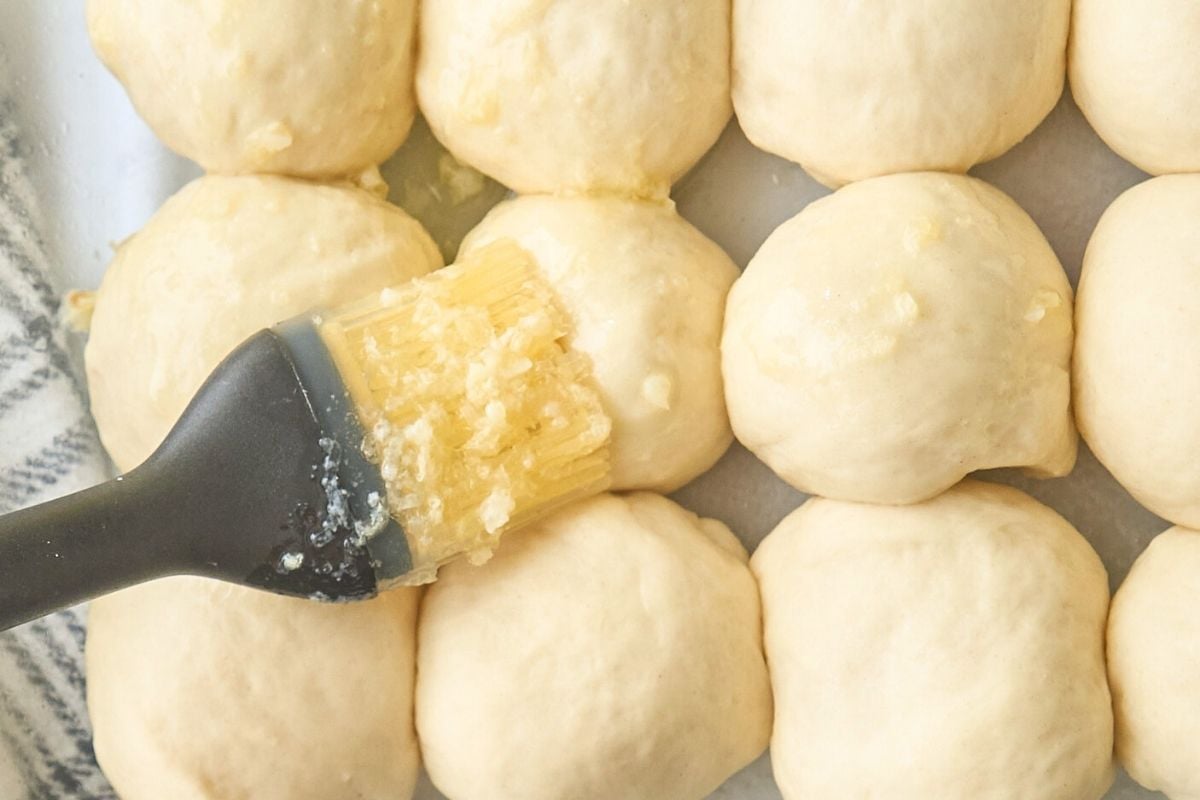
Don’t press down or you’ll deflate all that beautiful rise.
Baking
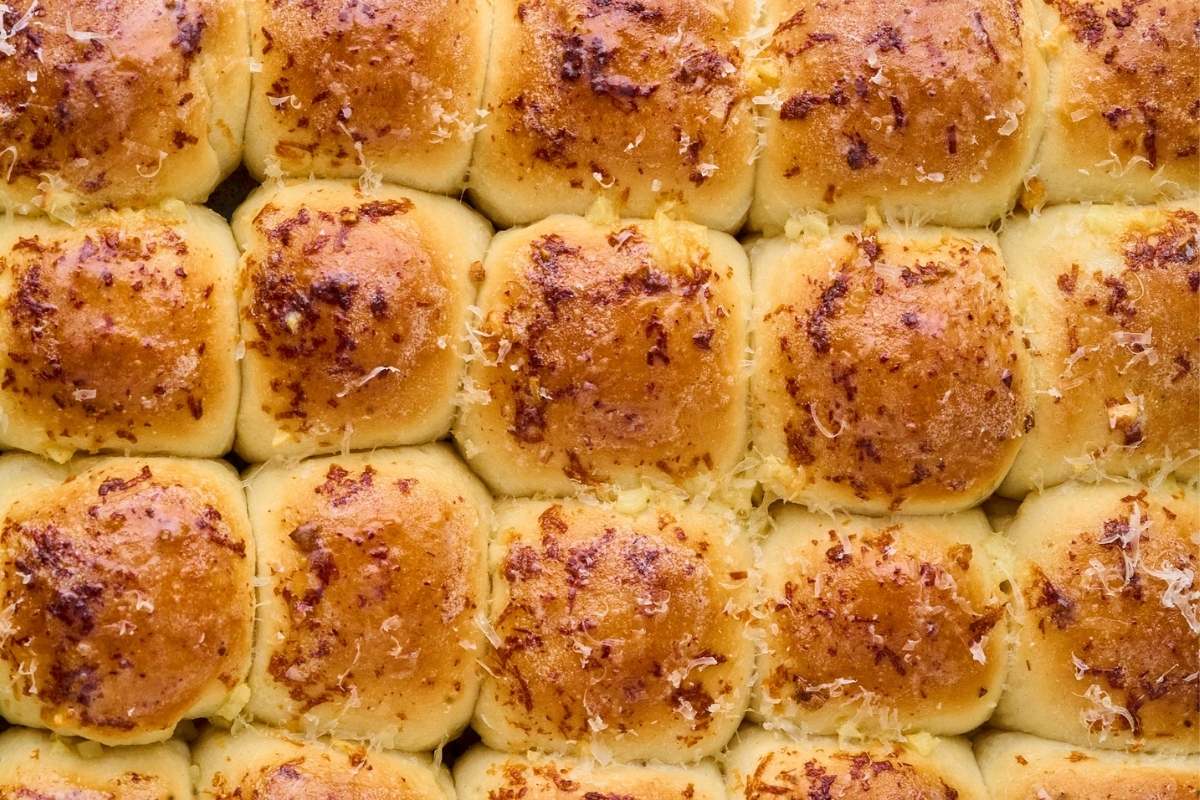
Pop them in the oven: 16-19 minutes for pie plates, 25 minutes for the 13×9 pan. You want them golden brown on top. If you’re not sure, they should sound hollow when you tap them, or hit about 190°F with a thermometer. If you want extra shine (and who doesn’t?), brush with a little extra melted butter right when you take them out.
The smell alone will have everyone hovering around your kitchen.
Storage Instructions
Once they’re at room temperature, toss them in a plastic bag or airtight container and keep them on your counter. They’ll stay soft for a couple days.

You can also freeze them and defrost individually for 1 minute on defrost.
Simple Variations
The base recipe is solid enough to handle pretty much anything you throw at it.
- Skip the garlic if you’ve got picky eaters – just brush with plain melted butter and parmesan. Still amazing.
- Italian herb rolls: Mix a teaspoon of Italian seasoning into your melted butter instead of garlic. Smells incredible.
- Cheesy rolls: Add a handful of shredded mozzarella or cheddar right into the dough when you’re mixing.
- Herb butter: Mix fresh chopped rosemary, thyme, or parsley into your melted butter.
Even More Dinner Rolls
I love all bread baking but dinner rolls are the best because they’re foolproof and you can eat your leftovers as a sandwich. Here are some of our favorites at the farmhouse:
- A bread machine makes the best soft dough for these bread machine dinner rolls.
- Potato flakes help you make beautiful potato rolls.
- For special occasions I love these old-fashioned yeast rolls.
- And for you sourdough bakers you’ll love these extra soft and fluffy sourdough rolls.
Questions and Troubleshooting
Yep! Make it through the first rise, then stick it in the fridge overnight. Let it come to room temperature before shaping and continue from there.
Under-risen or under-kneaded 99% of the time. Very rarely, your yeast might be bad.
A spoon works fine…. just drizzle it on gently. The key is not pressing down and deflating the rolls.
Printable Recipe
Garlic Parmesan Dinner Rolls
Ingredients
Dough:
- 1 cup water
- 1 ½ teaspoons salt
- 1 ½ tablespoons softened butter
- 3 tablespoons sugar
- 3 cups all purpose flour
- 2 tablespoons powdered milk
- 1 ½ teaspoons instant yeast
Topping:
- 4 tablespoons melted butter
- 1 crushed garlic clove
- 3 tablespoons grated parmesan cheese
- extra melted butter to brush on top of baked rolls for shine
Save This Recipe
You'll join my email list which you will love. And if you don't, unsubscribe in one click. ❤️
Instructions
- Mix the dough. Combine all dough ingredients in a bowl or bread machine bucket and mix until well combined. There is no need to proof the yeast first; simply combine everything. After a few minutes of mixing, evaluate the consistency of the dough and add more flour or water, a tablespoon at a time, if needed.
- Knead. Knead the dough by hand, stand mixer, or bread machine for 8-10 minutes until it is smooth, elastic, and stretchy.
- First rise. Cover the dough and let it rise in a warm place for 60 minutes until doubled in bulk. If your kitchen is cool, briefly turn on your oven, then turn it off to create a warm rising environment.
- Divide and shape. Turn the dough out of the bowl or bread machine and divide it into 24 equal pieces. Shape each piece into a round roll by pinching the bottom to smooth out the top. Arrange in a 13×9 pan in a grid of 4 x 6 or around two round pie plates.
- Second rise. Cover with greased plastic wrap and allow to rise until puffy, about 45 minutes. Preheat the oven to 375°F with the rack in the center toward the end of the rising time.
- Make the topping. Combine melted butter, grated parmesan, and crushed garlic clove. Gently brush the mixture on top of the rolls.
- Bake. Bake until golden brown (about 16-19 minutes for pie plates and 25 for 13 x 9). Remove and place the whole dish on a cooling rack. Serve directly from the pan or transfer to a serving dish.
Video
Notes
Nutrition


It went great and they were very good. We’ll be making them a lot. I was in a hurry so I especially loved the part where you let them finish rising in the oven as it preheats.
hi Sarah! thanks for doing back to let me know. We love these 🙂