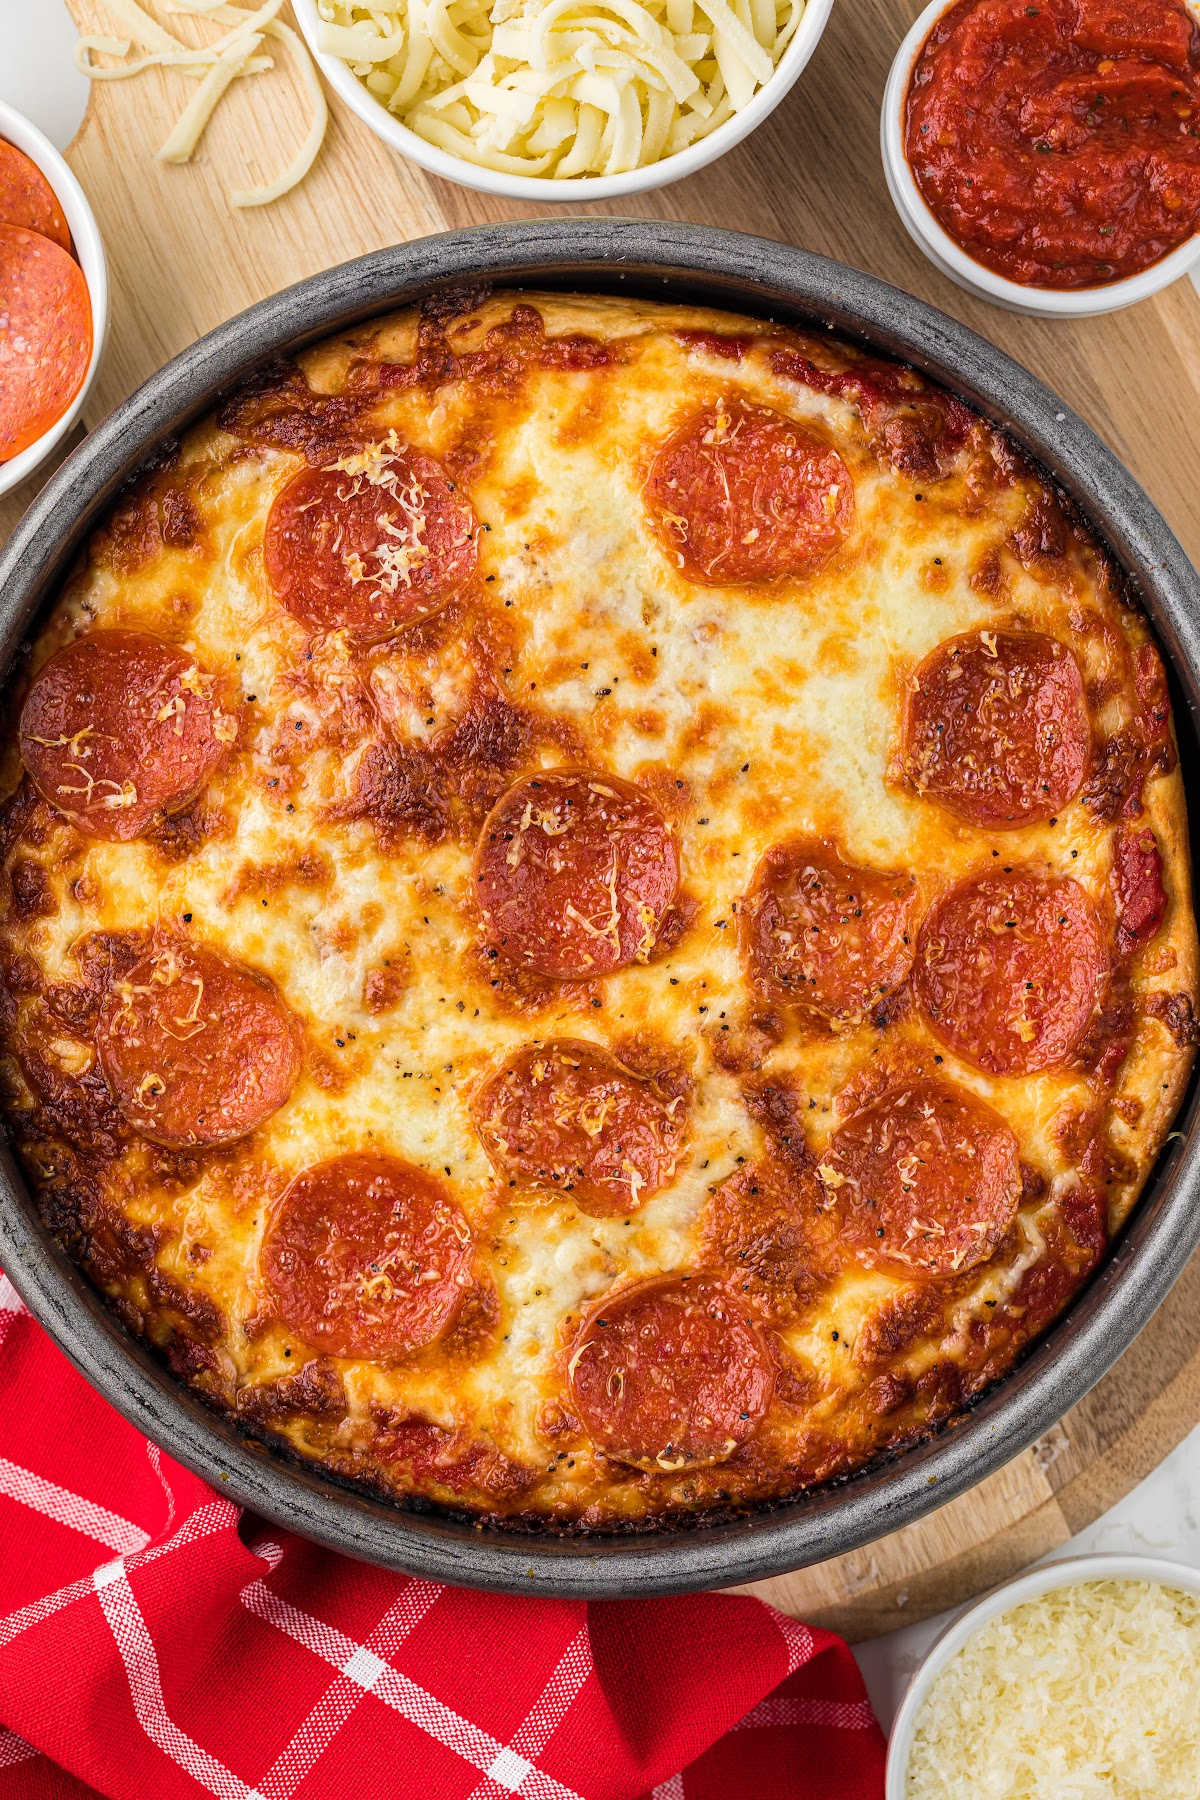
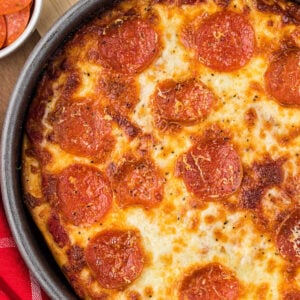
Deep Dish Pizza With Golden Crispy Edges
Reading through this recipe is fairly overwhelming, but I promise you making it is not. We’re just doing a little bit of kneading and stirring and assembling here and there, and at the end you’ll have an amazing pizza that over the course of your life is going to save you tons of money. Let’s do this.
Just remember, you need to give your dough enough time to rise twice! This will make your crust light and airy, but still crisp up.
Table of Contents
Ingredients and Tools You’ll Need
Bread flour will give you the best crust, but if all you have is all-purpose that’s fine. Just a little less water (like a tablespoon or two less). If you don’t have instant dry milk powder, you can leave it out or replace the 1 cup of water with milk. Don’t worry about proofing the yeast first. You don’t have to.

A stand mixer makes mixing and kneading so much easier, but you can still make this by hand. Mix the ingredients by hand with a sturdy spoon and then knead the dough on a lightly floured surface. It’ll take a bit more elbow grease, but it’s definitely doable.

This makes two 9-inch pizzas. If you’d like to double or triple this recipe, you can make adjustments in the recipe card at the bottom of this post.
Equipment
- 2 9 inch round cake pans
- Stand mixer
- 12-inch skillet
Ingredients
Dough
- 3 cups bread flour
- ¼ cup instant dry milk powder
- 1 teaspoon salt
- 1 cup warm water
- 2 tablespoons olive oil
- 1 tablespoon honey
- 2¼ teaspoons active dry yeast (1¼ ounce package)
Oiling the Bowl for Rising
- 1 tablespoon olive oil
Sauce
- 1 can whole peeled plum tomatoes (28 ounces)
- 1 tablespoon olive oil
- ½ teaspoon dried basil
- ½ teaspoon dried oregano
- ½ teaspoon salt
- ¼ teaspoon garlic powder
- ¼ teaspoon pepper
Assembly
- 2½ cups shredded mozzarella cheese
- 2 tablespoons grated Parmesan cheese
- 1 package pepperoni (6 ounces)
- Salt and pepper
How to Make Deep Dish Pizza
With takeout getting more and more expensive, I turn to this over and over. But I don’t mind because I love this recipe. The crust is just the way I like it…thick and chewy but with the perfect amount of crispness. And I’ve perfected the sauce over the years to get it just right.
Step One: Make the Dough
Dump all the dough ingredients in your stand mixer bowl and stir with a wooden spoon until it’s roughly mixed – it’ll look shaggy and that’s fine.
Switch to the paddle attachment and mix for about a minute until the dough pulls away from the sides. Add a bit more flour or water if needed.
Now switch to the dough hook and let it knead for 5-6 minutes. The dough should be smooth and form a nice ball.

Step Two: First Rise
Oil a big bowl with 1 tablespoon olive oil. Plop your dough ball in there, flip it over so both sides get oily, cover with plastic wrap. Let it double in size – takes about 1½ hours.

Step Three: Make the Sauce
About 30 minutes before your dough is ready, crush those tomatoes with your hands right into a skillet. Add the oil and all the seasonings. Simmer on low heat, stirring now and then, until it thickens up. Keep it warm.

Step Four: Shape the Pizzas
Oil two 9-inch cake pans with 1 tablespoon oil each – brush it around the sides too. Split your dough in half. Roll each piece into a 9-inch circle and plop it in the pan. Flip it over so both sides get oily – it’s supposed to look greasy. Press it to the edges. Don’t worry if it springs back a little.

Step Five: Second Rise
Cover and let it rise again for 45 minutes to an hour.
Step Six: Assemble and Bake
Heat your oven to 475°F.
Spread ¾ cup sauce on each pizza, leaving about ½ inch around the edges. Add 1¼ cups cheese to each one.

If you’re doing pepperoni, put 12-18 slices on a paper towel-lined plate, cover with more towels, and microwave for 20-30 seconds to get some grease out. Then arrange on the pizza.
Sprinkle with Parmesan, salt, and pepper. Bake 14-18 minutes until the cheese is golden brown.

Step Seven: Cool and Serve
Let it cool for 5 minutes, run a knife around the edges, and flip it out onto a cutting board. Cut into wedges and eat it!
Serving & Storing
Serve with garlic bread, Caesar salad, and homemade buffalo wings for a kid-friendly meal.
You can make the dough ahead of time. After the first rise, just punch it down gently, cover it tightly, and you can refrigerate it overnight. Just give it some time to warm up and go through the second rise the next day before baking.
Store any leftover slices in the fridge in an airtight container for 3-4 days. You could also freeze them in a freezer safe bag for two months.
You can reheat in the microwave for 30-60 seconds, but the best way is in the oven. Preheat your oven to 375°F (190°C). Place the refrigerated or thawed pizza slices on a baking sheet and cover loosely with aluminum foil. Heat for 10-15 minutes or until the cheese is bubbly and the crust crisp.
Troubleshooting and FAQs
Can I make this with all-purpose flour instead of bread flour?
Yes! Bread flour gives you a chewier, sturdier crust, but all-purpose works fine. Just use a tablespoon or two less water since all-purpose absorbs less liquid.
Yes, don’t skip the second rise. The first rise develops flavor and structure, and the second rise in the pan is what gives you that light, airy interior with a crispy bottom. It’s worth the wait.
Absolutely. After the first rise, punch it down, wrap it tightly, and refrigerate overnight. The next day, let it come to room temperature, shape it into your pans, and let it do the second rise before baking.
It removes some of the grease so your pizza doesn’t end up swimming in oil on top. If that won’t bother you, then just skip that step.

More Recipes For the Pizza Lover
- Pepperoni bread is great for bringing pizza on-the-go.
- If you always want good sauce on hand, learn to can your own pizza sauce.
- If you have a starter, use it to make sourdough pizza dough.
Printable Recipe
Homemade Deep Dish Pizza
Equipment
- 2 9 inch round cake pans
- Stand mixer
- 12-inch skillet
Ingredients
Dough
- 3 cups bread flour
- ¼ cup instant dry milk powder
- 1 teaspoon salt
- 1 cup warm water
- 2 tablespoons olive oil
- 1 tablespoon honey
- 2¼ teaspoons active dry yeast (1¼ ounce package)
Oiling the Bowl for Rising
- 1 tablespoon olive oil
Sauce
- 1 can whole peeled plum tomatoes (28 ounces)
- 1 tablespoon olive oil
- ½ teaspoon dried basil
- ½ teaspoon dried oregano
- ½ teaspoon salt
- ¼ teaspoon garlic powder
- ¼ teaspoon pepper
Assembly
- 2½ cups shredded mozzarella cheese
- 2 tablespoons grated Parmesan cheese
- 1 package pepperoni (6 ounces)
- Salt and pepper
Save This Recipe
You'll join my email list which you will love. And if you don't, unsubscribe in one click. ❤️
Instructions
- Combine ingredients. In a stand mixer bowl, mix together all dough ingredients with a wooden spoon. There is no need to proof the yeast first, but you can if you want to, by premixing it with the water and honey separately. Mix until the ingredients are combined and the dough is hard to stir. The dough will be slightly shaggy and rough.
- Machine mix. Fit your mixer with the paddle attachment and machine-mix until the ingredients are combined and the dough comes clean from the sides of the bowl when mixed (about 1 minute). You might need to add a few teaspoons of flour or water to get the right consistency.
- Knead. Using the dough hook, continue to mix the dough in the standing electric mixer for 5-6 minutes or knead the dough by hand for about 10 minutes. The dough will be more smooth and easily form into a ball when finished.
- First rise. Brush the remaining 1 tablespoon of oil into a large bowl. Form the dough into a ball and place it in the bowl. Turn the dough over onto the other side and back again to cover lightly in oil. Cover with plastic wrap and let it rise until double in size, about 1 ½ hours.
- Make the sauce. Towards the end of the rising time, make the sauce. With your hands, squeeze the tomatoes to crush them and add the tomatoes and sauce to a 12-inch skillet. Stir in oil, basil, oregano, garlic, salt, and pepper, and simmer over very low heat until thickened, stirring occasionally. Continue to simmer the sauce during the second rise of the dough and keep on low.
- Shape and oil the dough. Pour 1 tablespoon of oil into a 9-inch cake pan and repeat with a second pan. Brush oil around the pans to grease them. Divide dough in half and place into a ball. Place onto a very lightly floured countertop and roll dough evenly from the center outwards into a 9-inch circle. Place the dough in a pan and turn it over to grease the top of the dough. Then, turn it back again so that it is lightly coated in oil. It is supposed to look oily. Press the dough to reach the edges of the pan. It’s okay if the dough stretches back a little. As the dough rises, it will fill the pan. Repeat the process with the second ball of dough and pan.
- Second rise. Cover the dough and let rise 45 minutes to 1 hour. It will rise more quickly in a warm oven.
- Preheat. Preheat the oven to 475℉.
- Assemble pizzas. Using a spoon, spread ¾ cup of sauce over the dough evenly, leaving ½ inch of dough showing on the edges without any sauce. Repeat with the second pan. Spread evenly 1 ¼ cups of shredded cheese over the sauce in each pan.
- Add pepperoni (optional). Using a plate lined with paper towels, put 12-18 slices of pepperoni on the plate and cover with additional paper towels. Warm in the microwave for 20-30 seconds to remove some grease before placing them on the pizza. Arrange slices of pepperoni so they are evenly spread over the pizza, and repeat with the second pan.
- Top and bake. Spread one tablespoon of Parmesan over each pizza and sprinkle each pizza with salt and pepper. Bake in the preheated oven for 14-18 minutes, carefully removing the pizzas when the cheese is slightly browned on top.
- Cool and serve. Let the pizza cool for about 5 minutes, and then use a butter knife to loosen the pizza around the edges of the pan. Remove the pizza onto a cutting board using a spatula, cut into wedges, and serve.
Notes
Nutrition


Does this dough work well with freezing? I’m hoping to find one where I can prep the pizzas, freeze, and pull them out for baking later.
hey Jessica, I’ve never tried it but I do worry that the whole thing would be a little soggy. please let me know if you try it! I’d try making the shaping the dough, freezing it until firm, then layering everything on and freezing the whole thing.
I made this for our pizza night and it was delicious! I’d been making a different recipe with a thinner crust, but I’m a fan of this one. I like how the pans help make them nice and round without too much shaping.
yay! thanks Gretchen! yes this one is easy is a way, less working the dough.
Can you do this gluten free? If so, what flour do you suggest? Many thanks.
hi Joanne I’m sorry I’ve never personally tried it!
I don’t have a mixer like that. Would I be able to do this just by hand and have it turn out right? If so, would I just knead it really well once all the dough is together? Or will that make it too tough?
Hi Piper,
You can definitely knead by hand. What I would recommend is kneading for about five minutes, then putting it back in the bowl to rest about five minutes, kneading five minutes more just so you don’t tire yourself out. Don’t worry so much about overkneading.
Can you make the dough one day and then put it in the refrigerator and cook it the next?
Can I mix in the bread machine?
yes that will be just fine
Thank you for this recipe- I think we will make this recipe this week as an early dinner/game night with our littles here. That sounds like a nice activity for a rainy summer evening!