How to Pressure Can Pinto Beans
This is one of those things that might not seem worth the trouble, but it really is. Dried beans are so affordable, but take forever. But when you pressure can your own, they’re ready to go.

You’ll love these in chili, casseroles, or as a side. It’s one of the most practical pressure canning recipes.
Table of Contents
Ingredients and Tools You’ll Need
A pressure canner here is non-negotiable. You need it to can the low-acid beans and reach a high enough temperature to kill the bacteria. A water bath canner won’t work. Use canning salt, not regular table salt. Canning salt is pure and will make sure your beans aren’t cloudy or develop any weird flavors.

This makes 6 pints. If you’d like to double or triple this recipe, you can make adjustments in the recipe card at the bottom of this post.

Equipment
- Large pot 8-10 quart
- Pressure canner and canning tools
- 6 Pint jars plus lids and rings
- strainer
Ingredients
- 2 pounds dried pinto beans soaked overnight
- 3 teaspoons canning salt
- water
- white vinegar (optional)
How to Pressure Can Pinto Beans
If you live above 1,000 feet, make sure to adjust your pressure settings according to your altitude.
Step One: Soak and Cook Beans
Soak your beans overnight in water.

The next day, drain and rinse them. Put them in a big pot with enough water to cover by 2 inches. Bring to a boil, cover, reduce heat to low. Simmer 30 minutes.

Step Two: Prep Canner
Get your pressure canner ready while the beans cook. Add the rack, 3 inches of water, and 2 tablespoons vinegar. Start heating.
Step Three: Prep Jars
Wash your jars and fill them with hot water. Put your lids and rings in hot water – keep them warm, but don’t boil. Get another pot of water boiling for jar filling.
Step Four: Fill Jars
After 30 minutes, drain the beans. Empty the hot water from your jars. Fill each jar with beans, leaving 1 inch headspace. Add 1/2 teaspoon salt per pint. Fill with hot water, still leaving 1 inch headspace.

Step Five: Remove Air Bubbles
Use a chopstick to remove air bubbles. Add more water if needed to maintain headspace.
Step Six: Seal Jars
Wipe the jar rims clean. Put on the lids and rings – snug but not tight.

Step Seven: Process in Canner
Load the jars into the canner. Put the lid on and heat until steady steam vents for 10 minutes. Add the weight (10 pounds for weighted gauge, 11 pounds for dial gauge). When it reaches pressure, time for 75 minutes.

Step Eight: Monitor Pressure
Keep the pressure steady. If it drops, bring it back to pressure and restart the timer.
Step Nine: Cool Down
When done, turn off the heat. Wait for the pressure gauge to hit zero, then vent the steam. Remove the lid tilting AWAY from your face.
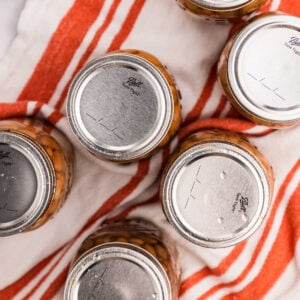
Step Ten: Remove and Check
Let the jars sit for 10-15 minutes before removing. Cool them overnight on a rack. Check the seals after 24 hours. Use unsealed jars immediately. Sealed jars keep 18 months.

Serving & Storing
Serve with cornbread and easy Southwest rice salad, or use them to make your favorite enchiladas or burritos.
Store your sealed jars in a cool, dark place like a pantry or cupboard. They should last up to 18 months. If a jar doesn’t seal properly, or has been opened, store it in the fridge and use within a week.
Questions and Troubleshooting
Yes. Soaking the beans overnight helps to soften them and cut down on cooking time. It also helps to remove some of the indigestible sugars that can cause gas. Trust me, it’s worth the extra step.
You could, but I wouldn’t recommend it. Table salt has additives that can make your beans look cloudy. Canning salt is pure and gives the best results.
If you’re above 1,000 feet, you’ll need to increase the pressure. Check your pressure canner’s manual for specific instructions or this chart. It’s really important to get this right for safety.
If a jar doesn’t seal, just pop it in the fridge and use it within a week. You can also reprocess it with a new lid, following the same canning steps. Yes this really does work.

More Canning Pantry Staples
Make sure you always label your jars and why not use my free and pretty downloadable canning labels!
- Making your own apple pie filling in one afternoon will give you enough to make 4 pies (and make baking a pie that much faster).
- When tomatoes are taking over your life in August, make some homemade pizza sauce.
- Pressure canning potatoes will make them last months and you’ll be able to quickly make mashed potatoes.
- This canned tomato soup recipe is my grandmother’s and has served me well every year.
- We go through homemade bone broth a lot, so I always make sure I have some on hand in the pantry.
Printable Recipe
Pressure Canning Pinto Beans Recipe
Equipment
- Large pot 8-10 quart
- Pressure canner and canning tools
- 6 Pint jars plus lids and rings
- strainer
Ingredients
- 2 pounds dried pinto beans soaked overnight
- 3 teaspoons canning salt
- water
- white vinegar (optional)
Save This Recipe
You'll join my email list which you will love. And if you don't, unsubscribe in one click. ❤️
Instructions
- Soak beans. The night before, soak the beans in cool water.
- Drain and rinse beans. Drain and rinse the soaked pinto beans. Place them in a large pot (8-10 quart).
- Cook beans. Add enough water to the pot so the beans are covered with water plus 2 inches. Place over medium heat and allow the beans to come to a boil. Cover and reduce the heat to low and simmer for 30 minutes.
- Prep canner. Prepare your pressure canner by adding the rack and 3 inches of water to the pot (or follow your manufacturer's recommendations). Add 2 tablespoons of white vinegar (this prevents mineral deposits from collecting on the jars). Place over medium heat and allow it to come to a gentle boil.
- Prep jars and rings. Place the lids and rings in a pot with hot water and simmer (don't boil). Wash the jars with hot soapy water. Fill them with hot water (so they don't crack when filled with the hot beans).
- Drain beans. Once the beans have simmered for 30 minutes, drain them and set aside.
- Prep hot water. Bring a pot of water to a boil. (This will be for filling the jars later)
- Fill jars with beans. Drain the jars of the hot water. Using a funnel and ladle, fill the jars with beans leaving a 1-inch head space. Top with 1 teaspoon of salt if using quart jars or ½ teaspoon of salt if using pint jars. Fill the jars with fresh hot water leaving a 1-inch headspace. Using a wooden chopstick or plastic knife (not metal), remove as much air and bubbles as you can. Refill with water so there’s a consistent 1-inch headspace.
- Place lids on top. Place the lids and rings onto the jars.
- Process in pressure canner. Using a jar lifter, place the jars into the pressure canner making sure there’s enough space between jars. Place the lid on the canner, making sure it's sealed. Cook on high heat until a steady stream of steam is being released. Let the steam vent for 10 minutes. Set your gauge to 10 pounds for a weighted gauge (or 11 pounds for dial) and let the canner come to pressure. Adjust for altitude if you live above sea level. Once it hits the pressure, set the timer for 75 minutes for pint-sized jars or 90 minutes for quart-sized jars. Continue to monitor the pressure so it doesn’t go below. If it does, bring it back up to pressure and restart the timer.
- Release pressure. When the time is up, turn off the heat and allow the pressure gauge to hit zero before releasing the steam. Release the steam and carefully remove the lid, tilting the lid AWAY from you so the steam doesn’t hit your face.
- Rest jars before removing. Allow the jars to sit for 10-15 minutes before removing them from the canner.
- Cool and check seals. Place the jars on a cooling rack and let them cool overnight. Check for a seal after 24 hours. Immediately use any unsealed jars and store the properly sealed jars for up to 18 months. (check your lid’s manufacturer’s recommendations for storing.)
Nutrition


Your beans look wonderful but why can you not can them in the water they were cooked in and how do you season these when your ready to eat them?
Hi Sheree the flavor is better if you can them in fresh water. I use them usually in burritos or chili, but you can also cook them into refried beans very easily. I don’t really eat them plain.