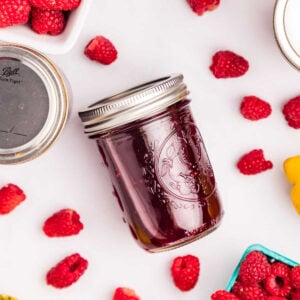
If you’ve got raspberries to use up but don’t feel like making jam, this raspberry syrup is the easier canning option. You don’t need to worry about gel stages or pectin, just cook, strain, sweeten, and can. We use it on pancakes, in cocktails, and even drizzled over ice cream. It’s one of those jars you reach for again and again. Here’s how to make it from fresh or frozen berries.

Replace your maple syrup with this! My kids love having this on weekends with pancakes. I also love mixing it with yogurt.
Table of Contents
Ingredients and Tools You’ll Need
There aren’t many ingredients here, so try not to change much. Fresh or frozen berries are fine. I know the sugar seems like a lot, but it keeps the syrup safe and shelf-stable. Don’t change it!

Heart’s Content Farmhouse is a participant in the Amazon Services LLC Associates Program, an affiliate advertising program designed to provide a means for sites to earn advertising fees by advertising and linking to Amazon.com. This means that when you click on certain links on this site and make a purchase, I may earn a small commission at no additional cost to you. I only recommend products I genuinely believe in and would use in my own kitchen. As an Amazon Associate, I earn from qualifying purchases.

FREE FOR SUBSCRIBERS
Canning Binder
Subscribe (free!) to my newsletter to receive this PDF + dozens of others in my printable library. You’ll also get emails you’ll truly love, with a weekly meal and so much more.
If you’d like to double or triple this recipe, you can make adjustments in the recipe card at the bottom of this post.
Equipment
- Water Bath Canner
- 8-quart pot
- fine mesh strainer (or cheesecloth)
Ingredients
- 3 pounds raspberries (fresh or frozen – thaw and drain if using frozen)
- 2 cups water
- ½ cup light corn syrup (don’t use the dark corn syrup)
- 2 ¾ cups sugar
- 2 tablespoons bottled lemon juice
How to Make Raspberry Syrup
Step One: Cook Raspberries
Add the raspberries and water to an 8-quart pot. Place over medium heat and simmer. Once simmering, lower the heat to low and cook for 20 minutes.

Step Two: Strain
Transfer the raspberries to a fine mesh strainer or jelly bag placed over a bowl. If you do not have one, line a strainer with 3 layers of cheesecloth. Allow the raspberries to drain for 2 hours.
Step Three: Prep For Canning
Prepare your jars for canning by washing them in hot, soapy water. Transfer jars to a water bath canner and fill the canner so the jars are fully submerged in water. Place the canner over medium heat and simmer. Add the canning lids and rings to a saucepan with water. Place them over medium-low heat and simmer.
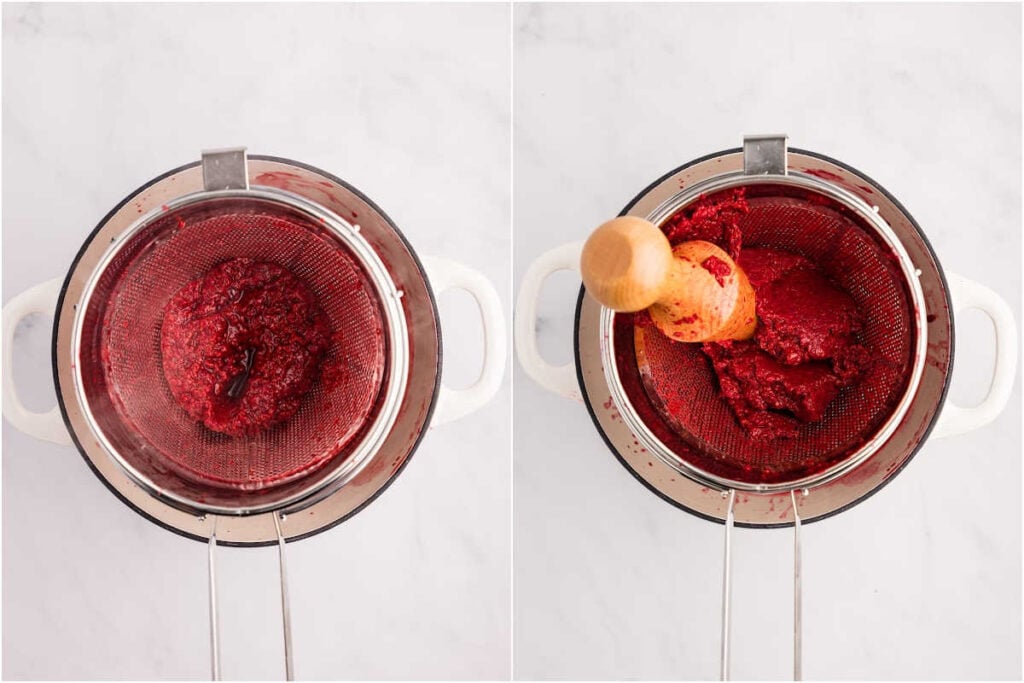
Step Four: Press Solids Through Strainer
Using a spatula or pestle, press the remaining liquid out of the raspberry mixture. You want a total of 4 ½ cups of liquid. Discard the seeds and pulp.

Step Five: Add Sweeteners And Lemon
Transfer the raspberry juice to a clean 8-quart pot over medium-high heat. Add the corn syrup, sugar, and lemon juice. Stir the mixture so the sugar dissolves completely.

Step Six: Boil
Bring the mixture to a full rolling boil, stirring constantly. Once it hits a full rolling boil, boil for 2 minutes. After 2 minutes, remove from the heat.
Step Seven: Skim Foam
Skim foam off the top of the syrup (optional but recommended).
Step Eight: Fill Jars
Add the hot syrup to the hot jars by placing a canning funnel over the hot jar, ladling in the syrup, leaving a ¼ inch headspace. Repeat this process until all of the syrup is added to the jars.

Step Nine: Clean Rims And Fasten Lids And Rings
Wipe the rims of the jars with a clean, moist towel. You may want to use a white vinegar-moistened towel to make sure there is no syrup left on the rims. Place the lids and rings on the jars. Tighten the rings so they are fingertip-tight.

Step Ten: Process
Place the filled and lidded jars back into the water bath canner. Make sure the jars are fully submerged with at least 1 inch of water above them. Place the lid on the canner, set the heat to medium-high, and allow the canner to come to a boil. Once the water is boiling, set a timer for 10 minutes and process the jars.

Step Eleven: Rest
After 10 minutes, remove the canner from the heat. Remove the lid and allow the jars to sit for 5 minutes.
Step Twelve: Cool And Check Seals
Transfer the jars to a heat-proof area so they can cool for 12-24 hours. The next day (after 24 hours), check the jars for a proper seal.

Step Thirteen: Store
Once a proper seal has been confirmed, remove the rings and store the jars in a cool, dark place for up to 18 months or per your lids manufacturer’s recommendations.
Storage Instructions
After the jars have cooled and you’ve confirmed they are sealed properly, remove the rings and store the jars in a cool, dark place. The syrup will keep for up to 18 months, or as recommended by your lids manufacturer.
Once opened, store the jar in the refrigerator. The syrup should last for about a month.
What to Serve with Raspberry Syrup
Use it for breakfast or dessert!
- Serve at breakfast with fluffy sourdough pancakes.
- Mix it in with yogurt.
- Spread some on toasted white chocolate raspberry sourdough bread.
- Drizzle it over old-fashioned vanilla ice cream for a delicious dessert.
Questions and Troubleshooting
After the jars have cooled for 24 hours, press down on the center of each lid. If it doesn’t pop back, it’s sealed. If it does, store that jar in the fridge and use it first.
You can thicken the syrup by boiling it a bit longer. Just be careful to stir constantly so it doesn’t burn.
No. The sugar is not for sweetness but to keep the syrup safe and shelf-stable. Reducing it will cause your jars to spoil faster.

More Raspberry Recipes To Try
- If you’d rather have something more spreadable, try my old-fashioned raspberry jam.
- This raspberry peach sweet tea is easy and pretty. What more can you want?!
- Blackberry raspberry pie is our favorite summer dessert (well, one of them, lol).
Printable Recipe
Raspberry Syrup for Canning
Equipment
- 8-quart pot
- fine mesh strainer (or cheesecloth)
Ingredients
- 3 pounds raspberries
- 2 cups water
- ½ cup light corn syrup
- 2 ¾ cups sugar
- 2 tablespoons bottled lemon juice
Save This Recipe
You'll join my email list which you will love. And if you don't, unsubscribe in one click. ❤️
Instructions
- Cook raspberries. Add the raspberries and water to an 8-quart pot. Place over medium heat and simmer. Once simmering, lower the heat to low and cook for 20 minutes.
- Strain. Transfer the raspberries to a fine mesh strainer or jelly bag placed over a bowl. If you do not have one, line a strainer with 3 layers of cheesecloth. Allow the raspberries to drain for 2 hours.
- Prep for canning. Prepare your jars for canning by washing them in hot, soapy water. Transfer jars to a water bath canner and fill the canner so the jars are fully submerged in water. Place the canner over medium heat and simmer. Add the canning lids and rings to a saucepan with water. Place them over medium-low heat and simmer.
- Press solids through strainer. Using a spatula, press the remaining liquid out of the raspberry mixture. You want a total of 4 ½ cups of liquid. Discard the seeds and pulp.
- Add sweeteners and lemon. Transfer the raspberry juice to a clean 8-quart pot over medium-high heat. Add the corn syrup, sugar, and lemon juice. Stir the mixture so the sugar dissolves completely.
- Boil. Bring the mixture to a full rolling boil, stirring constantly. Once it hits a full rolling boil, boil for 2 minutes. After 2 minutes, remove from the heat.
- Skim foam. Skim foam off the top of the syrup (optional but recommended).
- Fill jars. Add the hot syrup to the hot jars by placing a canning funnel over the hot jar, ladling in the syrup, leaving a ¼ inch headspace. Repeat this process until all of the syrup is added to the jars.
- Clean rims and fasten lids and rings. Wipe the rims of the jars with a clean, moist towel. You may want to use a white vinegar-moistened towel to make sure there is no syrup left on the rims. Place the lids and rings on the jars. Tighten the rings so they are fingertip-tight.
- Process. Place the filled and lidded jars back into the water bath canner. Make sure the jars are fully submerged with at least 1 inch of water above them. Place the lid on the canner, set the heat to medium-high heat, and allow the canner to come to a boil. Once the water is boiling, set a timer for 10 minutes and process the jars.
- Rest. After 10 minutes, remove the canner from the heat. Remove the lid and allow the jars to sit for 5 minutes.
- Cool and check seals. Transfer the jars to a heat-proof area so they can cool for 12-24 hours. The next day (after 24 hours), check the jars for a proper seal.
- Store. Once a proper seal has been confirmed, remove the rings and store the jars in a cool, dark place for up to 18 months or per your lids manufacturer’s recommendations.
Nutrition

More to Explore
Hot Pepper Jelly Glazed Wings
Simple Homemade Marinara
How to Make Garlic Powder in a Dehydrator
Homemade Spiced Apple Rings (For Canning)