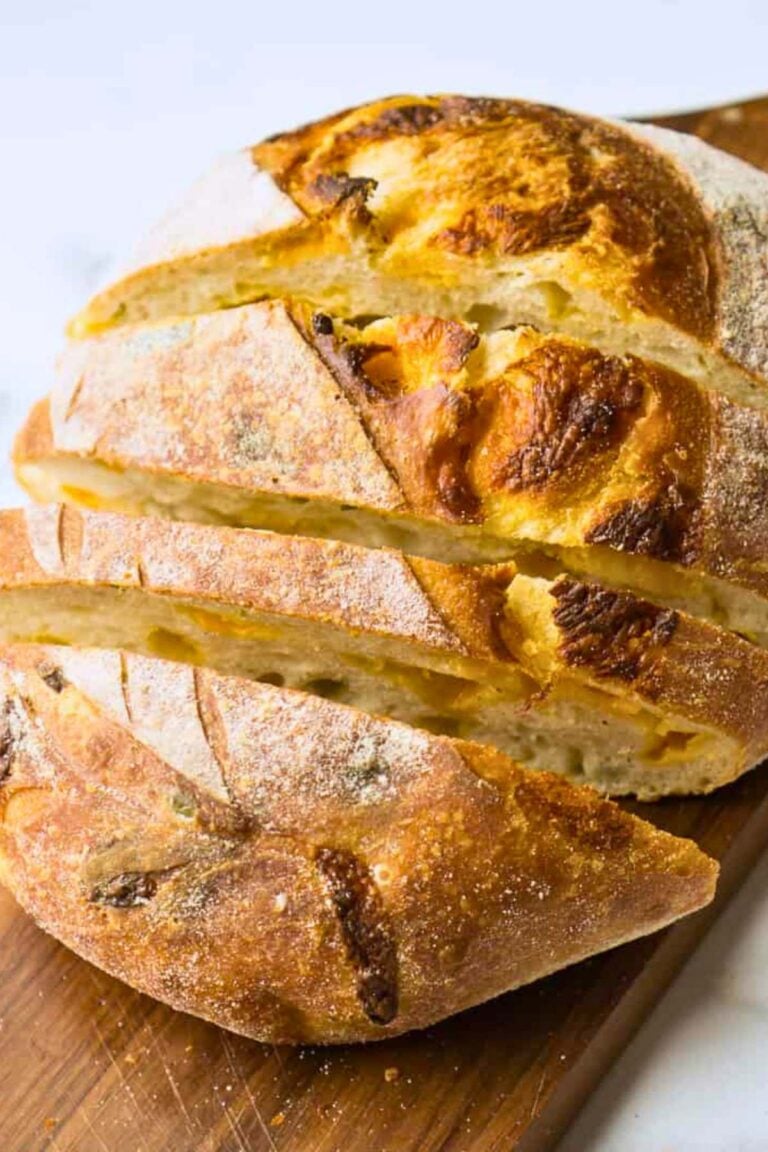
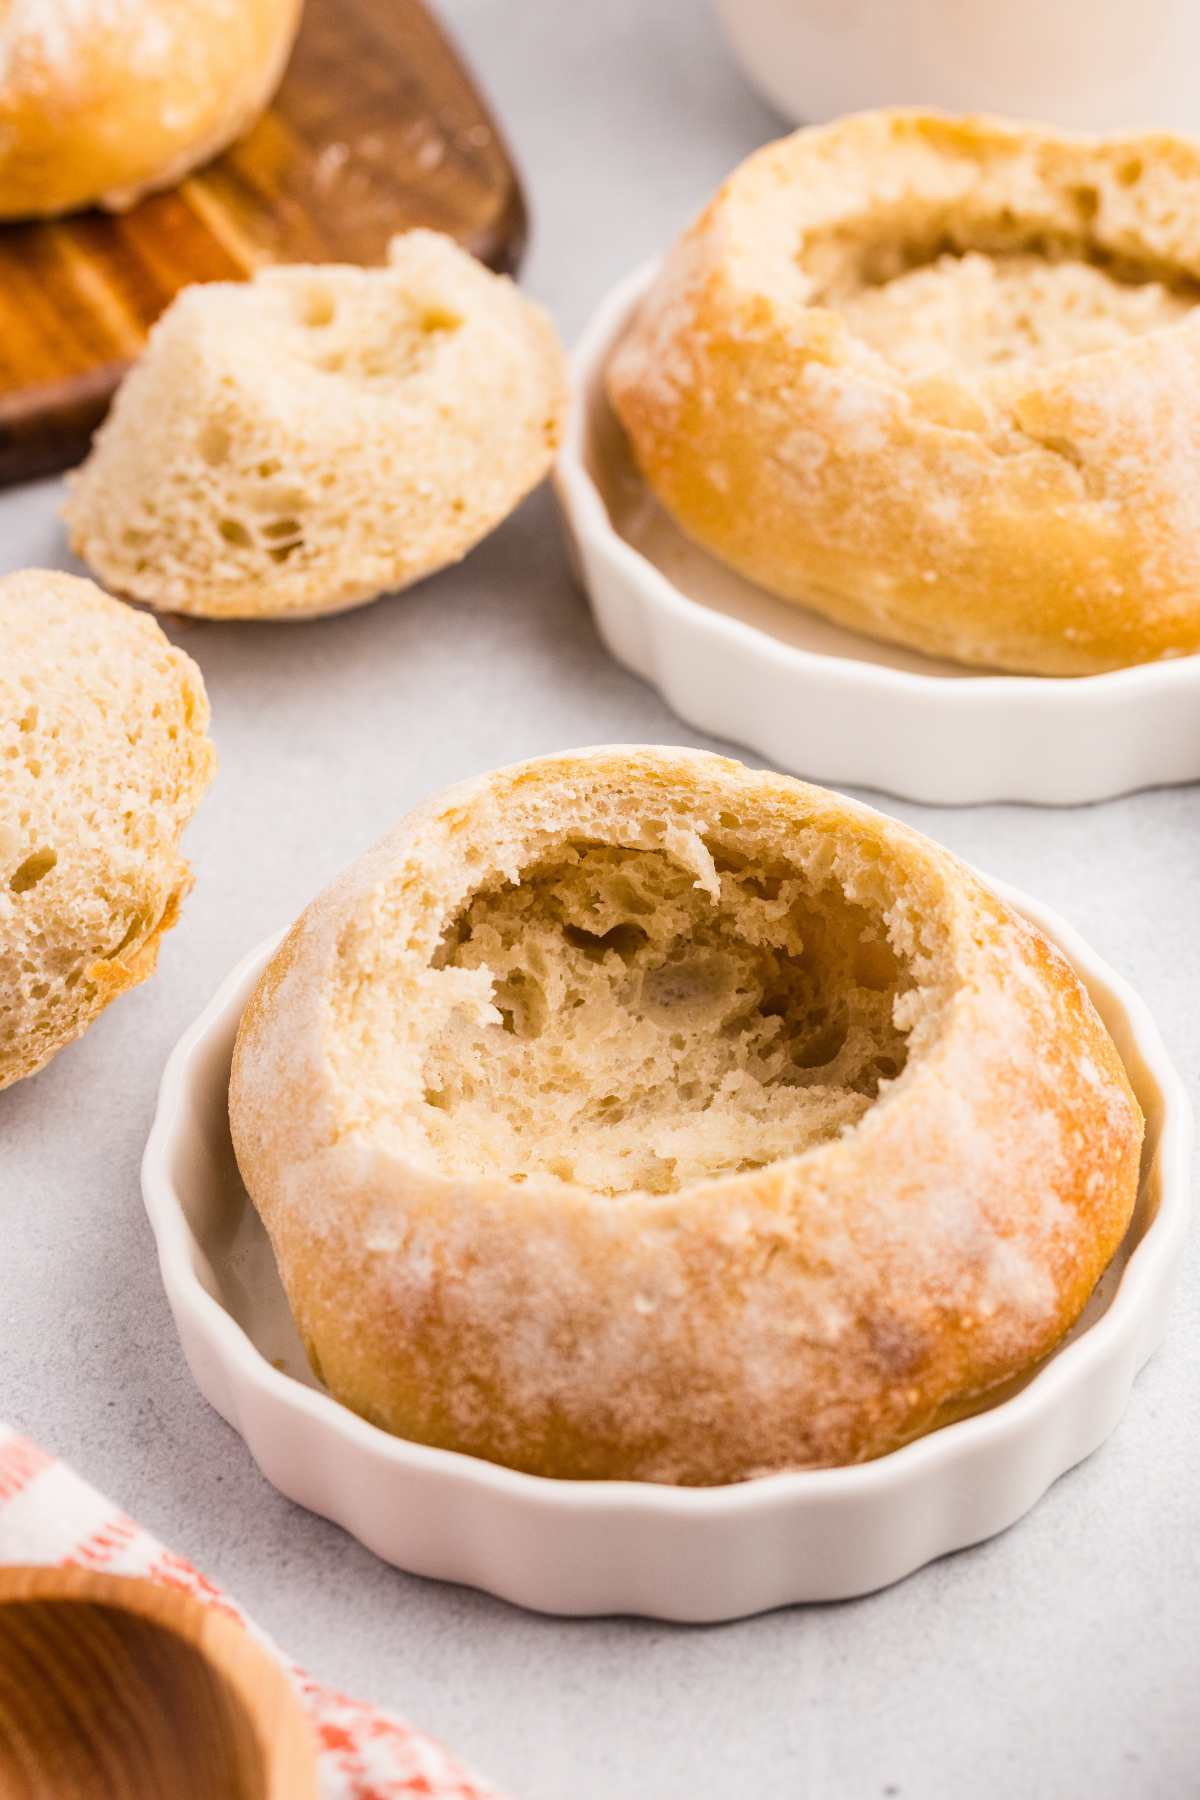
Homemade Sourdough Bread Bowls
You cna serve just about anything in a bread bowl and people will get excited, but just hollowing out your average loaf doesn’t always work. This recipe is designed to stay sturdy and be delicious. Fill it with your favorite soup, stew, or my preference, a spinach dip. Then, like, like a normal person, eat the bowl in secret. Like any sourdough recipe, you’ll need to plan ahead, but most of the time is hands-off while the dough is in the fridge.
The cold fermenting time is long, but you need this to make the bowls strong enough to hold soup.
Table of Contents
Ingredients and Tools You’ll Need
If you don’t have a baking stone, you can bake the bread on a parchment-lined baking sheet at 450°F for 25-30 minutes. You’ll want to place the ice under the parchment paper to help create some steam. You can reduce the ice to ½ cup.

This will make 6 bread bowls. If you have a larger family or want to freeze some, you can double or triple the recipe (and also use metric measurements) by adjusting the recipe card at the bottom of this post.
Equipment
- Bench Scraper
- Baking Sheet
- Parchment paper
- Bread razor
- digital scale
- Baking Stone (or parchment-lined baking sheet)
Ingredients
- 1 cup activated sourdough starter
- 4 ¼ cups all-purpose flour
- 3 ½ teaspoons salt
- 1 ⅔ cups warm water
- Ice cubes
instructions
Don’t skip the ice! Those first 10 minutes of steam are what give you the perfect crust.
Step One: Activate Starter
Mix 30 grams starter, 70 grams flour (I like adding 30 grams rye flour here, but all-purpose is fine), and 100 grams warm water. Stir it up and wait until it doubles and gets all bubbly.
Step Two: Mix Water And Starter
In a big bowl, combine your bubbly starter and warm water. Stir it with a spatula or whisk.

Step Three: Add Half Flour
Dump in half your flour and stir. It’s going to look REALLY wet and messy. That’s normal. Just make sure all the flour disappears.

Step Four: Finish The Dough
Add the rest of the flour and all the salt. Mix until it comes together. It won’t look pretty yet.

Step Five: Rest
Cover with a kitchen towel and ignore it for 30 minutes.
Step Six: Stretch And Fold Time
Grab one edge of the dough, stretch it up, and fold it over to the middle. Turn your bowl a quarter turn and do it again. Keep going until you’ve worked your way around the whole bowl.

Cover it back up, wait 30 minutes, then do this whole stretch-and-fold thing again. You’ll do this 3-5 times total. You’ll know you’re done when the dough looks smooth and you can stretch it without it ripping.

Step Seven: Long Rise
Let it sit covered for 4-6 hours somewhere warmish. Then stick the whole bowl in the fridge for 8-12 hours. This is where the flavor happens.

Step Eight: Shape
Line a baking sheet with parchment. Turn your dough out and divide it into 6 pieces. Roll each piece into a ball and put them on your baking sheet.

Step Nine: Score
Use your razor (or sharp knife) to cut an X on top of each ball. Don’t be shy about it.
Step Ten: Final Rise
Cover and let them puff up for an hour.
Step Eleven: Oven Prep
Put one rack in the lower third of your oven and one in the center. Stick your baking stone on the center rack and heat everything to 450°F. Let it get hot for 30 minutes. Fill a baking sheet with about a cup of ice and put it on that bottom rack.
Step Twelve: Bake
Move your bread balls onto the hot stone and bake for 25-30 minutes until they’re golden brown and sound hollow when you tap them.

If you don’t have a stone, bake them right on a parchment-lined baking sheet at 450°F for the same time. Put the ice under the parchment to create steam, but use only half a cup.
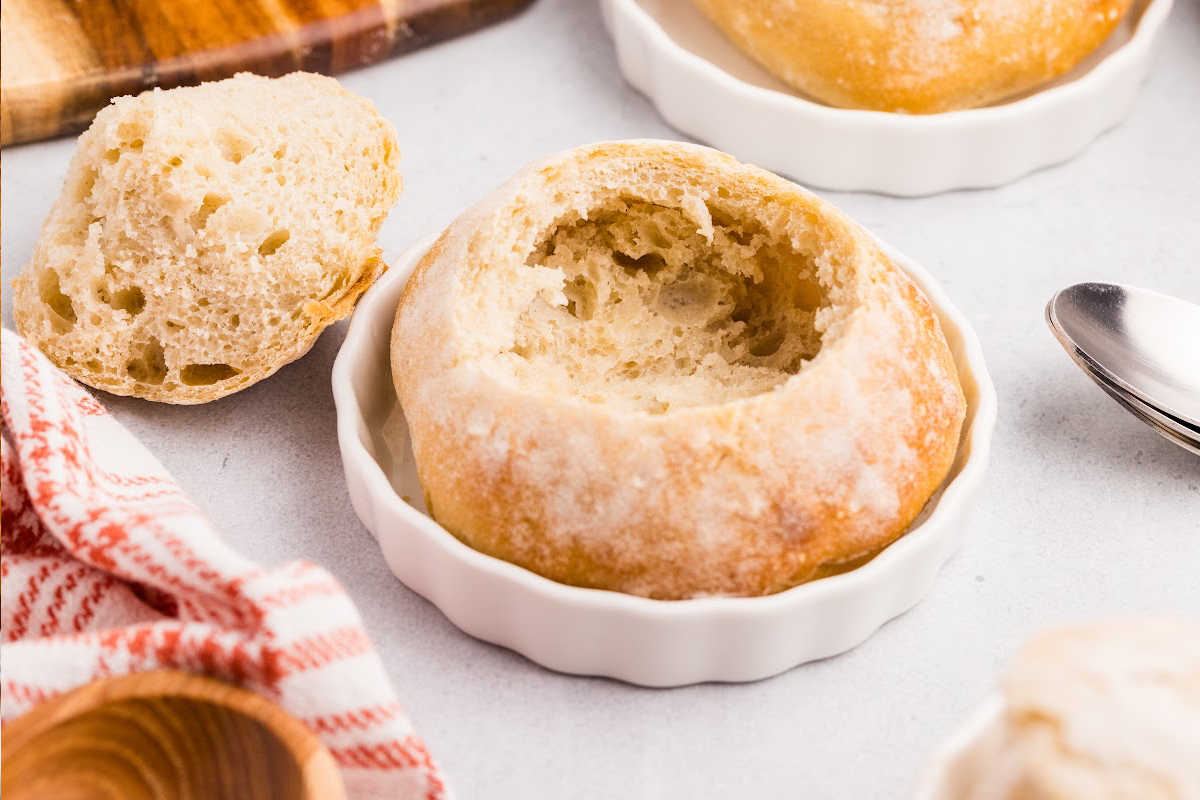
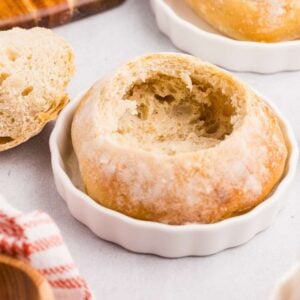
Step Thirteen: Turn Into a Bowl
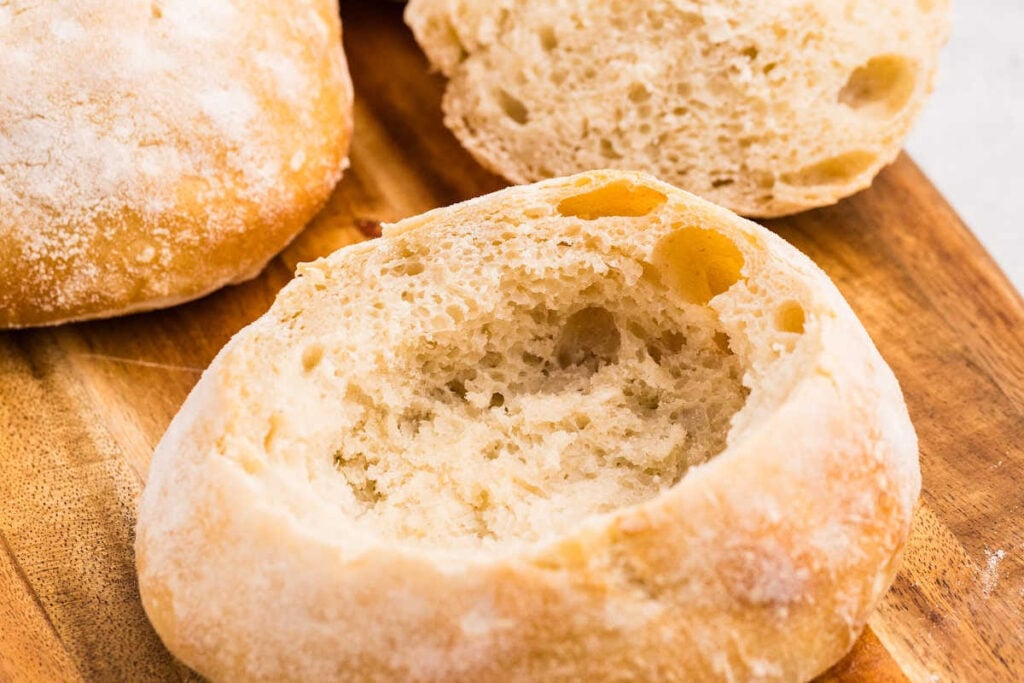
To serve, cut off the top third and hollow out the center, leaving about a ½-inch border all around.
What to do with the Center of the bread
The easiest option? Toss them in a freezer bag and deal with them later when you actually need breadcrumbs or croutons.
- Breadcrumbs: Freeze the pieces in a bag. When you need breadcrumbs, just grate them frozen or pulse in a food processor. Perfect for meatballs or breading chicken.
- Homemade Croutons: Cut into cubes, toss with olive oil and salt, bake at 375°F for 10-12 minutes until golden. Store in an airtight container for up to a week.
- Bread pudding: Got a lot of leftover chunks? Tear them up, soak in eggs and milk, and bake for a cozy dessert.
- Stuffing base: Let chunks dry out completely first (leave them out overnight), THEN store in a bag until you need them.
Serving & Storing
These will keep at room temperature for two days in a paper bag. For longer storage, freeze them whole and reheat in a 350°F oven until crisp, about 10 minutes.
- Soups and stews, like my creamy chicken noodle soup
- Dips for game day, like my spinach parmesan dip
- Chicken pot pie filling
- Or a breakfast bowl with scrambled eggs, cheese, and bacon.
More staple Sourdough Recipes To Try
- Make these soft and fluffy sourdough dinner rolls one night and use the leftovers for sandwiches the next day.
- Stock your cupboards with these homemade sourdough wheat crackers – they’re easier than they sound.
- Try this sourdough focaccia. It sounds fancy but really isn’t.
- Sourdough pitas are great for wraps or dipping in hummus.
Printable Recipe
Sourdough Bread Bowls
Equipment
- Bench Scraper
- Baking Sheet
- Bread razor
- Baking Stone (see notes if you don’t have one)
Ingredients
- 1 cup activated sourdough starter
- 4 ¼ cups all-purpose flour
- 3 ½ teaspoons salt
- 1 ⅔ cups warm water
- Ice cubes
Save This Recipe
You'll join my email list which you will love. And if you don't, unsubscribe in one click. ❤️
Instructions
- Mix the starter and water. In a large mixing bowl, add the sourdough starter and warm water. Stir to combine using a spatula, whisk, or Dutch bread whisk.
- Add half the flour. Add half of the flour to the bowl and stir to combine. This will be a very wet mixture, but you want to make sure the flour is fully incorporated.
- Add flour and salt. Add the rest of the flour and the salt. Stir to combine.
- Rest. Cover with a tea towel and let the dough rest for 30 minutes.
- Stretch and folds. After 30 minutes, start the process of stretch and folds. Start from one edge of the bowl and stretch the dough up and towards the middle, folding the dough over itself. Turn the bowl ¼ turn and repeat until all of the dough has been stretched and folded towards the middle. Cover the dough again with a towel. Wait 30 minutes and repeat. (You’ll want to do 3-5 series until the gluten is well developed. You will know it is done when the dough looks smooth and soft and you can stretch the dough without it breaking or ripping.)
- Rise. Let the dough sit covered and undisturbed for 4-6 hours in a warm dark place. Transfer the dough to the refrigerator to cold ferment for 8-12 hours.
- Divide and shape. Line a baking sheet with a piece of parchment paper and set aside. Remove the dough from the refrigerator and turn out onto a clean dry surface. Separate the dough into 6 equal pieces. Shape them into balls and transfer them to the prepared baking sheet.
- Score. Use a bread razor (or really sharp knife) to score the dough balls with an X on top.
- Rise. Cover and let them rise for 1 hour.
- Prep. Arrange the racks in your oven so you have a rack in the lower 3rd of the oven and 1 rack in the center of the oven. Place a baking stone in the oven on the center rack. Preheat the oven to 450°F and let it warm for 30 minutes.
- Add ice. Fill a baking sheet with about 1 cup of ice. Add the baking sheet with ice to the bottom rack of the oven.
- Bake. Transfer the dough balls to the baking stone and bake for 25-30 minutes or until golden brown.
Notes
Nutrition