Sourdough Pita Bread
This sourdough pita recipe is a simple way to make fresh, homemade pita bread from basic ingredients (and some patience).
Make sure your sourdough starter is active and bubbly so that the dough rises well and gives your pitas that perfect, chewy texture.
Sourdough Pita Bread
Ingredients
- ½ cup sourdough starter active and bubbly
- 1 cup water (+ ¼ cup filtered water for activating sourdough starter)
- ½ cup whole wheat flour
- 2 cups all-purpose flour (+ ¼ cup for activating sourdough starter)
- 1 tablespoon sugar
- 2 tablespoons vegetable oil (plus more for oiling bowl)
- 1 teaspoon salt
Save This Recipe
You'll join my email list which you will love. And if you don't, unsubscribe in one click. ❤️
Instructions
- Feeding the Sourdough Starter. The night before, feed your sourdough starter by adding 30 grams of sourdough starter to a glass container, followed by 35 grams (¼ cup) of unbleached all-purpose flour and 35 grams of room-temperature filtered water. Stir to combine. Cover the container and allow it to sit at room temperature for 8 hours or until it’s doubled in size and bubbly.
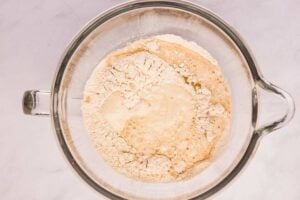
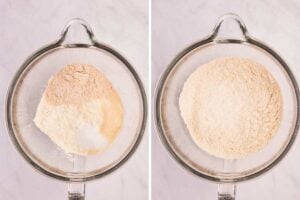
- Mix Dry Ingredients. Add all-purpose flour, whole wheat flour, salt, and sugar to the stand mixer bowl. Using the dough hook attachment, stir to combine.
- Add Wet Ingredients to Dry Ingredients. Add the water, sourdough starter, and vegetable oil to the flour mixture.

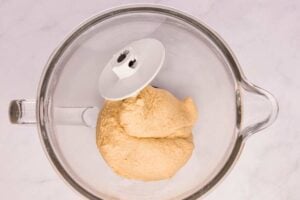
- Knead the Dough. Using the dough hook attachment, knead the dough on medium-low speed for about 10 minutes, or until it is soft and stretchy.

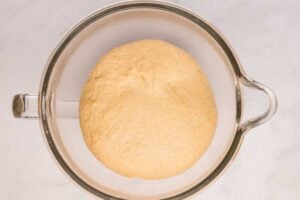
- Remove Dough, Grease Bowl, and Return Dough to Bowl. Turn the dough out onto a clean dry surface. Lightly grease the mixing bowl with a small amount of vegetable oil. Add the dough back into the bowl.
- Allow the Dough to Rise. Cover and let the dough rise for 6-8 hours or until it has doubled in size.

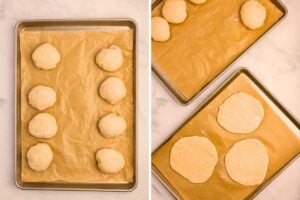
- Divide the Dough into 8 Round Discs. Turn the dough out onto a clean, dry surface and divide it into 8 equal pieces. Using a rolling pin, roll the dough balls out so they’re about ½” thick. They’ll be about 8” round discs. Allow them to sit for 30 minutes.

- Preheat Skillet. Turn your electric skillet to 375 degrees F and let it come to temperature before baking your pitas.
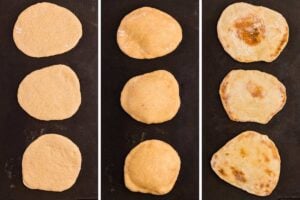
- Cook Pitas. Working in batches, place your prepared pitas on your preheated electric skillet (I could fit 3 on my skillet). Allow it to cook for 3 minutes. You will notice that the pita will start bubbling up. This is what you want. Flip your pita over and cook for another 3-5 minutes or until both sides are golden brown. Continue this process until all pitas have been baked.

Notes
Nutrition
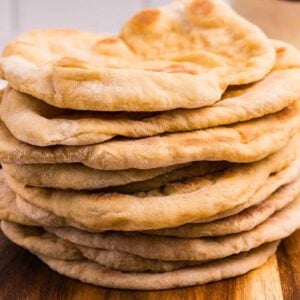
Although making these pitas takes longer than just ordering out, I like these better, knowing they came from my sourdough starter. I’ve tried several bread recipes, but this one is the most reliable. These pitas taste great for wraps, dipping in hummus, or just tearing off a piece and eating it plain!
Sourdough Sundays Newsletter

Every Sunday evening I’ll send you a sourdough recipe to make that week, straight from my kitchen to your inbox.
And as a thank you for signing up, I’ll send you this e-book with beautiful printable recipes right away. Simple!
You will not be added to any other email lists or my daily newsletter. But if you’re already on my newsletter, you’re welcome to join and receive both.

I hope you love them!
Key Ingredients and Tools
When making this recipe, having the right tools and ingredients can make all the difference. Here are a few key items to keep in mind:
- Sourdough Starter. Your starter should be active and bubbly for the best rise and flavor in your pitas. If you don’t have one, you can start your own at home, but it takes some time to develop.
- Whole Wheat Flour. This adds a bit of heartiness and flavor to the pitas. If you don’t have whole wheat flour, you can substitute it with all-purpose flour, but the texture and taste will be slightly different.
- Electric Skillet. Using an electric skillet helps maintain a consistent temperature, which is key for getting those pitas to puff up evenly. If you don’t have one, a heavy-bottomed skillet on the stove will work, but watch the heat closely.
As long as you prepare your sourdough starter ahead of time, everything else is pretty basic and easy to find at any grocery store.
Troubleshooting and Help
Yes, you can! After the dough has risen, you can store it in the fridge for up to 24 hours. Just let it return to room temperature before rolling it out and cooking the pitas.
If your pitas don’t puff, don’t worry—they’ll still taste great! It could be that the skillet wasn’t hot enough, or the dough wasn’t rolled evenly. Just make sure to roll the dough evenly and let the skillet preheat fully next time.
You sure can! Preheat your oven to 475°F and place the dough rounds on a preheated baking stone or baking sheet. Bake for about 3-5 minutes until they puff up.
Definitely! The texture might be slightly different, but all-purpose flour will work just fine. This is a good option if you want a lighter pita.
Just let them cool completely and store them in an airtight container at room temperature for up to 3 days. If you want to keep them longer, freeze and reheat them when needed.
I hope you enjoy this sourdough pita recipe and will start making these from home. All you need is some patience and simple ingredients. These pitas are great for lunch, dinner, or just a snack with your favorite spread. These easy pitas will surely become a kitchen staple.

Love,


