The Best Tasting Cut Out Sugar Cookies
Everyone loves cut out sugar cookies, but sometimes they look better than they taste. It is so common to see a beautifully decorated cookie that actually tastes terrible. This recipe is not like that. They are beautiful in a homemade, charming sense, but they will not win any cookie decorating awards. Where they really shine in is in texture and flavor.
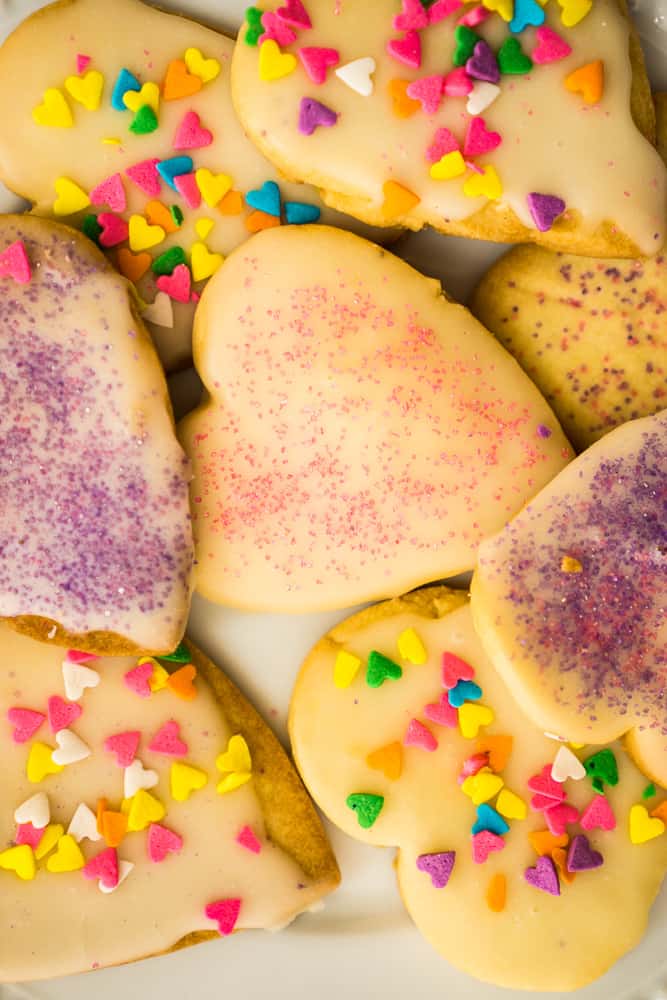
Cookies are for eating, not looking at! This recipe will win the taste award any time.
.
A Newsletter you’ll love
Daily recipes from the farmhouse, Sunday meal plans, seasonal ideas, straight from my kitchen to your inbox.
I promise to keep your email address safe. Unsubscribe at any time
The Best Cut Out Sugar Cookie Recipe

Equipment
- Stand mixer (with paddle attachment)
- Mixing bowl
- Measuring cups and spoons
- Spatula or silicone scraper
- Plastic Wrap
- Rolling Pin
- Cookie cutters
- Baking sheets
- Parchment paper or silicone baking mats
- Wire cooling racks
Ingredients
- 1 1/4 cups powdered sugar
- 18 tablespoons salted butter (1 cup + 2 T. at room temperature)
- 1 egg yolk
- 1/2 teaspoon salt
- 1 1/2 teaspoons vanilla
- 2 3/4 cups all purpose flour
Save This Recipe
You'll join my email list which you will love. And if you don't, unsubscribe in one click. ❤️
Instructions
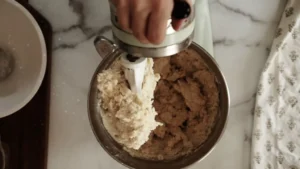
- Cream the butter and sugar. In a stand mixer fitted with the paddle attachment, beat the butter and powdered sugar on medium speed until smooth and creamy (about 1–2 minutes). Then, add the egg yolk, vanilla extract, and salt, scraping down the sides of the bowl as needed, and mix until well combined.

- Add the flour. Set the mixer to the lowest speed. Then, add half of the flour and mix until it's just blended. After that, add the rest of the flour and keep mixing until the dough starts to come together. If the dough is still too crumbly after a minute of mixing, add water a few drops at a time until the dough sticks together when you pinch it.
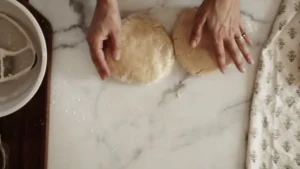
- Prepare and chill the dough. Place the dough on a clean surface and cut it into two equal pieces. Form each piece into a flat disc, wrap it well in plastic wrap, and put it in the fridge for at least 2 hours or up to 1 day. Chilling the dough makes it firmer and helps it keep its shape while baking.
- Preheat and soften the dough. Preheat your oven to 350°F (175°C). Then, line baking sheets with parchment paper or silicone baking mats. Next, take one dough disc out of the fridge and let it sit for a bit until it’s easy to roll out. If the dough gets too soft while you're working with it, just put it back in the fridge for a few minutes.
- Roll and cut the cookies. Sprinkle some flour on your work area and get your rolling pin. Then, roll the dough out to about ⅛–¼ inch thick, making sure it’s even for consistent baking. Use cookie cutters to make shapes, putting them close together to reduce leftover dough. You can roll the leftover pieces again to keep the dough from getting tough. Next, place the cut cookies on the baking sheets, leaving about an inch of space between each one.
- Bake. Bake in the preheated oven for 12–15 minutes, rotating the trays halfway through for even baking. Thinner cookies will bake closer to 12 minutes, while thicker cookies may take up to 15 minutes. The edges should be just slightly browned. Be careful not to overbake.
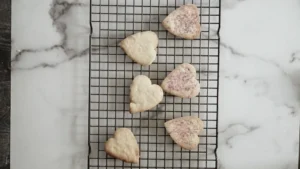
- Cool and decorate. Allow the cookies to cool on the baking sheets for 5 minutes before transferring them to a wire rack to cool completely. Decorate with your choice of glaze, royal icing, or buttercream, and add sprinkles.
Video
Notes
Nutrition
This is my mom’s recipe that she has made year after year at Christmas. She always makes them plain with just colored sugar sprinkled on top. They are delicious and simple to make that way. Some like them plain, while others go all out with sprinkles and frosting. I usually dip them in glaze or go all out with royal icing when I make them.
If you love the charm of traditional recipes, you might also enjoy these Old-Fashioned Roll-Out Sugar Cookies. They’re a nod to simpler times and deliver that classic, homemade flavor we all love.
Everyone will love them, and you’ll love how effortless they are! Plus, it’s a great way to get the whole family involved in baking! If you’re in the mood for a softer, no-roll sugar cookie, check out this Soft and Simple Sugar Cookies recipe. They’re quick to make and perfect for when you want something more casual.
Key Ingredients and Tools
Basic tools and ingredients will help you make great sugar cookies every time. Here’s what you need to know:
- Salted butter: Using salted butter adds a nice flavor to the cookies. If you only have unsalted butter, add some salt to the dough. Make sure the butter is at room temperature so it can mix easily.
- Powdered sugar: This gives the cookies their soft, melt-in-your-mouth texture. It’s finer than regular sugar and blends into the dough better, so don’t replace it with regular sugar. Sometimes labeled as confectioners’ sugar, this is found in the baking aisle. You can also blend regular granulated sugar in a food processor until it’s fine, but the texture might differ.
- All-purpose flour: This is what gives the cookies structure. It’s versatile and easy to find. If you want a gluten-free version, use a 1:1 gluten-free baking flour for similar results.
- Vanilla extract: Pure vanilla extract gives the cookies a rich, classic flavor. Imitation vanilla can work in a pinch, but the taste won’t be as strong. Swap it for a different flavor for almond, lemon, or orange extract.
- Rolling pin guides: These small bands or attachments help you roll your dough to the same thickness so the cookies bake evenly. If you don’t have these, you can use two stacked rulers on either side of the dough as a guide.
- Parchment paper: Lining your baking sheets with parchment paper prevents the cookies from sticking and makes cleanup easier. Silicone baking mats are a good reusable choice if you don’t have parchment.
These tools and ingredients will help your cookies turn out well!
Troubleshooting and Help
It’s tempting, I know, but chilling is super important! It helps the cookies keep their shape and prevents them from spreading too much in the oven. Trust me, it’s worth the wait.
Lightly flour your counter and rolling pin, and roll the dough evenly to about ⅛–¼ inch thick. If it sticks, roll it between two sheets of parchment paper instead.
Sprinkle a little flour on your work surface and rolling pin, or roll the dough between two sheets of parchment paper. If the dough warms up and gets sticky, pop it back in the fridge for a few minutes.
Don’t worry! If the dough isn’t coming together, add a few drops of water at a time and mix again until it holds together when you pinch it. Don’t add too much—you want it firm, not sticky.
This usually happens if the butter and sugar aren’t fully creamed or the dough isn’t rolled out evenly. Be sure to mix thoroughly and take your time rolling the dough to a uniform thickness.
Use rolling pin guides or stack two rulers on either side of your dough to keep it even. Press the cookie cutter straight down without twisting for clean edges.
Yes! You can find natural food coloring made from vegetable or fruit extracts or make your own with beet juice, turmeric, or spirulina for subtle colors.
Keep an eye on the edges—they should start to turn golden. The centers might still look a little soft, but that’s okay. They’ll firm up as they cool.
Yes! For a fun twist, you can swap the vanilla for almond, lemon, or even orange extract. Just stick to the same amount so the flavor isn’t overpowering. You might also enjoy these soft and tangy Cream Cheese Cookies.
Let me know if you have any other questions—I’m happy to help!
I hope you agree that these are the best-tasting cut-out sugar cookies in the world. They’re perfect for holiday baking, a fun weekend project, or even a sweet treat to brighten an ordinary day. Make a big batch to share with friends, or save some dough in the freezer for whenever the craving hits. Enjoy!

Love,