How to Make Apple Cider Soap: Simple Cold Process Recipe
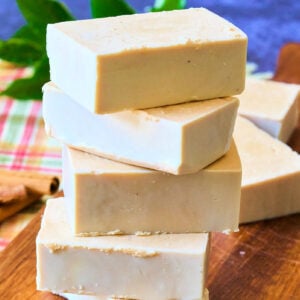
This apple cider soap is the perfect way to indulge in the cozy scents of autumn for the fall season. The real apple cider and comforting fragrance make this soap beautiful and super nourishing for your skin.
This moisturizing soap is perfect for those with normal to dry skin. And guess what? The natural color of the apple cider gives the soap a beautiful tan hue without the need for any artificial colorants.
Apple Cider Soap
Equipment
- Safety gear
- Safety equipment (gloves, goggles, apron)
- Old saucepan
Ingredients
- 10 ounces apple cider
- 4.21 ounces lye
- 5 ounces sweet almond oil
- 8 ounces coconut oil
- 12 ounces olive oil
- 5 ounces shea butter
- 2 tablespoons Comfort and Joy fragrance oil from Nurture Soap
Save This Recipe
You'll join my email list which you will love. And if you don't, unsubscribe in one click. ❤️
Instructions
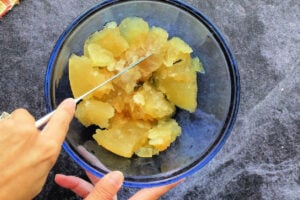
- Prepare the apple cider. Freeze the apple cider for a few hours until it reaches a slushy consistency.
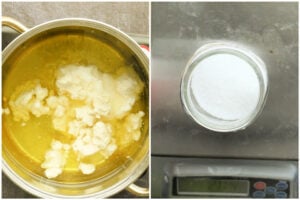
- Measure the oils and lye. Using a digital scale, measure out the lye, oils, and butter.

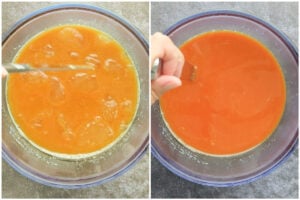
- Mix the lye and cider. Carefully add the lye to the partially frozen cider and stir until completely blended. The mixture will melt, heat up, and may change color. Set aside in a safe place.
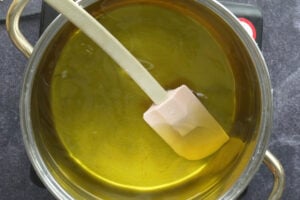
- Melt oils and butter. Melt the oils and shea butter over low heat until completely melted and heated to 140°F (60°C). Set aside to cool.
- Prepare mold and additional ingredients. Prepare your soap mold and any color or fragrance you plan to use.
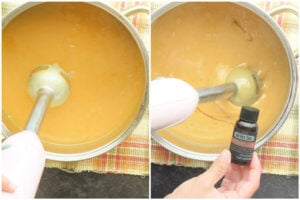
- Combine oils and cider mixture. When the oils and cider mixture cools to about 110°F (43°C), pour the mixture into the melted oils. Blend using a stick blender until "trace" is achieved – the soap thickens slightly, and a trail of soap rests on top of the batter rather than sinking in immediately.
- Add fragrance. Stir in the fragrance oil by hand.
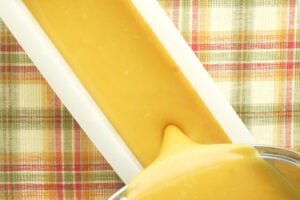
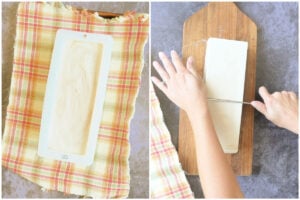
- Pour into mold and smooth. Pour the soap batter into the prepared mold, gently smoothing out the top. Allow it to cure at room temperature.
- Unmold and cure. Un-mold the soap after 24 hours, cut it into bars, and let the bars cure for 2 weeks before using.
Video
Notes
More Tips:
Never make soap when you are rushed or stressed. This leads to mistakes, which are very serious when working with chemicals.
Make sure to use a thermometer to check the temperatures of your oils and lye mixture before mixing to make sure they are just right.
Soap-making can be messy, and lye can ruin fabrics, so wear something you don’t mind getting stained or damaged.
Lye fumes can be strong, so working in a well-ventilated area or near an open window is best.
Keep any raw soap or lye away from children. Always follow safe soap-making practices: wear gloves, goggles, long sleeves, and work in a well-ventilated space.
The soap in the picture is colorless. Add a brownish-orange mica like this one if you want a deeper color.

Brand new to soapmaking? This recipe is a great choice for beginners, but first, read my beginner’s guide to making soap at home.
Key Ingredients and Tools
To make this soap, you’ll need some important tools and ingredients. Here are the key items you’ll need:

- Apple cider: Fresh apple cider is important for capturing the true essence of autumn in your soap.
- Lye: This important ingredient is necessary for making soap and can usually be found in the cleaning supplies section of a hardware store.
- Sweet almond oil: This oil adds moisturizing properties to your soap and can be found in the skincare aisle or online.
- Shea butter: Known for its rich, moisturizing qualities, shea butter can be found in health food stores or online.
- Stick blender: A sturdy stick blender helps you achieve “trace” quickly and ensures a smooth mixture.
These items will make sure that your soap-making process goes smoothly and that your final product is high quality.
Here are some good options for ingredient substitutes in this recipe:
- Sweet almond oil: You can use grapeseed or sunflower oil Instead of sweet almond oil.
- Shea butter: Use cocoa butter or mango butter as an alternative.
- Coconut oil: Consider using palm oil or babassu oil.
- Comfort and Joy fragrance oil: Try another autumn fragrance or essential oil blend like cinnamon and clove.
Using these alternate ingredients may affect the final result of the recipe, but feel free to try and see how it turns out.
Making your own Apple Cider Soap at home is a delightful and rewarding project that fills your space with the cozy scents of fall. With a little bit of preparation and care, you’ll end up with beautiful bars of soap that are useful and a lovely reminder of autumn.
Just follow these simple steps and tips to make lovely, fragrant soap bars perfect for pampering yourself or gifting to others. Don’t forget to enjoy making your own soap and the satisfaction of creating something wonderful from scratch!


How much soap does this yield? What volume size mold should I use?
soap molds are unfortunately super annoying and they don’t really sell them my volume size, they just give you the dimensions. I use a 10 inch mold and it fills it just right. but ALWAYS have extra in case there’s any overflow. I recommend having a spare cavity mold so you can pour any overflow into that.
Hi Katie, I have got my Apple cider in the freezer ready to try your recipe. I was wondering if this soap bar can be used as a shampoo bar?
hi estelle… you pretty much use any bar as a shampoo bar! this one has a great lather from the sugar so it should work well!
Can I use apple cider vinegar ( ACV) or I have to get apple ” cider” from the store?
You can use vinegar in soap and typically you would do 50% water 50% vinegar, but no the recipe is not intended to use it. the cider has sugar which helps the lather and it provides a nicer color as well. vinegar water would be a totally different bar 🙂
One of my favorite recipe easy to make
thanks veronica so glad yuu enjoy it 🙂
This recipe came out perfect!!!
The recipe instructions mentions the word ‘milk’ twice. I don’t see milk in your recipe list. Should instructions read: Lye/cider liquid in lieu of milk ?
yes! I’ll change that!