Easy Crusty Sourdough Rolls
Learn how to make these reader-favorite chewy and crusty sourdough rolls using a small amount of yeast and a special steam technique in your oven. Easy to make, with a great crust and soft interior.
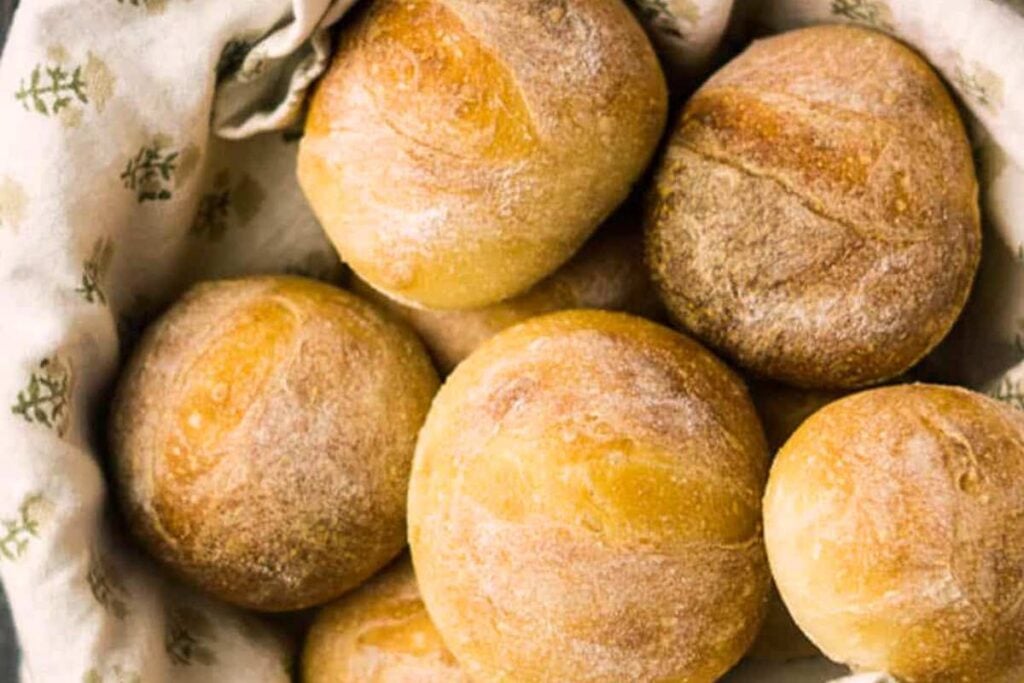
This is the most popular of all my sourdough bread recipes. You’ll love how flexible this recipe is: make them for dinner tonight, sandwiches for lunch, or freeze them for later.
Crusty Sourdough Rolls

Ingredients
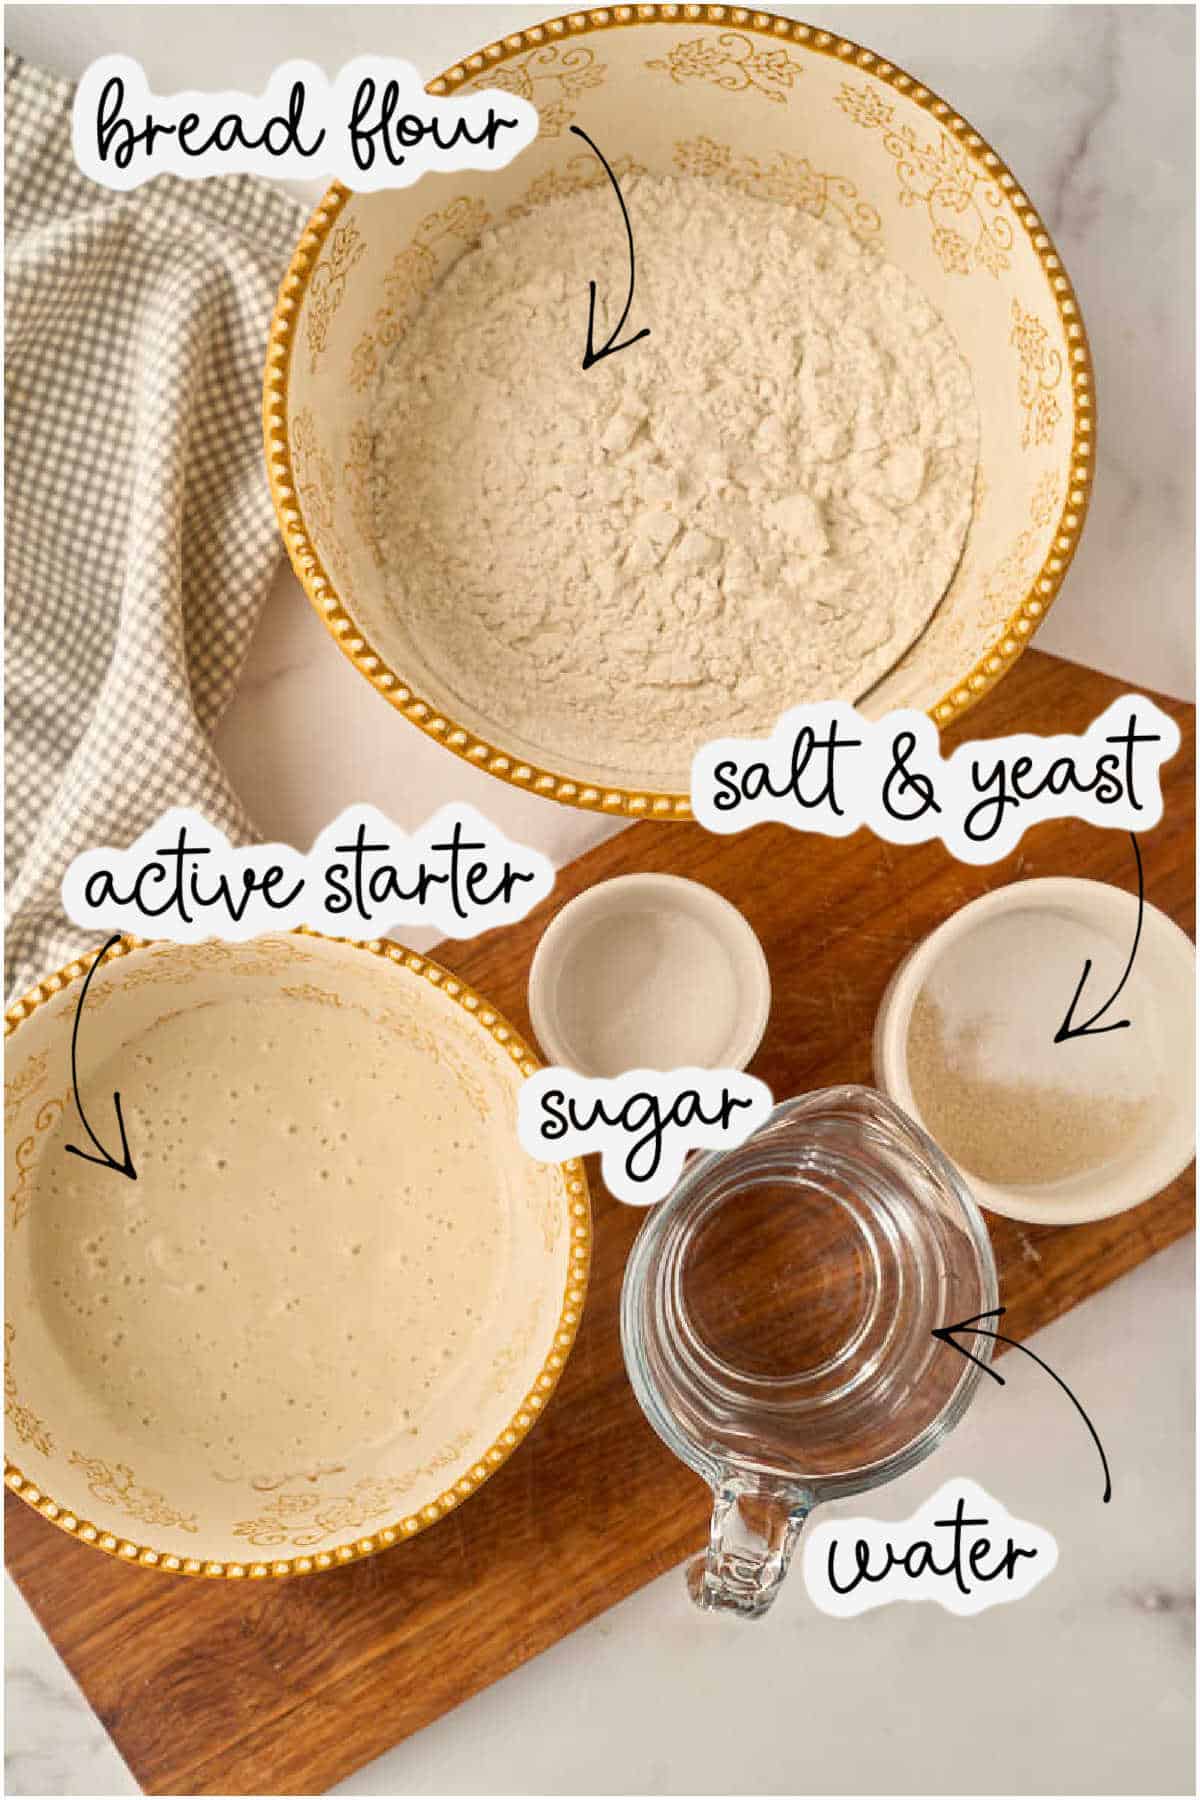
- 7 ounces active sourdough starter 1 ¼ cups / 200 grams
- 13 ounces bread flour 2 ½ cups to 3 cups / 370 grams
- 6.5 oz water ¾ cup plus 1 tablespoon / 185 grams
- ½ teaspoon sugar
- 1 ½ teaspoons salt
- ½ teaspoon yeast
Save This Recipe
You'll join my email list which you will love. And if you don't, unsubscribe in one click. ❤️
Instructions
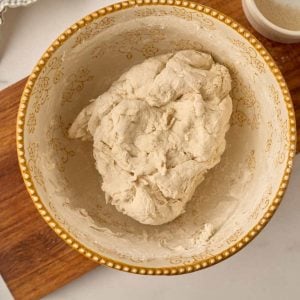
- Mix all ingredients except salt and yeast. Combine the starter, flour, water, and sugar in a large bowl. Stir well, using your hands if needed to incorporate all ingredients. The mixture may look dry but will feel slightly sticky to the touch. Cover and allow to rest at room temperature for thirty minutes.

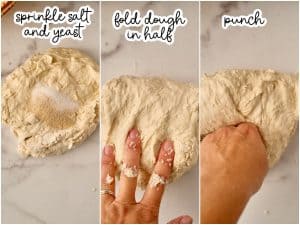
- Knead in the salt and yeast. Add the salt and yeast on top of the dough, and knead until smooth, stretchy, and elastic. (If using a bread machine, set it on the dough cycle. For a stand mixer, set it on low about 5 minutes. If kneading by hand, knead for about 10 minutes.) Check the consistency of the dough after a few minutes of kneading. It may seem sticky, but should clear the sides of the bowl and should not be too difficult to work with. If it seems very wet, add more flour a few tablespoons at a time.

- The first rise. When the dough is kneaded, cover it and put in in a warm place to rise between 60-90 minutes, until nearly doubled in size.

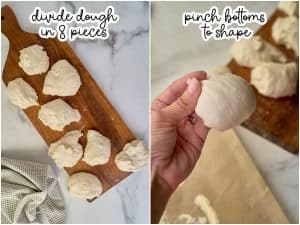
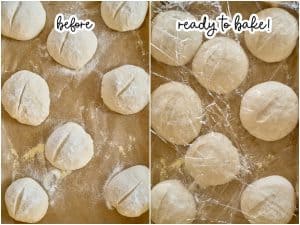
- Shape the rolls. Turn the dough out onto a clean counter or a cutting board. Prepare a baking sheet with parchment paper or oil and flour. Dust the top of the parchment with cornmeal. Divide the dough into 8 equal pieces, either by dividing into half, then quarters, then eighths, or by. using a kitchen scale. Shape the pieces into rolls by pinching the bottoms. Place on the cornmeal dusted parchment. Rub the tops with flour. Slash, if desired, using a lame or sharp knife.

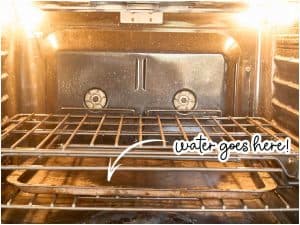
- The second rise. Cover the rolls with heavily greased plastic wrap and let rise in a warm place for 45-60 minutes, until puffy. Towards the end of the rising time, preheat your oven to 450 degrees. Place one rack in the center, and one in the lower middle area. Place an empty baking sheet on the lower rack to get hot while the oven preheats.

- Bake with steam. When the oven has heated and the rolls have risen, pour one cup of water on the hot baking sheet to create steam. (It may buckle, this is ok.). Place the rolls inside and bake for 17-21 minutes, until browned outside. Cool rolls on wire rack for at least 30 minutes before serving.

Video
Notes
Nutrition
It only took me a million different tries to get this recipe right. I really hope you like them.
Sourdough Sundays Newsletter
Every Sunday evening I’ll send you a sourdough recipe to make that week, straight from my kitchen to your inbox.
And as a thank you for signing up, I’ll send you this e-book with beautiful printable recipes right away. Simple!
You will not be added to any other email lists or my daily newsletter. But if you’re already on my newsletter, you’re welcome to join and receive both.
Adding steam is the secret method that gives them the artisan look and nice high rise. We’re doing it the cheap way without a profession steam oven. Just pour some water onto a hot pan as your putting the rolls in to bake. Now they’ll have a steamy environment that lets them rise higher and faster.
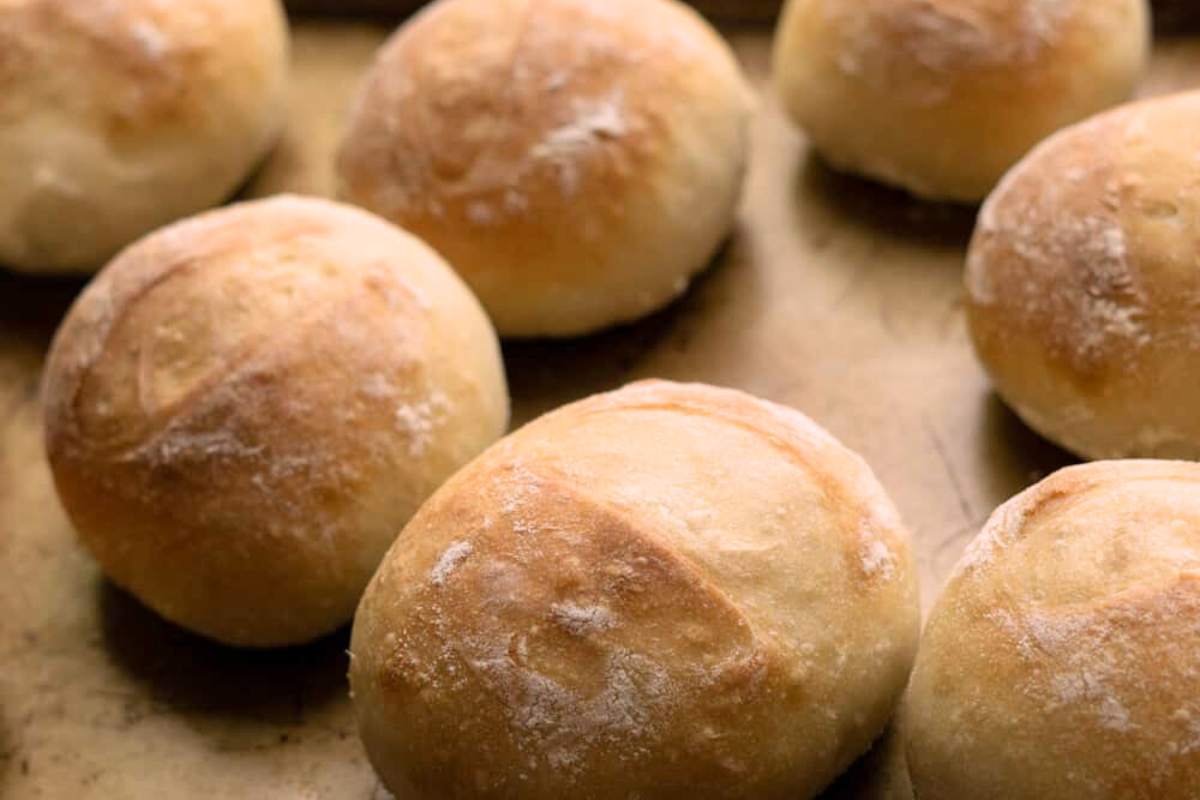
Getting the dough right is super important too. You want it slightly sticky but not so sticky that it’s hard to handle.
Tips for Success
Let them cool for at least 30 minutes; they’ll finish baking as they cool
You need to eyeball your dough. If it’s super wet, add flour. If it’s dry and crumbly add water. Just a little of each will make a difference.
The dough should clear the sides of the bowl but still feel slightly tacky.
Pinch the bottom of each roll to shape them, don’t squish down from the top.
This is one of the keys to a great oven spring. Don’t be afraid of this process.
Set up your oven like this, with a metal-rimmed baking sheet on a lower rack. (Do not use glass, or it will shatter!)
Ingredients and Equipment
Sourdough Starter: Should be active and bubbly, about the consistency of pancake batter
Bread Flour: Gives you chewier rolls with better structure
Digital Scale: Not required but really helps with consistency
Baking Sheet: You’ll need two – one for the rolls and one for creating steam
Parchment Paper: Prevents sticking and makes cleanup easier
Most sourdough starter is a thick, pourable liquid with the consistency of pancake batter. If yours is thicker or thinner, you will need to adjust the amount of water, so start with a lesser amount and add more slowly if needed.
Make It Your Own
- Try substituting up to 25% whole wheat flour
- Add a tablespoon of olive oil for softer rolls
- Divide into 12 pieces instead of 8 for dinner roll size
- No bread flour? All-purpose works too – just use a bit less water
Kneading Options
To knead by hand
Fold the dough in half, then punch it down. Stretch it out again, fold, and punch. Repeat this process for at least five minutes, until the dough is stretchy and smooth. You should be able to pull it flat without tearing it.
Kneading with a stand mixer
Place the dough in your mixer bowl with the dough hook and let it run on low for five to ten minutes.
Bread machine method
Simply add everything to the bucket and select the dough cycle. When the machine beeps, you’ll have a risen dough that’s ready to shape. I use this method the most.
Common Questions
You can reduce the water a bit and use all-purpose. They won’t be as chewy though. I really recommend bread flour!
You probably used all-purpose flour or measured it differently. Add some more flour. You’ll be okay.
Yes, an overnight rise in the refrigerator will work. Just shape them the next day, let them rise again, and bake.
I hope you come over to the sourdough dark side where everything is easy and works with your everyday life. This is a recipe you’ll make over and over.
Love,





Very good! My husband’s favorite. Nice & crusty on the outside and chewy on the inside. The only thing I did differently was to cut the dough into 10 pieces to make smaller rolls. This will be my rolls recipe from now own. Thanks for sharing, Katie!
so glad you liked them debbie! I like them a bit smaller too. 🙂
What temperature is warm is that like 200 degrees? If i wanted to freeze them then reheat.
for reheating yes 200 is great!
Hi Katie, So you think I could shape the rolls and then refrigerate them overnight, remove from the refrigerator, let warm-up and rise, and then bake them?
Hi Katie,
I only have Active Dry yeast on hand, which needs to be dissolved in water first. Should I use an additional amount of water to dissolve or use some of the 185g of water. I don’t want to affect the autolyze. Will dissolving in, say, 20g of water affect the dough or should I just add a bit more flour if too wet?
Thanks!
hey carol, use some of the 185g of water. the autolyse will still be fine 🙂
Thanks! Still trying to understand hydration and ratio thing. My starter is about 80% hydration. Do you use a 100% hydration starter? How will my 80% affect my rolls?
Thanks for your help!
Thank you for this stellar recipe! It’s a keeper. The rolls look professional. Next time, I will add a pinch more salt. I use kosher salt and wasn’t sure if the recipe was for table salt or kosher. 😋
So happy you enjoyed it Allison! :). (I use table salt, I’ll update the recipe!)
Hi Katie,
My husband likes a larger roll to make sammies. It’s hard to tell how large these rolls get. Can I portion the dough into 6 pieces? What would the baking time be? Thanks! The recipe looks amazing!
Hi carol, I actually eat these with sandwiches but they’re a little small. I think 6 would be good! I think at least 20 minutes 🙂
Thank you for responding so quickly! Just out of the oven, looking and smelling fantastic! Pulled them out at 17 minutes. Can’t wait to try one! Thanks again!
I did everything according to the directions except I proofed it overnight in the fridge on the first proof. Then on the second proof I left it out at room temp, covered, for 2ish hours. They came out perfect! Super yummy.
Best roll recipe ever!!! I have tried countless recipes and this one hits it out of the ballpark. Doubled the recipe with no problems. Although kneading in the yeast and salt seems weird after letting the dough sit, just do it! Amazing texture – just the right amount of chewy and tender
aw thank you SO very much! we love them too! so thankful you let me know you enjoy them 🙂
I followed your recipe to the letter, and these rolls are perfection! Seriously bakery quality. The texture and flavor are spot on! We had them for dinner with cauliflower and potato leek soup. So good. Will be making on a regular basis.
I meant to post 5 stars. Not sure why it jumped to 4.
thank you amanda! so happy you liked them!
Hi, what sort of yeast should you use for the recipe? Can I use quick easy bake yeast?
I am not a baker but have packed into the high country with Sailor most of my life. I usually just add my starter to whatever I am making be it pancakes, biscuits, dumplings. I pretty much put all your listed ingredients in a can with Sailor, took off on horseback to a trout stream, fondled everything before bedding down for the night. In the early morning waiting for my cowboy coffee I did some more touchy stuff with the dough, grained the critters and buried the Dutch ovens in the smoldering coals of the campfire. Might have been gone a couple of hours. Came back to camp with a mess of Goldens that were rolled in polenta and fried in bacon fat. Popped the lids of them ol’ cast iron pots to the best rolls I ever made. Don’t know who to blame for the results. Me, you, or Sailor! Two horses, one yeller pup, and an this ol’ boy ate Em gone-gone before noon! Thank you young lady. Gonna have to do the dance again!!!~kw
Since 1 teaspoon salt = 2,300 mg. sodium, the whole recipe contains at least 3450 mg sodium and the 8 rolls contain at least 430 mg each. Your nutrition information is drastically incorrect. If I cut the salt to 1/2 tsp, will the flavor still be any good?
hi marsha- i’ve updated the nutrition info, it wasn’t pulling in the salt for some reason. i would personally find them bland with only 1/2 teaspoon of salt but if you are accustomed to lower sodium foods you might find it acceptable.
Best sourdough dinner rolls! They where great with lasagna night and for our Easter dinner. I have an addiction with sourdough recipes. I name my starter – Henrietta 🙂 So far the recipes I have tried on this website have been winners. Keep them coming.
Hello
I’ve not made this yet, firstly I wondered if you can make without adding ANY yeast? I’ve got a great starter (very proud) and my body isn’t a fan of yeast. Please can you advise?
Thanks
Vicki (UK)
yes, you can absolutely make them without yeast. they aren’t quite as fluffy inside, but still delicious. MUCH longer rise times, obviously 🙂
Can I get your starter recipe for these sourdough rolls.
hi cecile! if you search my site for homemade sourdough startr you’ll see my process! if you don’t want to wait, i recommend buying some from king arthur flour, it’s around 6 dollars last time i checked and gets you off to a good start right away!
I’ve been wanting to try sourdough rolls and your recipe was the first I made. They are so good! Easy to make, puffed up nicely, and taste delicious. I’ve been making various sourdough things since last summer, and my husband declared that these rolls are his favorite. Thank you.
These have been my go to for using up discard. I also usual use all purpose flour and flour the tops and score immediately before baking. Turns out great every time, and they freeze well! Just heat frozen rolls in a 350° oven for about 15 minutes and you get a nice crunchy crust and soft, fluffy interior. Thanks for the great recipe!
suzanne thank YOU for the tip about reheating in the oven straight from frozen. i will be doing that with my sourdough rolls from now on! 🙂
These are really yummy! Comes together quickly and the dough is so easy to work with when forming the rolls. I ended up baking mine for about 25 minutes to get that golden crusty top. They disappeared quickly so I’m making more today. I’m thinking of making them a little bit bigger and making them into mini soup bread bowls. 🙂
This is my go to recipe and quite often I double it to be sure we are well stocked since these tend to disappear!
I was wondering, how do they fair if I were to place them in the fridge overnight instead of the 60-90 portion?
These look delicious! Should the starter be active or could you use discard? Thanks!
you’ll want active starter! 🙂
Oops. I had it in my head to use discard. I made these for dinner tonight. They were a bit dense, but we loved them. Do you think that was because I used discard? I will definitely make them again. This is my second recipe of yours that is a keeper!
hi yvonne! yes you’ll definitely want an active starter next time! (or use 3x the yeast). 🙂