Easy Crusty Sourdough Rolls
Learn how to make these reader-favorite chewy and crusty sourdough rolls using a small amount of yeast and a special steam technique in your oven. Easy to make, with a great crust and soft interior.
This is the most popular of all my sourdough bread recipes. You’ll love how flexible this recipe is: make them for dinner tonight, sandwiches for lunch, or freeze them for later.
Crusty Sourdough Rolls

Ingredients
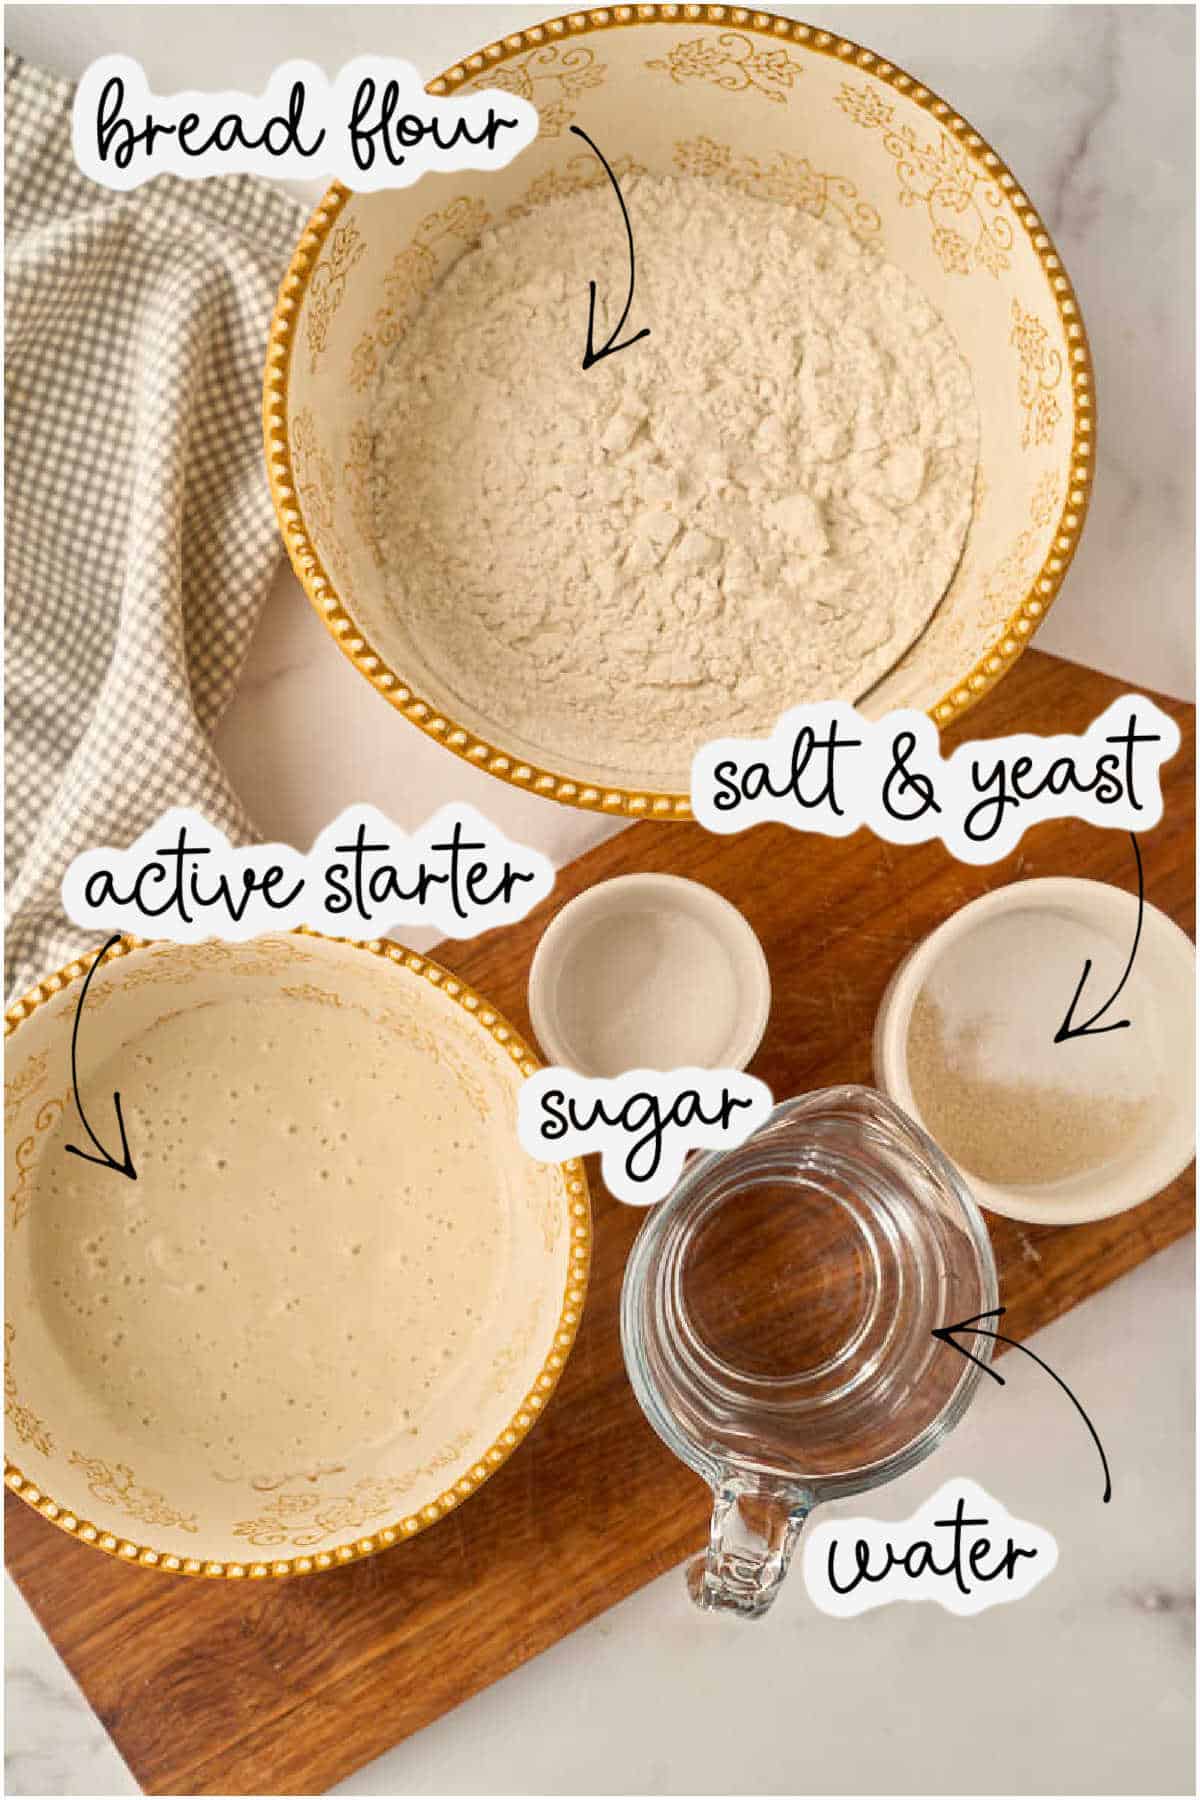
- 7 ounces active sourdough starter 1 ¼ cups / 200 grams
- 13 ounces bread flour 2 ½ cups to 3 cups / 370 grams
- 6.5 oz water ¾ cup plus 1 tablespoon / 185 grams
- ½ teaspoon sugar
- 1 ½ teaspoons salt
- ½ teaspoon yeast
Save This Recipe
You'll join my email list which you will love. And if you don't, unsubscribe in one click. ❤️
Instructions
- Mix all ingredients except salt and yeast. Combine the starter, flour, water, and sugar in a large bowl. Stir well, using your hands if needed to incorporate all ingredients. The mixture may look dry but will feel slightly sticky to the touch. Cover and allow to rest at room temperature for thirty minutes.
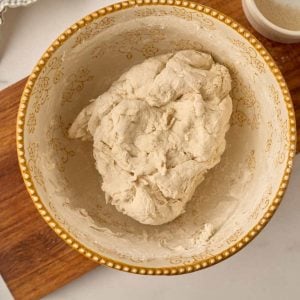
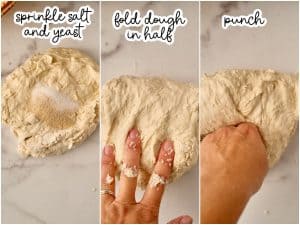
- Knead in the salt and yeast. Add the salt and yeast on top of the dough, and knead until smooth, stretchy, and elastic. (If using a bread machine, set it on the dough cycle. For a stand mixer, set it on low about 5 minutes. If kneading by hand, knead for about 10 minutes.) Check the consistency of the dough after a few minutes of kneading. It may seem sticky, but should clear the sides of the bowl and should not be too difficult to work with. If it seems very wet, add more flour a few tablespoons at a time.

- The first rise. When the dough is kneaded, cover it and put in in a warm place to rise between 60-90 minutes, until nearly doubled in size.

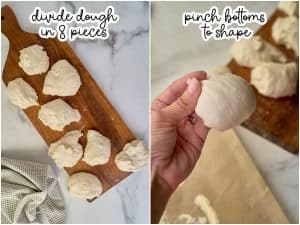
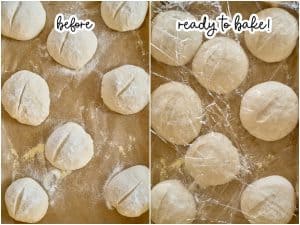
- Shape the rolls. Turn the dough out onto a clean counter or a cutting board. Prepare a baking sheet with parchment paper or oil and flour. Dust the top of the parchment with cornmeal. Divide the dough into 8 equal pieces, either by dividing into half, then quarters, then eighths, or by. using a kitchen scale. Shape the pieces into rolls by pinching the bottoms. Place on the cornmeal dusted parchment. Rub the tops with flour. Slash, if desired, using a lame or sharp knife.

- The second rise. Cover the rolls with heavily greased plastic wrap and let rise in a warm place for 45-60 minutes, until puffy. Towards the end of the rising time, preheat your oven to 450 degrees. Place one rack in the center, and one in the lower middle area. Place an empty baking sheet on the lower rack to get hot while the oven preheats.

- Bake with steam. When the oven has heated and the rolls have risen, pour one cup of water on the hot baking sheet to create steam. (It may buckle, this is ok.). Place the rolls inside and bake for 17-21 minutes, until browned outside. Cool rolls on wire rack for at least 30 minutes before serving.

Video
Notes
Nutrition
It only took me a million different tries to get this recipe right. I really hope you like them.
Sourdough Sundays Newsletter
Every Sunday evening I’ll send you a sourdough recipe to make that week, straight from my kitchen to your inbox.
And as a thank you for signing up, I’ll send you this e-book with beautiful printable recipes right away. Simple!
You will not be added to any other email lists or my daily newsletter. But if you’re already on my newsletter, you’re welcome to join and receive both.
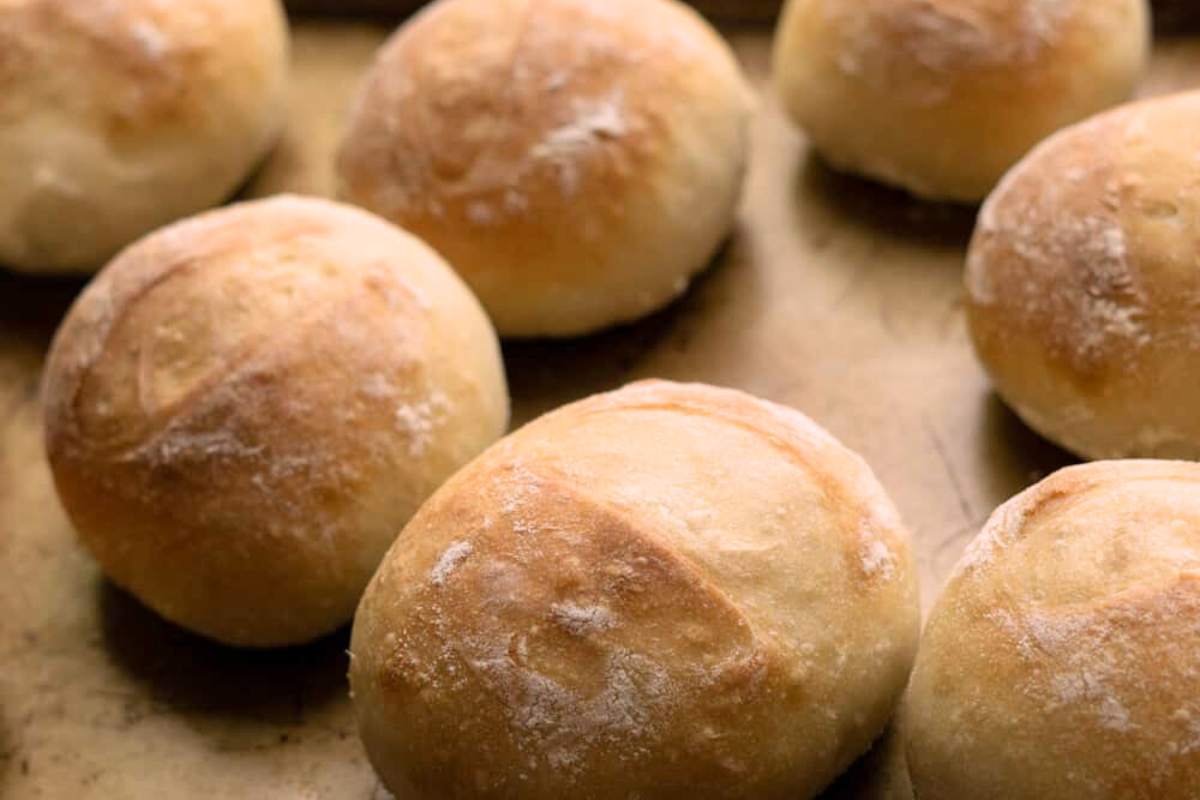
Adding steam is the secret method that gives them the artisan look and nice high rise. We’re doing it the cheap way without a profession steam oven. Just pour some water onto a hot pan as your putting the rolls in to bake. Now they’ll have a steamy environment that lets them rise higher and faster.
Getting the dough right is super important too. You want it slightly sticky but not so sticky that it’s hard to handle.
Tips for Success
Let them cool for at least 30 minutes; they’ll finish baking as they cool
You need to eyeball your dough. If it’s super wet, add flour. If it’s dry and crumbly add water. Just a little of each will make a difference.
The dough should clear the sides of the bowl but still feel slightly tacky.
Pinch the bottom of each roll to shape them, don’t squish down from the top.
This is one of the keys to a great oven spring. Don’t be afraid of this process.
Set up your oven like this, with a metal-rimmed baking sheet on a lower rack. (Do not use glass, or it will shatter!)
Ingredients and Equipment
Sourdough Starter: Should be active and bubbly, about the consistency of pancake batter
Bread Flour: Gives you chewier rolls with better structure
Digital Scale: Not required but really helps with consistency
Baking Sheet: You’ll need two – one for the rolls and one for creating steam
Parchment Paper: Prevents sticking and makes cleanup easier
Most sourdough starter is a thick, pourable liquid with the consistency of pancake batter. If yours is thicker or thinner, you will need to adjust the amount of water, so start with a lesser amount and add more slowly if needed.
Make It Your Own
- Try substituting up to 25% whole wheat flour
- Add a tablespoon of olive oil for softer rolls
- Divide into 12 pieces instead of 8 for dinner roll size
- No bread flour? All-purpose works too – just use a bit less water
Kneading Options
To knead by hand
Fold the dough in half, then punch it down. Stretch it out again, fold, and punch. Repeat this process for at least five minutes, until the dough is stretchy and smooth. You should be able to pull it flat without tearing it.
Kneading with a stand mixer
Place the dough in your mixer bowl with the dough hook and let it run on low for five to ten minutes.
Bread machine method
Simply add everything to the bucket and select the dough cycle. When the machine beeps, you’ll have a risen dough that’s ready to shape. I use this method the most.
Common Questions
You can reduce the water a bit and use all-purpose. They won’t be as chewy though. I really recommend bread flour!
You probably used all-purpose flour or measured it differently. Add some more flour. You’ll be okay.
Yes, an overnight rise in the refrigerator will work. Just shape them the next day, let them rise again, and bake.
I hope you come over to the sourdough dark side where everything is easy and works with your everyday life. This is a recipe you’ll make over and over.
Love,





Absolutely gorgeous, great recipe! 1 time making rolls, and not the last – thank you
Fantastic recipe! My rolls turned out great.
I’m so happy to hear that! There’s nothing like fresh, crusty sourdough rolls, especially when they turn out just right. Thanks for sharing your success—I love knowing they worked well for you!:)
This recipe calls for an active starter that has been recently fed. When you say this, do you mean a mature and establish starter that has been fed to make a levain or could you be using discard from a mature starter?
no it needs to be active, not discard. there isn’t enough yeast to make the rolls rise without some activity from the starter too 🙂
Very good recipe for a new baker. Thank you very much. I will be making them again.
I’ve just made these for the 1st time. Your written & video instructions were great. Mine don’t come out that crispy & came out a bit darker than I would have like. The whole process was perfect up until I actually baked them. I did in a fan forced oven, probably need to turn it down a bit!
Made them exactly as the recipe states (mixing in the dry yeast and all) and they turned out perfect!! Will double next time now that I know I can do it. Thank you for the excellent recipe and tips!!
These rolls were awesome ~ just started on my sourdough journey and i think the hardest part is how long some of the recipes take… The recipe was clear and concise, the rolls turned out perfectly and everyone loved them. Thank you!
Update from a couple months ago asking about making this recipe into a load. I’ve now made this recipe into a loaf twice. Both times has come out incredible. The loaf doesn’t last a day in our house. Amazing toast, amazing sandwiches. So yummy. Thanks again!
This is a fantastic recipe, and so easy. My family loves it, and I make it every week. My starter is robust and works for a lot of yeast free recipes, but I like how the yeast in this recipe speeds up the process and just provides a bit of security if the starter seems a bit less active than usual. I generally make 1.5 times the recipe to yield 12 rolls. I love the steam trick, too, to give the crust that extra crispness and chew.
Place the rolls in the oven (on a separate baking sheet above) or place them directly in the water?
seprate baking sheet above
I make this recipe about once a week. Sometimes, I up the quantity to 1.5 times the recipe to get 12 rolls.
This is a big family favorite. It has a mellow sourdough tang, but is also a half-day project because of that little bit of instant yeast. It’s advantageous for me to bake as a workday bread, because the addition of the yeast means that it rises and proofs much more quickly. My own starter is very robust, but the yeast accelerates the process. Plus it has the nice sourdough tang, and the great ability of a sourdough based bread to stay fresh much longer than the purely yeast raised alternatives.
This is a terrific recipe for anyone with a busy schedule, but who sets aside the time to cultivate a sourdough starter., and wants some rolls that will give you almost a week’s worth of school lunches!
What is the nutritional information for the rolls? Calories, protein per roll etc?
These are so great and so easy! But do you ever scratch your head at some of the immensely stupid questions / comments you receive? Does anyone actually think before asking a question? And how about the person that gave you 4 stars because they clearly screwed something up? And to the person that asked you for nutritional info … I must have missed the dietician designation behind your name.
You are a saint, and thank you for what you do!
hi Angela! you made my day 🙂 I’m glad you liked them and THANK YOU!
This recipe was easy to follow and rolls turned out perfectly. Thanks
these were a huge hit with my husband and myself! Delicious, soft, easy to cut, we love these buns!!! great recipe, I will keep this recipe on hand. thank you for this recipe!!!
Would I be able to make the dough up a day ahead of time and stick in the fridge overnight? If it can be done, at what step would I stick in fridge until ready to finish. Thanks.
I would shape the rolls and refrigerate then
Fantastic!
Do you use active dry yeast for this? I’m not getting hardly any rise on my first rise
yes active dry or instant. they have a lot of oven spring,b ut yes you should see a noticeable rise on your first rice, try popping in a slightly warmed oven.
I have made these rolls several times, and my family loves them. I would definitely recommend this recipe.
Watch the grams if you were making more than a single batch.
thanks kate!! i am working on the grams, hopefully it will work next time you make them! 🙂
Made these last weekend and they came out amazing!!! My husband loved them. Can these be made as multigrain seeded rolls? Do you have a recipe for those? Thanks again!
Wonderful recipe!
**Please note the measurements in grams does not update with the option to double or triple the recipe