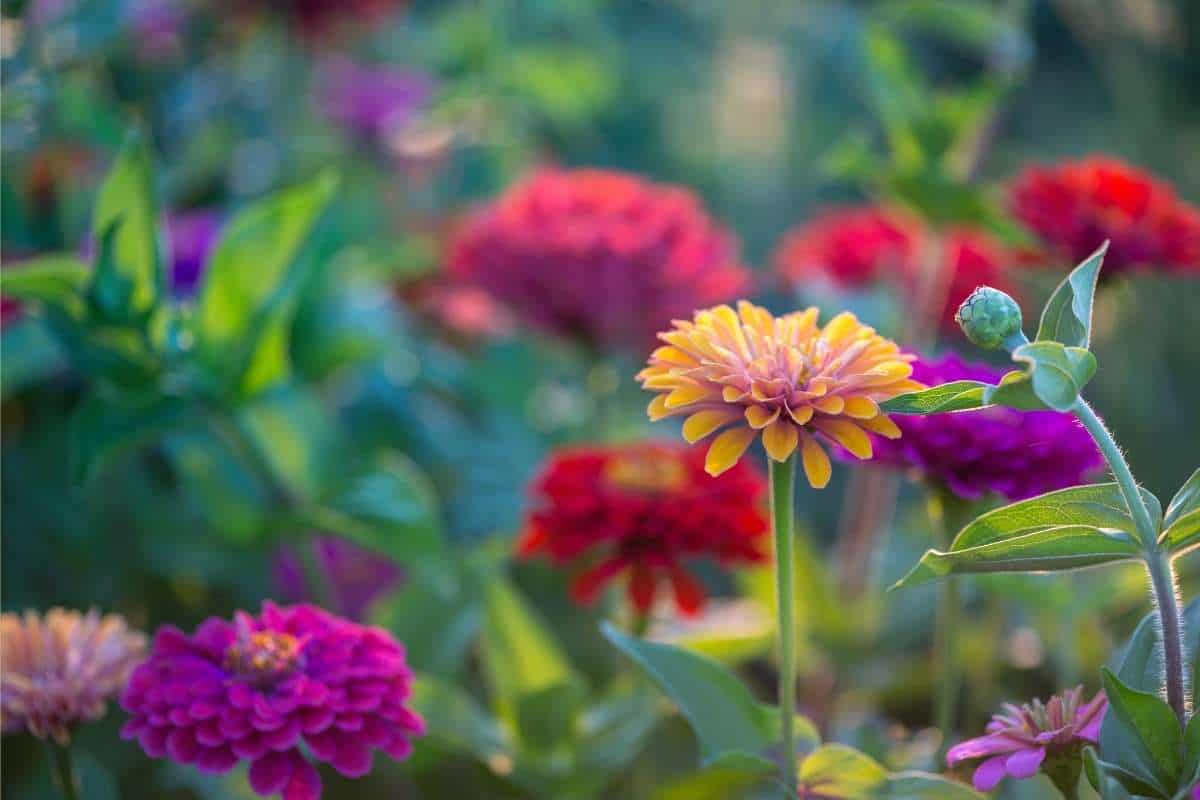
How to Grow Zinnias From Seed
Whenever anyone asks me what to grow in their garden as a complete beginner, I always say the same thing: zinnias. A lot of people recommend tomatoes or zucchini or something practical, but I will never will. Some people like tomatoes. But everyone loves flowers. And zinnias are the easiest and most affordable flowers of all. They’re almost too good to be true.
Here’s how to grow zinnias from seed and what you need to do to care for them well.
Why You’ll Love Growing Zinnias
- They are easy, easy, easy.
- The flowers bloom all the way up to frost and if you keep cutting, you’ll have more blooms than you know what to do with.
- Butterflies and hummingbirds love them.
- Did I mention they’re easy?
Step 1: Pick Your Varieties
Don’t overthink this. Just look at the seed packets and pick some. Don’t buy plants, they are absolutely not worth the money.


Some of my favorites:
- Benary’s Giant This is a classic choice, with big flower heads and a huge variety of colors..
- Fireball blends are varieties in the red, orange, and yellow color scheme.
- California Giants are varieties in the red, rose, yellow, and orange color scheme. They grow tall and are the first of the varieties to bloom. California giant flowers and blooms are similar to dahlia flowers with tall stems and large double blooms.
- Cactus Flower Blend Cactus Zinnia flowers are a little different. The petals are long with rolled edges that turn and twist.
- Cupcake Blend Cupcake blends are beautiful varieties of the Zinnia that resemble Scambiosa.
- Thumbelina These varieties are nice for borders but don’t buy them for cut flowers. I don’t like them at all really.
- Peppermint Stick Peppermint zinnias are a fun stripey variety that kids like. Not my favorite.
Overwhelmed? Buy a Benary’s Giant mixed-color packet. Can’t go wrong.
Step 2: Decide on a Location and Prepare It for Planting
In some ways, this truly is as basic as “stick seeds in the ground and wait for the flowers to bloom” but of course, there’s a little more to know for the best results.
Choosing a Good Location
Zinnias grow well anywhere, but they do need full sun. (This means 6-8 hours of sun per day, so some afternoon shade is fine, and often appreciated). Here are some great places to put them:
- Border Backdrop. Try adding tall zinnia varieties as a backdrop in your flower garden plan.
- Containers. Zinnia plants do alright grown in containers.
- In The Vegetable Patch. My favorite spot for them. They attract beneficial pollinators and can be planted alongside crops like zucchini, beans, and chard.
Again, sun is a must.
Prepping the Soil
This is quite minimal, but you do need to make sure there’s good drainage.
Prepare the garden bed by cultivating and loosening soil. The young plants are sensitive to cold, and soil temperatures should be in the 50s or 60s before transplanting.
Zinnias do not need rich soil, but a light fertilizer application or a good amount of compost will result in healthier plant. Do not add a ton of fertilizer! It’s a complete waste.
A Note About Starting Seeds vs Direct Sowing
Either one works! I always direct sow because it’s so much easier and I’m not in a hurry. But, if you have a short growing season or want extra-early blooms, you can certainly start yours indoors.
Starting Seeds Indoors
If you’d like an extra-early start on your blooms, you can plant zinnia seeds under fluorescent plant lights, either in trays, peat pots, or soil blocks. Put them on a heat mat, keep the soil moist, and the zinnias will germinate quickly (within five days).
You can start four to six weeks before your average last frost date. Transplant outdoors after the last frost date. Most gardeners choose not to start seeds indoors as there is no benefit from being sown early and prefer to wait for warmer weather.
They grow quickly, so be prepared to move them into the garden within a few weeks (don’t start them too early!)
Step 3: Put ’em Outside
You’ll plant them with your tender annuals, like your peppers and tomatoes. They love the heat and will die in a frost.
Soaking zinnia seeds before planting for about 12-24 hours will help reduce germination time.
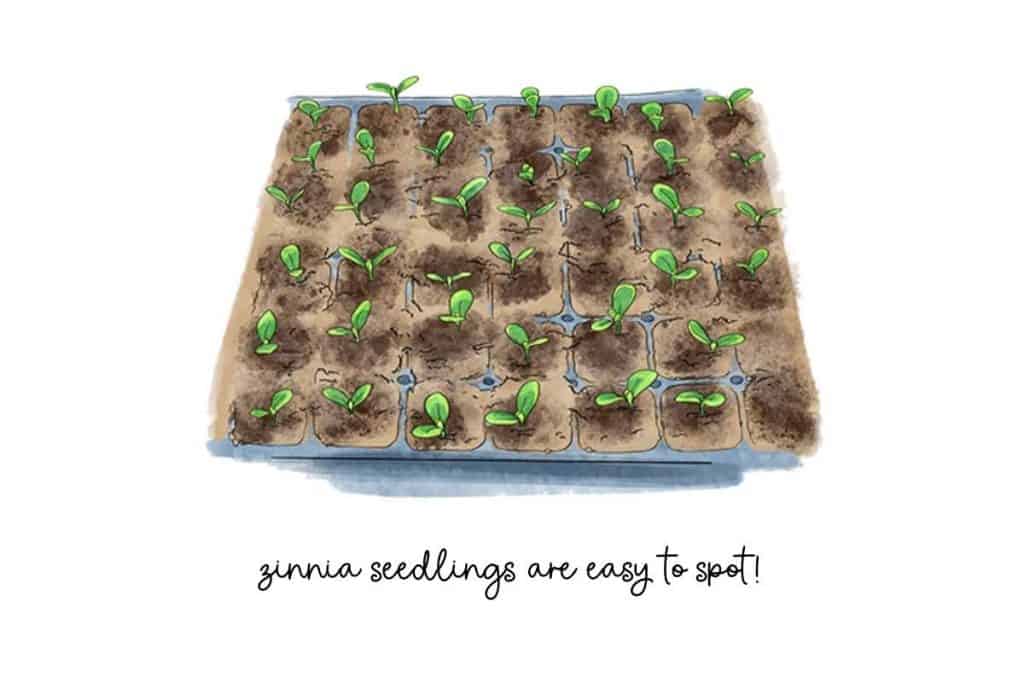
Sow the seeds about ¼ inch deep (this is quite shallow!) and lightly water after planting. After about a week, you’ll see seedlings emerge from the soil.
The average spacing is 6 inches between plants in the row and two feet between the rows for most zinnia varieties. (But check the seed packet!)
(If you’re planting zinnia seedlings, space them at the recommended distance that plants will be after thinning.)
The best place to find the exact information for spacing distances and seed sowing depths is always on the back of the seed packet. Larger varieties will need more space, and dwarf types can be closer together.
Step 4: Care for Them as They Grow
We’ve already discussed that zinnias are easy to grow, but they will need a few things from you.

Once your seeds have germinated, and the plants are about 6 inches tall, spread organic mulch around them to preserve soil moisture. You don’t have to do this, but it will make weeding easier and you won’t have to water as much.
Thinning: Once the seedlings reach three inches tall, it’s essential to thin them to about 6 to 18 inches apart to allow air circulation and keep them from fighting each other for nutrients. I know you read this sentence and like “yeah, whatever”. But I really really want you to do this. Giving your plants enough room is so important for their success.
Pinching: Pinch young plants when they are about 12 inches tall. Pinch directly above the leaves, and two stems will form where there was one. If you pinch too high you’ll have a strange zinnia bush. Pinch low and you’ll have nice long stems for cutting.
Watering: Zinnias will survive with less water than other plants, but that doesn’t mean they like it. They’ll still do best with an inch of water per inch and a little extra on very hot days.
Powdery mildew: Zinnias will often get powdery mildew, especially later in the season when mornings are cool and damp. Give your plants plenty of good air circulation and choose disease-resistant varieties to combat this. But powdery mildew is just a nuisance, and since it usually happens at the end of the season, you can pull the plants that are badly affected.
Other diseases: Your zinnias are less susceptible to bacterial and fungal spots and wilt. The best way to prevent the disease from bothering your beautiful flowers is to water at the base of the plants in the soil and minimize getting the foliage wet.
Pests: Japanese beetles may nibble on the leaves, but they rarely cause severe damage. One thing you will not have to worry about when keeping your zinnias cared for and thriving is deer. Wildlife is always a concern for most plants, but lucky for the zinnia, they are deer-resistant. (Of course, a deer who is hungry enough will eat anything, but they don’t find zinnias particularly delicious)
Fertilizing. If you’re noticing that you’re not getting the blooms you expected from your Zinnia’s, try giving the plants some fertilizer. A fertilizer rich in phosphorous such as bone meal will help encourage blooms.
Deadheading. Use clean garden snippers to deadhead plants by cutting off old flowers to encourage more flowers to form.
Zinnias will take 60 to 70 days from being sown in the soil producing mature flowers (depending on the conditions and the variety).
Step 5: Harvest and Enjoy
Make sure to cut and enjoy your zinnias in bouquets all summer long. This is why you planted them. Enjoy them! Remember that by cutting flowers, you’ll encourage new blooms to form throughout the season.

When harvesting zinnias for a cut flower bouquet or vase, make sure to harvest before small yellow flowers emerge between the petals.
- Harvest after the morning dew has dried, but before the heat of the day
- Cut long flower stems, deep into the plant, at a 45-degree angle
- Let cutting flowers sit in a bucket of cool water for a few hours before arranging
- Treat water with a floral preservative for the longest vase life
Step 6: Save Seeds and Wrap Up the Season
Zinnias are annuals, meaning they complete their life cycle in one growing season and do not survive through winter. You’ll need to plant new seeds next spring.
The good news is, you can save seeds from your zinnias for planting the following year. Harvest the seeds from the dried flower heads and store them in a cool, dry place.
It’s easy to save seeds from open-pollinated varieties such as candy cane and California giant.
Wait for the flowers to dry before harvesting. Place harvested seed heads on a screen so they can dry all the way around. Remove the seeds over a labeled piece of paper and allow them to dry further. They are long and skinny and flat and weird.
Place the seeds in a cool, dry place such as a brown paper bag in a closet. Don’t forget to label the bag.
FAQs: Common Questions About Growing Zinnias
Direct sow seeds. It’s cheap and easy.
Not really. Zinnias will thrive in warmer climates. Just keep them well-watered on hot days.
Hundreds! Each seed will produce a plant that will give you dozens of blooms.
Depends on the variety! A “normal sized” variety will be from 24-36 inches tall and 12-18 inches wide.
Nothing says mid-summer like a bouquet of zinnias in the kitchen. Better than a bushel of tomatoes. But one day I hope you have both.


I am a cancer survivor with very little energy. I love flowers and would like a “Healing Garden”, but have been afraid to try. You have given me the courage! Thank you!
hi sue 🙂 you can absolutely do this. and don’t forget to buy yourself a bouquet every now and then.
Thank you for this post! I’ve been growing zinnias for years just kinda by default, but it’s nice to have real tips and tricks this year 🙂
hi Alison! I’m so glad. here’s to your best year ever 🙂
Would zinnias do well if planed under a small, pea gravel type covering? We opted for small stones instead of mulch I. Our new flower bed. Some plants are coming back, others (still perennials) did not. Just wondering about this. Thank you and LOVE your emails!
hi Carolyn! they should do okay if you mulch around them after they’ve gotten to a decent size. they’d have too much trouble breaking through the pea gravel to get started, and direct sowing them is just SO easy I really encourage to do it. just clear off a little spot for them. 🙂
I would love to see Hearts Content Farmhouse ideas put into books for those of us who have eye strain using phones☹️
hi lynn, do you mean a physical paper book or ebook?
How do you pinch zinnias?
youu pinch the center when the plants are still young, basiclly like you’re cutting off the top. this will force it to send strong side shoots out and you get more flowers 🙂
I’m wondering what fertilizer to use. You mention “high bone-meal” but that is it… I think.
Those ratios 5-20-5 or similar ratios.
Any input on this?
Great tips for growing zinnias. I am excited to try.