Peppermint Ice Cream Pie
You’re just going to have to trust me that this peppermint ice cream pie is an absolute crowd pleaser. It’s creamy, cold, and has just enough candy cane flavor, all wrapped up in a chocolatey cookie crust. Plus, it’s so easy to make, you’ll breathe a sign of relief when you read the recipe. Merry Christmas from me to you.
Peppermint Ice Cream Pie
Equipment
- Mixing Bowls (medium and large)
- Spatula
- Spoon or flat-bottomed glass
- 9-inch pie plate
- Plastic wrap or aluminum foil
- Sharp knife
- Rolling pin or food processor
- Measuring cups or spoons
Ingredients
- 20 chocolate cream-filled sandwich cookies (crushed)
- ¼ cup melted butter
- 1 pint prepared vanilla ice cream
- 12 ounce frozen whipped topping (divided)
- ½ cup crushed peppermint candies (divided)
- 3 drops pink food coloring
Save This Recipe
You'll join my email list which you will love. And if you don't, unsubscribe in one click. ❤️
Instructions
- Prepare the crust. Place the crushed chocolate sandwich cookies in a medium-sized mixing bowl. Then, stir the melted butter until the mixture is evenly moistened. Next, press the mixture into a 9-inch pie plate, spreading it evenly across the bottom and sides. Use the back of a spoon or a flat-bottomed glass to press the crust firmly for a smooth finish. Set aside.

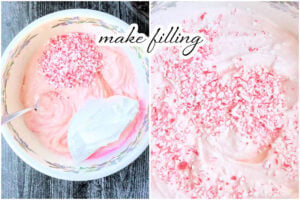
- Make the filling. Remove the vanilla ice cream from the freezer and let it soften at room temperature for 10–15 minutes. In a large mixing bowl, combine the softened ice cream, half-whipped topping, 3 drops of pink food coloring (if using), and ⅓ cup of crushed peppermint candies. Mix well until the color and candies are evenly distributed, creating a creamy pink filling.

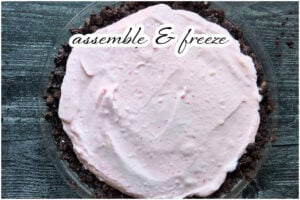
- Assemble the pie. Transfer the prepared filling into the pie crust, using a spatula to spread it evenly and smooth the top. Cover the pie tightly with plastic wrap or aluminum foil, making sure there are no air gaps to prevent freezer burn. Place the pie in the freezer for at least 4 hours or until the filling is firm.

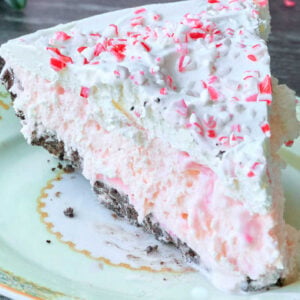
- Add the topping. Once the pie is fully frozen, remove it from the freezer and spread the remaining whipped topping evenly over the top, using a spatula to create a smooth or decorative finish. Then, generously sprinkle the remaining crushed peppermint candies over the whipped topping for a festive touch. Cover the pie loosely and return it to the freezer for at least 1 hour to allow the topping to set before serving.

- Serve and enjoy. Before serving, let the pie sit at room temperature for a few minutes to make slicing easier. Use a sharp knife to cut into 8 slices. Serve chilled, and enjoy the cool, creamy, and festive flavors!

Notes
Nutrition
I’m always looking for fun ways to enjoy classic holiday flavors without hassle, and this pie checks all the boxes. I love recipes like this because they’re quick, easy, and always a crowd-pleaser! Whether entertaining a crowd or craving something sweet, this no-bake pie is quick, delicious, and will surely be a hit with everyone. If you want more peppermint-inspired treats, check out this delicious Peppermint Fudge Recipe.

If you love no-bake desserts, this one will become a favorite in your recipe rotation!
A Newsletter you’ll love
Daily recipes from the farmhouse, Sunday meal plans, seasonal ideas, straight from my kitchen to your inbox.
I promise to keep your email address safe. Unsubscribe at any time
Key Ingredients and Tools
Here are some important tools and ingredients to consider when making this pie.

- Vanilla ice cream: There’s no need for an expensive brand. Great Value is perfect.
- Chocolate sandwich cookies: These cookies are used for the crust, giving the pie a rich chocolate base. You can find them in the cookie section at the supermarket. Graham crackers or chocolate wafer cookies can be good substitutes if you don’t have these.
- Peppermint candies: These are crushed and added to the filling and on top of the pie for a festive, minty taste. Usually, they are in the candy aisle, especially around the holidays. If they’re unavailable, candy canes work well, too.
- Frozen whipped topping: This is important for getting a fluffy texture in the filling and topping. Look for it in the freezer section near the ice cream. You can also make your own whipped cream, but ensure it holds well in the freezer.
- Pink food coloring: This is optional but adds a fun, festive look to the pie. Find food coloring in the baking aisle. Beet-based food coloring is a good choice if you like a natural option.
- 9-inch pie plate: A strong pie plate is necessary for holding the crust and filling. Glass or metal plates work best for freezing and cutting. A disposable aluminum pie pan can be a good alternative if you don’t have one.
These ingredients may seem basic, but they make this dessert easy and tasty. With the right tools and items, your pie will come out great!
Troubleshooting and Help
Not at all! The food coloring is just for that festive pink color. If you prefer a natural look or don’t have food coloring on hand, you can skip it—it won’t affect the taste.
Make sure the pie is fully frozen before adding the whipped topping and candies. Work quickly and return the pie to the freezer immediately after decorating.
Run a sharp knife under warm water, then dry it off before slicing. This helps cut through the frozen layers cleanly. Repeat as needed between slices.
That happens sometimes! Pressing the crust firmly into the pie plate and letting it chill properly can help. If it still crumbles, serve it like an ice cream sundae—no one will mind.
I hope this pie recipe becomes a holiday favorite in your home, just like mine! It’s the perfect treat for festive gatherings or a quiet night with family. Make it ahead for an easy dessert, or enjoy any leftovers as a sweet, frosty snack. Either way, it’s a holiday win!

Love,


