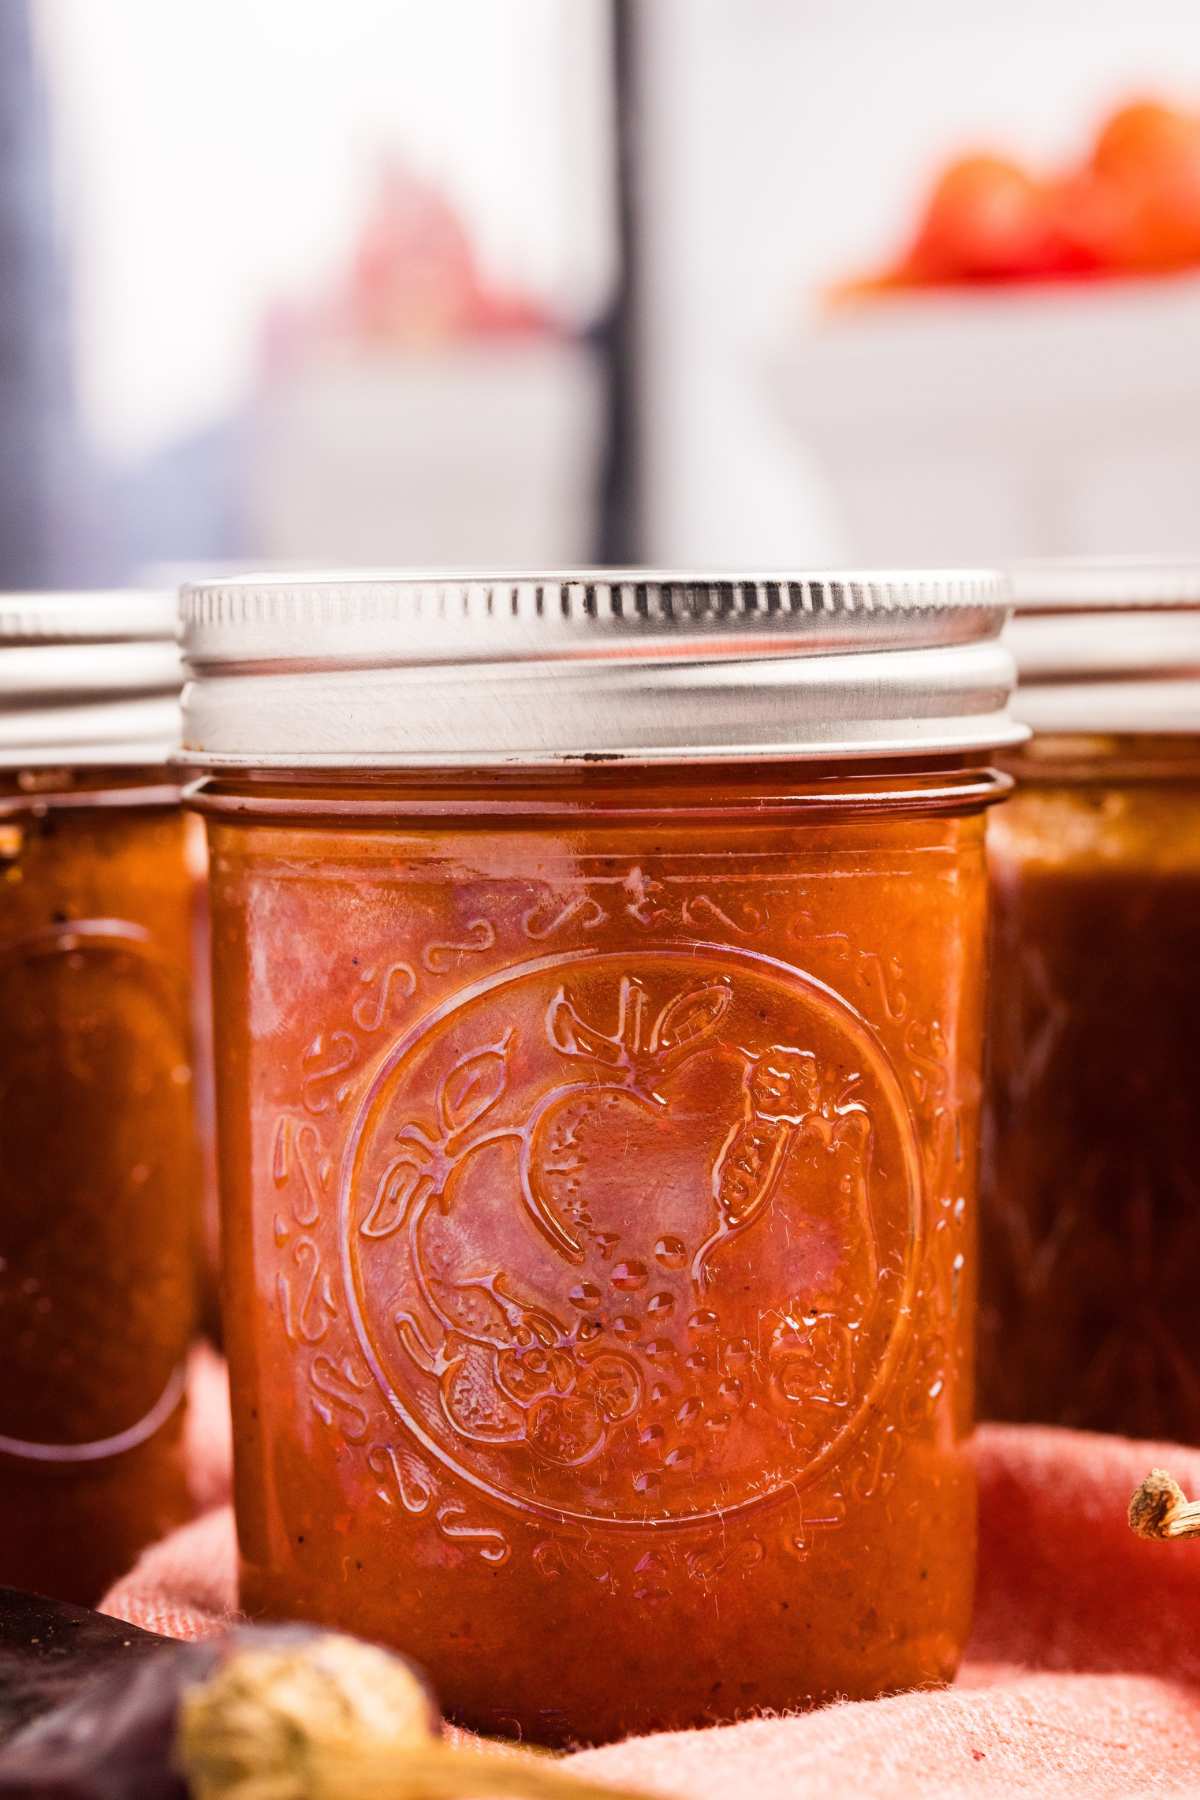
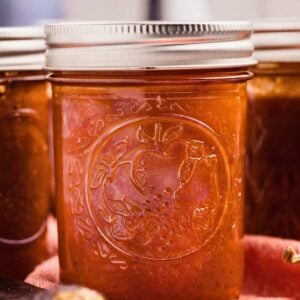
Smoky Homemade Enchilada Sauce (Pressure Canning Recipe)
After pressure canning for five years and making probably 200+ jars of various sauces, this enchilada sauce recipe is hands-down my most requested. It’s the perfect balance of roasted chiles, caramelized onions, and spices that reminds me of our favorite restaurant’s enchiladas. Making a big batch gives you 18 months of pantry-ready sauce.
First, a confession. There are a lot of steps and you will need to spend a fair amount of time cleaning up afterwards. But the beauty of this recipe (and pressure canning recipes in general), is that so much of the prep work is done and jarred up and waiting neatly for you on your shelf.
Table of Contents
Ingredients and Tools You’ll Need
Look for the New Mexican chile peppers in the Latin/International aisle of the grocery store. I can find them at our local store, but if you can’t, you find them online too.
You have to use a pressure canner here because of the low-acid ingredients. It makes sure the sauce reaches a high enough temperature. No waterbath canning! If you have an immersion blender, it makes blending the sauce super easy right in the pot! Just make sure your pot is deep enough so it doesn’t make a mess!

If you’d like to double or triple this recipe, you can make adjustments in the recipe card at the bottom of this post.
Equipment
- Pressure canner
- Large pot
- Skillet
- Blender (or immersion blender if your pot is deep)
Ingredients
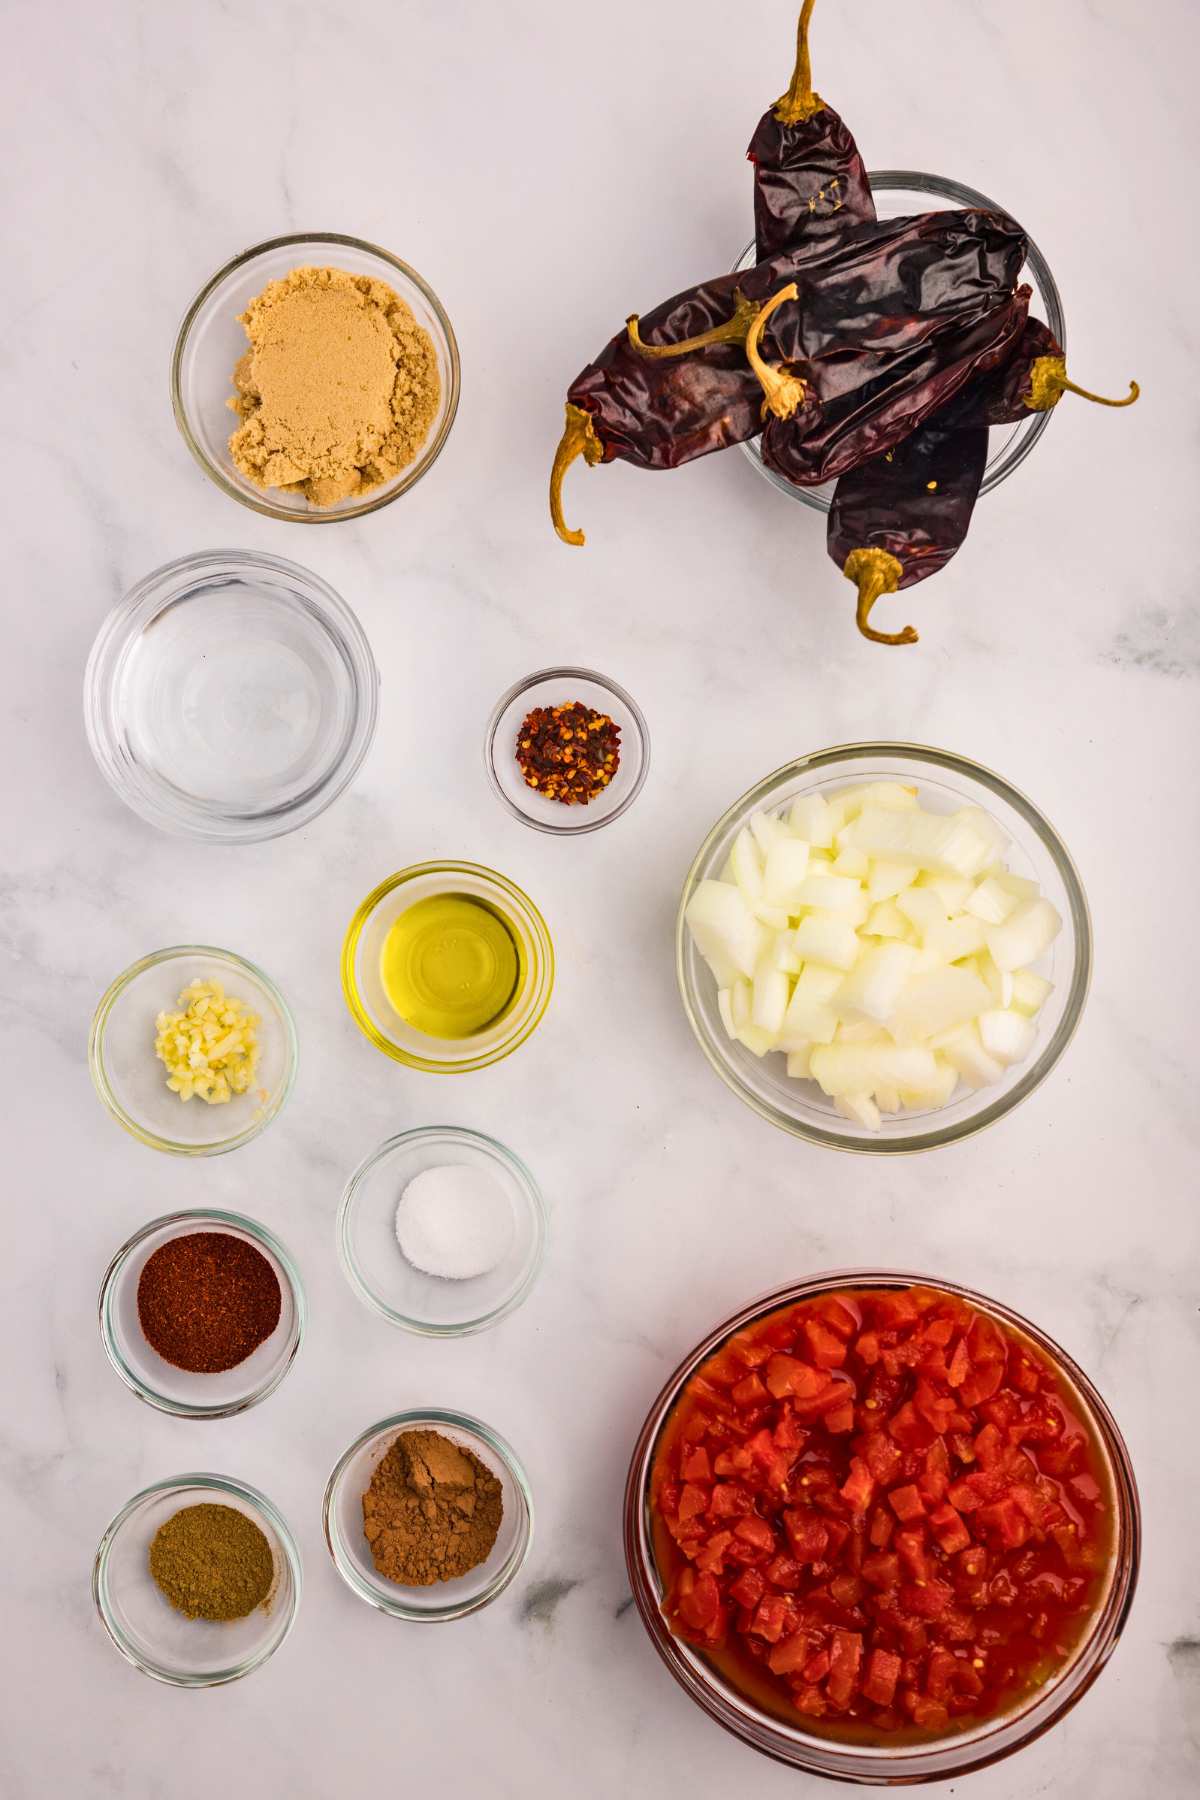
- 6 New Mexican chile peppers dried (can also use Ancho chile peppers)
- 2 cups boiling water
- 2 cloves garlic, finely chopped
- 1 tablespoon olive oil
- 2 ½ cups chopped onion, about 1 large onion or 2 small onions
- 3 cups canned diced tomatoes, two 14.5-ounce cans
- ¼ cup brown sugar, packed
- 1 tablespoon chili powder
- 1 tablespoon cocoa powder
- 1 teaspoon salt
- 1 teaspoon ground cumin
- ½ teaspoon red pepper flakes, optional
How to Make Pressure Canned Enchilada Sauce
If you live above sea level, adjust for altitude. This article will help you adjust your pressure canner correctly based on your altitude.
Step One: Prepare Peppers
Rinse the dried chile peppers under some water to remove any dirt. Pat them dry with a towel.
Step Two: Cook Chile Peppers
Place a skillet over medium heat. Cook the chile peppers for 8-10 seconds or until they just start to puff up and blister. Then flip them over and cook for another 8-10 seconds or until they resemble the other side. (You want to prevent the chile peppers from burning; this will affect the taste of the sauce.) Don’t skip this step. It’s quick but will add the flavor you’re looking for.

Step Three: Cool And Remove Stems And Seeds
Transfer the chiles to a plate lined with a paper towel to cool. Once cool enough to handle, remove the stem and seeds and discard them. Tear the chiles into a few pieces and transfer them to a bowl.

Step Four: Soak Chiles
Cover the chiles with 2 cups of boiling water. Cover with a tea towel and allow the chiles to sit for 20 minutes. Once the chiles are soft, reserve 1 cup of the soaking water and then drain the chiles.

Step Five: Saute Garlic
In a large pot over medium heat, add the olive oil. Once the olive oil has warmed, add the garlic and saute for about 30 seconds.

Step Six: Caramelize Onions
Next, add the onions and stir until well incorporated. Bring the heat down to medium-low and cover. About every minute or so, stir the onions, making sure they don’t stick to the bottom of the pot or burn. Do this for about 10 minutes. Once the onions are nice and soft, remove the lid and cook for another 5-10 minutes, stirring often until they are nicely caramelized.

Step Seven: Add Rest Of Ingredients
Add the tomatoes, brown sugar, chile powder, cocoa powder, cumin, salt, softened chile peppers, and reserved water. Stir to combine. If you want more heat, add in the optional red pepper flakes at this point. Remove from the heat.

Step Eight: Blend
Working in batches, process the tomato mixture in a blender or food processor until nice and smooth. You can also use an immersion blender right in the pot, as long as your pot is deep enough not to splatter!

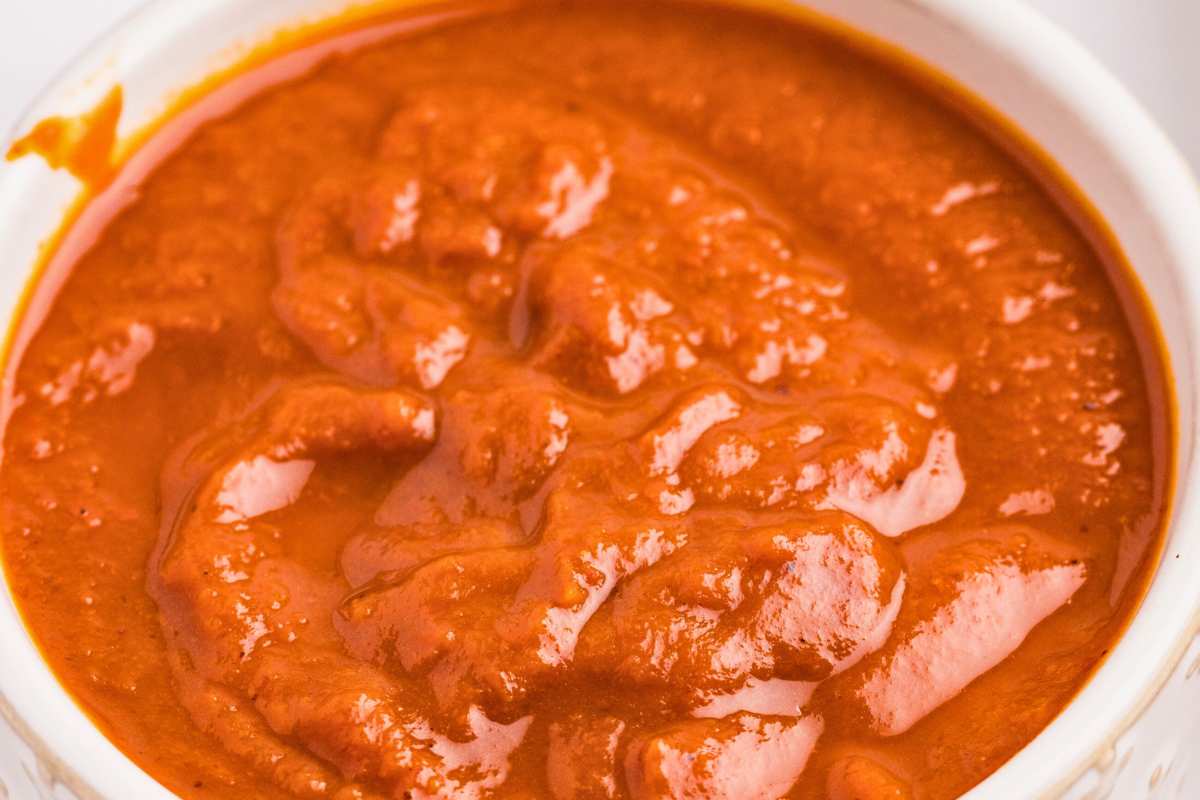
Step Nine: Simmer Mixture
Transfer back into the large pot and bring to a boil. Once boiling, reduce the heat to a simmer and allow the mixture to simmer for about 30 minutes or until it has thickened and darkened in color.

Step Ten: Prepare For Canning
While the sauce is simmering, wash the jars in hot, soapy water. Transfer them to the pressure canner and add enough water so the jars are about half full and the water is to the recommended line. Cover (but don’t seal) and place over medium-high heat. Place your rings and lids into a saucepan with water, place over low heat, and bring to a simmer.

Step Eleven: Fill Jars
Once the sauce has thickened, ladle it into the hot jars, leaving 1-inch headspace. Remove any air bubbles using a debubbler, and then wipe the rims off with a clean, damp cloth or a vinegar-moistened cloth. Place the lids on top, followed by the rings, and tighten them until they are fingertip-tight.

Step Twelve: Process Jars
Transfer them into the pressure canner. Fill the canner with at least 2 inches of water or to the recommended line of your pressure canner. Place the canner lid on and secure it tightly. Set it over medium-high heat and allow the canner to vent continuous steam. Once the steam is venting, allow it to steam for 10 minutes. After the 10 minutes, set your weighted canner to 10 pounds or your dial to 11 pounds (adjusting for elevation) and process jars for 50 minutes. If your pressure drops below 10 pounds for weighted or 11 pounds for dial, stop the timer, bring the canner back up to pressure, and restart the timer. This sauce needs to be processed for 50 minutes at the correct pressure.

Step Thirteen: Cool
After 50 minutes, turn off the heat and allow the pressure to drop to zero naturally. Once the pressure is at zero, remove the weight or set the dial to zero and allow the steam to vent. Wait 5 minutes after the venting has stopped before removing the lid. Remove the lid by tilting it away from you. Allow the jars to sit in the canner for 10 minutes. Transfer jars to a heat-safe place and allow them to cool for 12-24 hours.

Step Fourteen: Check Seals
After they’ve cooled for 24 hours, check the seal. If they have a proper seal, label them and store them in a cool, dark place for up to 18 months (per your lids manufacturer’s recommendations).
Serving & Storing Your Enchilada Sauce
To make enchiladas, I just brown some ground beef with taco seasoning, warm up a can of pinto beans, and grab some large tortillas. Roll the beef and beans in the tortillas, pour the sauce over the top, sprinkle with cheese, and bake for 20 minutes.
Store the jars in a cool, dark place like your pantry or cupboard away from direct sunlight and heat. The jars will keep for 18 months. Make sure you label the date and contents of your jars.
If you don’t want to can or have leftovers, you can freeze the sauce. Pour it into freezer-safe containers or bags, and leave a bit of headspace to allow for expansion as it freezes. They will be good for 6 months. Thaw in the fridge overnight when you are ready to use it.
Questions and Troubleshooting
First, run it with jars of water. This is a low-stakes way to make sure you understand how to vent the canner properly and how to monitor the pressure.
Simmering the sauce for a longer time will help it thicken naturally. Don’t add cornstarch or any additives.
You can’t waterbath can this recipe. But you can make the sauce and freeze it instead: it’ll keep for 6 months.
Start over with new chiles. Burned ones will make your whole batch taste bitter and there’s no fixing that. Those 8-10 seconds go by fast, so watch them like a hawk.
More Pressure Canning Recipes To Try
Once you feel comfortable with pressure canning, you can preserve so many more foods.
- If you grow your own potatoes, pressure canning them is a great way to save them and have them ready to go for winter meals.
- This pressure can green beans recipe is a quicker canning recipe to knock out in an afternoon.
- Pressure canned corn is another great beginner recipe. Use fresh summer corn, and it will still taste fresh in January!
- This spaghetti sauce is ready right out of the jar and perfect to grab for a quick weeknight dinner.
Printable Recipe
Pressure Canned Enchilada Sauce
Equipment
- Large pot
- Skillet
- Blender (or immersion blender if your pot is deep)
Ingredients
- 6 New Mexican chile peppers dried (can also use Ancho chile peppers)
- 2 cups boiling water
- 2 cloves garlic finely chopped
- 1 tablespoon olive oil
- 2 ½ cups chopped onion about 1 large onion or 2 small onions
- 3 cups canned diced tomatoes two 14.5 ounce cans
- ¼ cup brown sugar packed
- 1 tablespoon chili powder
- 1 tablespoon cocoa powder
- 1 teaspoon salt
- 1 teaspoon ground cumin
- ½ teaspoon red pepper flakes optional
Save This Recipe
You'll join my email list which you will love. And if you don't, unsubscribe in one click. ❤️
Instructions
- Prepare peppers. Rinse the dried chile peppers under some water to remove any dirt. Pat them dry with a towel.
- Cook chile peppers. Place a skillet over medium heat. Cook the chile peppers for 8-10 seconds or until they just start to puff up and blister. Then flip them over and cook for another 8-10 seconds or until they resemble the other side. (You want to prevent the chile peppers from burning; this will affect the taste of the sauce.)
- Cool and remove stems and seeds. Transfer the chiles to a plate lined with a paper towel to cool. Once cool enough to handle, remove the stem and seeds and discard them. Tear the chiles into a few pieces and transfer them to a bowl.
- Soak chiles. Cover the chiles with 2 cups of boiling water. Cover with a tea towel and allow the chiles to sit for 20 minutes. Once the chiles are soft, reserve 1 cup of the soaking water and then drain the chiles.
- Saute garlic. In a large pot over medium heat, add the olive oil. Once the olive oil has warmed, add the garlic and saute for about 30 seconds.
- Caramelize onions. Next, add the onions and stir until well incorporated. Bring the heat down to medium-low and cover. About every minute or so, stir the onions, making sure they don’t stick to the bottom of the pot or burn. Do this for about 10 minutes. Once the onions are nice and soft, remove the lid and cook for another 5-10 minutes, stirring often until they are nicely caramelized.
- Add rest of ingredients. Add the tomatoes, brown sugar, chile powder, cocoa powder, cumin, salt, softened chile peppers, and reserved water. Stir to combine. If you want more heat, add in the optional red pepper flakes at this point. Remove from the heat.
- Blend. Working in batches, process the tomato mixture in a blender or food processor until nice and smooth.
- Simmer mixture. Transfer back into the large pot and bring to a boil. Once boiling, reduce the heat to a simmer and allow the mixture to simmer for about 30 minutes or until it has thickened and darkened in color.
- Prepare for canning. While the sauce is simmering, wash the jars in hot, soapy water. Transfer them to the pressure canner and add enough water so the jars are about half full and the water is to the recommended line. Cover (but don’t seal) and place over medium-high heat. Place your rings and lids into a saucepan with water, place over low heat, and bring to a simmer.
- Fill jars. Once the sauce has thickened, ladle it into the hot jars, leaving 1-inch headspace. Remove any air bubbles using a debubbler, and then wipe the rims off with a clean, damp cloth or a vinegar-moistened cloth. Place the lids on top, followed by the rings, and tighten them until they are fingertip-tight.
- Process jars. Transfer them into the pressure canner. Fill the canner with at least 2 inches of water or to the recommended line of your pressure canner. Place the canner lid on and secure it tightly. Set it over medium-high heat and allow the canner to vent continuous steam. Once the steam is venting, allow it to steam for 10 minutes. After the 10 minutes, set your weighted canner to 10 pounds or your dial to 11 pounds (adjusting for elevation) and process jars for 50 minutes. If your pressure drops below 10 pounds for weighted or 11 pounds for dial, stop the timer, bring the canner back up to pressure, and restart the timer. This sauce needs to be processed for 50 minutes at the correct pressure.
- Cool. After 50 minutes, turn off the heat and allow the pressure to drop to zero naturally. Once the pressure is at zero, remove the weight or set the dial to zero and allow the steam to vent. Wait 5 minutes after the venting has stopped before removing the lid. Remove the lid by tilting it away from you. Allow the jars to sit in the canner for 10 minutes. Transfer jars to a heat-safe place and allow them to cool for 12-24 hours.
- Check seals. After they’ve cooled for 24 hours, check the seal. If they have a proper seal, label them and store them in a cool, dark place for up to 18 months (per your lids manufacturer’s recommendations).
Notes
Nutrition


Are the New Mexico chili peppers spicy? I have stomach issues. I can eat flavorful. If these are spicy, can you suggest a milder chili pepper? Thank you, Deb
these are not very hot, no.
can I use fresh tomatoes for this recipe?
yes!