Sourdough Lemon Bars
Sourdough lemon bars are a unique twist on a classic dessert. Make sure your ingredients, especially the eggs and butter, are at room temperature to achieve the smoothest filling and a crust that’s just right. A great sourdough recipe for dessert lovers.

Sourdough Lemon Bars
Ingredients
For the Crust
- 1 cup all-purpose flour
- ⅓ cup sugar
- ½ cup unsalted butter cold and cubed
- ½ cup sourdough discard
Lemon Filling
- ½ teaspoon salt
- 1½ cups sugar
- 2 tablespoons cornstarch
- ½ teaspoon salt
- ¼ cup water
- 5 egg yolks
- 2 eggs
- ⅔ cups lemon juice freshly squeezed for best flavor
- 1 lemon zest
Asssembly
- Powdered sugar
Save This Recipe
You'll join my email list which you will love. And if you don't, unsubscribe in one click. ❤️
Instructions
- Preheat your oven to 350°F (175°C). Line a 9×9 or 8×8 inch baking pan with parchment paper, or spry with cooking spray.
- Mix flour, sugar, and a teaspoon of salt in a medium bowl. Cut in the butter with a fork, pantry cutter, or your fingers. Continue cutting in the butter until the mixture resembles coarse crumbs. Gently mix the sourdough and discard until it begins to come together. It will look like a pie dough.

- Press evenly into the bottom of the prepared pan. Bake for 15-20 minutes until lightly golden. Remove and cool slightly.
- Prepare the Lemon Mixture. In a medium saucepan, whisk together sugar, cornstarch, and 1/4 teaspoon of salt. Stir in the water, lemon juice, and lemon zest. Cook over medium-high heat, stirring frequently, until the mixture boils. Once the mixture reaches a boil, reduce the heat to low and let it simmer for 1 minute. The mixture should thicken considerably.

- In a small bowl, whisk egg yolks and eggs. Gradually whisk in about 1/2 cup of the hot sugar mixture to temper the egg yolks. This step prevents the eggs from cooking.
- Pour the tempered egg yolks back into the saucepan. Bring the mixture to a gentle boil and continue cooking, stirring constantly, for 2 minutes. The filling should be thick and smooth.
- Remove from heat. Add 2 tablespoons of butter and stir until fully incorporated.
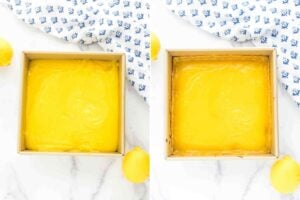
- Assemble. Pour the filling over the crust, spreading out to smooth if necessary.
- Bake: Bake for 20-25 minutes or until the filling is set. Cool to room temperature, then chill for at least 2 hours.
- Finish. Dust with powdered sugar, cut into bars, and serve chilled.


Notes
Nutrition
I’ve made these bars for family gatherings, potlucks, and just for myself when I need a little pick-me-up. Trust me, they never disappoint! They disappear faster than anything else on the table, and everyone always asks for the recipe. Even my kids, who are picky, can’t resist diving into these lemony treats. I’ve found that letting them dust their own pieces with a generous sprinkle of powdered sugar makes the experience even more fun.

Key Ingredients and Tools
- Sourdough Discard. Find this in your own kitchen if you’re maintaining a sourdough starter; otherwise, a baking enthusiast friend might share some. It adds a delightful tang and depth to the crust, distinguishing these lemon bars from the classic version.
- Fresh Lemons. Look for these in the produce section of your grocery store. Fresh lemon juice and zest are crucial for that vibrant, citrusy punch in the filling. Bottled juice won’t deliver the same fresh flavor.
- Cornstarch. It’s available in the baking aisle and is used as a thickener for the lemon filling. Without it, your lemon bars won’t set properly, and you’ll have a runny mess. There’s no great substitute for its thickening power here without altering the texture.

- 9×9 or 8×8 inch Baking Pan. This is crucial for achieving bars of the perfect thickness. A pan that’s too large will result in thin, overcooked bars, while one that’s too small will give you bars that are too thick and undercooked in the middle.
- Parchment Paper. Lining your baking pan with parchment paper makes sure that the lemon bars can be easily removed after cooling. It also makes cleanup a breeze.
- Medium Saucepan. Needed for cooking the lemon filling. A saucepan with a heavy bottom will help distribute heat evenly, preventing the filling from burning.
- Whisk. A good whisk is essential for combining the filling ingredients smoothly and preventing lumps. It allows you to mix thoroughly, ensuring the sugar and cornstarch are well incorporated into the liquid.
- Mixing Bowls. You’ll need two sizes: a larger one for preparing the crust and a smaller one for tempering the eggs for the lemon filling. Make sure they’re sturdy and easy to handle.
- Zester and Juicer. To get the most flavor out of your lemons, you’ll need a zester for the zest and a juicer to extract all the juice efficiently. Fresh zest and juice make all the difference in flavor.
Troubleshooting and Help
Sure, you can use bottled lemon juice in a pinch, but honestly, fresh lemon juice will give you that bright, fresh flavor that bottled juice just can’t match. If you can, go for the fresh stuff!
No worries! If you have a similar-sized pan, say a 7×11 inch, you can use that too. Just keep an eye on the baking time, as it might vary slightly. The goal is to get that perfect golden edge and set filling.
Absolutely! Just swap out the all-purpose flour for your favorite gluten-free flour blend in the crust. Look for one that’s a 1:1 substitute to make things easy.
They’ll stay fresh in the refrigerator for up to 5 days. Just make sure to keep them in an airtight container. They also freeze well if you want to save some for later. Just thaw overnight in the fridge before serving
So, next time you’re in the mood for a refreshing and tangy treat, give these lemon bars a try.