One afternoon of work gives you enough filling for four pies, and you can customize the spice levels exactly how your family likes them. Plus, when apple season hits and you can get beautiful fresh apples, this captures that peak flavor all year long. I use it for pies, cobblers, and cookie bars.
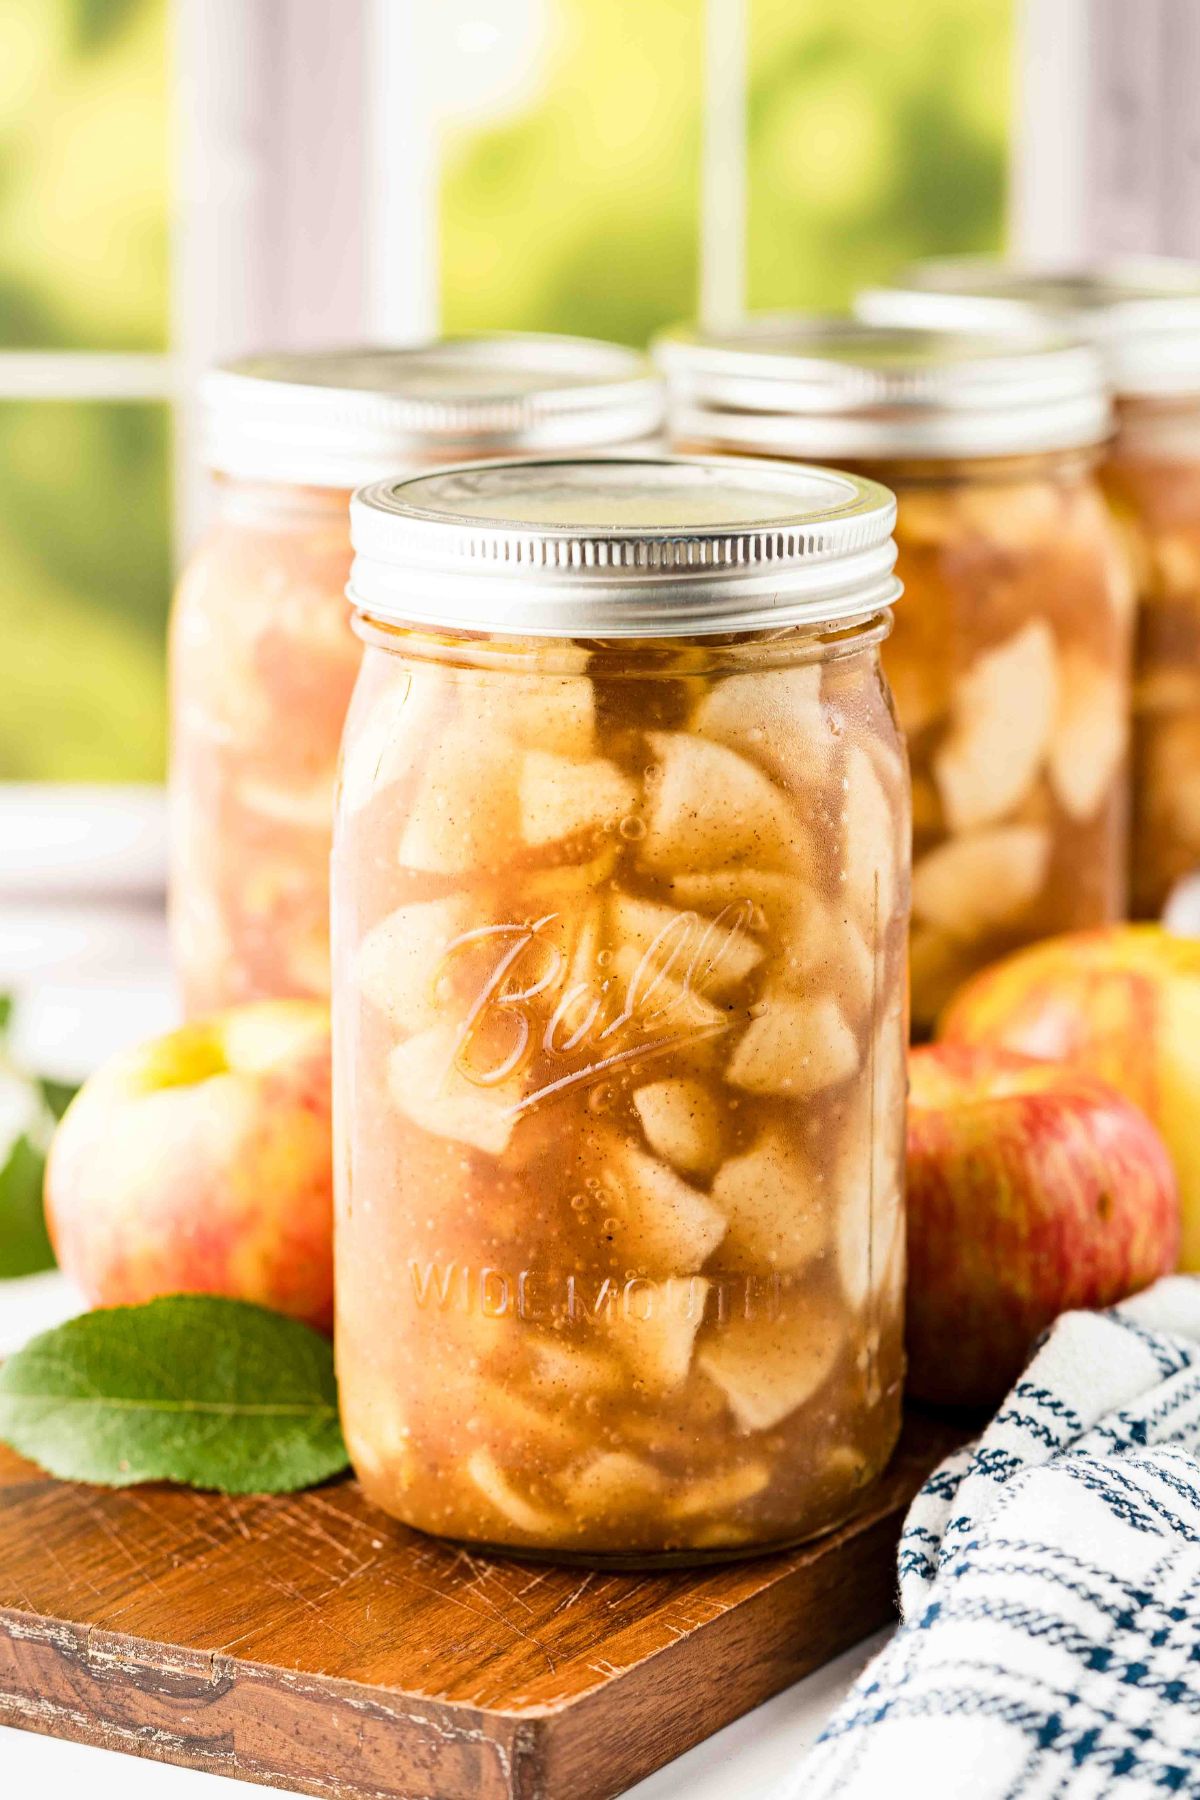
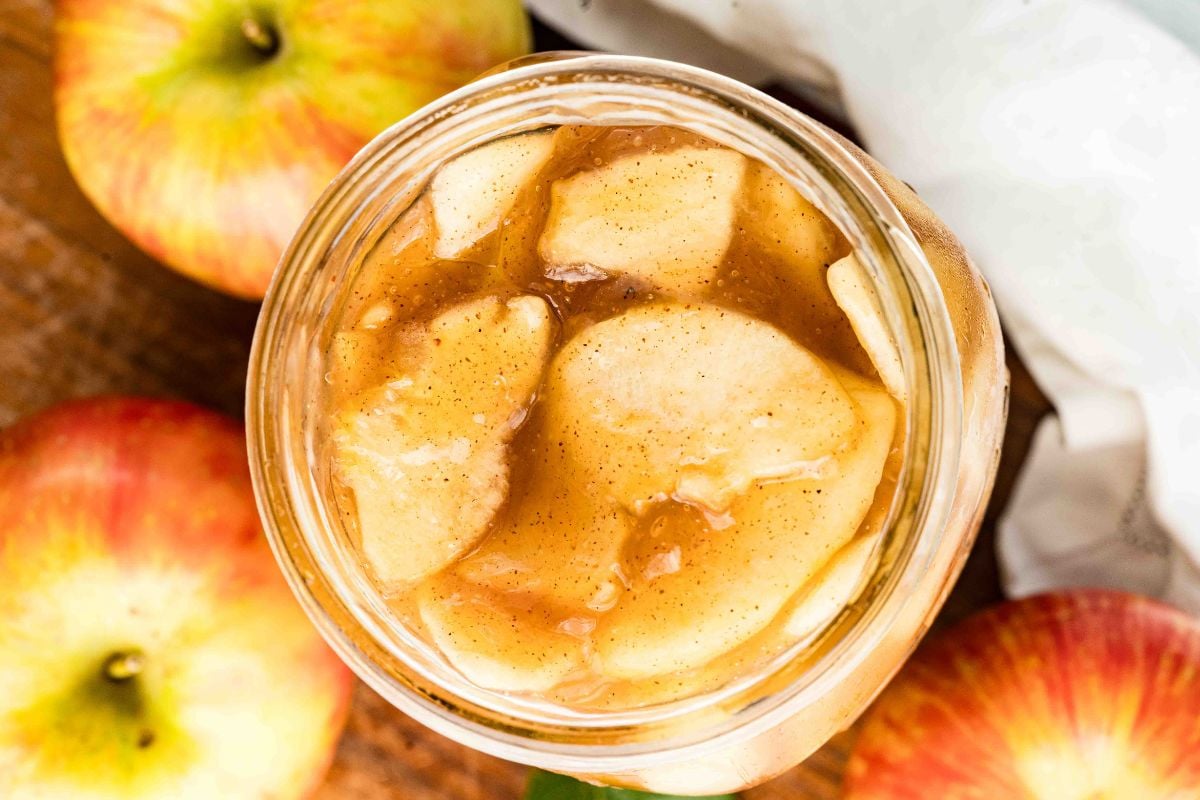
A blend of cinnamon, brown sugar, nutmeg, and sweet and tart apples with spices makes this an instant classic.
Table of Contents
What You’ll Need
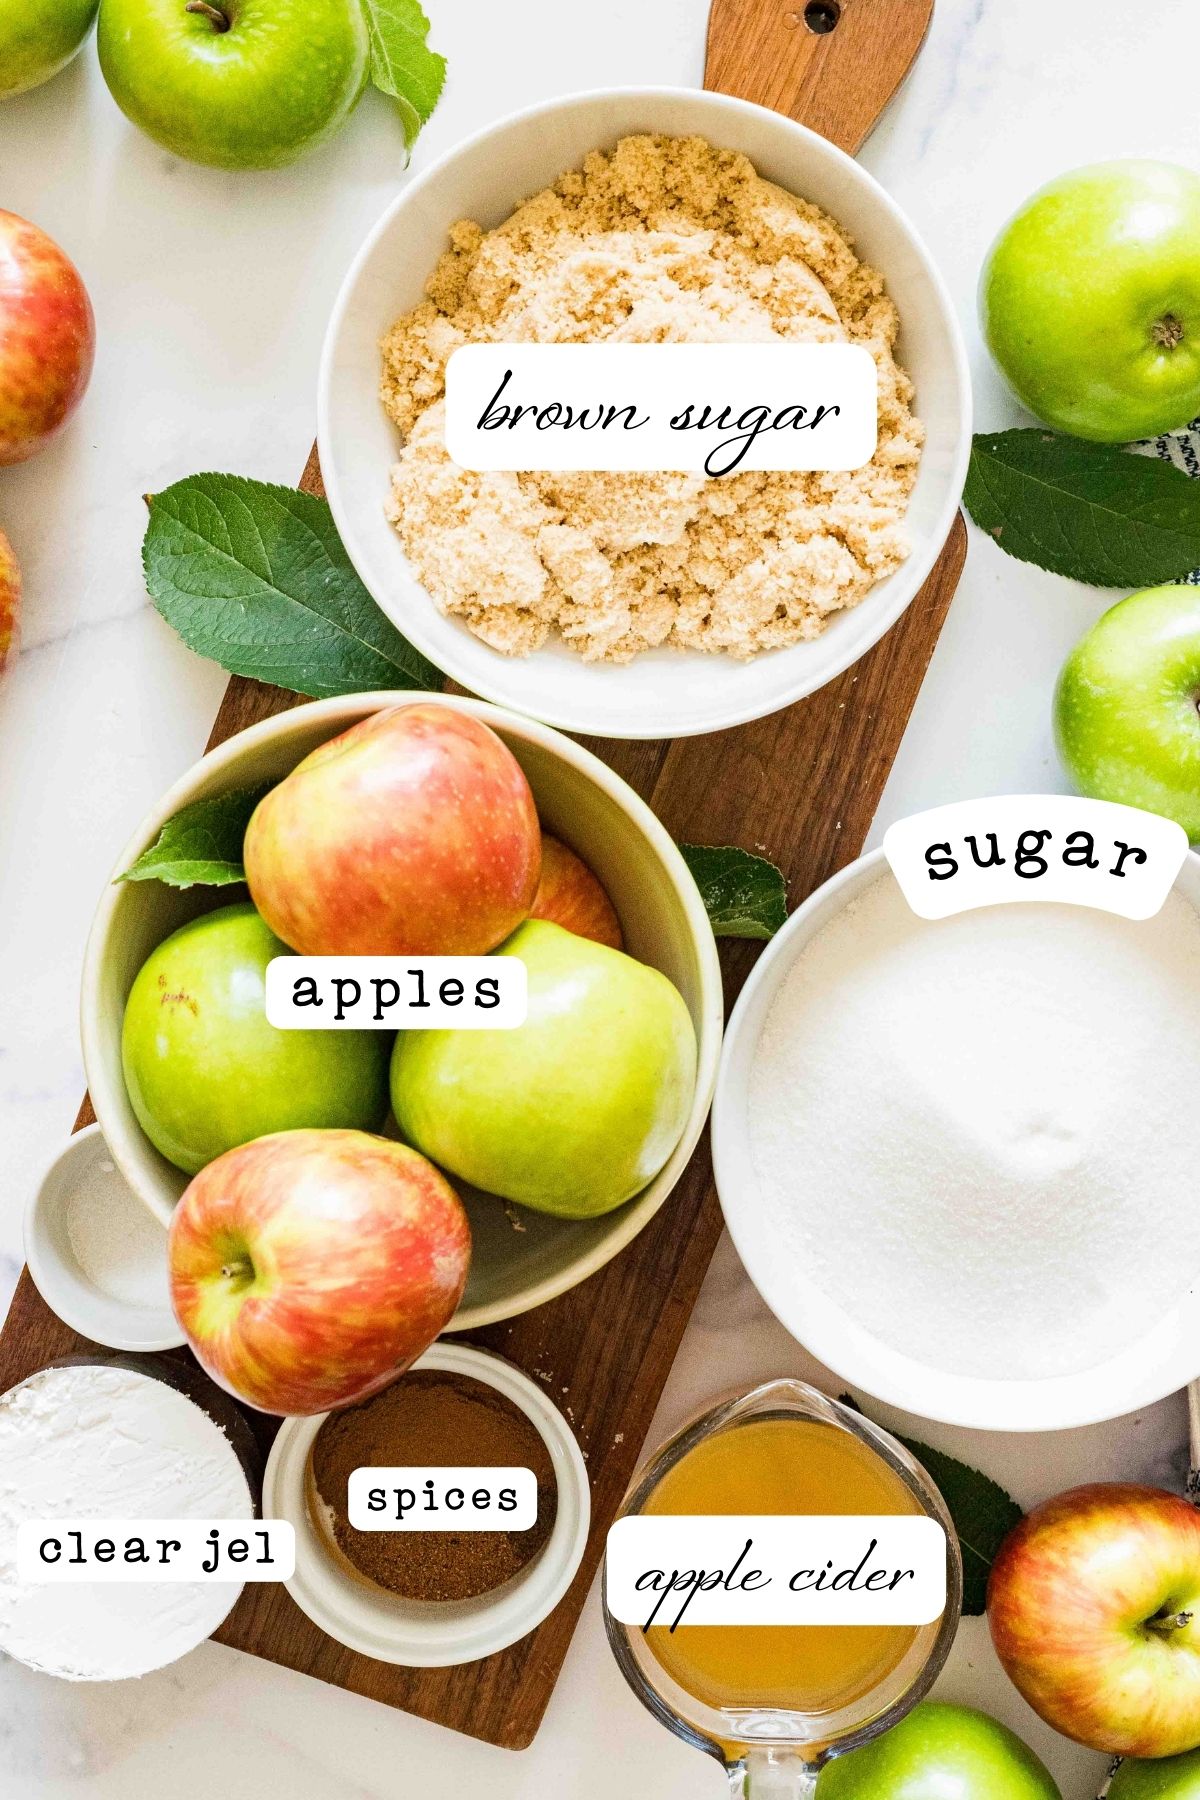
You can use any type of apples, but I recommend a mix of sweet and tart, like Honeycrisp and Granny Smith. Make sure you have all your canning supplies ready to go. You can find all my recommended canning supplies here.
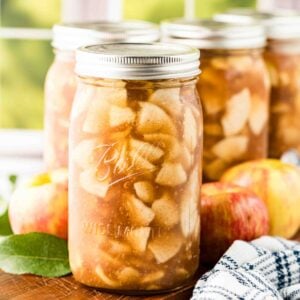
This will make 4 quarts from about 16 apples. If you’d like to double or triple this recipe, you can make adjustments in the recipe card at the bottom of this post. Though you will need lots of apples.

FREE FOR SUBSCRIBERS
Canning Binder
Subscribe (free!) to my newsletter to receive this PDF + dozens of others in my printable library. You’ll also get emails you’ll truly love, with a weekly meal and so much more.
Equipment
- Water Bath Canner
- 4-quart jars
- new lids
- Canning funnel
Ingredients
- 16 cups apples cored, peeled, and sliced (I use a mix of sweet and tart apples like Granny Smith and Honeycrisp)
- 4 tablespoons lemon juice
- 2 cups granulated sugar
- 2 cups brown sugar, packed
- 1 cup Clear Jel cook-type for canning
- 2 teaspoons ground cinnamon
- ½ teaspoon ground nutmeg
- ½ teaspoon salt
- 5 cups of water
- 2 cups apple juice or apple cider
- 2 teaspoons pure vanilla extract, optional, I prefer without
How to Make Apple Pie Filling
Carefully follow the instructions! Apple pie filling is prone to siphoning! (Siphoning is when the liquid inside your jars gets pushed out during the processing. It’s when you pull your jars out and think, “Hey, where’d half the liquid go?”). Leave proper headspace and remove the bubbles to help prevent this.
Watch the apples in the syrup when you simmer them like a hawk. If they’re overcooked, they’ll turn mush when you bake them in a pie. Aim for tender but still firm. Remember, these apples will likely be cooked again whenever you use the filling.
Step One: Prep Canning Supplies
Get your jars hot by putting them in the oven at 200℉ – cold jars will crack when you add hot filling, and nobody wants that mess. Wash your lids and rings in soapy water, then keep them in simmering water. Fill your canner about ¾ full with water and get it boiling. Everything stays hot until you’re ready to use it.

Step Two: Prep the Apples
Time to tackle 16 cups of apples (that’s about 5 pounds or 16 medium apples). Wash, peel, core, and slice them into uniform pieces. I like mixing Granny Smith with something sweeter like Honeycrisp – gives you that perfect sweet-tart balance.

Step Three: Make the Syrup
In a large saucepan, whisk together both sugars, Clear Jel, cinnamon, nutmeg, and salt. Slowly stir in the water and apple juice – don’t dump it all in at once or you’ll get lumps. Add the lemon juice. Bring it to a boil over medium heat, stirring constantly until it thickens up nicely.
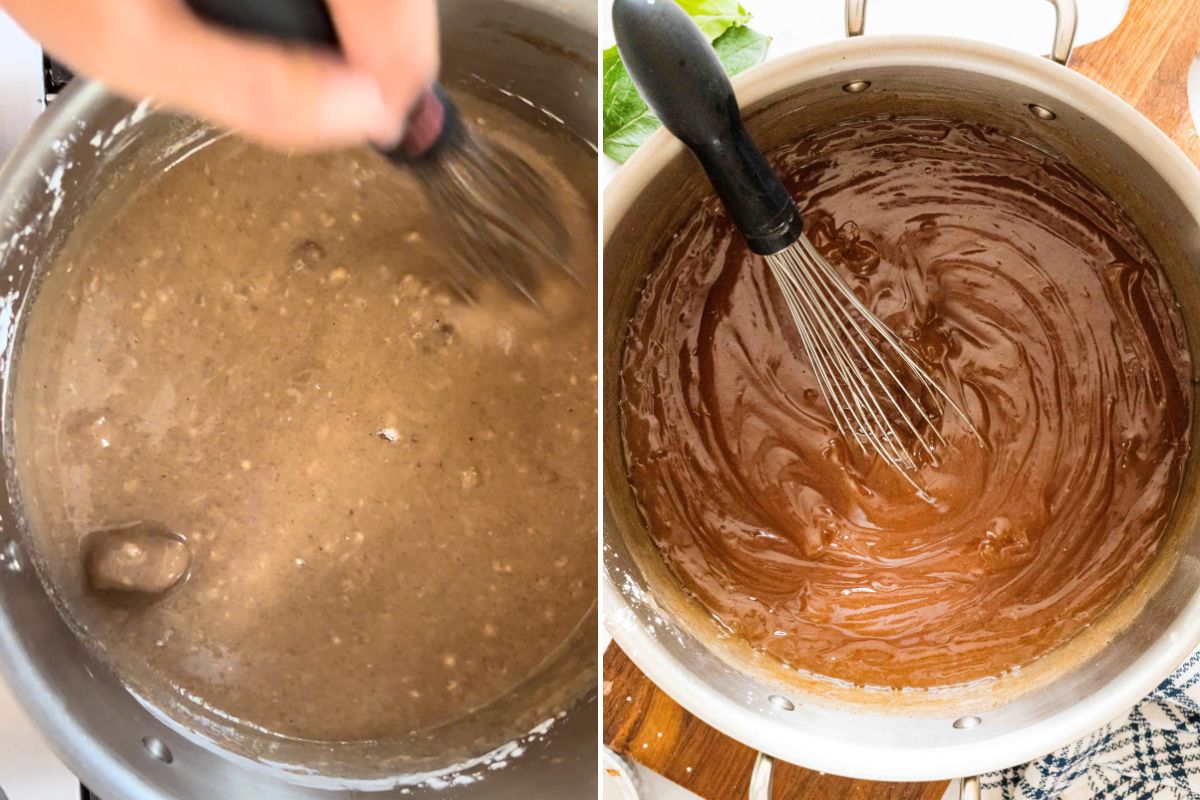
Step Four: Add the Apples
Gently add your apple slices to the bubbling syrup. Turn the heat down to medium-low and simmer for 6-8 minutes until the apples are tender but not mushy. Stir occasionally so everything cooks evenly. Add vanilla if you’re using it.

Step Five: Fill and Seal Jars
Ladle the hot apple mixture into your prepared jars, leaving ½ inch headspace at the top. Tap the sides gently to remove air bubbles. Wipe the jar rims clean – even a tiny bit of sticky stuff can mess up your seal. Put on lids and rings, tightening just fingertip-tight.

Step Six: Process in Water Bath
Process the jars in your boiling water canner for 25 minutes. Make sure they stay covered with water the whole time. Set a timer – nobody remembers 25 minutes when they’re doing other things.
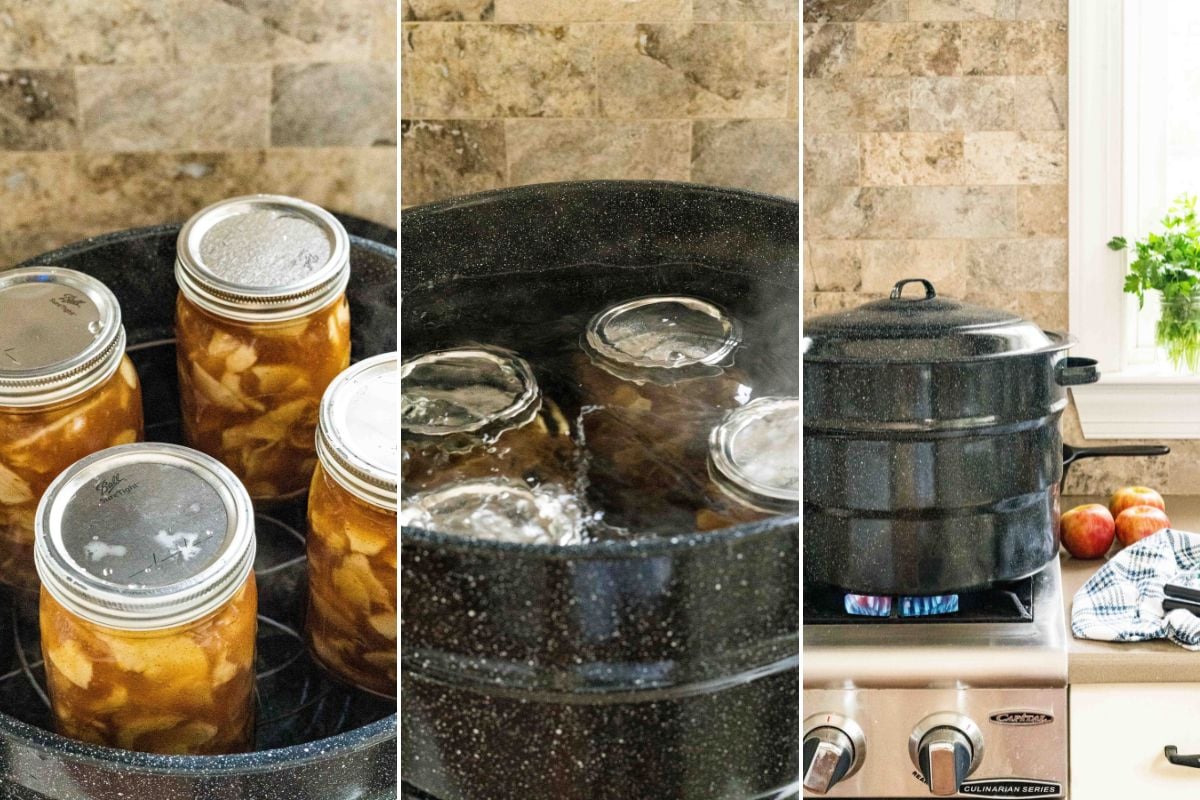
Step Seven: Cool and Store
Remove jars carefully and set them on a clean towel to cool completely. Listen for that satisfying “pop” as the lids seal. Check that lids are sealed properly before storing in a cool, dark place. If any didn’t seal, put them in the fridge and use within a few weeks.

Storage Instructions
Store jars in a dark, cool place for 12-18 months. If a jar doesn’t seal, pop it in the fridge and use it within a few weeks.
If you don’t want to can, you can freeze the filling in freezer bags. Flatten, remove the air, and use within 6 months.
How To Use Your Filling
- Go the classic route and bake it in an apple pie or caramel apple cobbler.
- Make apple cinnamon rolls. Spread the filling over your cinnamon roll dough before rolling, slicing, and baking.
- Mix it in with your morning oatmeal.
- Warm it up and slather over pancakes or waffles.
- Make apple turnovers. Use puff pastry or pie dough to make individual turnovers. Fill, fold, crimp, bake, and enjoy!
Questions and Troubleshooting
You need a thickening agent, and cornstarch is not safe for canning. When canning, you need heat to penetrate through the entire jar to kill all the potential spoilage bacteria, making sure your food is preserved safely. Cornstarch can sometimes create a mixture that’s too thick, preventing even heat distribution. If some spots don’t get heated enough, bacteria can survive and potentially make you sick later on.
Sugar acts as a preservative in this recipe, so a good amount is necessary. However, if you’d prefer a less-sweet filling, you can reduce it by 1/2 cup.
Yes, they are only for flavor and can be altered however you’d like. 😊
More Fruit Canning Recipes
- Blueberry pie filling is another great one to have on hand. It tastes SO good on top of cheesecake.
- Everyone loves old-fashioned apple butter, and I’ve got a pretty printable for you.
- At least once, you should go blackberry picking and come home and make blackberry jam. The kids will love it.
- This small batch strawberry jam is the perfect recipe for beginners.
Printable Recipe
Canned Apple Pie Filling
Equipment
- 4 quart jars
- new lids
- Canning funnel
Ingredients
- 16 cups apples cored, peeled and sliced (use a mix of sweet and tart apples like Granny Smith and Honeycrisp)
- 4 tablespoons lemon juice
- 2 cups granulated sugar
- 2 cups brown sugar packed
- 1 cup Clear Jel cook-type for canning
- 2 teaspoons ground cinnamon
- ½ teaspoon ground nutmeg
- ½ teaspoon salt
- 5 cups water
- 2 cups apple juice or apple cider
- 2 teaspoons pure vanilla extract optional, I prefer without
Save This Recipe
You'll join my email list which you will love. And if you don't, unsubscribe in one click. ❤️
Instructions
- Prep canning supplies. Heat jars in the oven at 200℉, or by using the dishwasher or placing in hot water. They don't need to be sterilized, but need to be hot so they don't crack. Wash rings and lids in soapy water and place in a small saucepan of simmering water. Fill the canner ¾ full with water and place on high heat to bring to a boil. Keep everything hot until you're ready to fill them.
- Prep the apples. Wash, peel, core, and slice the apples into uniform pieces.
- Make the syrup. In a large saucepan, whisk together the granulated sugar, brown sugar, Clear Jel, ground cinnamon, ground nutmeg, and salt until well combined. Gradually stir in the water and apple juice (or cider) into the sugar and spice mixture. Add the lemon juice. Bring the mixture to a boil over medium heat, stirring constantly until it thickens.
- Add apples. Gently add the prepared apple slices to the boiling syrup. Reduce the heat to medium-low and let the apples simmer for about 6-8 minutes until they become tender but not mushy. Stir occasionally to make sure everything cooks evenly. Add vanilla if using.
- Fill and seal jars. Carefully ladle the hot apple pie filling into the prepared canning jars, leaving about ½-inch of headspace at the top. Use a non-metallic utensil to remove any air bubbles by gently tapping the sides of the jars. Wipe the jar rims clean to make sure you get a proper seal. Place the lids and bands on the jars, tightening the bands until they are just fingertip-tight.
- Process. Process the filled jars in a boiling water canner for 25 minutes (adjust processing time for altitude if necessary). Make sure the jars are fully submerged in water during the entire processing time. If you are processing pints, they need 25 minutes as well.
- Cool and store. Once the processing time is up, carefully remove the jars from the canner and place them on a clean kitchen towel. Let the jars cool completely. As they cool, you should hear a "pop" sound as the lids seal. Check that the lids are properly sealed before storing the jars in a cool, dark place. If any do not seal, place them in the fridge and use them within a few weeks.
Video
Notes
Nutrition


Thank you! This is perfect for apple lovers!
I hope you like it!
Hello, do you have baking instructions for using this in a 9” apple pie? Thanks!
hey mackinley,
Add one quart (or 1.5 for a fuller pie) filling to the bottom crust. Cover with the top crust, crimp the edges, and cut slits for steam. Bake at 425°F for 40-45 minutes. When the top is brown and the filling is bubbling, it’s ready 🙂
if you peel and cut up your apples before making the sauce how do you keep them forming turning brown
I just work quickly, and the you mix them with the sugar everything will look nice again. you can sprinkle them with lemon juice or citric acid but I wouldn’t bother.
I love this idea of having a ready-to-go pie filling in the pantry, so all I do is prepare my crust- but I’ve never done this before. Will one quart-size jar be the correct amount for one 9″ deep-dish pie? Thank you!
hi jennifer! one quart is enough to fill a 9 inch pie plate but it won’t be heaping, if that makes sense. I often use 1.5 and then use the extra to put on top of ice cream!