Blueberry Pie Filling (Canning Recipe)
This recipe is quite beginner friendly because it’s just a quick boil to set everything. And blueberries, thank goodness, don’t need any chopping. The perfect fruit! You’ll be so glad to have this on hand for summertime flavor all year long. Our favorite way to use it is in hand pies or cobbler.
One note before we start: this recipe is written for water bath canning and uses ClearJel, which is the only thickener approved for home-canned pie fillings. Regular cornstarch or flour will not work here. It’s not a flavor thing, it’s a safety thing. ClearJel doesn’t break down under high heat and long storage the way other starches do, which is what keeps the filling stable and safe in the jar. Don’t substitute.
what You’ll Need
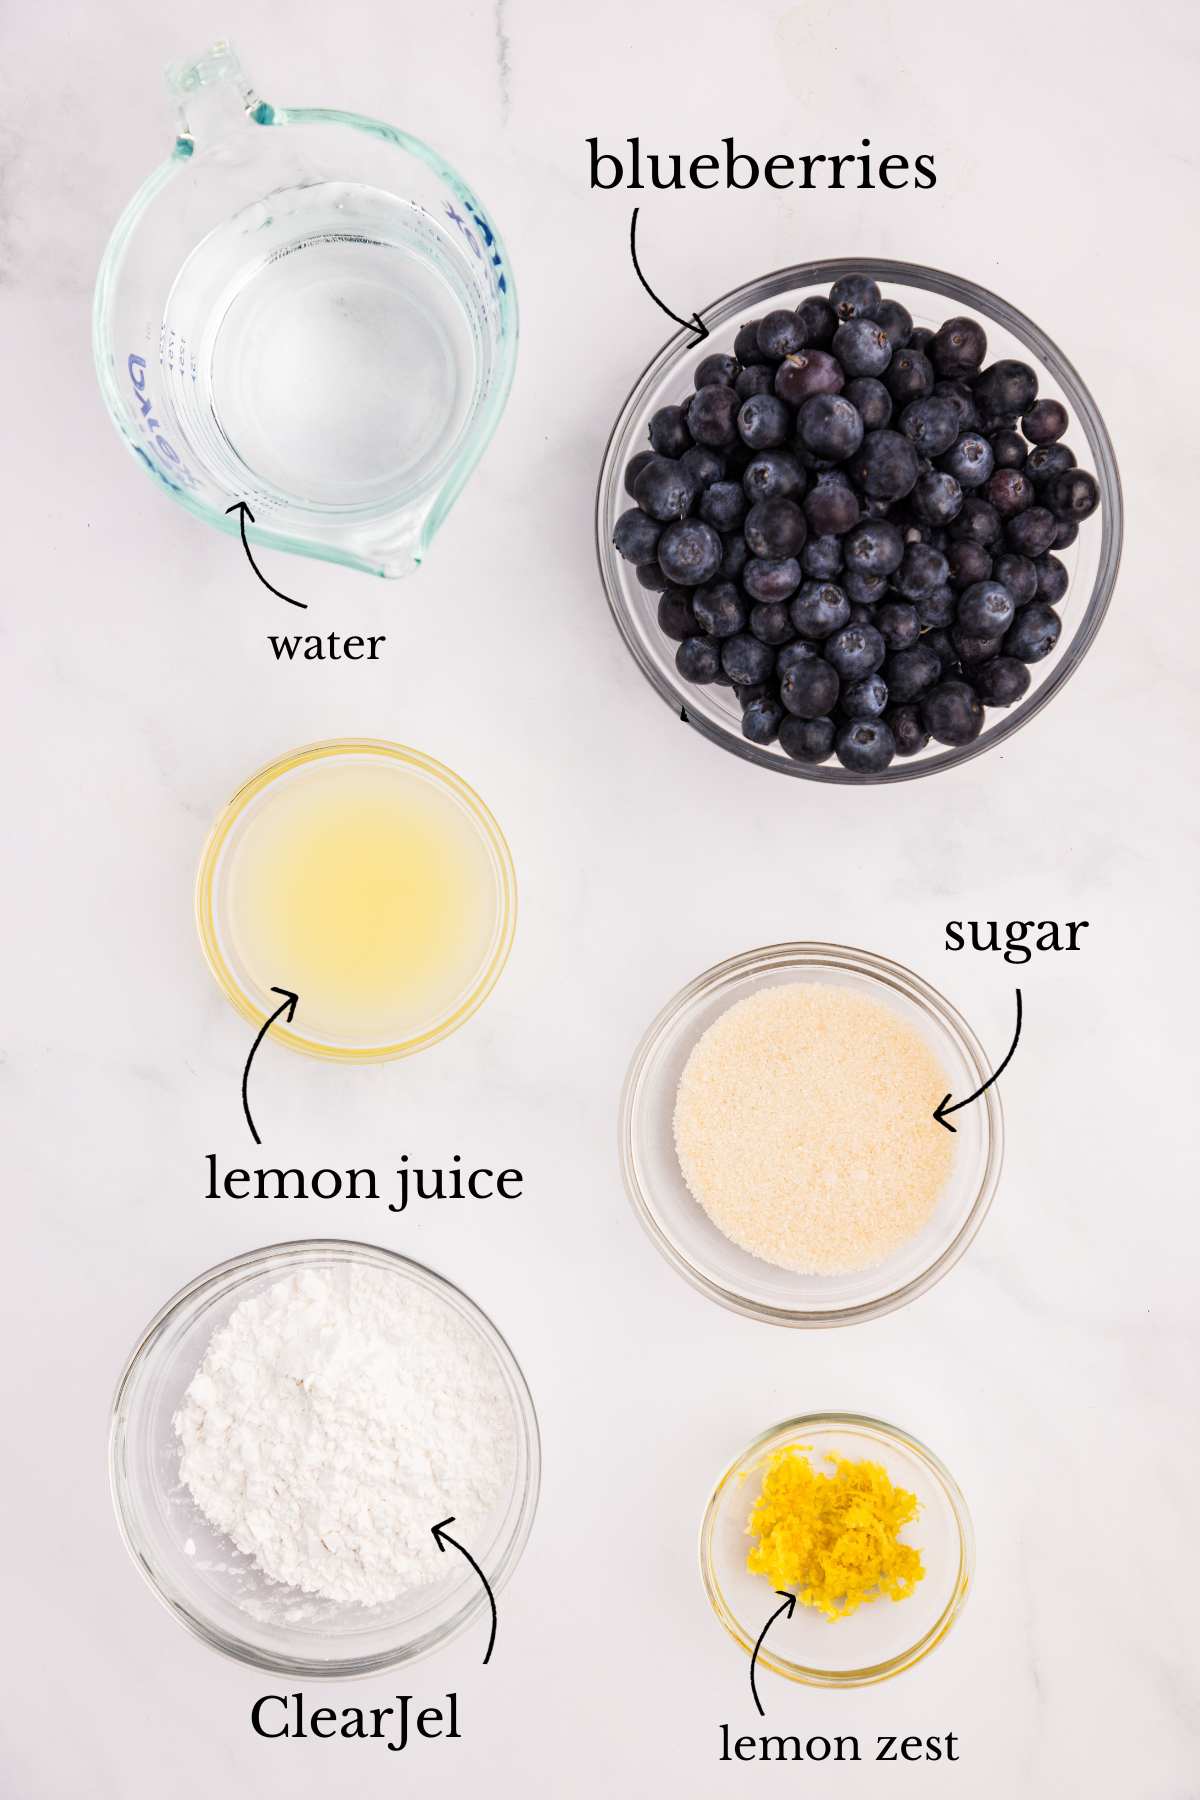
- 7 cups blueberries (fresh or frozen)
- 1 ⅔ cups sugar
- ⅔ cup ClearJel (I use Hoosier Hill Farm)
- 2 cups water, cold or room temperature, plus more for blanching
- Zest of 1 lemon (about 1 tablespoon)
- ¼ cup lemon juice, use bottled, not fresh
- Blue and red food coloring (optional)
- ¼ teaspoon ground cinnamon (optional but recommended)
Instructions
Step One: Prep Your Jars and Canner
Wash the jars, rings, and lids in hot soapy water. Put the jars in your water bath canner, fill it with enough water to fully submerge them, and set it over medium heat with the lid on. Let them simmer while you work.
Put the lids and rings in a small saucepan of water over medium-low heat. Everything that touches the filling should be hot when the filling is hot.

Step Two: Blanch the Blueberries
Bring a large pot filled halfway with water to a full rolling boil. Add the blueberries and blanch for exactly 1 minute. Any longer and they’ll start to break down.
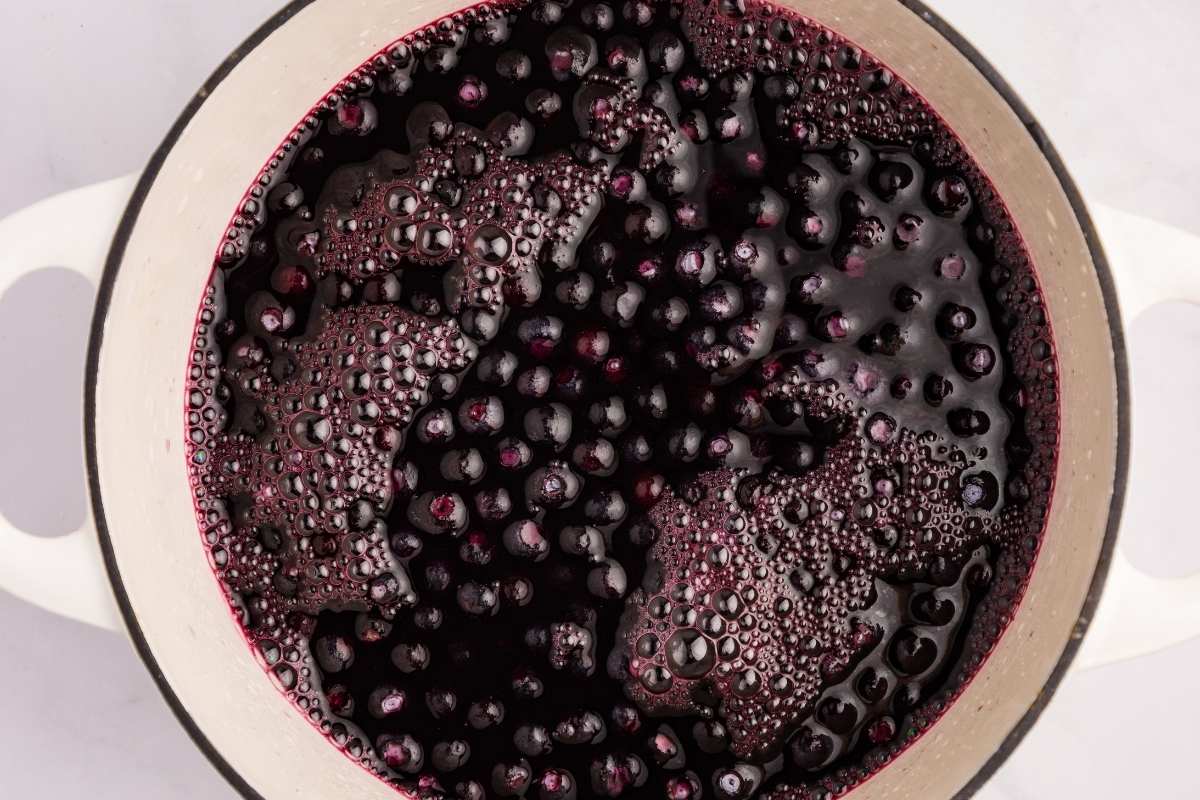
Drain them well in a large strainer and set aside.
Tip: If you want the natural blueberry color without using food coloring, reserve 2 cups of the blanching water. You’ll need to cool it down before using it in the next step (hot water + ClearJel = lumps), but it’s a beautiful natural substitute. I typically do use the food coloring and it’s used in the photos here.
Step Three: Mix the ClearJel Base
In a large pot, combine the sugar, the cinnamon if you’re using it, and ClearJel and stir until they’re evenly mixed. This dry-mixing step matters because it prevents the ClearJel from clumping when the liquid hits it.
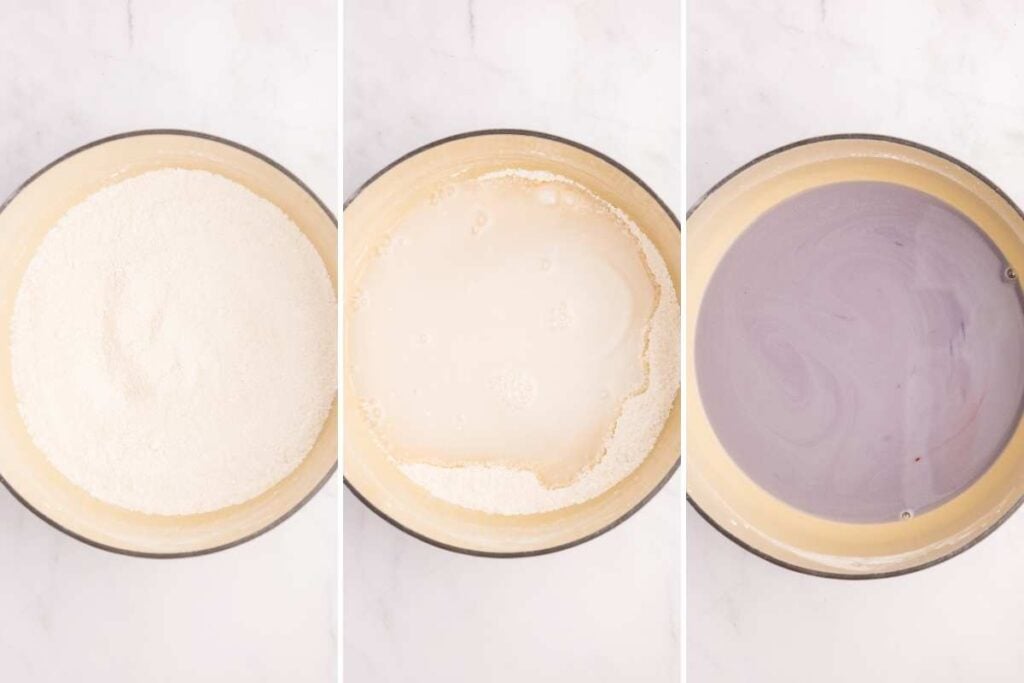
Pour in the 2 cups of water. The water must be cold or room temperature. Hot water will seize the ClearJel into lumps you can’t stir out. If you’re using reserved blanching water for color, make sure it’s fully cooled.
If you’re using food coloring, add it now: 12 drops blue and 3 drops red gives you a gorgeous deep blueberry color.
Step Four: Cook Until Thick, then add lemon
Bring the mixture to a boil over medium-high heat, stirring frequently. Once it starts to bubble, reduce the heat to low for a gentle boil and stir constantly until it thickens.
This happens fast! Only a minute or two once it really gets going. Keep the spoon moving across the bottom of the pot so nothing sticks or scorches. You’ll feel it go from watery to glossy and pudding-like almost all at once.
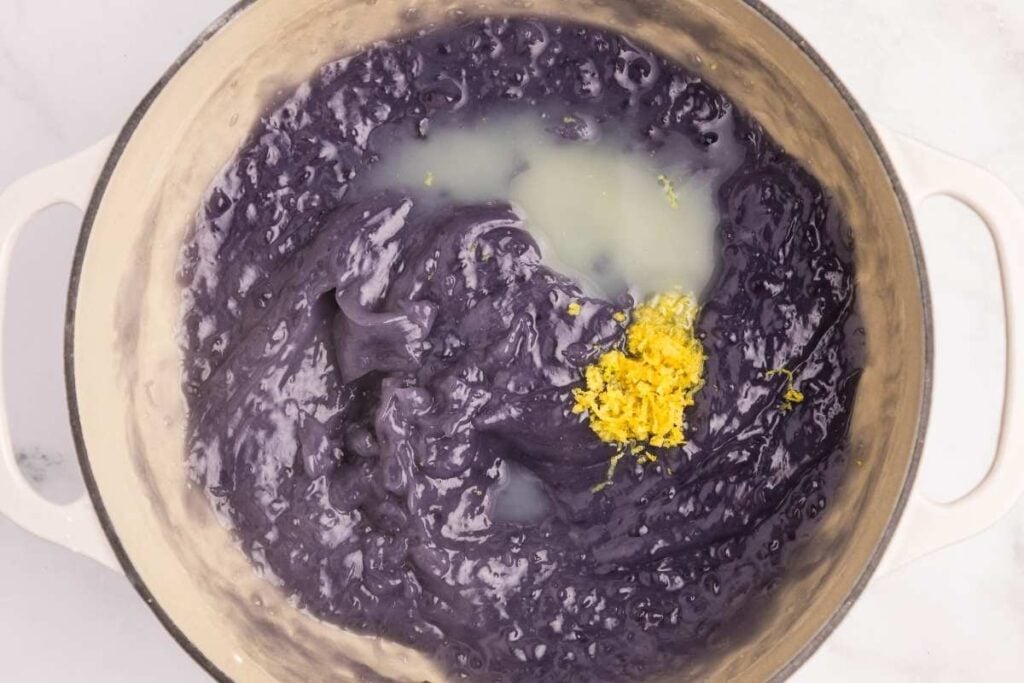
Once it’s thick, stir in the lemon zest and lemon juice. Cook for 1 more minute, still stirring.
Step Five: Fold in the Blueberries
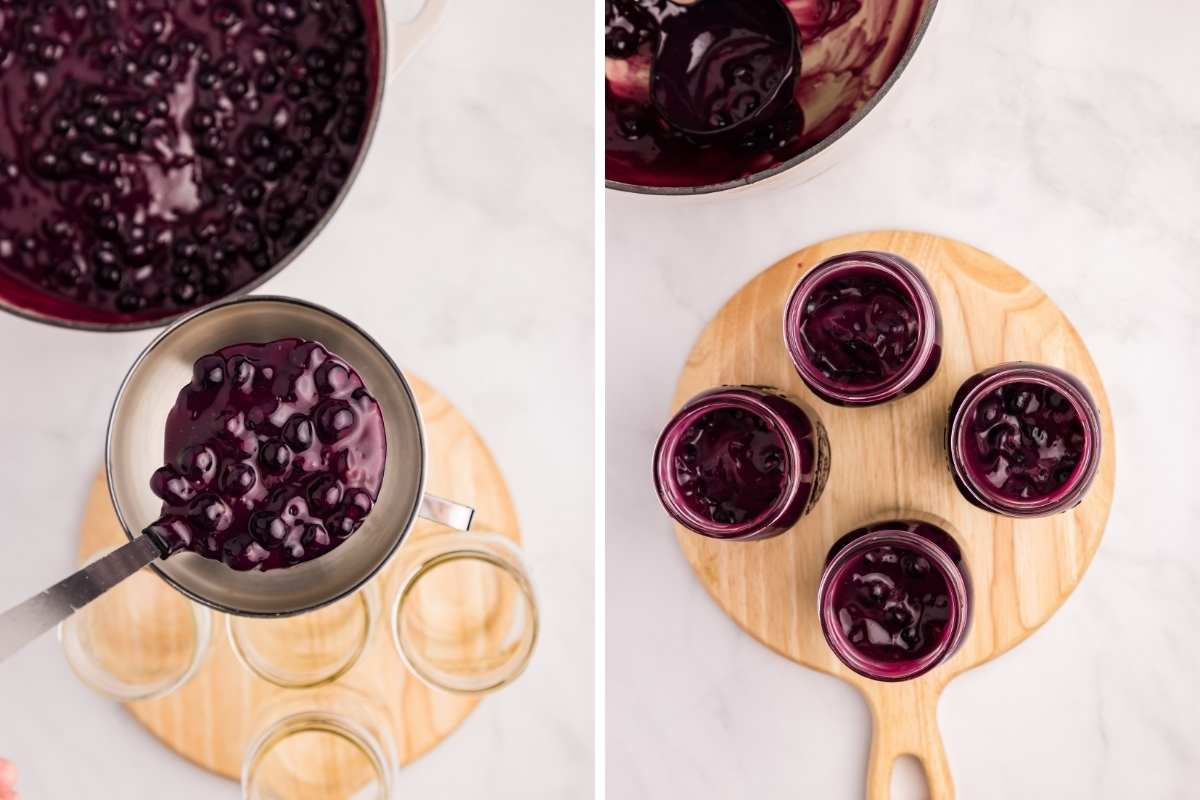
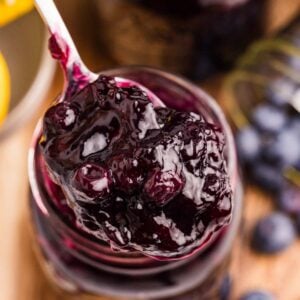
Remove the pot from the heat and gently fold in the blanched blueberries. Fold, don’t stir.

You want them to stay whole and intact, not get smashed into a puree.
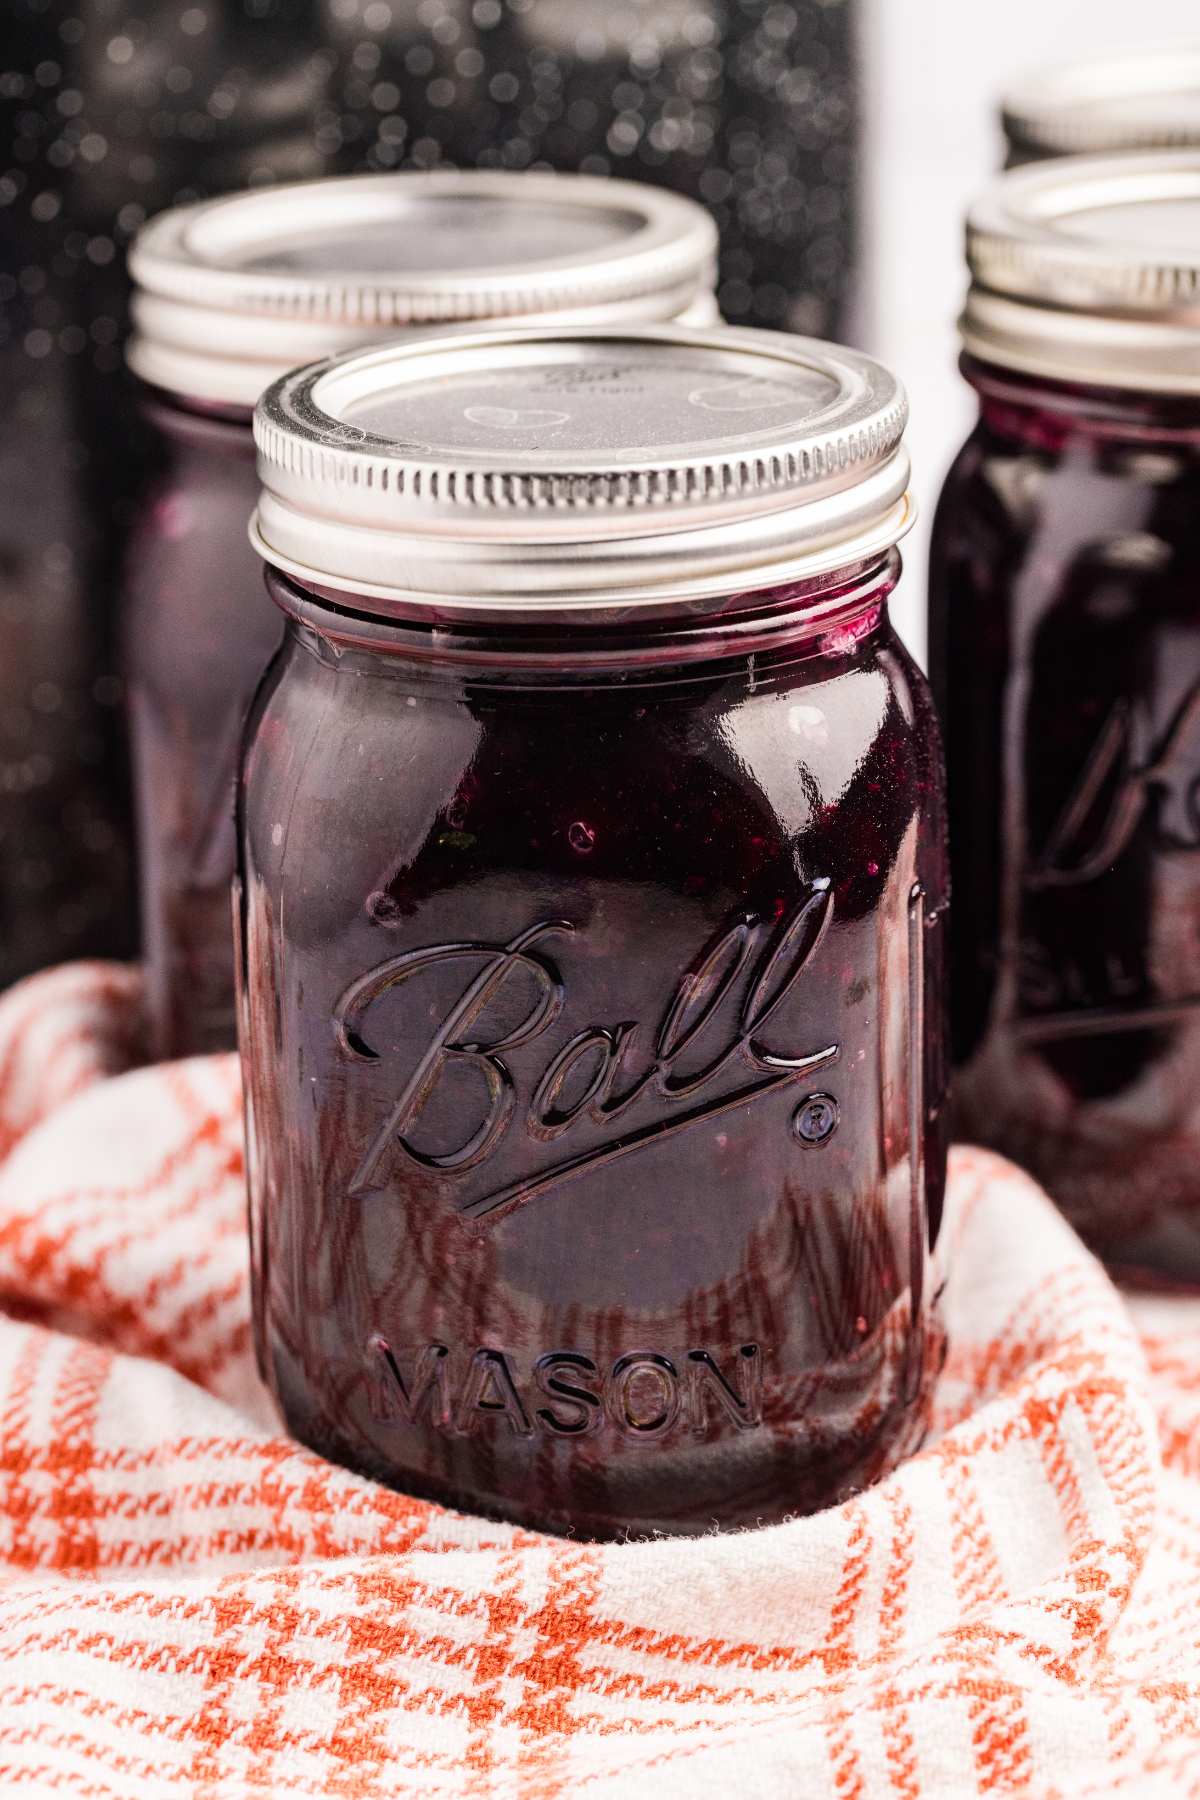
Step Six: Fill the Jars
Ladle the hot pie filling into the hot jars, leaving a generous 1 ½ inch of headspace. This is more headspace than you use for most canning recipes, and it matters: if you leave less, the filling will ooze out of the jars during processing and you’ll end up with siphoning (and a mess).
Run a chopstick or debubbler around the inside of each jar to release any air pockets. I honestly prefer a wooden chopstick for this, it gets into the corners better than the plastic debubblers.
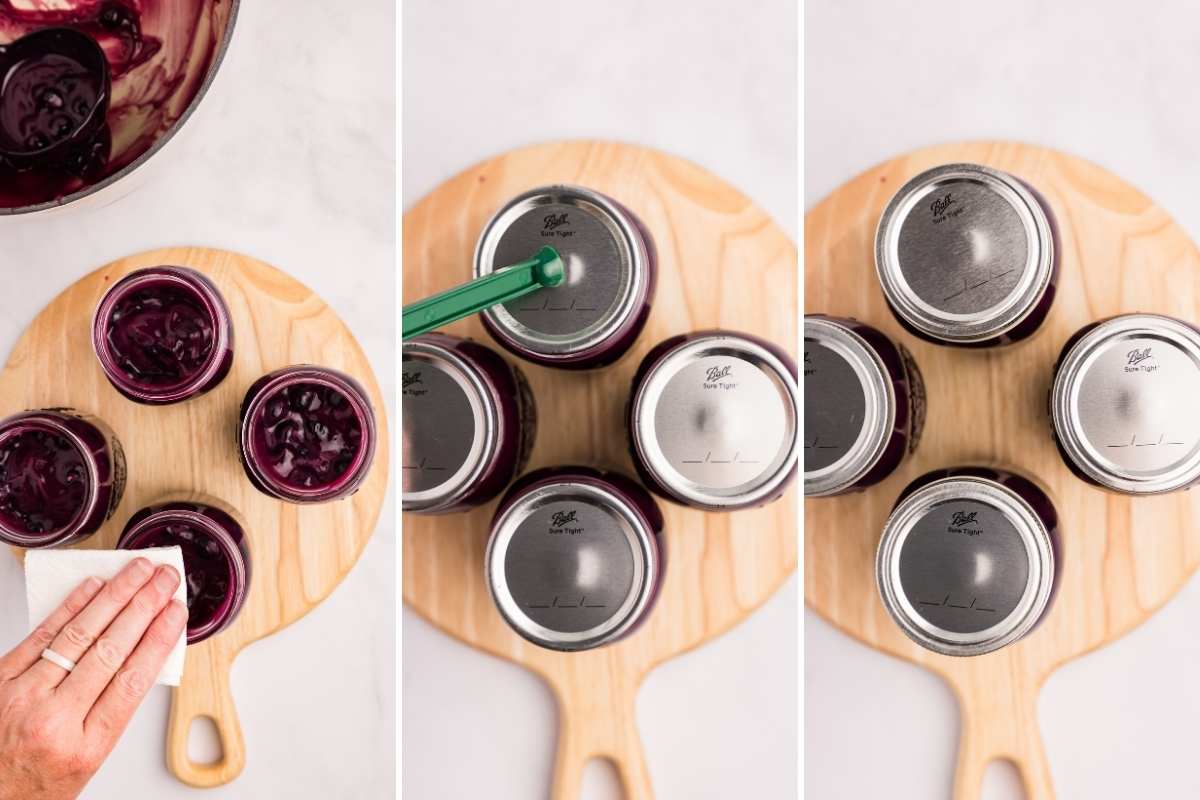
Wipe the rims with a clean damp cloth. Place the lid on top and screw the ring down to fingertip-tight. This means snug, but not cranked down. You should still be able to twist them off with just (you guessed it) your fingertips.
Step Seven: Process in the Water Bath
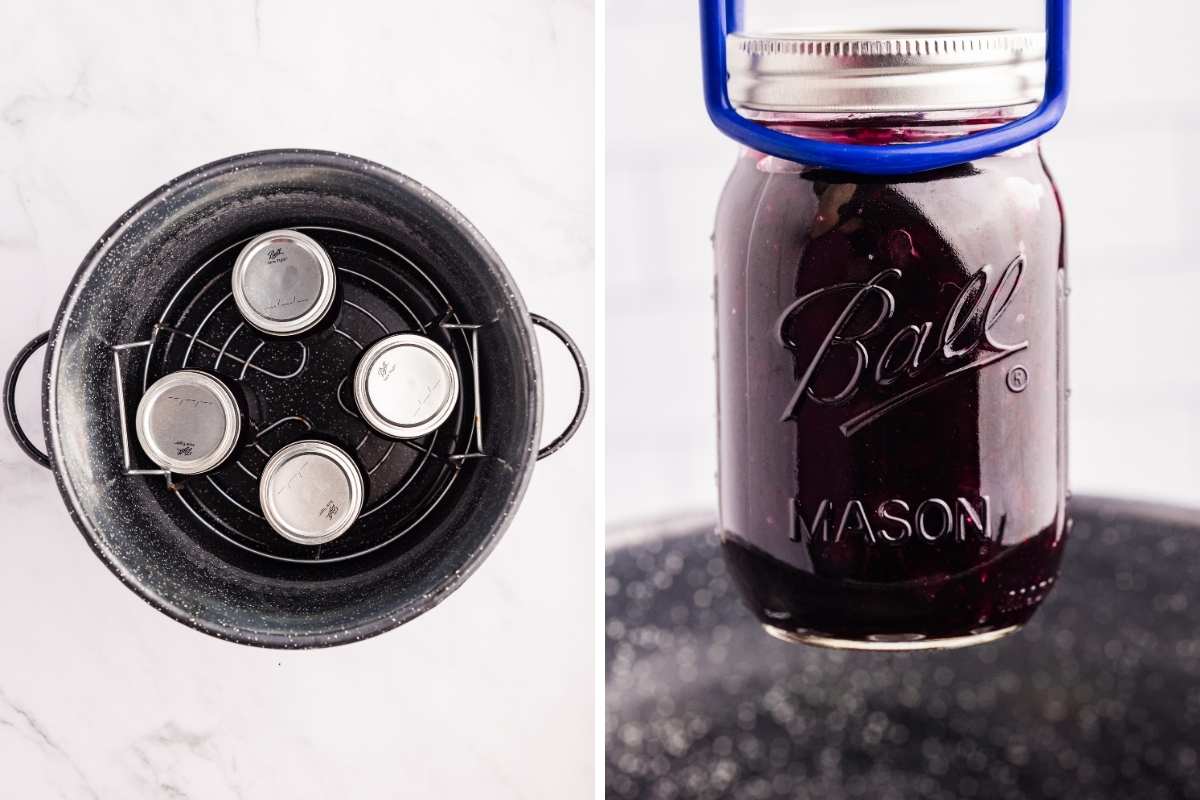
Lower the jars into the canner. They should be fully submerged with at least 2 inches of water above the lids. Bring the water to a rolling boil, and once it’s boiling, set the timer for 30 minutes (adjust for altitude if you’re above 1,000 feet).
When the timer goes off, turn off the heat, remove the canner lid, and let the jars sit in the water for 5 minutes. This slow transition helps prevent siphoning.
Step Eight: Cool and Check the Seals
Lift the jars out with a jar lifter and transfer them to a heat-safe rack or a folded towel on the counter. Leave them alone for 12 to 24 hours. Don’t tip them, don’t press the lids, just let them sit.
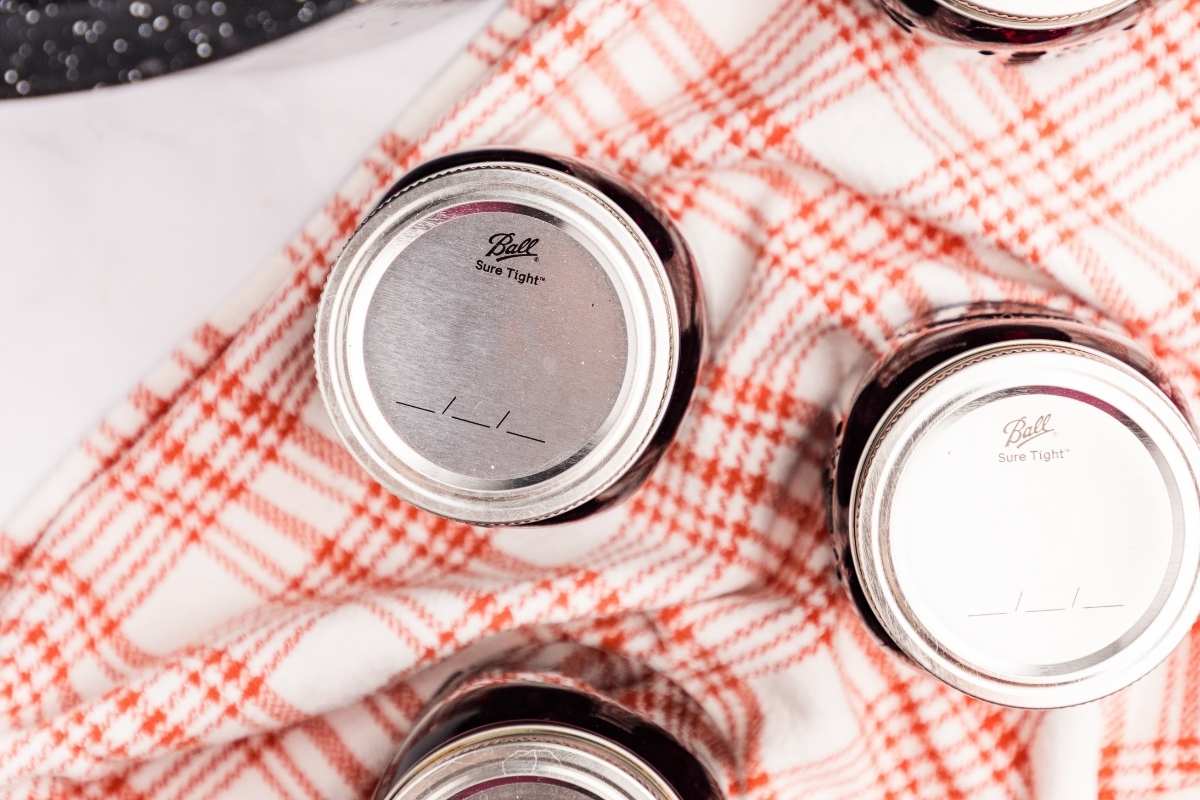
After 24 hours, check the seals by pressing the center of each lid. If it doesn’t flex, it’s sealed. Any jar that didn’t seal goes straight into the fridge to use within a couple weeks.
Storage Instructions
Properly canned and stored, this homemade blueberry pie filling can maintain peak quality for 12 to 18 months. Store the jars in a cool, dark place, such as a pantry or cupboard.
If you prefer to freeze the filling, use freezer-safe containers or freezer bags, leaving some headspace to allow for expansion. Thaw frozen filling in the refrigerator before use.
Using Homemade Pie Filling
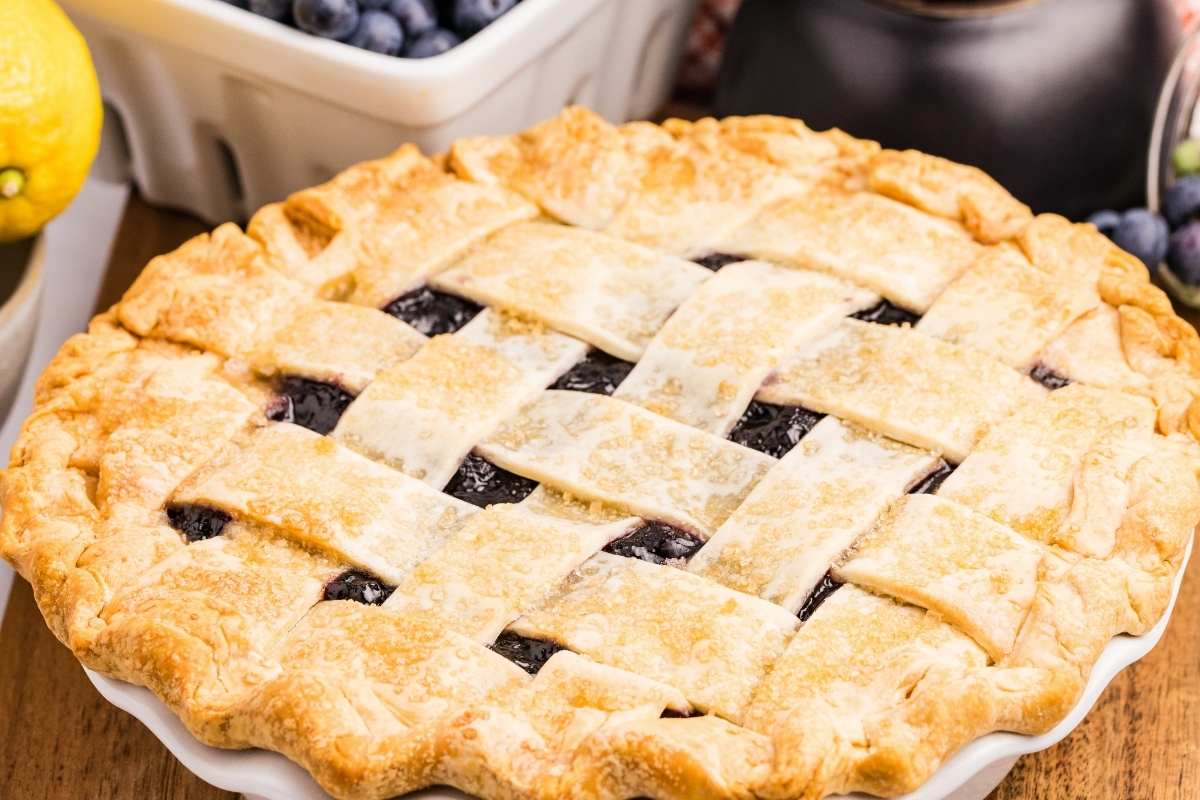
One quart fills a standard 9-inch pie. Beyond pie, a jar of this is ridiculously useful:
- My favorite blueberry cobbler uses canned filling so you can make it any time.
- Churn into vanilla ice cream with Golden Oreos to make an amazing 4th of July ice cream.
- As the filling for hand pies or turnovers
Troubleshooting and Substitutions
Yes. Thaw them fully before using and skip the blanching step entirely. If you want that pretty blueberry color without food coloring, save the thawing liquid and add water to bring it up to a full 2 cups.
Can without it and add cornstarch right before you use the filling. Do not can with cornstarch; it is not safe!
After the jars have cooled, press the center of each lid. If it’s sealed, the lid won’t pop back. If it does pop, that jar hasn’t sealed correctly. You can refrigerate it and use it first. It’s a simple check but super important for ensuring your pie filling is stored safely.
Usually it’s because hot water hit the ClearJel. The ClearJel and sugar have to be dry-mixed first, and the water you add has to be cold or room temperature. If you do end up with lumps, you can press the mixture through a fine mesh strainer before folding in the berries.
Yes. Pie fillings expand more than most canned goods during processing, and anything less than 1 ½ inches will siphon out of the jar.
You can double it if you have the pot size for it, but don’t triple it. ClearJel thickens so quickly that very large batches are hard to stir evenly, and you’ll end up with scorched spots on the bottom.
More for Canning Season
- If blueberry is your thing, my blueberry preserves and blueberry syrup are a great way to use up the rest of the haul.
- Once you have ClearJel in the pantry, you can also make cherry pie filling, apple pie filling, and blackberry pie filling the same way.
- New to water bath canning? Start with my canning tips. It covers every question I wish someone had answered for me the first time.
Printable Recipe
Blueberry Pie Filling
Equipment
- 8-quart pot
- Canning jars, lids, and rings
- Canning funnel
- Jar lifter
- lid lifter
Ingredients
- 7 cups blueberries fresh or frozen and thawed
- 1 ⅔ cups sugar
- ⅔ cup ClearJel do not substitute cornstarch or flour
- 2 cups water cold or room temperature (plus more for blanching)
- 1 tablespoon lemon zest from about 1 lemon
- ¼ cup bottled lemon juice reduce to 2 tablespoons for a milder flavor; use bottled, not fresh
- 12 drops blue food coloring optional
- 3 drops red food coloring optional
- ¼ teaspoon ground cinnamon optional
Save This Recipe
You'll join my email list which you will love. And if you don't, unsubscribe in one click. ❤️
Instructions
- Prep jars and canner. Wash jars, rings, and lids in hot soapy water. Submerge the jars in a water bath canner, cover, and bring to a simmer over medium heat. Place the lids and rings in a small saucepan of water over medium-low heat.
- Blanch the blueberries. Bring a large pot of water to a rolling boil. Add the blueberries and blanch for 1 minute. Drain well in a large strainer and set aside. Reserve 2 cups of the blanching water if using for natural color.
- Mix sugar and ClearJel. In a large pot, whisk the sugar and ClearJel together until evenly combined. (If using cinnamon, whisk it in now.)
- Add cold water. Pour in 2 cups of cold or room temperature water. Do not use hot water, it will cause lumps. Stir in food coloring now if using (12 drops blue, 3 drops red).
- Cook until thick. Bring to a boil over medium-high heat, stirring frequently. Once bubbling, reduce heat to low for a gentle boil and stir constantly until the mixture thickens. This happens quickly.
- Add lemon. Stir in the lemon zest and lemon juice. Cook 1 minute more, stirring constantly.
- Fold in blueberries. Remove the pot from the heat and gently fold in the blanched blueberries.
- Fill jars. Ladle the hot filling into hot jars, leaving 1 ½ inches of headspace. Less headspace will cause siphoning.
- Debubble and seal. Run a chopstick or debubbler around the inside of each jar to release air pockets. Wipe rims with a damp clean cloth, place lids, and screw rings on fingertip-tight.
- Process. Lower jars into the canner, submerged with at least 2 inches of water above the lids. Bring to a boil, then process for 30 minutes (adjust for altitude).
- Rest and cool. Turn off the heat, remove the canner lid, and let the jars rest in the water for 5 minutes. Transfer to a heat-safe rack and cool 12 to 24 hours.
- Check seals and store. After 24 hours, press the center of each lid to confirm a seal. Remove rings and store sealed jars in a cool, dark place for up to 18 months.
Notes


Hey carol, my guess is you used large blueberries and the volume ended up being different. I’m about to make this and I’ll weigh everything which should be more accurate! 🙂
How do you bake your pies with this canned filling? I love this recipe and plan to use it this summer. Thank you for this
hi mimi- I use a quart per pie. this is my favorite pie crust: https://heartscontentfarmhouse.com/crisco-butter-pie-crust/ then I crust od a simple double crust, a few slashes, brush with milk + sparkling sugar and bake at 350 for about an hour.
How much time if using pint jars
I always just reduce by 5 min but to be honest you could probably go lower.
Just canned my blueberries today and love how they look. I am sure they will taste good too.