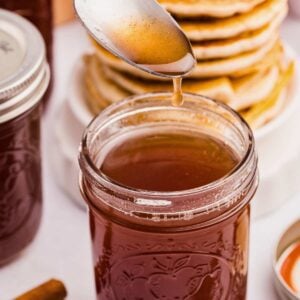
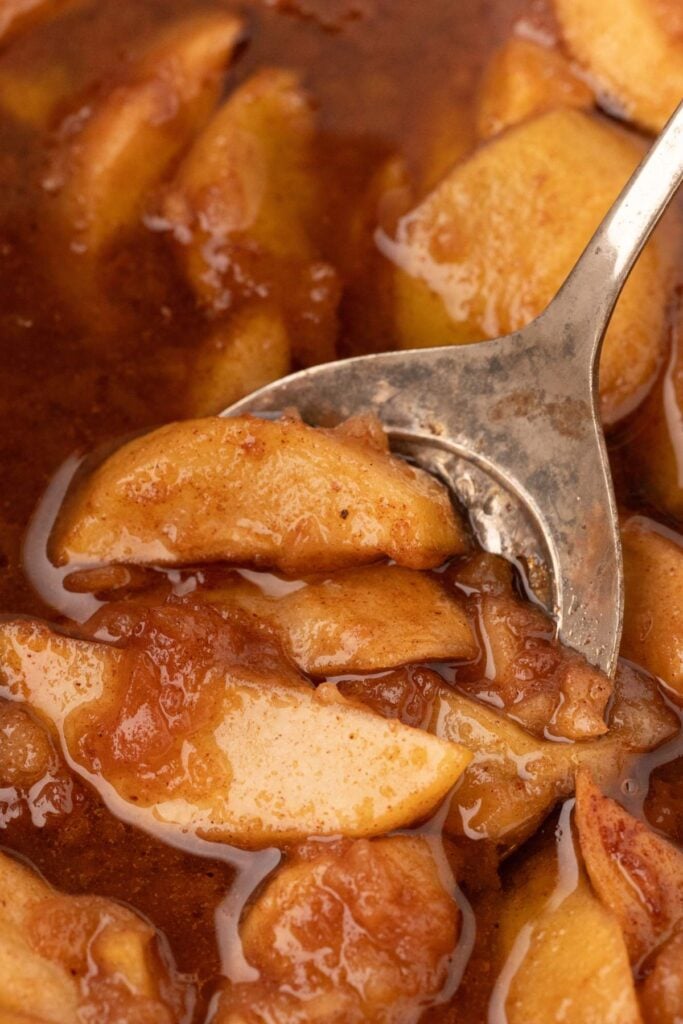
Think twice before you toss those apple peels and cores! They are the main ingredient in this apple syrup canning recipe. This syrup is perfect for drizzling over pancakes or waffles and tastes like apple pie! Perfect for fall mornings. This waterbath canning recipe is easy to make.

I know we’ve all thrown out those apple scraps after making applesauce without thinking twice. But now you have a way to use them! Waste not, and all that.
Table of Contents
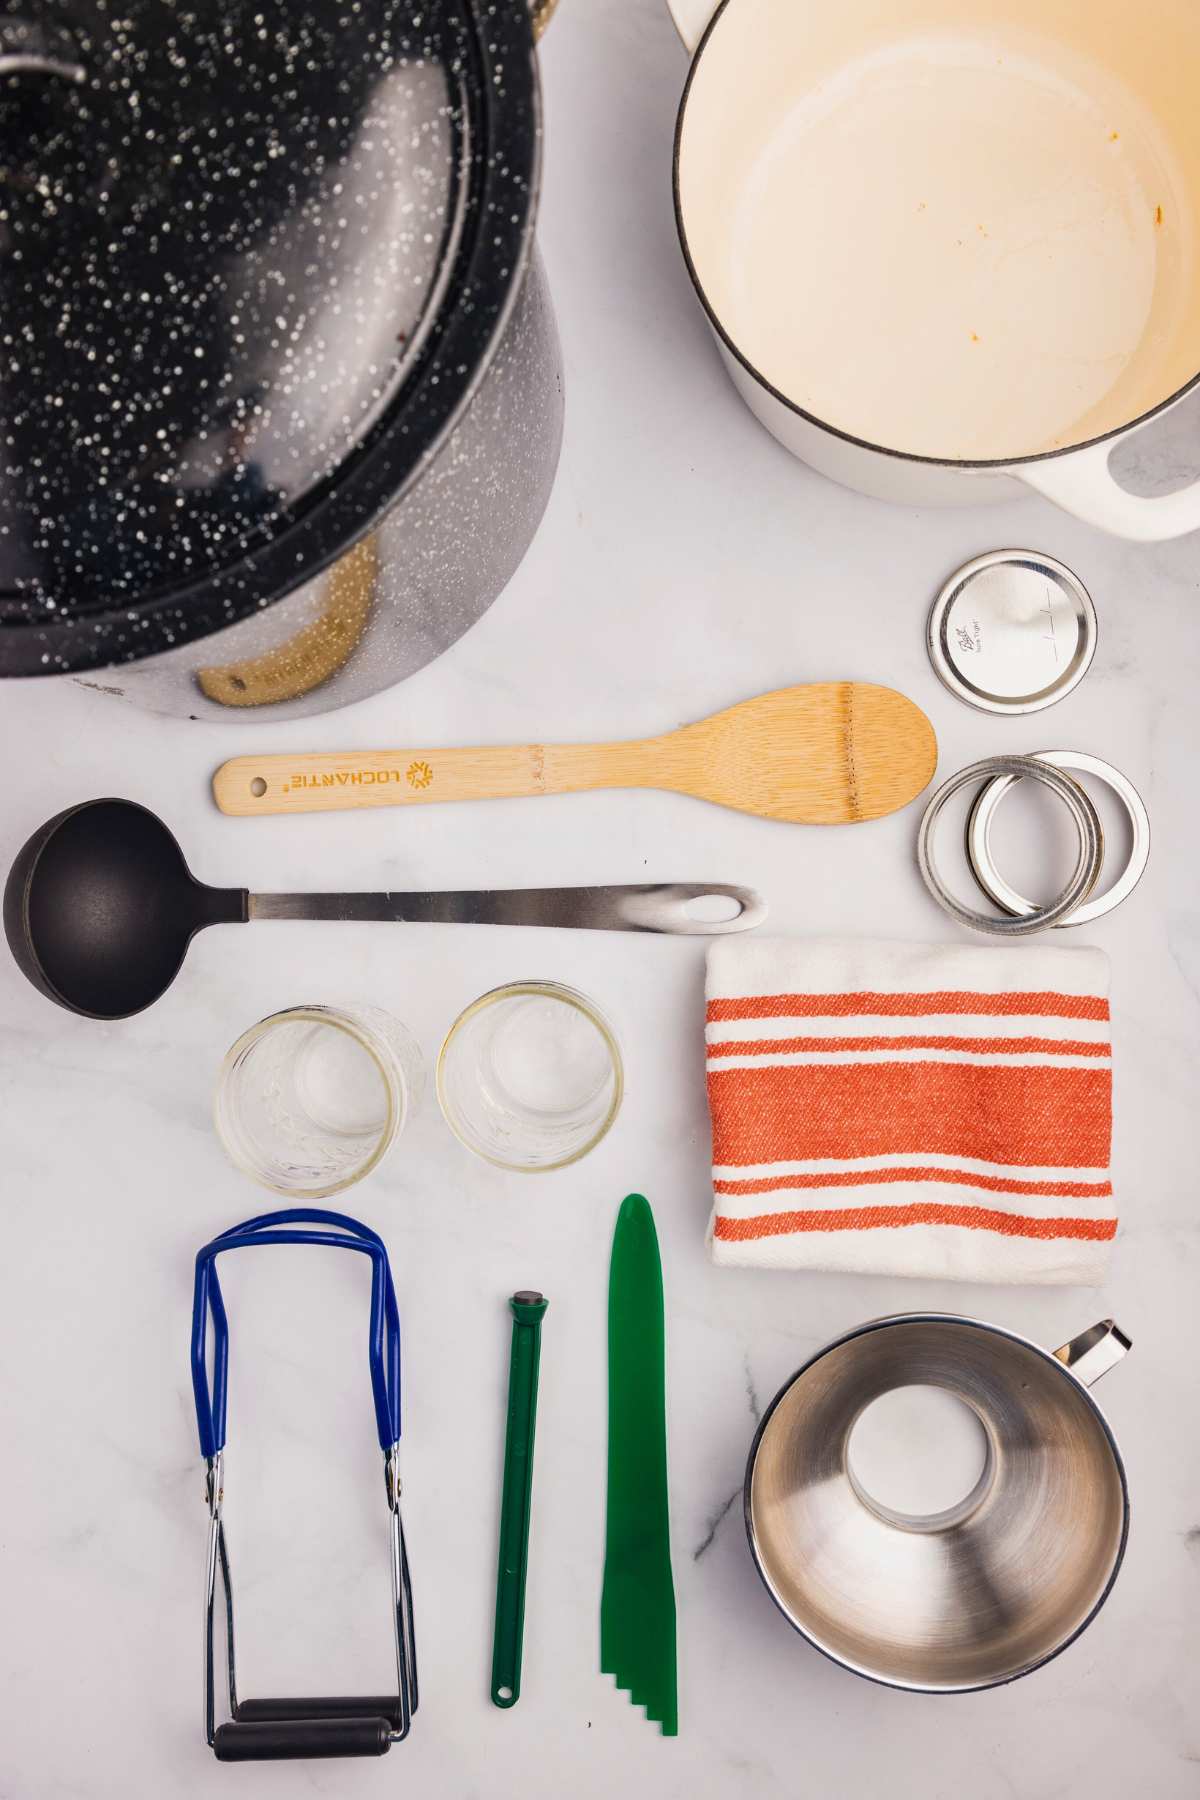
Ingredients and Tools You’ll Need
You can still make this recipe with cut-up apples. You will want to cut them in half and cut each half into quarters. No need to peel or core them. A candy thermometer is necessary here because you need to get just the right temperature to turn it into a syrup.
Heart’s Content Farmhouse is a participant in the Amazon Services LLC Associates Program, an affiliate advertising program designed to provide a means for sites to earn advertising fees by advertising and linking to Amazon.com. This means that when you click on certain links on this site and make a purchase, I may earn a small commission at no additional cost to you. I only recommend products I genuinely believe in and would use in my own kitchen. As an Amazon Associate, I earn from qualifying purchases.

FREE FOR SUBSCRIBERS
Canning Binder
Subscribe (free!) to my newsletter to receive this PDF + dozens of others in my printable library. You’ll also get emails you’ll truly love, with a weekly meal and so much more.
If you’d like to double or triple this recipe, you can make adjustments in the recipe card at the bottom of this post.
Equipment
- Water Bath Canner
- Candy thermometer
- fine mesh strainer
- Large pot
Ingredients
- 13 cups apple peels and cores, about 2 pounds of peels and cores – any apple variety or a mixture is fine
- 10 cups water
- 3 cups sugar
- 2 tablespoons lemon juice
- 1 teaspoon cinnamon
- ¼ teaspoon nutmeg
- ¼ teaspoon allspice
How to Make Apple Syrup
Keep an eye on the syrup as it cooks to make sure the sugar doesn’t crystallize. Wipe down the pot’s sides with a damp pastry brush while the syrup simmers to help prevent this.
Step One: Cook
Add the apple peels and cores to a large pot. Fill the pot with water until the peels and cores are submerged. Bring to a boil, then reduce the heat to medium-low, cover, and allow the mixture to simmer until soft for about 45 minutes. Once you can smoosh the cores with a wooden spoon, they will be soft enough for the next step.

Step Two: Strain
Strain the peels and cores from the liquid using a fine mesh strainer or a strainer with two layers of cheesecloth. Allow the peels and cores to drain for about 30 minutes or until no more liquid is expressed. You should have about 6 cups of liquid. If not, add water to get to 6 cups of liquid.

Step Three: Prep Jars
Wash your jars with hot, soapy water. Transfer the clean jars to your water bath canner and fill them so they are fully submerged with about 2 inches of water above them. Place the canner over medium heat and allow the jars to warm. Add the lids and rings to a saucepan with water placed over medium-low heat and simmer.
Step Four: Add Sugar
Transfer the apple juice liquid to a large pot and add the sugar. Bring the mixture to a boil, stirring frequently, and allow the sugar to dissolve completely.

Step Five: Add Lemon Juice And Spices
Add the lemon juice, cinnamon, nutmeg, and allspice. Using a candy thermometer, bring the mixture to a boil and allow it to get to 218℉. This will turn the liquid into a syrup.

Step Six: Test Syrup
Place a plate in the freezer for 3 minutes. Remove the plate from the freezer and spoon a drip or two of the syrup onto the plate. Drag your finger through the mixture. If it separates without spreading, the mixture is ready. If it spreads, it needs to boil longer. Boil for three more minutes and check again. Repeat this process until it stays. Stay close to the mixture, as it can overcook quickly.

Step Seven: Fill Jars And Attach Lids
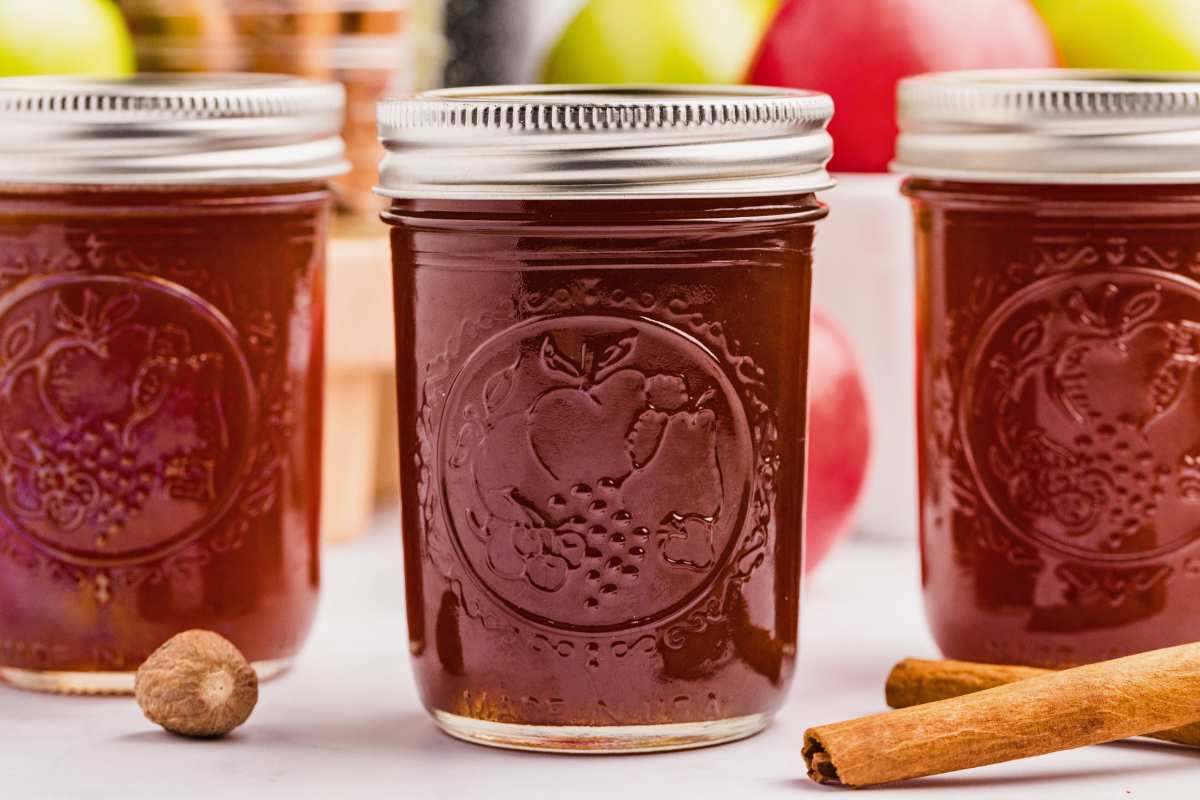
Once the liquid becomes a syrup consistency, ladle the apple syrup into the hot jars. Wipe the jars with a clean, damp cloth. Add the lids and rings and tighten them so they are fingertip-tight.

Step Eight: Process
Transfer the jars to the canner. Make sure there is enough water in the canner so the jars are fully submerged, with at least 2 inches above them. Cover and bring the water bath canner to a boil. Once boiling, set the timer for 10 minutes.

Step Nine: Cool
After 10 minutes, remove the canner from the heat and remove the lid. Allow the jars to sit in the water for 5 minutes. After 5 minutes, transfer the jars to a heat-safe area and allow them to cool for 12-24 hours.

Step Ten: Check Seals
After 24 hours, check for a proper seal by pressing the middle of the lid. If it is down and you don’t hear/feel/see the lid pop back, you have a proper seal.

Step Eleven: Store
Remove the rings and store the jars in a cool, dark place for 12-18 months or per the manufacturer’s recommendations for your lids.
Serving & Storing Apple Syrup
Serve over pancakes or sourdough waffles, along with some fruit and coffee, for a delicious breakfast.
Store the jars in a cool, dark place like a pantry or cupboard if you’ve canned your syrup. They should last 12-18 months, but always check the manufacturer’s recommendations for your specific lids.
Store in the fridge if you haven’t canned the syrup or if you’ve opened a jar. It should stay good for several weeks.
More Ways To Preserve Apples
I could go on forever, but here are just a few.
- Apple butter on toast. Doesn’t that sound heavenly!
- When I want apple pie but don’t want to make it, I take a jar of this apple pie jam off the shelf.
- Make some delicious homemade apple juice that the kids will love.
- Having apple pie filling makes creating pies, cobblers, bars, and many more of your favorite fall treats a breeze.
Printable Recipe
Apple Syrup Canning Recipe
Equipment
- fine mesh strainer
- Large pot
Ingredients
- 13 cups apple peels and cores about 2 pounds of peels and cores
- 10 cups water
- 3 cups sugar
- 2 tablespoons lemon juice
- 1 teaspoon cinnamon
- ¼ teaspoon nutmeg
- ¼ teaspoon allspice
Save This Recipe
You'll join my email list which you will love. And if you don't, unsubscribe in one click. ❤️
Instructions
- Cook. Add the apple peels and cores to a large pot. Fill the pot with water until the peels and cores are submerged. Bring to a boil, then reduce the heat to medium-low, cover, and allow the mixture to simmer until soft for about 45 minutes. Once you can smoosh the cores with a wooden spoon, they will be soft enough for the next step.
- Strain. Strain the peels and cores from the liquid using a fine mesh strainer or a strainer with two layers of cheesecloth. Allow the peels and cores to drain for about 30 minutes or until no more liquid is expressed. You should have about 6 cups of liquid. If not, add water to get to 6 cups of liquid.
- Prep jars. Wash your jars with hot, soapy water. Transfer the clean jars to your water bath canner and fill them so they are fully submerged with about 2 inches of water above them. Place the canner over medium heat and allow the jars to warm. Add the lids and rings to a saucepan with water placed over medium-low heat and simmer.
- Add sugar. Transfer the apple juice liquid to a large pot and add the sugar. Bring the mixture to a boil, stirring frequently, and allow the sugar to dissolve completely.
- Add lemon juice and spices. Add the lemon juice, cinnamon, nutmeg, and allspice. Using a candy thermometer, bring the mixture to a boil and allow it to get to 218℉. This will turn the liquid into a syrup.
- Test syrup. Place a plate in the freezer for 3 minutes. Remove the plate from the freezer and spoon a drip or two of the syrup onto the plate. Drag your finger through the mixture. If it separates without spreading, the mixture is ready. If it spreads, it needs to boil longer. Boil for three more minutes and check again. Repeat this process until it stays. Stay close to the mixture, as it can overcook quickly.
- Fill jars and attach lids. Once the liquid becomes a syrup consistency, ladle the apple syrup into the hot jars. Wipe the jars with a clean, damp cloth. Add the lids and rings and tighten them so they are fingertip-tight.
- Process. Transfer the jars to the canner. Make sure there is enough water in the canner so the jars are fully submerged, with at least 2 inches above them. Cover and bring the water bath canner to a boil. Once boiling, set the timer for 10 minutes.
- Cool. After 10 minutes, remove the canner from the heat and remove the lid. Allow the jars to sit in the water for 5 minutes. After 5 minutes, transfer the jars to a heat-safe area and allow them to cool for 12-24 hours.
- Check seals. After 24 hours, check for a proper seal by pressing the middle of the lid. If it is down and you don’t hear/feel/see the lid pop back, you have a proper seal.
- Store. Remove the rings and store the jars in a cool, dark place for 12-18 months or per the manufacturer’s recommendations for your lids.
Notes
Nutrition


Thanks for sharing this! We have three Apple trees, so we end up with lots of apples. I make jelly, jam, apple butter, apple sauce, cider, wine, etc and with the skins and cores I usually make apple scrap vinegar. I have quite a bit vinegar and so I have a bunch of cores and skins, which I haven’t used yet, in the freezer awaiting me finishing up one of my jars of vinegar. But I am going to try to make your apple syrup with some. I love finding different ways for using food scraps that might otherwise be put on the compost pile or thrown away.
Thanks again and wishing you Happy Holidays!
thank you sassy! you’ll love having this hand. happy holidays 🙂
Isn’t apple seeds poisonous?
only if crushed and it huge quantities, they are strained out here and cause zero problems
I’m thinking about making this with my apple scraps. How much liquid syrup does this produce? I’m trying to calculate how many jars (either 1/2 pint or pint) this will make. Does the size of the jar impact the processing time in the water bath? And what size jars did you use when you made this recipe? If I end up with more liquid, do I need to add more lemon juice to be able to have the proper acidity for water bath canning? Thanks!
this makes 4 half pints of syrup, processed in a ½ pint jar. yes the size the impact the processing time. if you use pints you’ll need to double the processing time. if you were to double the recipe ye you’d double the lemon juice too. if you just mean you have more liquid than expected, the proportions will still be correct.
Great idea for no-waste cooking! I’m making apple butter this weekend and will make syrup instead of compost with the scraps.
Have you ever made apple strawberry jelly? My grandmother gave me bread and this jelly when I was little. I don’t think she made it, but I have never seen it in a store and would love to find a recipe.
hi Marcia was it a true jelly with no little bits of fruit? if so I might have a recipe for it!
yes, it was a jelly. crystal clear and so good. I was too small to notice the jar it was in. This was around 60 years ago!
I would love a recipe!