Super Flaky Pie Crust with Butter and Shortening
I present to you one pie crust recipe to rule them all: a crust with butter, shortening, and a touch of sugar. There are so many opinions and different techniques in the crust world that it’s enough to make you throw up your hands and buy a premade one (for which I would NEVER judge you).
But honestly, making your own is no big deal. This recipe is easy to follow, and you can make it the day before, so you aren’t stressed.

I love this recipe so much that I bought a large food processor just so I could double it and actually have it fit. At Thanksgiving, I actually need to triple it. Which will not fit. But that’s okay.
Ingredients and Tools You’ll Need
Butter adds great flavor to everything, and baked goods especially, but Crisco has a magic way of improving texture. The solution? Use a pie crust recipe that uses both!
I know some of you hate Crisco, and that’s fine, but when it works, it works. You can, of course, just use all butter, but it will be slightly harder to work with.

If you have access to lard, that will actually work even better.
Equipment
- Food processor or pastry blender (makes quick work of cutting in the butter)
Ingredients
- ¾ cup cold unsalted butter 1 ½ sticks (cut into cubes and chill again if needed)
- 3 cups all-purpose flour
- ¾ teaspoon salt
- 2 tablespoons sugar
- ⅓ cup vegetable shortening such as Crisco – must be cold! (If you don’t have shortening, you can substitute lard or butter. All butter pastry is lovely too.)
- ½ cup water
How to Make a Crisco Butter Pie Crust
Focus on keeping everything cold, being gentle with the mixing, and giving yourself enough time for proper chilling. Do not stress out! The crust can sense it. At least that’s what my grandma always said.
Step One: Cut The Butter Into The Flour
Chop the butter into about eight pieces using a knife and blend them into the flour by pulsing with a food processor or using a pastry blender. Keep working until the butter is the size of small peas.

Step Two: Add The Remaining Ingredients To Form A Dough
Add the salt, sugar, shortening, and water and stir by hand or with the food processor. Mix until a dough forms. It will look slightly dry and crumbly, but should come together as a ball. If it does not, add more water one teaspoon at a time. Don’t overmix: handling the dough too much will make it tough.

Step Three: Allow Dough To Rest
Turn the dough out onto a cutting board and divide into two. Shape the pieces into rough discs and wrap them tightly in plastic wrap. Place them in the fridge to chill for at least one hour, or up to overnight.

Step Four: Roll Out And Prepare For Filling
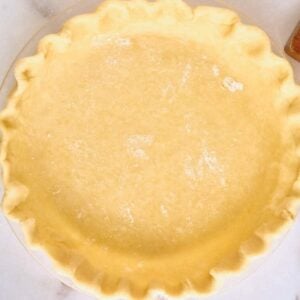
Place discs to warm at room temperature for 15-30 minutes before rolling out. Unwrap the first one and place on a generously floured counter. Using a floured rolling pin, roll out to desired thickness. Carefully transfer to the pie plate and trim and crimp the edges. Roll the dough, don’t stretch it. If you stretch it, it will shrink when you bake.

Trimming and Crimping
If you use a baking dish with high edges, such as deep-dish or quiche pans, it might be that no trimming is needed. But if you want to use a regular pie dish, you’ll need to trim it a bit. You want a one-inch overhang, and the easiest way to do this is with kitchen shears.

For a one-crust pie, crimp before you fill. For a double crust, crimp at the end. Push the inner edge out with the index finger of one hand while pinching the outer edge in with the thumb and index finger of the other. Repeat over all edges of your pie. You’ll get a classic scalloped edge.
And there’s nothing wrong with just pressing a fork all along the edge if you don’t want to crimp!
How to Blind Bake
Blind baking means you’re baking an empty pie shell. If your recipe calls for a pre-baked crust, here’s how you do it.
- Line the crust with parchment paper, then fill the pie with pie weights to prevent it from shrinking.
- Bake at 375 degrees until the edges of the crust are golden brown, about 30 minutes.
- For a partially baked crust, bake for about 10 minutes, and the crust will continue baking once filled.
Storing & Using Your Pie Crust
You can store pie crust in the fridge for up to 3 days or in the freezer for up to 2 months. If you’re freezing it, wrap it tightly in plastic and place it in a freezer bag.

This is perfect for:
- Chicken pot pie
- Blackberry-raspberry pie
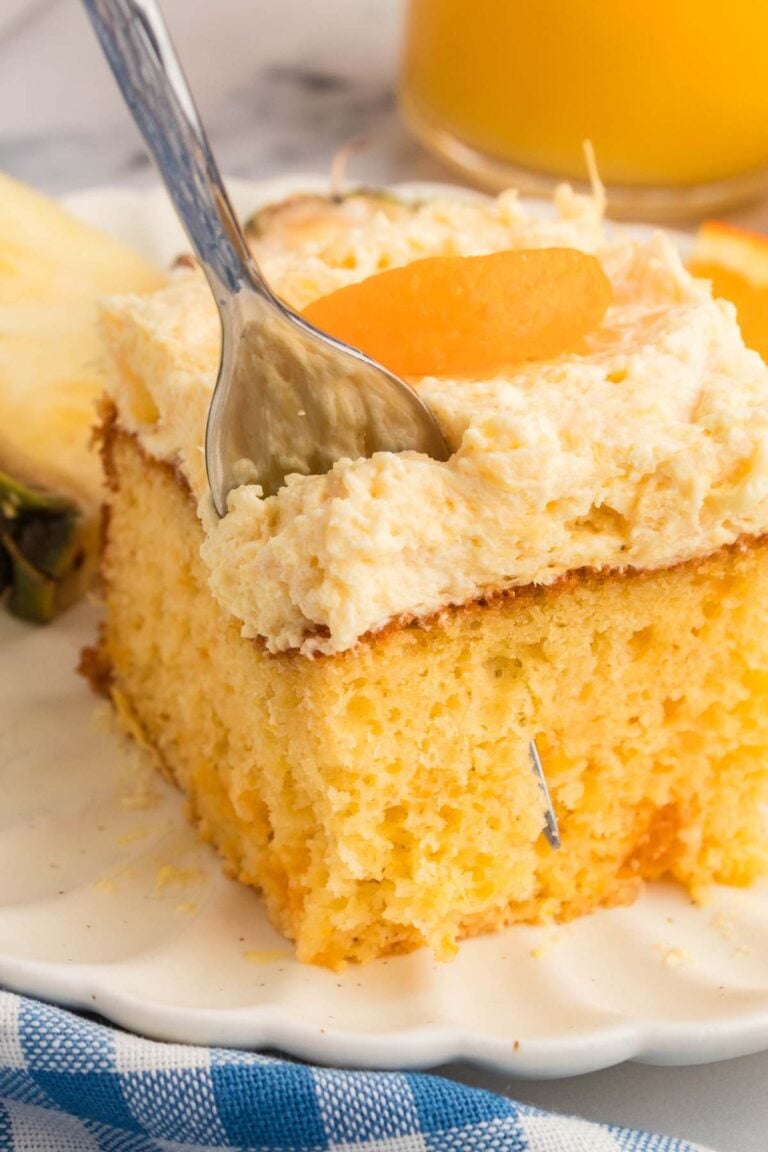
- Brown sugar crumble apple pie
- Cinnamon sugar peach apple pie
Questions and Troubleshooting
It’s too cold. Let it sit at room temperature for 15-30 minutes until it’s pliable but still cool.
Don’t stretch the dough when you’re putting it in the pan, and make sure to chill it for at least an hour before baking.
Add water one teaspoon at a time until it holds together when you squeeze it. I’m serious! A teaspoon at a time!
Make It Your Own
- Add herbs or black pepper for savory pies
- Sprinkle the top with coarse sugar for sweet pies
- Use the scraps to make cinnamon-sugar pinwheels (a baker’s treat!)
- For a beautifully browned crust, brush the top with an egg wash before baking.
Printable Recipe
Pie Crust with Butter and Shortening
Equipment
- Food processor or pastry blender
Ingredients
- ¾ cup cold unsalted butter 1 ½ sticks
- 3 cups all-purpose flour
- ¾ teaspoon salt
- 2 tablespoons sugar
- ⅓ cup vegetable shortening such as Crisco (If you don't have shortening, you can substitute lard or butter. All butter pastry is lovely too.)
- ½ cup water
Save This Recipe
You'll join my email list which you will love. And if you don't, unsubscribe in one click. ❤️
Instructions
- Cut the butter into the flour. Chop the butter into about eight pieces using a knife and blend them into the flour by pulsing with a food processor or using a pastry blender. Keep working until the butter is the size of small peas.
- Add the remaining ingredients to form a dough. Add the salt, sugar, shortening, and water and stir by hand or with the food processor. Mix until a dough forms. It will look slightly dry and crumbly, but should come together as a ball. If it is does not, add more water one teaspoon at a time.
- Allow dough to rest. Turn dough out onto a cutting board and divide in two. Shape the pieces into rough discs and wrap them tightly in plastic wrap. Place them in the fridge to chill for at least one hour, or up to overnight.
- Roll out and prepare for filling. Place discs to warm at room temperature for 15-30 minutes before rolling out. Unwrap the first one and place on a generously floured counter. Using a floured rolling pin, roll out to desired thickness. Carefully transfer to the pie plate and trim and crimp the edges.
Notes
Nutrition


After more decades of making pie than I care to admit, this is now my “go to” crust. I double it up through the Crisco in my food processor, but then have to transfer to a bowl to finish as my food processor is not quite big enough. Still works beautifully, and after dividing, I put 2 discs into the freezer for another day. Thank you so much!
I have always been the pie maker for forty years. I have always used a Shortening pie crust but this year I decided to try this recipe. Everyone loved it. It’s a keeper
Thanks, Muriel. I’m so glad everyone loved it. Merry Christmas.
very nice flakey dough
how would one go about blind baking or par baking this crust? I know how to just don’t know oven temp and times. thank you very very much
hey heather, line your unbaked crust with parchment paper, fill it with pie weights (or dried beans), and bake at 375°F for about 30 minutes until the edges are golden. For a partially baked crust, just do 10 minutes. The weights keep it from puffing up – super important!
This was the best pie crust recipe I’ve ever made. Flaky and delicious. Thank you!
good morning Mary, you are so welcome! 🙂
I worry over having exact measurements. do you know the weight a cup of flour should be?
I go with around 140 grams, but some sources say 120. I will retest this recipe using weights and add them here 🙂
Easy beautiful pie crust. I baked mine as a cobbler. It was delicious! I’ll be using this recipe many more times.
Hey Jo Anne, thank you so much! I’m so happy to hear you enjoyed the crust, and using it for a cobbler sounds absolutely delicious. That’s such a great idea! I appreciate you taking the time to share your experience, and I hope you get to make it many more times. Happy baking!
Everything was perfect until baking. I made sure to not stretch the dough, rolled over the rolling pin gently to add to pan but both pies the crust shrunk in the oven. Barely deep enough for filling.
Hi Roxanne, I’m sorry that happened! Shrinking can be so frustrating. Chilling the dough after you shape it can help, or maybe try not rolling it too thin next time. I hope the pies still tasted amazing, though!
can I use Lard instead of Crisco
Hey Nomand,
Yes, you can absolutely use lard instead of Crisco in this pie crust recipe! Lard actually gives an even richer flavor, and many bakers swear by it for an extra tender crust. Just substitute the Crisco with an equal amount of lard, and follow the rest of the instructions as usual. The only difference you might notice is that lard can make the dough a bit softer, so if it starts feeling too warm, pop it in the fridge for a few minutes to keep it manageable. Hope your pie turns out amazing!
I am 86 yrs. old and the head of the dining rm has asked me to make an apple pie because I’m the only resident at Grand Living who uses the kitchenette in my apt. I am attempting your pie crust recipe + a Granny Smith filling, Please wish me luck. Your recipe looks the most rewarding and I have all ingredients and a marble work space. Honored to have been asked. Welcome suggestions.
good luck Ellie! if it starts misbehaving just pop it in your fridge for a bit so you can both take a break! you got this 🙂
I always only have salted butter. I’m going to omit most of the salt in the recipe.
But it m surprised you didn’t address this issue.
hey teresa, honestly it’s fine even if you keep all the salt in the recipe, I usually have salted as well and make it as-is. I’ll add a note 🙂
I have FINALLY mastered my crust…thanks to you & this AMAZING recipe. I can now make a custard pie that rivals Marie Callender’s.
thank you lori!! i’m so. happy it was a success!
My Crisco only pie crusts were perfect until Crisco changed the formula about 20 years ago, then they failed and were thrown away or were hard, not delicate and flaky. Solution? Sub half the water with cheap, unflavored vodka! Moist enough to handle, but evaporates into being a flaky crust! And I always add a tsp of pure vanilla, unless making a savory crust.
But I’m going to try yours without the sugar. We’ll see what happens😊 I bought Granny Smith apples today. Soon hubby will be going around with exhuberant cries of “pie! Pie!” like the birds in Finding Nemo crying “Mine, Mine!”
hi; I would like to save the crust for April. I am waiting for the rhubarb in April or so; Can I freeze the dough in the pie tins? Just like you buy in the supermarkets??
Thanks,
Sarah
Hi Sarah, You sure can! :). Be sure to check out my strawberry rhubarb cobbler too it’s easier. 🙂 https://heartscontentfarmhouse.com/strawberry-rhubarb-cobbler/
Thank you so much for responding.
Best pie crust recipe….and I’ve tried slot of them. Thanks so much!
so happy to hear it diana! happy thanksgiving 🙂
Made this crust and it worked perfectly. Usually I struggle but it seems like the butter/Crisco combo made this easy to handle. Thank you!
I was wondering if you could substitute leaf lard for the Crisco.