I have made these rolls every week of my life for fifteen years. We use them for everything. They are not authentic, artisan style sourdough. But they are delicious, beautiful and foolproof. Yes, when I make these, I use a pinch of instant yeast. You can leave it out and just extend the rising times.

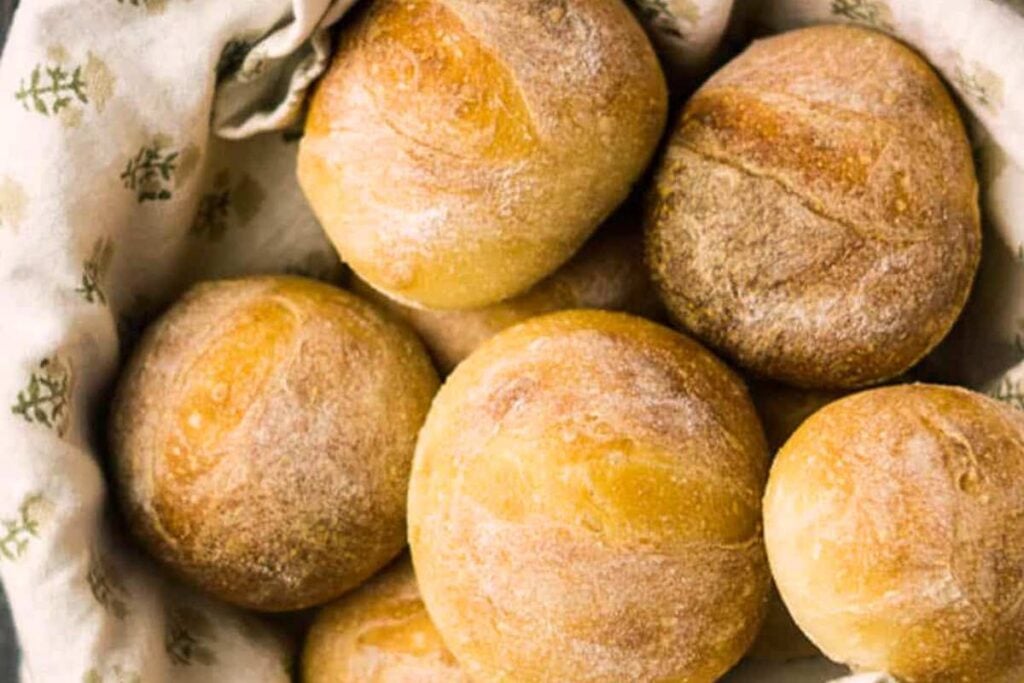
There is a time and a place for recipes involving many tools with French names. This is not it. This recipe is for when you just want some really good rolls. They have a crisp crust, soft interior, and good flavor. There is a slight sourdough tang, but it is totally undetectable by my kids. More of just a depth of flavor. They’re the perfect sandwich roll! It only took me a million different tries to get this recipe right. I really hope you like them.
Table of Contents
What You’ll Need
I’ve made these every which way…with the yeast, without it, with all-purpose flour, etc. I recommend that you make them exactly as written, but I’ve included notes about what substitutions you can make.
Get a Free + Pretty PDF Recipe Book
Sourdough Sunday Newsletter

Every Sunday evening I’ll send you a sourdough recipe to make that week, straight from my kitchen to your inbox.
And as a thank you for signing up, I’ll send you this e-book with beautiful printable recipes right away. Simple!
You will not be added to any other email lists or my daily newsletter. But if you’re already on my newsletter, you’re welcome to join and receive both.
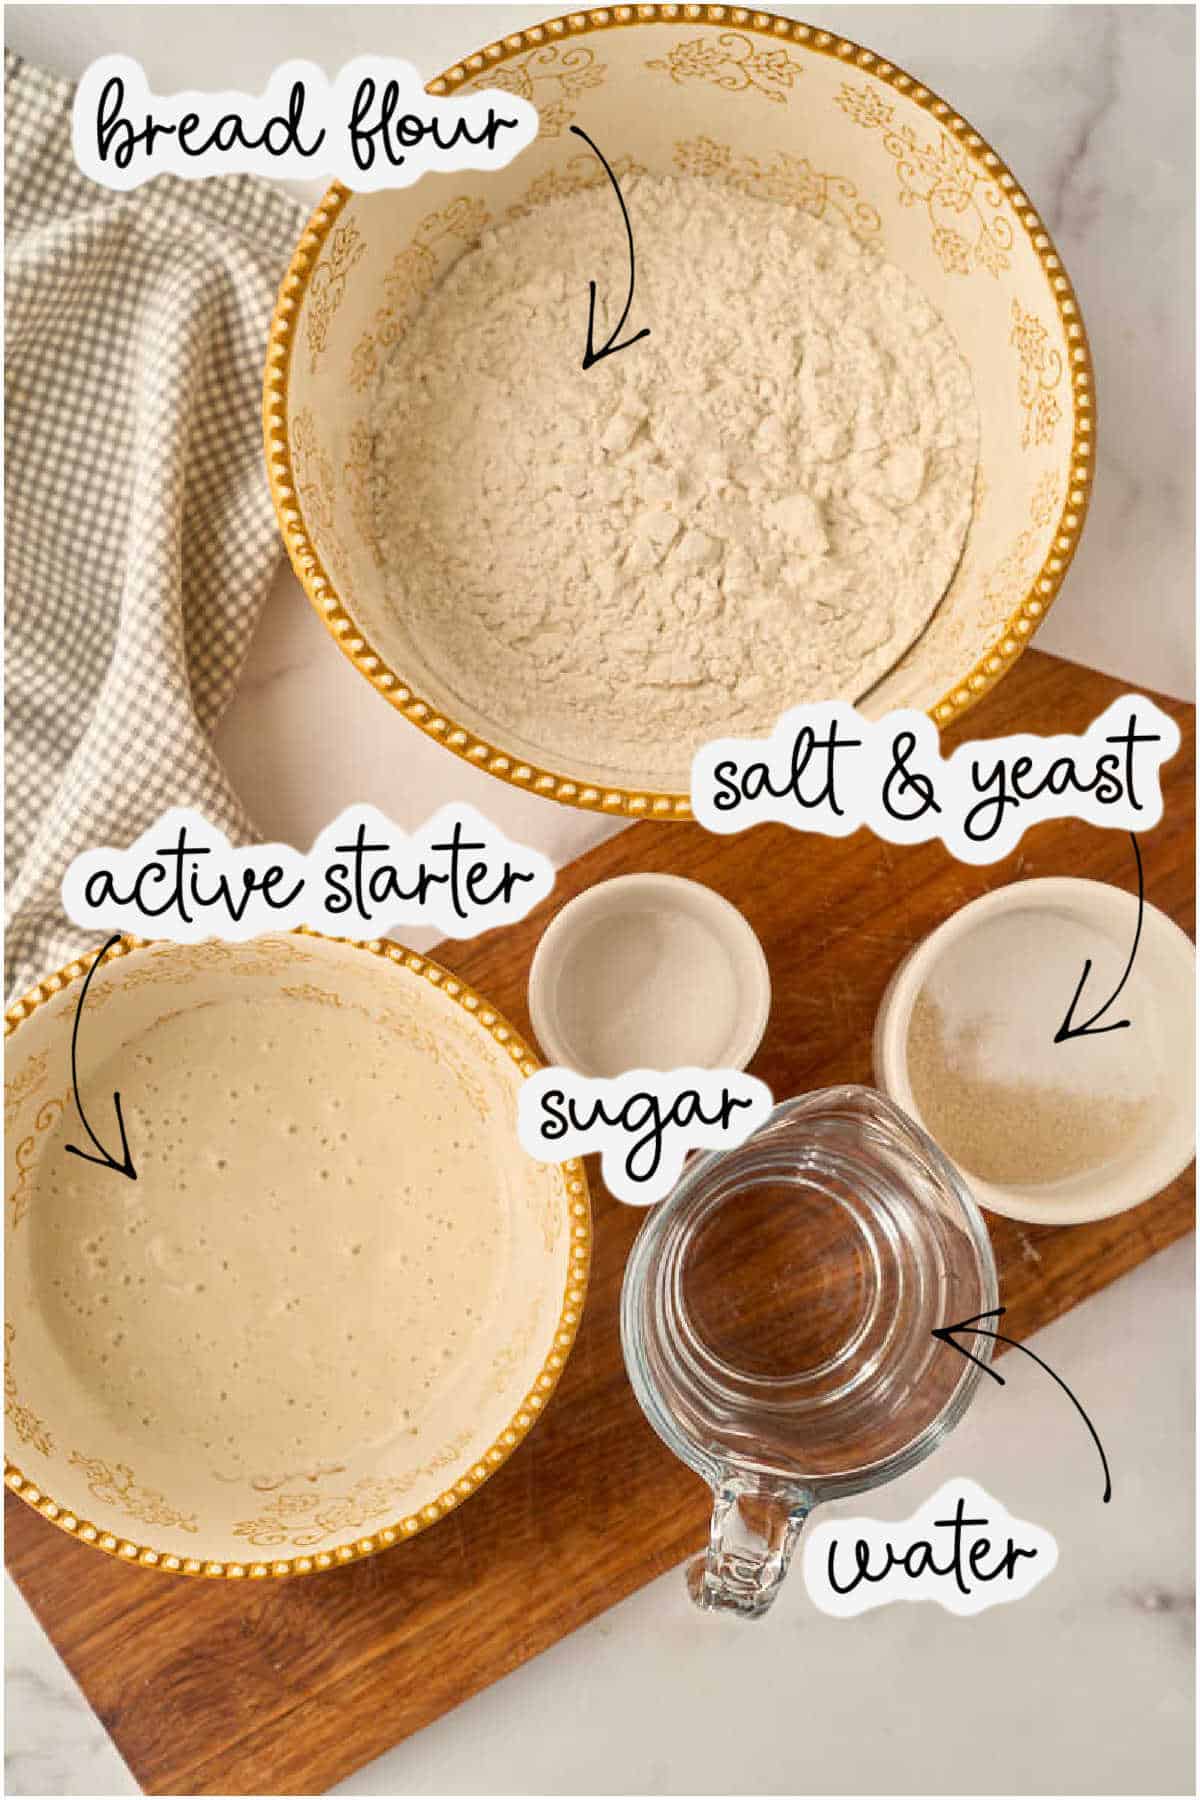
Main Ingredients:
- 7 ounces active sourdough starter (1 ¼ cups / 200 grams) should be bubbly and pancake batter consistency
- 13 ounces bread flour (2 ½ to 3 cups / 370 grams) bread flour is important to get the a crusty, chewy texture. If you are using all purpose flour, the texture won’t be quite the same, and you’ll need to use a little more flour.
- 6.5 oz water (¾ cup plus 1 tablespoon / 185 grams)
- ½ teaspoon sugar
- 1 ½ teaspoons salt
- ½ teaspoon yeast – yes, even though it’s sourdough! This helps with consistent rise and texture
For Assembly:
- Cornmeal for dusting
- Extra flour for dusting tops of rolls
As written, this recipe makes 8 large sandwich rolls or 12 smaller dinner rolls.
It doubles quite well, but you’ll likely need to bake in batches because you need one rack for the steam and one for the rolls.
If you’d like to double (or triple!) the amounts, use the 2x or 3x button on the recipe card at the very bottom of this post.
Instructions
Let’s do this! It’s easy!
Mixing the dough
Weigh out your ingredients with a digital scale and add everything except the yeast and salt to a bowl.
Stir with a spoon to form a rough, slightly dry looking dough. If you are used to baking artisan sourdough, the dough will probably seem very dry to you. Since we are forming it into rolls, it needs to keep its shape. So the texture is more like a traditional bread dough.

Allow it to rest, covered, at room temperature, for 20-40 minutes, then come back and knead in the salt and yeast.
Kneading Options
Knead the dough by hand, bread machine, or stand mixer with dough hook until smooth and slightly sticky. The dough is done kneading when it passes the windowpane test. All you need to do is take a golf ball-sized piece of dough and stretch it out. Look for translucent “windows” in the dough. If the dough tears instead of stretching thin, it’s not ready yet.
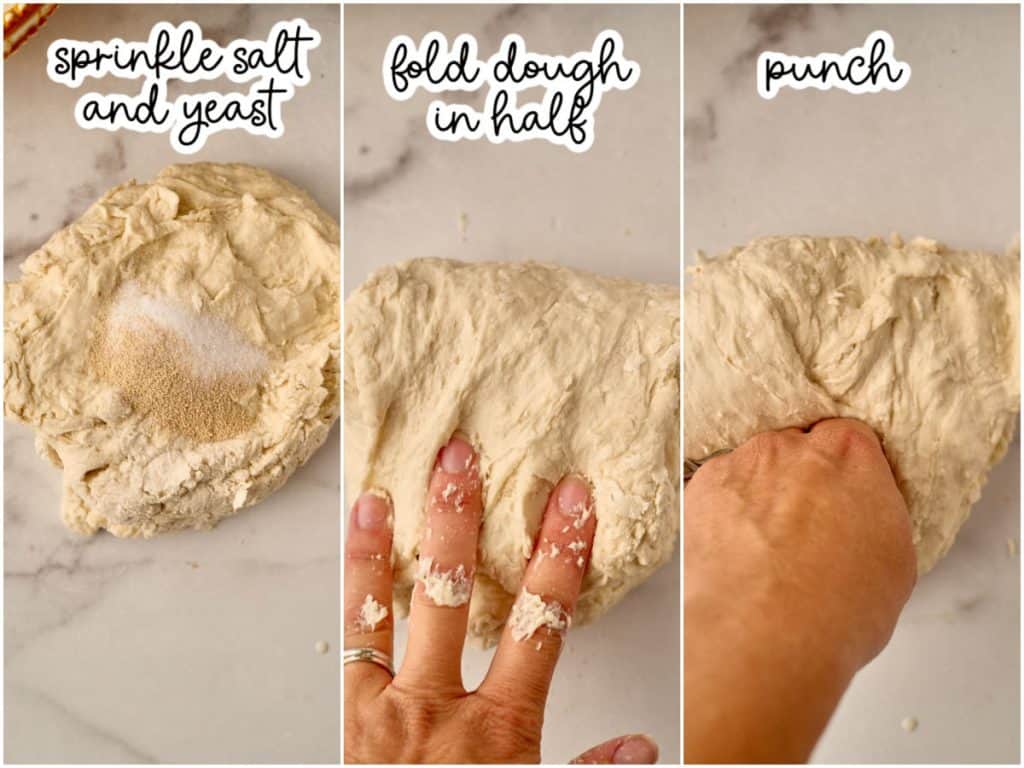
By hand: fold the dough in half, then punch it down. Stretch it out again, fold, and punch. Repeat this process for at least five minutes, until the dough is stretchy and smooth. You should be able to pull it flat without tearing it.
With a mixer: Place the dough in your mixer bowl with the dough hook and let it run on low for five to ten minutes.
Bread machine: Simply add everything to the bucket and select the dough cycle. When the machine beeps, you’ll have a risen dough that’s ready to shape. I use this method the most.
After a few minutes of kneading, the dough may be a little sticky, but it should not be wet or impossible to handle. Add more flour, a tablespoon or two at a time, until it forms a workable dough.
The first rise
Place the dough in a clean, lightly oiled bowl and cover. Allow to rise for 1 hour in a warm place, such as a slightly warmed but turned-off oven, until doubled in size.
Shaping and rising again
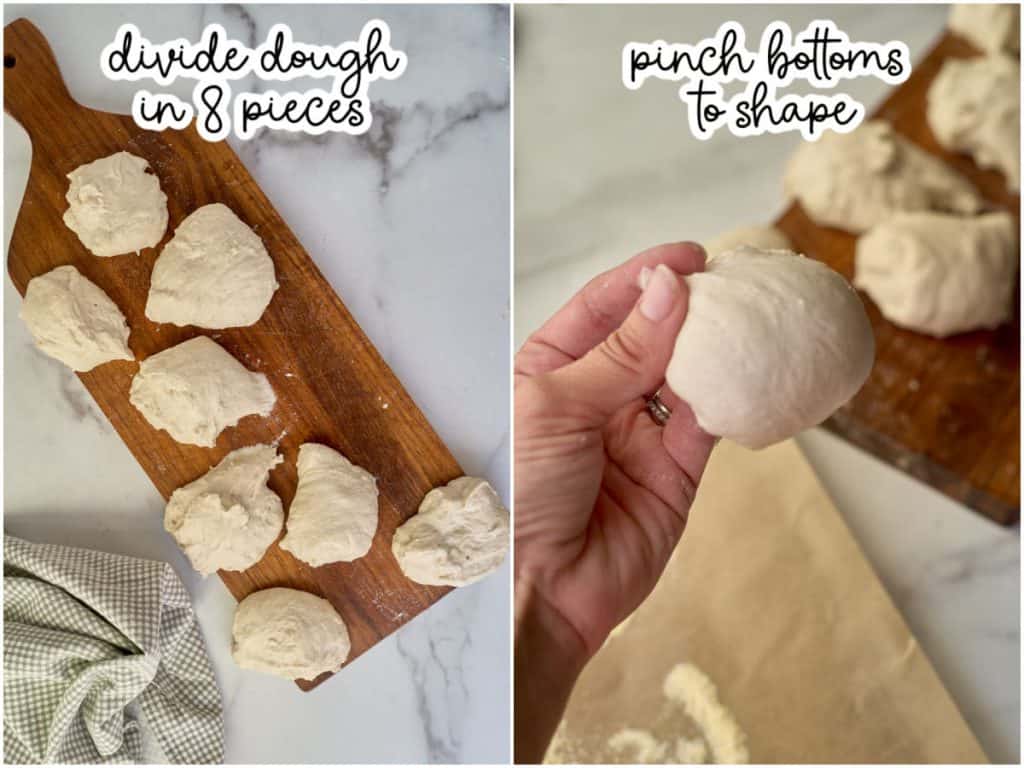
Then divide and shape into 8 rolls, placing them on a parchment- lined baking sheet sprinkled with cornmeal.
Cover with greased plastic wrap and allow to rise for 45- 60 minutes at room temperature. Halfway through the rising time, preheat your oven to 450 degrees. Put an empty, rimmed baking sheet on a lower rack.
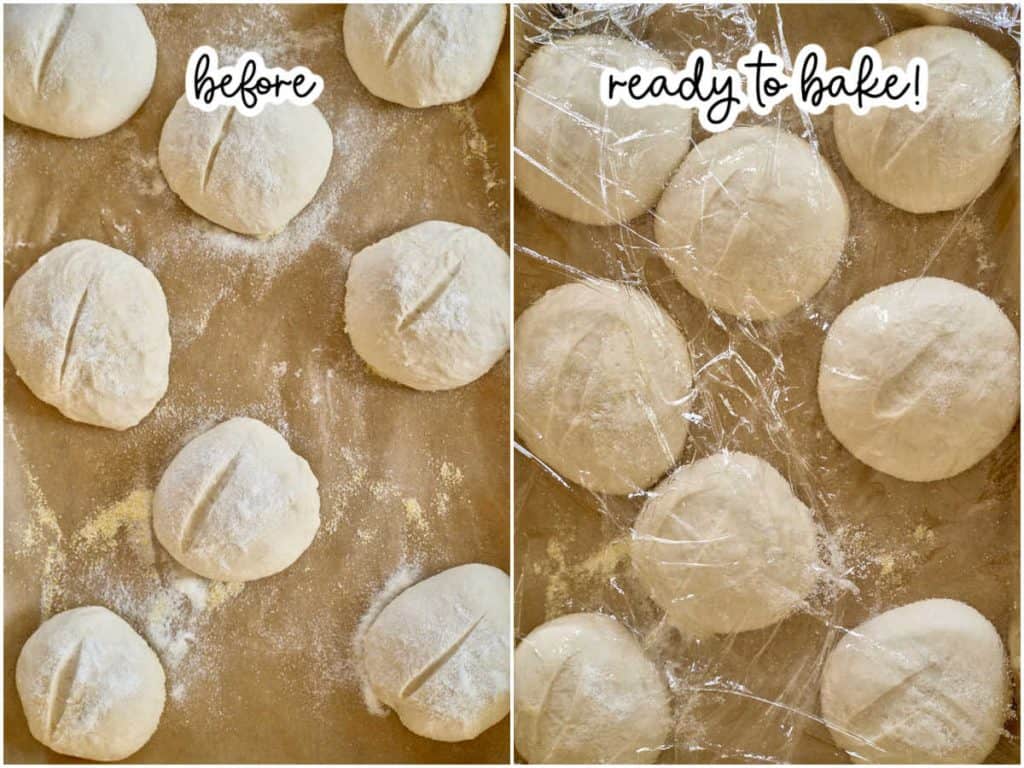
When the rising time is up, the rolls should be puffy.
Baking With Steam
Pour 1 cup of water on the empty baking sheet to create steam.
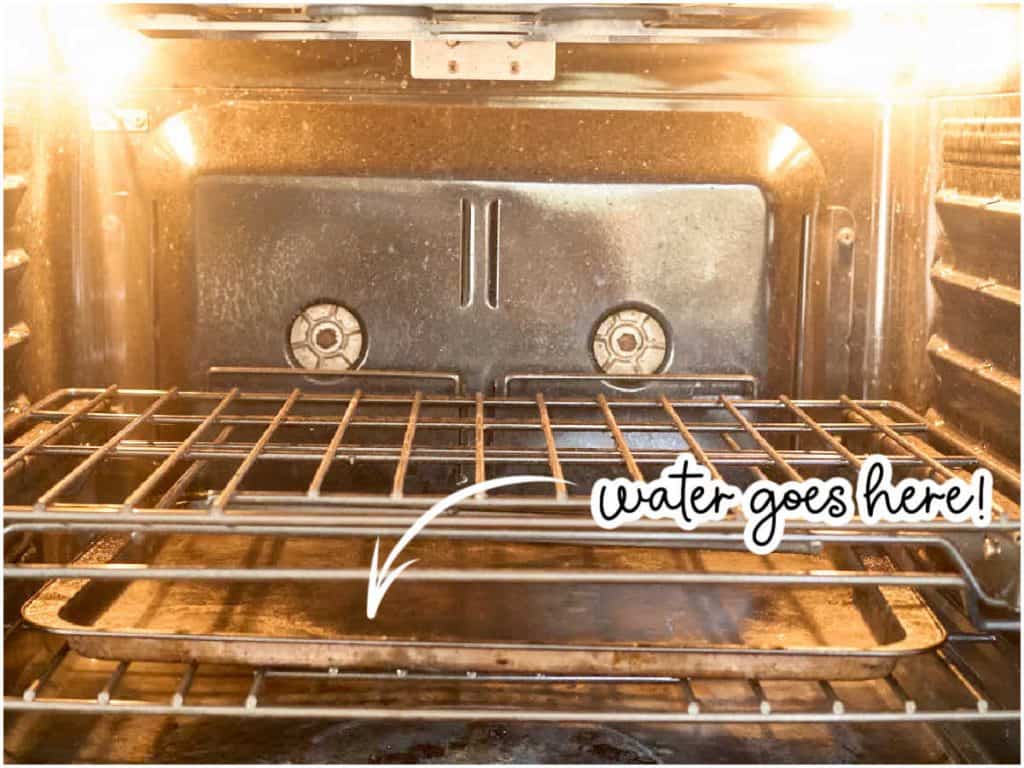
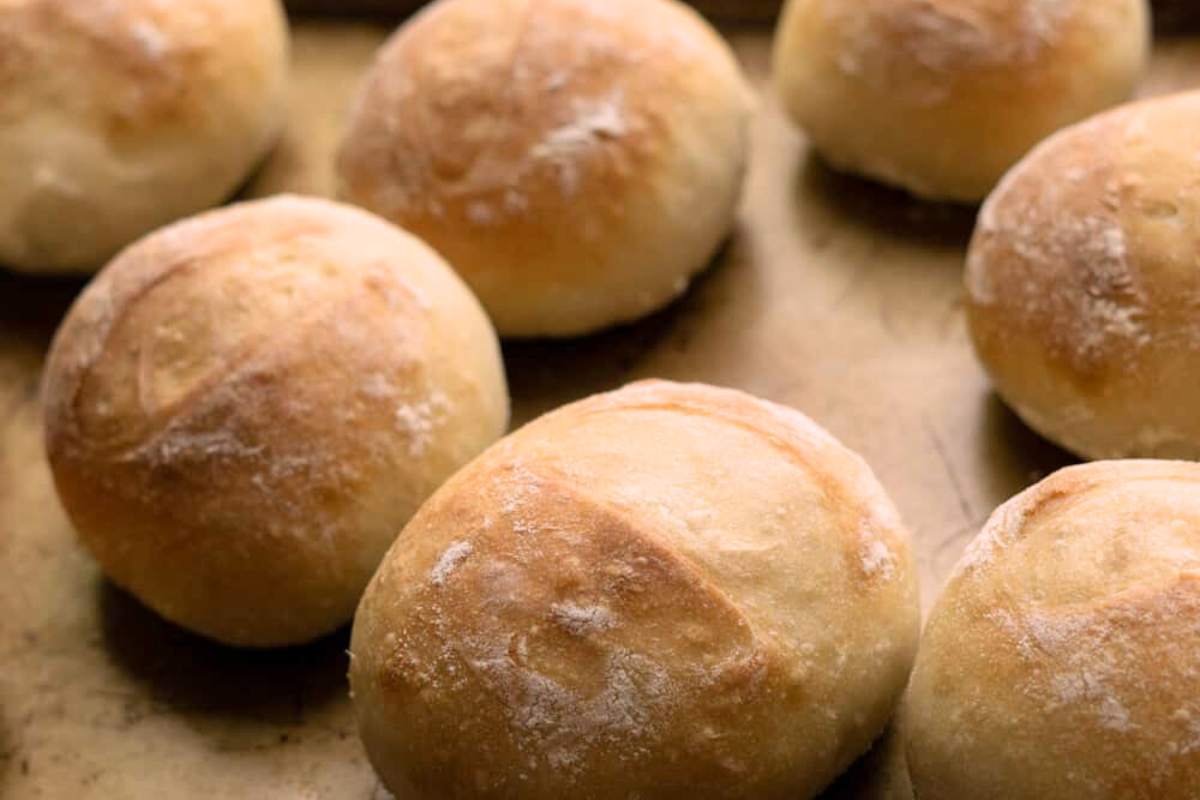
Bake for 17-21 minutes until browned. The baking time varies widely with this recipe because of the steam. The steam lowers the oven temperature and depending on how quickly your oven gets back up to temperature, some ovens will bake much faster than other.
Cool on a wire rack.
Storage Instructions
These freeze very well. After cooled to room temperature, pack them up in a freezer bag and they will keep fine for at least a month.
To reheat rolls without drying them out, defrost for a minute or so in the microwave at the defrost setting. Then wrap them in foil and place them in a warm (not hot!) oven for 5-10 minutes.
Customizing this recipe
This is a reader favorite and you all have made it many different ways!
Garlic-herb version: add a full tablespoon of dried herbs (any blend equaling one tablespoon), then half a teaspoon of garlic powder to the dough and knead it all together.
Seeded sourdough rolls: add seeds the dough and press some on top.
Italian sourdough rolls: slightly less water for even more chew and sesame seeds on top!
Questions and Troubleshooting
Yes! Cover the dough or the shaped, unbaked rolls very tightly with greased plastic wrap and pop it in the fridge. Then pick up the process when you’e ready.
Yes, divide the dough into 6 portions for big sandwiches or 12 for smaller dinner rolls. Adjust the baking time ups or down a few minutes.
It’s okay :). Just use the cup measurements, but start with less flour and add more if the dough feels too wet. The dough should clear the bowl sides but still feel slightly tacky.
They should sound hollow when you tap the bottom and be golden brown all over. If they’re pale, give them another few minutes.
You probably used all-purpose flour or measured it differently. Add some more flour. You’ll be okay.
Printable Recipe

Crusty Sourdough Rolls
Ingredients
- 1¼ cups active sourdough starter 7 ounces
- 2½-3 cups bread flour 13 ounces
- ¾ cup plus 1 tablespoon water 6½ ounces
- ½ teaspoon sugar
- 1 ½ teaspoons salt
- ½ teaspoon yeast
Save This Recipe
You'll join my email list which you will love. And if you don't, unsubscribe in one click. ❤️
Instructions
- Mix all ingredients except salt and yeast. Combine the starter, flour, water, and sugar in a large bowl. Stir well, using your hands if needed to incorporate all ingredients. The mixture may look dry but will feel slightly sticky to the touch. Cover and allow to rest at room temperature for thirty minutes.
- Knead in the salt and yeast. Add the salt and yeast on top of the dough, and knead until smooth, stretchy, and elastic. (If using a bread machine, set it on the dough cycle. For a stand mixer, set it on low about 5 minutes. If kneading by hand, knead for about 10 minutes.) Check the consistency of the dough after a few minutes of kneading. It may seem sticky, but should clear the sides of the bowl and should not be too difficult to work with. If it seems very wet, add more flour a few tablespoons at a time.
- The first rise. When the dough is kneaded, cover it and put in in a warm place to rise between 60-90 minutes, until nearly doubled in size.
- Shape the rolls. Turn the dough out onto a clean counter or a cutting board. Prepare a baking sheet with parchment paper or oil and flour. Dust the top of the parchment with cornmeal. Divide the dough into 8 equal pieces, either by dividing into half, then quarters, then eighths, or by. using a kitchen scale. Shape the pieces into rolls by pinching the bottoms. Place on the cornmeal dusted parchment. Rub the tops with flour. Slash, if desired, using a lame or sharp knife.
- The second rise. Cover the rolls with heavily greased plastic wrap and let rise in a warm place for 45-60 minutes, until puffy. Towards the end of the rising time, preheat your oven to 450 degrees. Place one rack in the center, and one in the lower middle area. Place an empty baking sheet on the lower rack to get hot while the oven preheats.
- Bake with steam. When the oven has heated and the rolls have risen, pour one cup of water on the hot baking sheet to create steam. (It may buckle, this is ok.). Place the rolls inside and bake for 17-21 minutes, until browned outside. Cool rolls on wire rack for at least 30 minutes before serving.
Video
Notes
Nutrition


Could i use dry yeast?
yes, instant or active dry are both fine
I’ve been making these rolls for a while now and they turn out absolutely perfect every time! A great way to use up sourdough starter that seems a little reluctant to perform on its own too. Thank you so much for sharing this recipe. P.S I’m in Scotland where the flours are quite different but they still work perfectly (using bread flour here)!
hi norma! that’s great to know about your flour. I’m so happy you enjoy the recipe.
Can we use discard, or is it better to use active (fed and peaked) starter? Can’t wait to try them. Love the bread machine idea.
hi susan this recipe uses active starter
Are you able to double the recipe?
hi Kaitlyn, yes that will work perfectly 🙂
I want to make these for a holiday dinner. if I fully make them the day before how would I store and reheat? I saw good on the counter for 3 days so I’m assuming just leave them out but then how do I reheat them and for how long? will they still be just as good?
for the day before I would make them, let them cool, and store them. to heat them up, wrap in foil and bake for 5 minutes or so at 350. of course they are their very best if you make them the day of.
Yuuup, this is the one. They came out exactly as promised–chewy, crusty, and with well-balanced sourdough flavor. They paired perfectly with my bean soup. 🙂 Split in 8 pieces, they ended up as big as hamburger buns! Perfect mini-loaves. Next time, I’m thinking of doubling the recipe, so I can have some to put in the freezer.
Hi rain! thank you! and they freeze absolutely perfectly by the way! 🙂
Can I make this recipe if I have a gas oven?
yes, absolutely, the steam trick will work just fine in there
Has anyone made this recipe without the yeast?If so, would like to know a time line. Have been searching for a crusty roll recipe.
yes I do it alllllll the time. I allow 5 hours for the bulk rise and 3 after shaping. I start them super early in the morning. 🙂
Hi! I will be using this recipe this weekend! What is being used to bake the rolls?
hi do you mean the pan? just a rimmed baking sheet, I use a special “large” nordicware one that holds all of them.
Only 4 stars bc I haven’t made them yet but I am today! And you don’t have to use the second baking sheet for steam, bakers hack, throw some ice cubes in the bottom of the oven when you put the rolls in. They’ll create enough steam trust me!! Works for me every time 😊
I adjusted this recipe for a loaf instead of rolls. The rising time is the same but I bake at 425° for 20-22 minutes. It’s great sliced as sandwich bread. (The rolls are awesome too!)
hey dot! I truly love this idea because I love crusty sandwich bread. thanks so much for letting me know:)
Easy Peasy! First time making this recipe. Love it!
They look beautiful! wish I could show you.
Hey Lin, that’s so wonderful to hear! I’m so glad you loved the recipe. I bet your rolls turned out beautiful, wish I could see them too! If you ever have any questions or try another recipe, I’d love to hear how it goes. Happy baking
Wonderful recipe! Great flavor and such a tender texture while maintaining that crusty exterior. This was the recipe I’ve been searching for. Thank you!
Hey Scarlett, thank you so much! I’m so happy you found the recipe you were looking for. Enjoy your baking!
This is a wonderful recipe! Thank you for sharing it. These are wonderful hamburger buns and hoagie rolls too. I like having one recipe I can go to, to make different sourdough breads!
Hey Kelly, thank you so much! I’m so glad you love the recipe and find it useful for different types of bread. Using one recipe for multiple things makes baking so much easier! Happy baking!
My 1st time making rolls using active starter and they turned out perfect! I will be making these again. Thank you!
Hey Kaylene, that’s wonderful to hear! I’m so glad your rolls turned out perfect on your first try. There’s nothing better than the smell of fresh sourdough baking! Thank you for trying the recipe, and I hope you enjoy making (and eating!) them again. Happy baking!:)
The best sourdough rolls ever! I doubled the recipe and made 15 rolls. I baked half and froze half after the 2nd rise. I would highly recommend freezing as they baked up absolutely perfect! I took them out of the freezer and they were defrosted within a few hours. I kept them in the refrigerator until an hour before dinner, then put them in a warm place to rise a bit. Baked at 400 for 15 minutes without the water tray (I had chicken in the oven) and they were crusty and perfect! Thank you for this recipe!!
Hey Linda, thank you so much for your wonderful comment! I’m happy to hear these rolls turned out so perfectly for you. I’m so glad you enjoyed the recipe, and I really appreciate you sharing your process. Happy baking!
Thank you so much for sharing! I wanted to try a different kind of dinner roll and I’m so glad I found this! I’ve started using 00 flour and yeast from Italy. Little side note, I went to Europe for 2 weeks and had no digestive issues so when I came home, it started up again. Anyway, I added 25g more flour because it’s considered like an all purpose and followed your recipe! They came out perfect!! Thanks again!!
Hey Maureen, so glad they turned out perfect for you! Thanks for sharing your tweaks, I love hearing how you made it your own!
I’m excited to try this recipe. Is it possible to double it?
Yes, definitely! The only issue is you need two racks for one pan of rolls (on for the steam, one for the rolls) so it takes a little more time
I cannot possibly overstate how delicious and easy these rolls were to make. I did start making them a bit too late in the day, so after I had shaped the rolls, I covered the pan and let them cold proof in the fridge overnight before taking them out and letting them sit at room temperature for an hour prior to baking. They each are like an individual loaf of sourdough bread, so perfectly crispy on the outside while soft and chewy on the inside. I definitely will be making more for the holidays, and trying them out with rye and wheat flours for some variation.
hi Sarah! this warmed my heart! so happy you loved them, and enjoy your holidays 🙂
These were amazing, my first sour dough bread attempt; I appreciated the helpful tips! I plan on making again very soon! Thank you!
These were so yummy! exactly what I was hoping for. I substituted the sugar for honey and they turned out great. Thank you for sharing this recipe with us. ♡
Hi Rebecca,
I’m so happy to hear they turned out just how you hoped. Thanks for giving the recipe a try and sharing your experience!
Way to much salt, I doubled the recipe and we could not even eat these. Might be a good recipe if you cut the salt in half.
hey Shirley I’d double check your measurements. these really are not any saltier than any other bread. sometimes if you hit the 2x button the grams do not double. 🙂
I use the bread machine option, adding water and starter to the bottom of the bowl, then flour and the rest on top. After the bread machine does its thing (1 1/2 hours) I divide the dough in two and form into baguettes.
I also do an herb option, grinding a tablespoon of dried herbs (parsley, sage, rosemary, thyme, winter savory and oregano, about equal portions except less thyme), 1/2 tsp each of granulated onion and garlic. Comes out great.