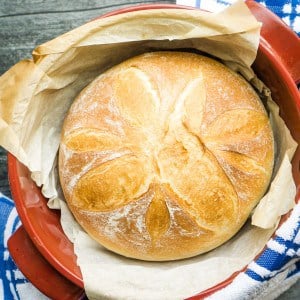
Dutch Oven French Bread (Easy)
This Dutch oven French bread recipe is easy to follow, with no weird techniques, odd ingredients, or words you’ve never heard before.
The Dutch oven helps creates a mini steam oven that helps you dough rise high and beautiful. So even if you’ve never baked bread, I promise you can handle this yeast bread recipe—it’s easy and forgiving and a great starting point if you’re brand new.
Easy French Bread in a Dutch Oven
Equipment
- Mixing Bowls
- Measuring cups and spoons
- Wire rack
- Clean towel or plastic wrap
Ingredients
- 4 cups bread flour
- 2 teaspoons salt
- 2½ teaspoons instant yeast (SAF brand recommended)
- 1½ cups water
- pinch cornmeal (for sprinkling on the parchment)
Save This Recipe
You'll join my email list which you will love. And if you don't, unsubscribe in one click. ❤️
Instructions
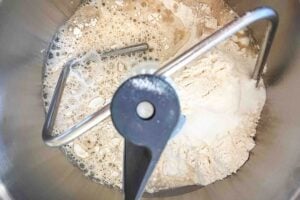
- Mix the dough. Combine the flour, salt, yeast, and water in a large mixing bowl or the bowl of a stand mixer. There’s no need to proof instant yeast—toss everything together. Then, mix until the dough clears the sides of the bowl but remains slightly sticky to the touch. If it’s too dry, add a tablespoon of water at a time. If it’s too wet, sprinkle in a bit of flour.Pro Tip: The dough should feel soft and stretchy, not stiff or overly wet.
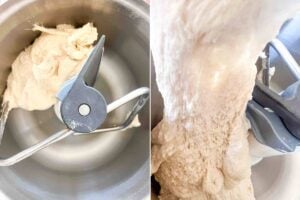
- Knead the dough. Knead by hand (15–20 minutes) or with a stand mixer (5–10 minutes). You’ll know it’s ready when the dough is smooth, elastic, and passes the windowpane test: stretch a small piece thin enough to see the light through it without tearing.

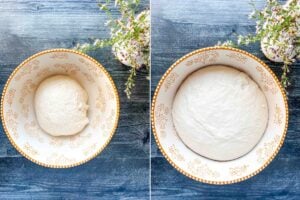
- First rise. Place the dough in a lightly oiled bowl and cover with plastic wrap or a clean towel. Let it rise in a warm, draft-free place (about 90°F is perfect) for 60 minutes or until doubled in size.Tip: An oven warmed briefly (then turned off), or a sunny windowsill works well.
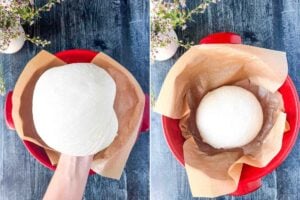
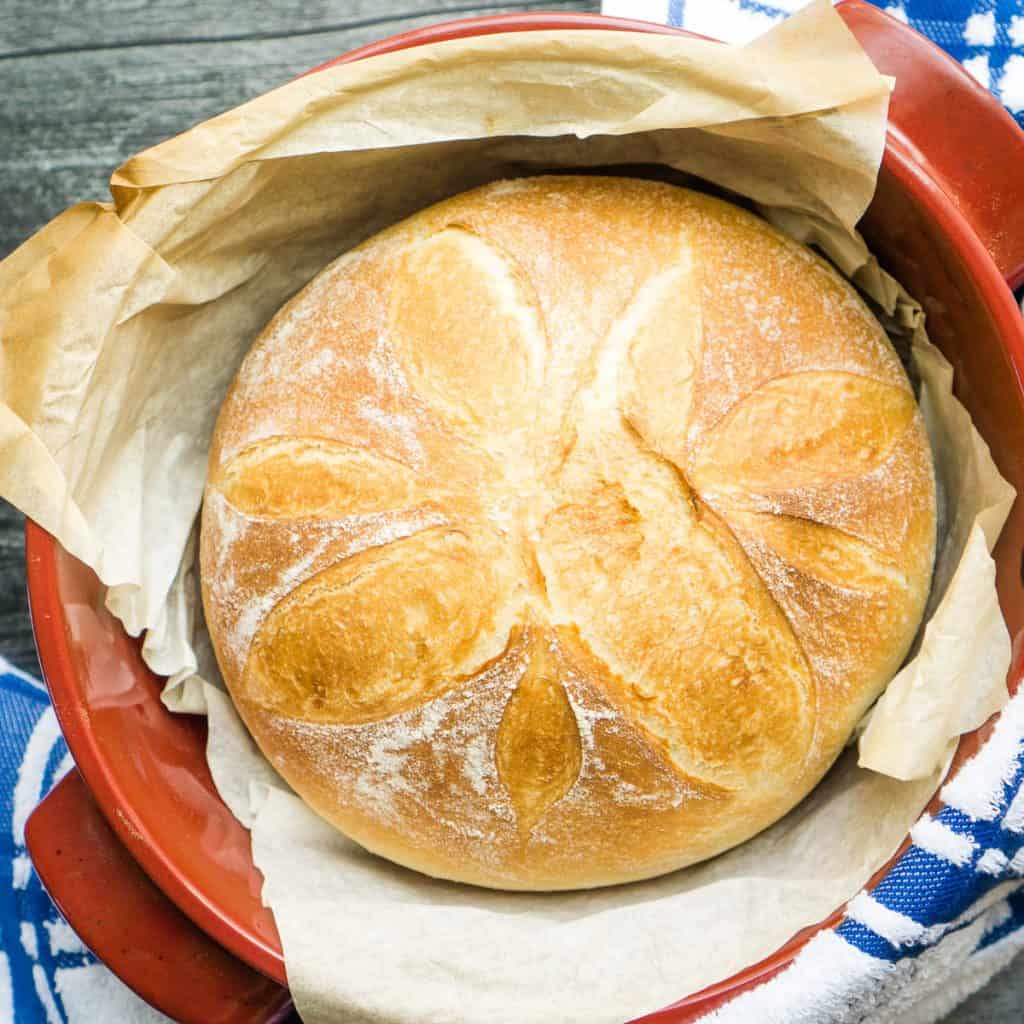
- Shape the loaf. Turn the risen dough onto a floured surface. Gently shape it into a round loaf by folding the edges under and pinching the bottom until the top is smooth. Then, line your Dutch oven with parchment paper and sprinkle a pinch of cornmeal on top. Place the loaf seam-side down on the parchment.
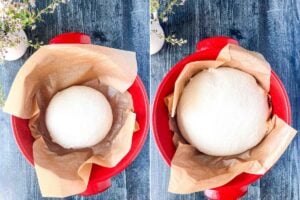
- Second rise. Cover the loaf with heavily greased plastic wrap or the lid of your Dutch oven. Let it rise for 45–60 minutes until it significantly puffs up. Preheat your oven to 450°F during the last 15 minutes of rising.
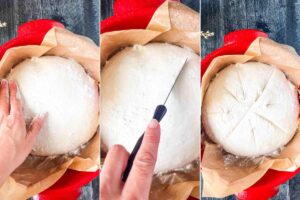
- Slash and flour. Dust the top of the dough lightly with flour for a rustic finish. Using a very sharp knife or bread lame, make three or four shallow slashes across the top. This helps the bread expand evenly in the oven.
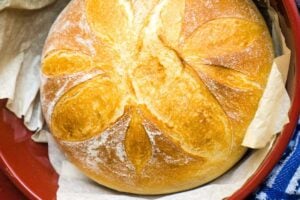
- Bake. Place the Dutch oven in the preheated oven (with the lid on). Bake for 35–40 minutes total:First 20 minutes: Bake with the lid on to trap steam, which creates a crisp crust.Final 15–20 minutes: Remove the lid and bake until the loaf is golden brown and has an internal temperature of at least 190°F.
- Cool and serve. Remove the bread from the Dutch oven and cool on a wire rack. Let it cool for at least 20 minutes before slicing—if you can wait that long! Serve warm or at room temperature.
Notes
Nutrition
Did You Make This?
I would love it if you would leave a review!If you’ve ever looked at bakery bread and thought, “I wish I could make that,” this recipe is just what you need—and it tastes even better straight from your own oven!
A Newsletter you’ll love
Daily recipes from the farmhouse, Sunday meal plans, seasonal ideas, straight from my kitchen to your inbox.
I promise to keep your email address safe. Unsubscribe at any time
If you want a more traditional, artisan-style loaf with more hands-on work, check out my Rustic French Bread Recipe. It’s a perfect complement to this simpler version.
We enjoy it sliced with butter or dipped in olive oil and balsamic vinegar.
Key Ingredients and Tools
- Bread flour: This flour has more protein than all-purpose flour, which helps give the bread its chewy texture and structure. You can use all-purpose flour if needed, but the bread might turn out softer and less sturdy.
- Instant yeast: Instant yeast is my favorite because it’s not fussy about temperature. But active dry is perfectly fine.
- Cornmeal: Sprinkling cornmeal on the parchment paper prevents the bread from sticking and gives the bottom of the loaf a nice, textured crust. If you don’t have cornmeal, use semolina, regular flour, or even fine breadcrumbs to prevent sticking.
- Dutch oven: A Dutch oven holds in steam during baking, creating a golden and crusty outside that makes the bread tasty. If you don’t have one, a heavy pot with a tight lid will work, or you can use a baking sheet with water to create steam.
- Parchment paper: Good-quality parchment paper stops your bread from sticking and makes transferring the dough to the hot Dutch oven safer and easier. Look for a parchment that can withstand high heat, as some brands might not hold up well above 400°F.
Troubleshooting and Help
Sticky dough can be tricky, but it’s a good sign for light, airy bread! Flour your hands and work surface lightly. Resist the urge to add too much flour, or you might have dense bread.
Slashing isn’t just for looks! It lets the bread expand while baking and prevents it from splitting in random places. Use a sharp knife or bread lame to make clean, shallow cuts.
It could be the yeast! If it’s old or expired, it might not work properly. Also, make sure your water isn’t too hot—it should feel like warm bath water. If your kitchen is cold, let the dough rise in a slightly warm oven (turned off) or near a sunny window.
This bread is meant to have a crispy crust, but if it’s too hard, wrap the loaf in a clean kitchen towel as it cools. This will trap steam and soften the crust slightly.
Baking bread at home doesn’t have to be intimidating—this recipe shows that anyone can do it.

Love,


Have made this bread twice now. It is so good. Easy to follow instructions. I will keep this recipe and use often.
Hey Jean, that’s wonderful to hear! I’m so glad you’re enjoying the recipe and finding the instructions easy to follow. Homemade bread is the best, isn’t it? Thank you for your kind words, and happy baking!
My husband loved the bread! He it toasted for breakfast the next morning. Definitely making this again.
Hey Kim, that’s wonderful to hear! I’m so glad you and your husband enjoyed the bread. Toasting it for breakfast sounds like a great idea! Thank you for trying the recipe. I hope you make it again and love it just as much. Happy baking!
This recipe sounds very easy. Do you preheat the dutch oven before baking the bread?
Hey Paula, thank you so much. Yes, you CAN preheat the Dutch oven before baking the bread. This helps create a nice crispy crust! Just be careful when placing the dough inside since it will be very hot. However, I usually DON’T and it’s not necessary. Hope you enjoy the recipe! Let me know how it turns out!
I’m rather new to using my Kitchen Aid mixer.
Can you give me an idea of the speed setting for each of the steps?
I look forward to making this very soon.
Thanks
Sheree
hey Sheree! low! you can easier burn out the motor if you have it too high. if the dough feels really stiff and the mixer in straining, add a tiny bit more water. and if you feel it getting too hot, give it a 5 minute break 🙂
Tasted amazing and so easy to make
I’m so glad! thanks for letting me know!
This turned out great! Definitely beginner friendly. l used all purpose flour instead of bread flour and it still had a great texture. I had to knead the dough for a bit longer than stated but that’s not a big deal. Very informative, thank you!
Hey Tessie,
I’m so glad it worked out for you! Thank you for the kind words and for sharing your experience—it makes my day to hear this!
Everyone loved this bread, I added roasted garlic and it was amazing
Easy to make and tastes great! I brush the top with beaten egg and sprinkle with sesame seeds before making slash marks
great idea nancy! i love seeds on my bread too 🙂