Rustic French Bread Made Easy: Step-by-Step Guide for Perfect Results
There’s nothing quite like the smell of bread baking in your kitchen. This simple homemade French bread recipe is perfect for those just starting to bake or anyone looking for an easy bread that the whole family will enjoy. Just grab some simple ingredients and give the dough some time to rise.
You can use this bread for all sorts of delicious sandwiches, from classic Italian paninis to upscale grilled ham and cheese. It’s also great for rounding out a meal with soup or salad, making for an affordable and satisfying dinner. It’s one of the best yeast bread recipes you should have on your baking list! So try it and see how this homemade bread quickly becomes a favorite!
Rustic French Bread
Equipment
- Bread machine (optional)
- Stand mixer with a dough hook (optional)
- Large mixing bowl
- Baking Sheet
- Damp tea towel
- Wire cooling rack
Ingredients
- 4 cups all purpose flour or bread flour (bread flour will require a higher amount of water)
- 1½-1¾ cups water (for the dough)
- 1 teaspoon water (for creating steam before baking)
- 2 teaspoons salt
- 2 teaspoons instant yeast
- cornmeal for bottom of the pan
Save This Recipe
You'll join my email list which you will love. And if you don't, unsubscribe in one click. ❤️
Instructions
- Mix the dough. Combine the flour, yeast, salt, and less water (1½ cups). Mix until well combined. If the dough seems dry, add more water and a teaspoon until you get a soft, smooth dough. You can mix by hand, using a stand mixer with a dough hook, or in a bread machine using the dough cycle.
- Knead the dough. Knead the dough for 7-12 minutes, or longer if kneading by hand. The dough should become elastic and smooth. If it sticks to the sides of the bowl, add flour a teaspoon at a time. If it is too dry, add more water by a teaspoon. The dough is ready when you can stretch it thin enough to see translucent areas without tearing (windowpane test).

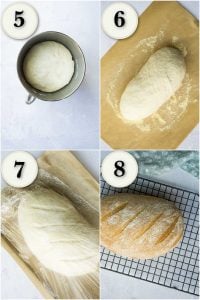
- First rise. Gently shape the dough into a ball and place it in a clean, lightly oiled bowl. Then, cover the bowl with a damp tea towel and place it in a warm area (90°F or 32°C is perfect) to rise until puffy and doubled in size, about 1 hour.
- Shape the loaf. After the first rise, gently remove the dough from the bowl and shape it into an oval loaf. There is no need to flatten it beforehand; shape it. Next, place the shaped loaf on a parchment-lined baking sheet sprinkled with cornmeal. Lightly rub the top with flour and slash the loaf with a sharp knife to create shallow cuts.
- Second rise. Cover the loaf with plastic wrap sprayed generously with cooking spray to prevent sticking. Place the loaf in a warm spot to rise until puffy and doubled in size, about 45 minutes.

- Preheat the oven. Preheat the oven to 400°F (200°C) towards the end of the second rise. Place an empty, rimmed baking sheet on the lower oven rack and allow it to preheat.
- Create the steam and bake. Before placing the loaf in the oven, pour 1 cup of boiling water onto the preheated baking sheet to create steam. Carefully place the bread in the oven and bake for 40 minutes, or until the loaf is golden brown and sounds hollow when tapped on the bottom.
- Cool and slice. Remove the loaf from the oven and cool it on a wire rack for at least 30 minutes before slicing for the best results.
Notes
Nutrition
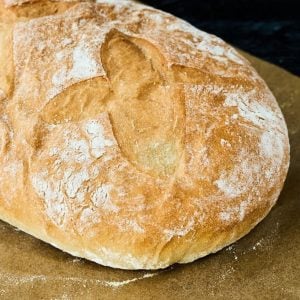
Homemade bread just has this comforting vibe for me, and whipping up this simple French loaf is no different. It bakes a lovely golden crust with a soft and airy inside, perfect for creating sandwiches or dunking into my favorite soup. This recipe is as straightforward as they come—no flashy equipment, no complex steps, just a few basic ingredients that magically change into something special.

The trick is letting the dough rise; I’ve learned to be patient and let it puff up nicely. Once it’s fresh out of the oven, I’m treated to a loaf that’s just right for any occasion, be it a casual family meal or a cozy breakfast during the weekend. Once you’ve mastered this rustic loaf, you might also want to try this Easy French Bread Recipe for a softer, simpler version that’s great for everyday meals.

I’m sure you’ll enjoy it as much as I do.
Key Ingredients and Tools
When making simple French bread, having the right tools and ingredients can improve your results. Here they are:

- Bread flour: This flour has more protein than regular flour, making it chewier and helping it rise better. Regular flour is okay if you don’t have bread flour, but the crust might not be as chewy.
- Instant yeast: This yeast is quick and can be added directly to the dough without first dissolving it in water. Look for it in the baking section at the store, and it’ll save you some time when making bread. If unavailable, use active dry yeast instead of instant yeast. Just remember to dissolve it in warm water first.
- Cornmeal: Dusting the baking sheet with cornmeal keeps the bread from sticking and adds a bit of crunch to the bottom. You can usually find it with the baking ingredients at the grocery store. Don’t have cornmeal? Use semolina or just regular flour. Both keep the dough from sticking, but only cornmeal gives a crunchy bottom.
- Parchment paper: It keeps the bread from sticking to the pan and makes cleaning up easier. It’s a good option instead of greasing the pan, and you can find it with the foil and wraps. No parchment paper? Just use a baking sheet that’s lightly greased. This helps prevent the bread from sticking.
- A sharp knife or bread slasher: Cutting the bread with a sharp knife or a special bread-cutting tool lets it expand correctly when it bakes. A sharp tool means neat cuts that don’t squish the dough.
Attention to these specific items can help you get a tastier and better-textured loaf. Even little things, like the type of flour or yeast, can make a noticeable difference in how your bread turns out.
Troubleshooting and Help
Great question! The dough should double in size and look puffy. If you press a finger into it and the indentation stays, it’s ready. If it springs back right away, give it more time.
If your bread isn’t rising, make sure your yeast is fresh. Yeast can lose its potency over time, so if it’s been sitting in your pantry for a while, that might be the issue. Also, make sure the dough is in a warm spot—yeast loves warmth to do its job.
It helps keep the bread from sticking and adds a little crunch to the bottom. You can use flour or semolina if you don’t have any, but cornmeal gives it that rustic feel.
The steam in the oven is key! Pouring water onto a preheated pan creates steam, which gives the bread its crisp, golden crust. Just be careful when adding the water to avoid any splashes.
Yes, you can! After the first rise, you can cover and refrigerate the dough overnight. When you’re ready to bake, let it come to room temperature and rise again before baking. This can develop the flavor even more!
Definitely! You can mix in rosemary, thyme, or even roasted garlic for a flavorful twist. Just fold them into the dough evenly during kneading so the flavors are distributed throughout.
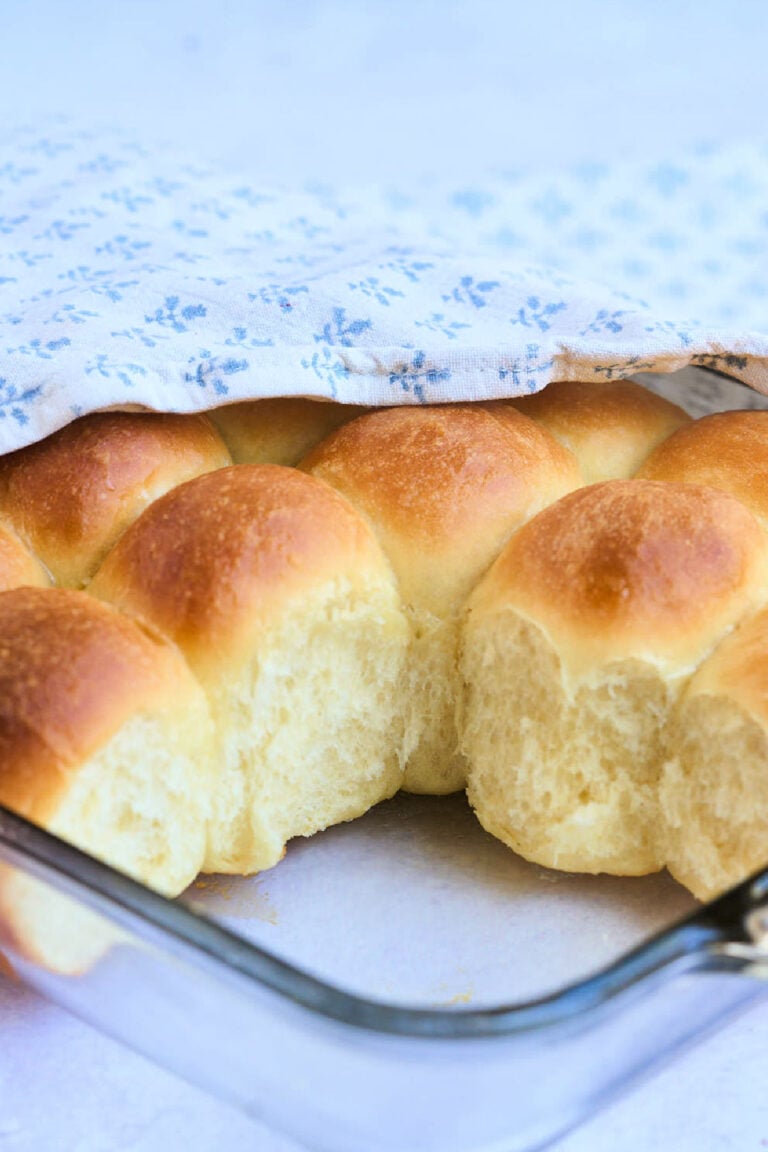
Absolutely! This rustic French bread is perfect for serving at parties—its crispy crust and soft interior make it great for tearing and sharing. If you plan to make sandwiches, it works wonderfully, especially for hearty fillings. For something smaller and more sandwich-friendly, you can also check out these French Rolls for Sandwiches for individual servings.
Making this simple French bread at home is easy and fulfilling. All you need are some essential ingredients and a bit of patience, and you’ll end up with a fresh loaf that’s great for anything. Whether you use it for sandwiches, to dip in soup, or just to eat with butter, this bread is flexible and will soon be a must-have in your kitchen. Also, making it a calm and rewarding process makes the effort worthwhile every time. Try it out, and you’ll discover how simple and fun it is to bake your own bread!


Can I bake the bread in a Dutch oven?
yes that will work great!
Amazingtechnique
does instant yeast mean rapid rise yeast? i have dry packets of yeast, but some say rapid rise
they’re aatually a little different. rapid rise can be used for this recipe, but keep a close on it, will probably rise in 30-45 min.
I’m frustrated as I could not get 5 ⭐️⭐️⭐️⭐️⭐️ to engage. This was the perfect accompaniment to the tortellini soup with Italian sausage. Katie – you consistently outdo yourself. Love what you have built here for us to also enjoy!!
The recipe missed listing the sugar. Make sure you add sugar for the yeast to feed and foam.
But I do have a question. I am confused as to how to bake it … preheat tray, where does the water go? Where does the bread in parchment paper go? If someone can explain that would be helpful.
I made this tonight. A few thoughts…I added a bit of sugar to help yeast. Baking this in the future, I wouldn’t score or pat with flour until after second rise. And it splayed out in second rise on the cookie sheet. I’d Shapiro in a banneton for rise 2.