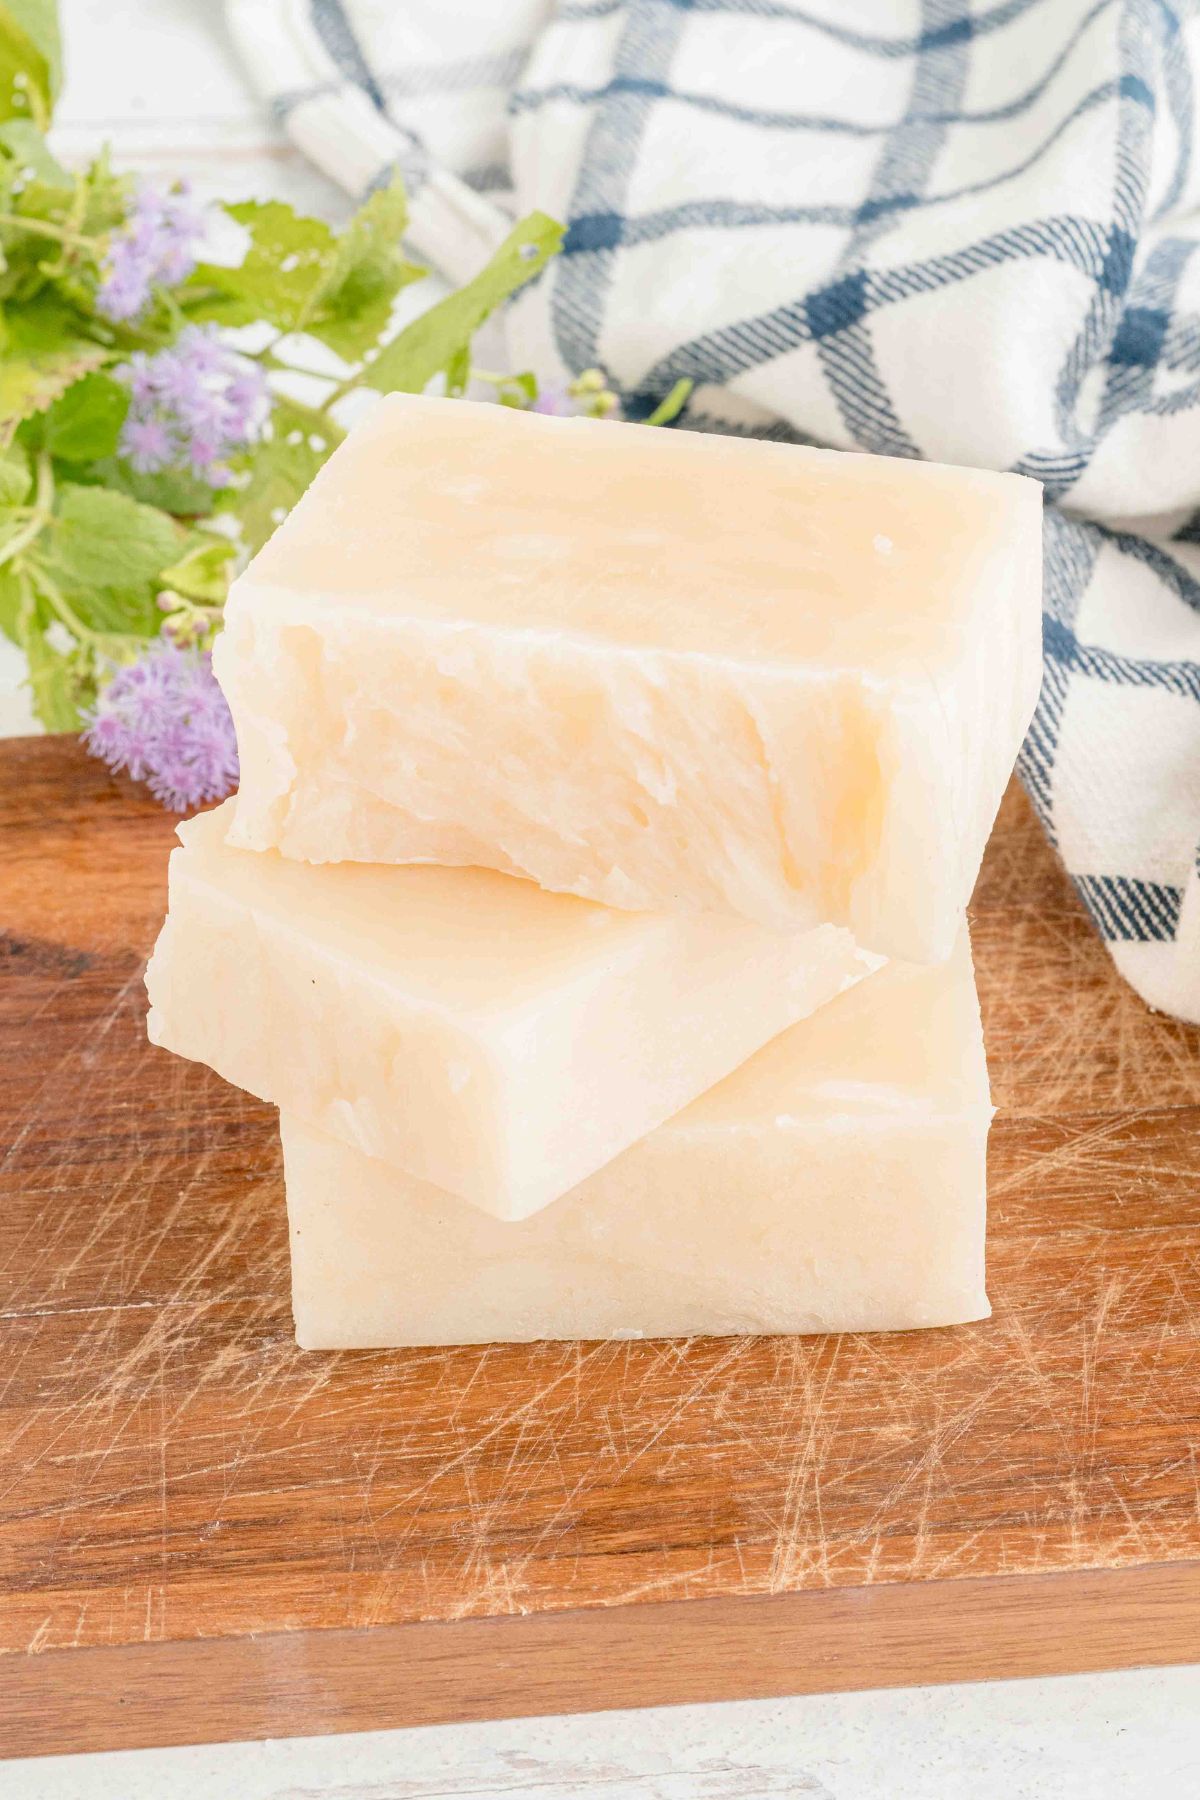
How to Make Hot Process Soap
Do you want to make your own soap without the long wait for it to cure? Then, this hot process soap recipe is perfect for you. This soap is ready in a few days, is simple to make, and has great moisturizing benefits and a nice lather.
Hot process soap forces a faster curing time by heating the soap after blending. It makes cleanup simple, and your bars are ready to use immediately.

Hot Process Soap
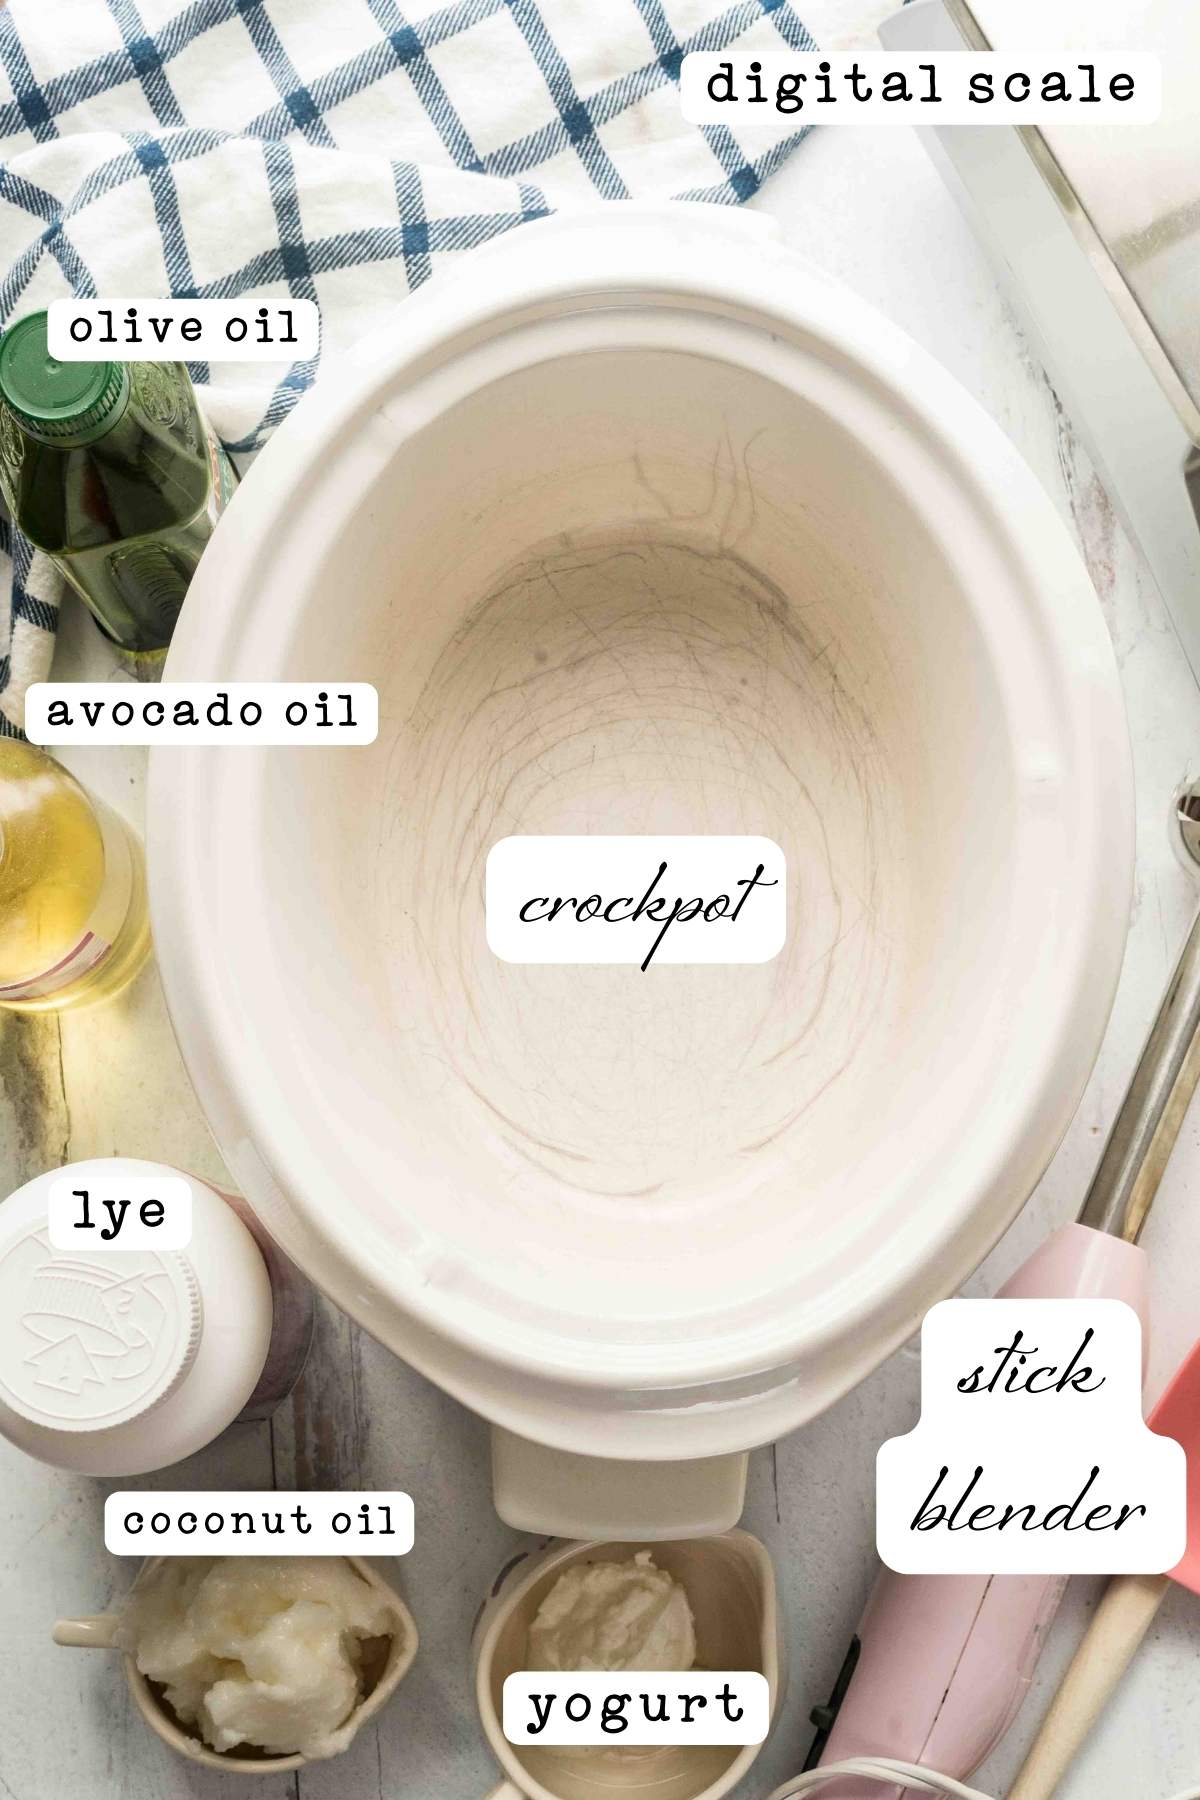
Equipment
- Slow cooker
- Safety equipment (gloves, goggles, apron)
- Heat-safe spatula
- Measuring cups and spoons
- Thermometer (to check temperatures of lye water and oils)
Ingredients
- 8 ounces water
- 4.26 ounces lye
- 3 ounces avocado oil
- 9 ounces coconut oil
- 9 ounces palm oill
Add at trace
- 2 tablespoons Greek yogurt
- 1 ounce water
Save This Recipe
You'll join my email list which you will love. And if you don't, unsubscribe in one click. ❤️
Instructions
- Prepare the lye solution. Put on your gloves, goggles, and apron for safety. Carefully add the lye to the water (never the other way around). Stir until the lye is fully dissolved. The mixture will get very hot, so set it aside in a safe place to cool.Tip: Always remember, “snow floats on the lake,” meaning lye should be added to water, not vice versa.
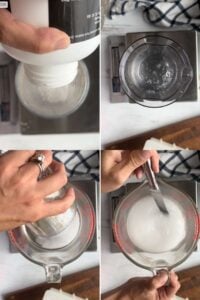
- Melt the oils. Measure and combine the avocado, coconut, and palm oil in a large pot. Then, melt the oils over medium-low heat until fully melted, stirring occasionally. Once melted, set the pot aside to cool.
- Blend to trace. Once the lye water and oils have cooled to around 100-115°F, it’s time to mix. Then, pour the cooled lye water into the slow cooker, followed by the melted oils. Use a stick blender to blend the mixture until it reaches trace—when the soap batter thickens slightly and leaves a trail when lifted.

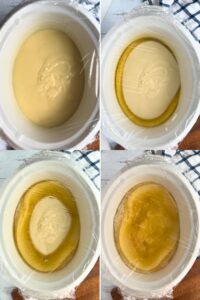
- Cook the soap. Cover the slow cooker and cook the soap on the low setting for 45-60 minutes. Stir occasionally. The soap will change color and become gel-like and translucent through the “gel phase.” It’s ready when it has this gel-like consistency throughout.
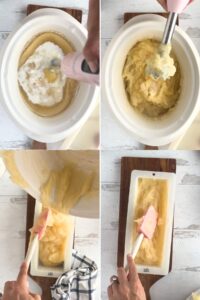
- Cool and add the yogurt. Remove the insert from the slow cooker and place it on a heat-safe surface (use potholders to protect your counter). Let the soap cool to around 180°F. While it’s cooling, mix the Greek yogurt with 1 ounce of water. Once the soap has cooled slightly, briefly blend in the yogurt mixture. Then, add any fragrance or essential oils you like at this point.
- Pour into the mold. Scrape all the soap batter into a prepared loaf mold using a spatula. Smooth out the top of the soap with the spatula. Allow the soap to set and harden for 12-24 hours.
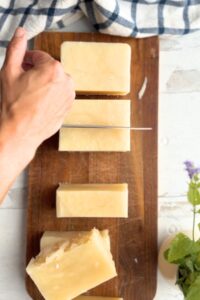
- Cut and cure. Once the soap has hardened, remove it from the mold and slice it into bars. Although the soap is safe to use immediately, it will last longer if you allow it to cure for 1-2 weeks.

Notes
If you’ve ever wanted to make your own soap but didn’t know where to start, this hot process recipe is just the thing. It’s easy and gives you a creamy, moisturizing bar ready to use in a few days.
Hot process soap forces a faster curing time by heating the soap after blending. It makes cleanup simple, and your bars are ready to use immediately.
Key Ingredients and Tools
Lye (Sodium Hydroxide): Lye is essential for turning oils into soap through saponification. You can buy it online or in some hardware stores, but handle it carefully because it’s very strong and can burn.
Stick Blender: You’ll need this to mix the oils and lye until they thicken, known as reaching “trace.” While stirring by hand is possible, a stick blender does the job faster and more thoroughly.
Palm Oil: Palm oil makes the soap hard and durable, creating a smooth lather. Find palm oil that’s produced responsibly, or you can use shea butter or cocoa butter instead. Instead of palm oil, you can use shea butter or cocoa butter to get a creamy, solid soap.
Avocado Oil: This oil moisturizes the soap and softens the skin. If you don’t have it, olive or sweet almond oil are great alternatives for adding moisture.
Coconut Oil: Coconut oil is great for lather and cleaning. It can be replaced with babassu oil, which cleans well, though the soap’s texture might be slightly different.
Digital Scale: Getting your measurements right is key in soap making, and a digital scale helps you measure lye and oils precisely. It’s better than guessing amounts.
Greek Yogurt: Adding yogurt when the mix thickens boosts the soap’s moisture. You can use coconut milk or skip it to make the recipe simpler.
3- in-1 Immersion Hand blender, Powerful 1000W Stainless Steel Stick Blender, 4 Sharpe Blades with Whisk, Milk Frother AttachmentsRooto 1030 1 Lb. Drain Cleaner with Lye, 3 PackPACIFIC PPE 2 Pack Safety Glasses, Anti-fog, Scratch Resistant Clear Wraparound Lenses and No-Slip Grips, Adjustable, Lab GogglesLoaf Soap Making Molds 50oz Silicone Rectangular Mould Supplies for Handmade DIY SoapMy Weigh KD-7000 Digital Kitchen and Office Scale (Black)Oatmeal Milk and Honey Fragrance Oil (60ml) for Diffusers, Soap Making, Candles, Lotion, Home Scents, Linen Spray, Bath Bombs, Slime
A Note About Lye
Lye is the essential ingredient that acts as a catalyst in the saponification process. Essentially, lye breaks down the oils, allowing them to combine with the water in the recipe to create soap.
Without lye, the oils and water would not mix properly; they would remain as separate layers.
It’s important to note that no lye remains in the finished product if the soap is made correctly. It reacts with the oils and fats during saponification to create soap and glycerin, leaving no residual lye in the finished bars.
Remember to handle the lye carefully. It’s a strong alkaline substance that can burn your skin and eyes. Always use proper safety equipment like gloves and goggles when working with it. For a detailed guide on working with lye safely, check out this comprehensive lye safety guide.
Hot Process vs. Cold Process
In cold process soap, the batter cures at room temperature over time.
The hot process accelerates this process by applying heat. Saponification happens during the “cooking process” and is done within an hour.
The soap is often slightly lumpy and harder to swirl or do other designs. The advantage is that it’s ready to use right away.
Can You Use Any Recipe for this Method?
Any soap recipe can used as a hot process recipe, with a few exceptions.
The core ingredients like oils, lye, and water will usually remain the same in both methods, but the procedure and some additional ingredients may differ.
In the hot soap process, some fragrances and colorants may behave differently due to the heat. Fragrances can evaporate, and some colors may change or fade, so adding these elements after the cooking phase is a good idea.
I wouldn’t recommend a recipe with a lot of honey or sugar, as they will heat the soap even more and become very hot.
Also, the texture will be more rustic, and the soap might not be as smooth as cold process soap. With the hot process, achieving intricate designs is more challenging (or even impossible), so it’s often reserved for simpler, more natural-looking bars.
If you’re looking for an extra nourishing soap, you might want to try this shea butter soap recipe, which adds even more moisturizing properties to your bars.
Troubleshooting and Help
It’s possible, but I wouldn’t recommend it. Mixing by hand can take a long time, and you might not get the soap to “trace” as quickly or consistently as with a stick blender. If you’re serious about soap-making, a stick blender is worth having!
Great question! Trace is when your soap mixture thickens enough to leave a faint trail or “trace” on the surface when you lift the blender. It’s the point when the oils and lye are fully combined and starting to thicken, which means it’s ready to start cooking in the slow cooker.
Absolutely! One of the best things about making your own soap is that you can customize it. Just keep the overall oil amounts the same for the recipe to work properly. And remember, add scents or essential oils after the soap has cooled down to about 180°F, so the fragrance doesn’t evaporate.
You could, but the slow cooker makes things much easier because it keeps the soap at a consistent temperature while it cooks. If you don’t have one, you could try using a double boiler on the stovetop, but you’ll need to monitor it closely.
Technically, you can use it right after 12-24 hours of curing, but the soap will last longer and feel better if you let it cure for 1-2 weeks. It’ll harden and give you a longer-lasting bar that doesn’t dissolve as quickly.
I hope this guide helps you feel ready to try making hot process soap at your place. It’s an easy method that lets you mix in your preferred oils, fragrances, and extras, creating a soap that’s uniquely yours. With a bit of patience, you’ll quickly have a lovely, hydrating bar of soap—great for yourself or as a caring gift.


If soap was put in the mold before it was ready, would it still be good if left to cure like cold processed soap
if you mean before it was ready in terms of cook time, yes, curing will solve that problem.