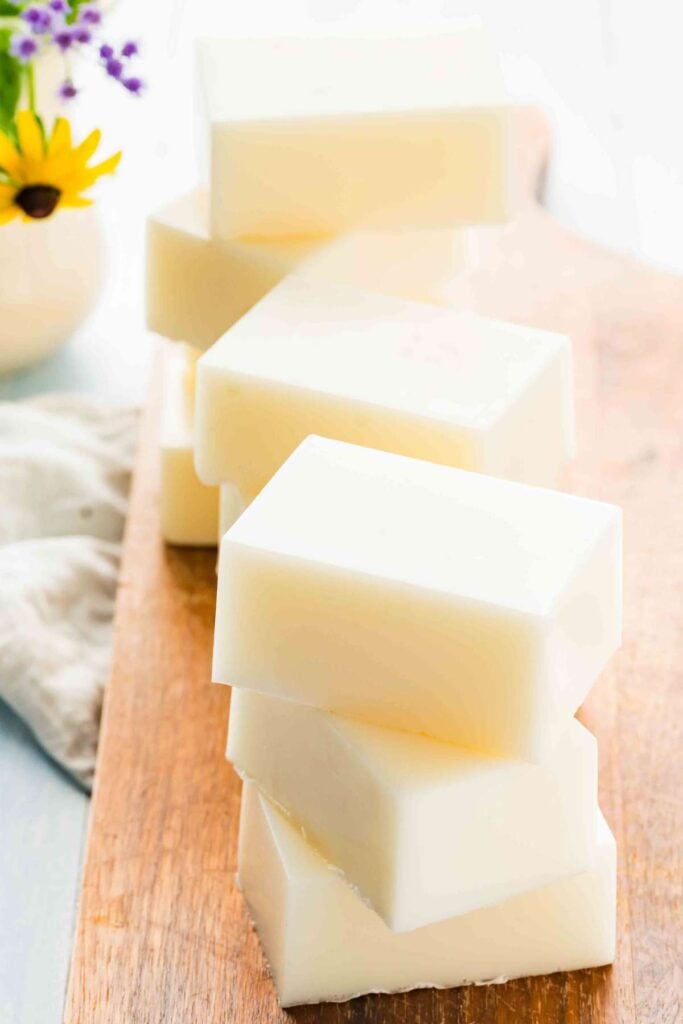
Easy Goat Milk Soap {Melt and Pour, No Lye!}
This simple and nourishing homemade soap is perfect for beginners and a wonderful treat for anyone looking to pamper their skin.
There is no need to handle lye; melt, mix, and mold to create your soothing soap bars.
Immerse yourself in goat milk’s rich, creamy goodness and emerge with beautifully soft, hydrated skin.
The blend of goat’s milk and glycerin both make this a moisturizing bar your skill will love. And if you don’t want to work with lye, you’ll love how easy it is.
Important ingredients and tools
- Powdered Goat Milk: This is a key ingredient, rich in fatty acids and vitamins, making it excellent for your skin’s health and suppleness. It’s also a key ingredient in goat milk lotion bars, great for keeping your skin nourished.
- Liquid Glycerin: You need to this for mixing the powdered milk. As a bonus, it attracts moisture, ensuring that your soap will cleanse and hydrate your skin.
- Soap base. Making soap without lye requires a premade soap base. Pick a nice one since it’s your most important ingredient. While is best because adding the goat milk to a clear base will just look streaky and weird.

- Spatula: Essential for mixing your ingredients smoothly and efficiently.
- Sharp Knife: Useful for chopping the soap base into smaller pieces for quicker melting.
- Individual Cavity Soap Mold: Necessary for forming your soap bars and ensuring they cool and harden in the correct shape.
- Microwave-safe container or Large Pot: For melting the soap base properly.
Primal Elements White Soap Base – Moisturizing Melt and Pour Glycerin Soap Base for Crafting and Soap Making, Vegan, Cruelty Free, Easy to Cut, Unscented – 10 PoundJET LAG Rectangle Silicone Soap Mold 4oz, 12 Bar Soap Mold for Soap Making, Thick and Durable with Flat Sides and Smooth Lines365 by Whole Foods Market, Vegetable Glycerin, 4 Fl OzMeyenberg Evaporated Goat Milk, Vitamin D, 12 Fl Oz (Pack of 12)Silicone Spatula Set of 5,High Temperature Resistant, Food Grade Silicone, Dishwasher Safe, for Baking, Cooking (Aqua Green)Jillmo Mini Whisk, 6inch Silicone Whisk
Experienced soapmakers will have most of these on hand already. 😊
Melt and Pour soap tips
Quality Ingredients: Invest in high-quality powdered goat milk, glycerin, and soap base. Premium ingredients will enhance the beneficial properties of your soap, providing optimum moisturization and nourishment to the skin.
Patience with Melting: Melt the soap base gradually over low heat or use a microwave in 30-second intervals to avoid overheating or burning. Overheated soap may not set properly and can lose its creamy texture.
Thorough Mixing: Ensure the goat milk and glycerin mixture is perfectly smooth before adding it to the melted soap base. Proper mixing ensures an even, lump-free consistency, contributing to the final soap’s quality.
Handling Fragrances and Colors: If adding fragrances or colors, mix them thoroughly. Uneven mixing can lead to patches of color or scent, leading to an uneven look and feel.
Mind the Temperature: Mix the goat milk solution into the soap base while it’s hot. This ensures a smooth and seamless blend of ingredients, helping to prevent any separation as the soap sets.
Air Bubbles? After pouring the mixture into the molds, tap them gently to release any trapped air bubbles. This step ensures your final soap bars are smooth and professionally finished.
Optimal Cooling: Allow the soap to harden in a cool, dry place for the suggested time. If you try to turn it out of the mold too quickly, the edges won’t be crisp.
Test and Adjust: After your first batch, evaluate your soap. If needed, adjust the quantities of goat milk or glycerin in your next batch to achieve the desired texture and moisturizing properties.
Clean Molds and Utensils:. Ensure your molds and mixing utensils are clean and dry. Any moisture or residue can affect the soap’s setting process and its final quality.

Don’t let the information overwhelm you; this is a simple soap that’s relatively foolproof!
Can I use fresh goat milk instead of powdered milk in this recipe?
It’s best to stick with powdered goat milk as fresh goat milk contains more water and may affect the soap’s consistency and setting time. Powdered goat milk provides the same nourishing benefits without the extra moisture.
Can I add natural ingredients like honey or lavender to the soap?
Absolutely! Feel free to enhance your goat milk soap with additional natural ingredients. Adding honey will increase the soap’s moisturizing properties, and lavender will add a delightful fragrance and a calming effect.
More Easy Soap Recipes
There are many ways to dive into soapmaking that aren’t scary. Here are some!

full recipe
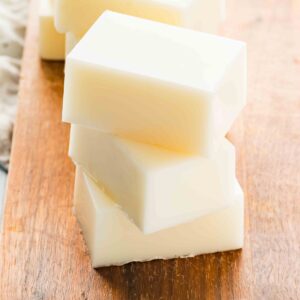
Melt and Pour Goat Milk Soap (No Lye!)
Equipment
- Spatula
- Individual cavity soap mold
Ingredients
- 3 pounds white melt and pour soap base
- 3 tablespoons powdered goat milk
- 2 tablespoons fragrance oil optional
- 3 tablespoons liquid glycerin
Save This Recipe
You'll join my email list which you will love. And if you don't, unsubscribe in one click. ❤️
Instructions
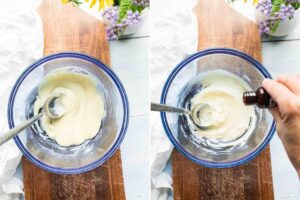
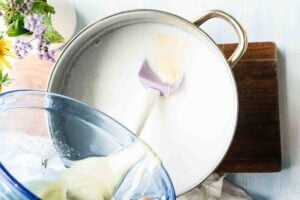
- Combine the goat milk and glycerin. In a medium mixing bowl, combine the glycerin and powdered goat milk until smooth. Add fragrance oil, if using. Set aside while you prepare the base

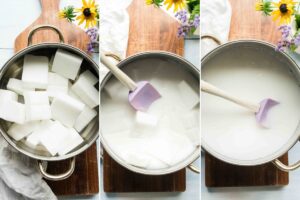
- Melt the soap base. Using a sharp knife, chop up the melt and pour base. This is just to make the melting process faster, so there's no need to be precise. Place in a large pot and melt over low heat, stirring occasionally (You can also ace the soap pieces into a microwave-safe container such as a large Pyrex measuring cup. Microwave in 30-second intervals until it is completely melted. (The soap will be very hot.)
- Combine the goat milk and soap. Pour the goat milk solution into the hot, melted soap base. There may be a slightly unpleasant smell, but it will disperse as the soap cures. Mix well with a spatula until combined. If there are any stray lumps, remove them or squish them with your fingers.
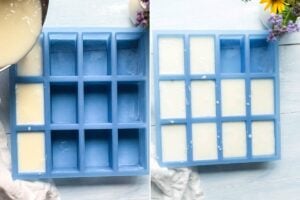
- Pour into molds. Pour into a bar mold. The batter will smooth out on its own. There is no need to cover or cool the soap as it hardens.
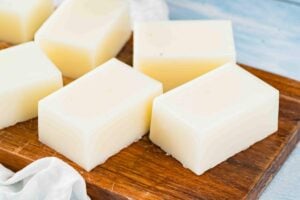
- Allow to harden at least 4 hours. Let the soap cool for 4-8 hours, then remove from the molds.
Notes


Hi Katie, how many bars does this recipe make?
it varies wildly depending on your mold. There’s no real “standard” for the bar sizes in the mold. I use a cavity mold that I consider “normal” and I get 8 bars. I know this is terribly unhelpful! just have an extra mold or two in case you need it.
This seems like something simple I could do to get started with my first batch of soap. Thank you!! I was wondering could I use a goat milk base instead of the powdered goat milk and glycerin?
absolutely! will be be even easier 🙂
Hi katie,
I love your ideas and planning sheets! I want to try making the Melt and Pour Goat Milk Soap but I noticed that the recipe calls for powdered goat’s milk, yet the link and your pictures show canned evaporated goat’s milk. Your response to Luis Carrera says to use powdered as well, so I wanted to check and see if you have tried it and whether it worked out well.
Can I use the liquid ingredient without making the bars too soft? I want these bars to be as hard as possible.
Thank you!
Terri
hi terri! the evaporated goats milk is powdered; it’s different from canned evaporated cows milk. a little confusing, i know! the pictures and link are correct! 🙂
Could I use evaporated goat milk instead of powder milk?
mmmmm… i’m not sure. i use powdered + glyerin because any time i try to add something with water to a melt and pour it doesn’t blend in well.