How To Pressure Can Green Beans
Not the most exciting thing to make, but once you taste homemade canned green beans, you’ll understand why I spend a summer afternoon doing this every year. I promise you that pressure canning is simple. Your canner does all the hard work. I’ll walk you through it!

Once you’ve pressure-canned a few things, you’ll be hooked. It opens up a whole new world of all those things you thought were off limits.
Table of Contents
Ingredients and Tools You’ll Need
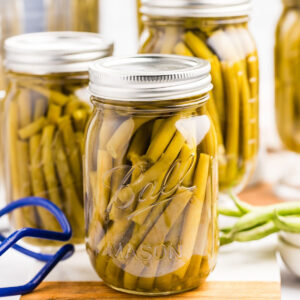
Look for young, tender green beans. They more flavor and aren’t stringy, which will give you a better texture after canning. Yes, you need your pressure canner here to safely kill the bacteria so you can store this long term.

This makes 5 pints, but you can easily double or triple this recipe if you have lots of green beans. You can make adjustments in the recipe card at the bottom of this post.

FREE FOR SUBSCRIBERS
Canning Binder
Subscribe (free!) to my newsletter to receive this PDF + dozens of others in my printable library. You’ll also get emails you’ll truly love, with a weekly meal and so much more.
Equipment
- Pressure canner
- 5 pint-sized canning jars, lids, and bands
- Jar lifter
- Canning funnel
- clean cloths
- Bubble freer or non-metallic spatula
Ingredients
- 5 pounds of green beans
- 2 ½ teaspoons salt optional, 1/2 teaspoon per pint jar
- water
How to Pressure Can Green Beans
You’re just putting the beans in jars and heating them up. Nothing to be nervous about. Make sure you adjust for altitude if you live above sea level.
Step One: Prep Beans
Wash your green beans and trim off the ends. Cut them into pieces if you want – I usually break mine by hand to fit the jars.

Step Two: Clean Jars
Get your jars, lids, and bands clean by boiling them for 10 minutes or running them through the dishwasher. Keep them hot so they don’t crack when you add the beans.
Step Three: Fill Jars
Pack those beans in there pretty tight – don’t be shy about it. Leave about an inch at the top. Toss in a half teaspoon of salt per jar if you want (I always do).

Step Four: Add Boiling Water
Pour boiling water over the beans, still keeping that inch of space at the top. Take a plastic spatula and poke around to get the air bubbles out – they’ll mess with your seal if you don’t.

Step Five: Seal Jars
Wipe the jar rims with a damp cloth (any food bits will keep them from sealing right). Put the lids on and screw the bands on just until they’re snug – don’t crank them down.

Step Six: Process
Get those jars in your pressure canner and process at 10 pounds pressure for 20 minutes. If you live up high, you’ll need to adjust for altitude.

Step Seven: Cool And Store
Turn off the heat and let everything cool down naturally – don’t rush it. Pull the jars out carefully and let them sit for at least 12 hours. You’ll hear them “pop” as they seal. Label them and stick them somewhere cool and dark.

Serving & Storing
Use your beans to make cast iron skillet green beans with bacon, or add plain to soups, casseroles, or stir-fries.
Store your sealed jars in a cool, dry place for 12-18 months.
Questions and Troubleshooting
For green beans, you’ll need a pressure canner. Green beans are low in acid, so high temperatures from pressure canning are needed to preserve them safely. A water bath canner won’t reach high enough temperatures to make sure it’s safe.
If a jar doesn’t seal after cooling, just put it in the fridge and use it within a week or two.
Ha, yes. But honestly I prefer them canned. But to freeze them: blanch them first by boiling them briefly and then plunging them into ice water. Dry them, pack in freezer bags, remove as much air as possible, and freeze.

More Ways To Preserve Veggies
Even if you grew one thing this year, get serious about preserving all your hard work. See my canning tips to get you started.
- This small batch refrigerator pickle recipe is perfect to start with (no canning needed).
- I reach for jars of this pressure canned corn all year long.
- You can throw pressure canned potatoes into soups all winter, or pull them out for Sunday mashed potatoes.
- There are so many ways to preserve tomatoes. Preserve them whole, diced, or crushed.
Printable Recipe
Pressure Canning Green Beans
Equipment
- 5 pint-sized canning jars, lids, and bands
- Jar lifter
- Canning funnel
- clean cloths
- Bubble freer or non-metallic spatula
Ingredients
- 5 pounds green beans
- 2 ½ teaspoons salt optional, 1/2 teaspoon per pint jar
- water
Save This Recipe
You'll join my email list which you will love. And if you don't, unsubscribe in one click. ❤️
Instructions
- Prep beans. Rinse the green beans thoroughly in cold water. Trim the ends, and if desired, cut or snap the beans into pieces to fit your jars.
- Clean jars. Wash and heat your canning jars, lids, and bands by boiling them for 10 minutes or using a dishwasher on the sanitize cycle. Keep jars hot until ready to use.
- Fill jars. Tightly pack the green beans into the hot jars, leaving a 1-inch headspace at the top. If using, add 1/2 teaspoon of salt to each pint jar.
- Add boiling water. Pour boiling water over the beans in the jars, maintaining the 1-inch headspace. Use a bubble freer or a non-metallic spatula to remove air bubbles by gently sliding it between the beans and the jar.
- Seal jars. Wipe the rims of the jars with a clean, damp cloth. Place the lids on the jars, then screw on the bands until fingertip tight.
- Process. Place the jars in your pressure canner, following the manufacturer's instructions. Process pint jars at 10 pounds of pressure for 20 minutes (adjust for altitude if necessary).
- Cool and store. Turn off the heat and allow the canner to depressurize naturally. Carefully remove the jars using a jar lifter and let them cool on a towel or rack for 12-24 hours. Check the seals, then label and store the jars in a cool, dark place.
Notes
Nutrition


Is the nutritional information for a whole pint jar? serving size is not listed~ We will be trying this canning recipe this summer!
yes it’s per jar! it calculates weird and just divides by the number of servings and i though number of pints mde more sense 🙂