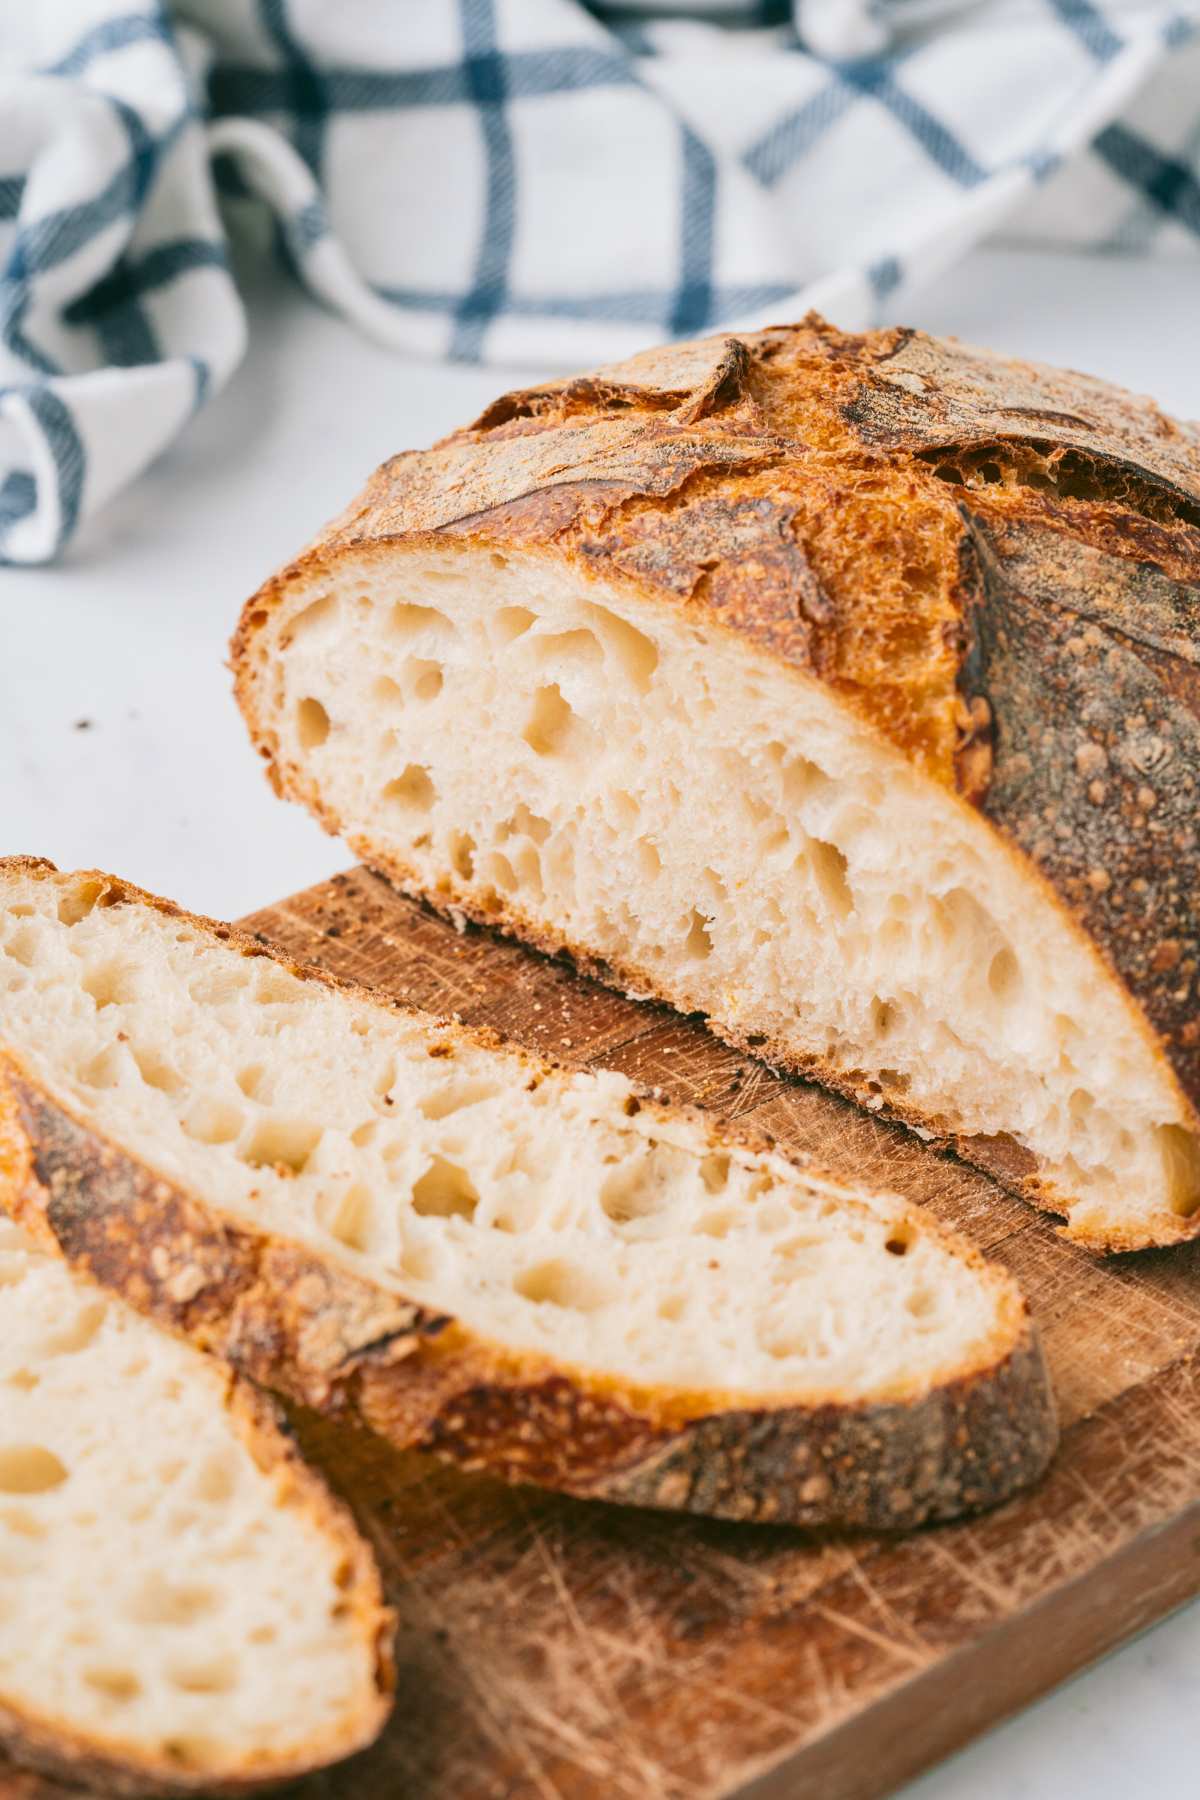
Sourdough French Bread (in a Dutch Oven)
This is a super crusty and chewy recipe for those of you who love that. It makes, in my opinion, the best sandwiches. The overnight cold rise gives that great flavor and the Dutch oven gives you that crispy crust.
The long rise means you can break this up into chunks throughout your day. A little bit in the morning, some stretch and folds at lunch, then let it rise overnight and bake the next morning.
Table of Contents
Ingredients and Tools You’ll Need
A 5-6 quart sized Dutch oven works best here. And if you want to measure using metric measurements, make sure you have a kitchen scale handy. Your starter should be active and bubbly. Bread flour will give you a chewier loaf but if all you have is all purpose flour, using that is fine. It just might taste different.

This makes 1 loaf with about 12 slices.
Equipment
- Dutch oven
- Parchment paper
- Large mixing bowl
Ingredients
- 400 grams (3 ¼ cups) bread flour
- 275 grams (1 ⅛ cups) water
- 100 grams (½ cup) active sourdough starter (100% hydration)
- 10 grams (2 teaspoons) salt
- Pinch cornmeal for dusting parchment
How to Make Sourdough French Bread
Step One: Feed Your Starter
Two nights before you want bread, feed your starter so it’s nice and active by morning. You know it’s ready when it’s doubled and bubbly.
Step Two: Make the Dough
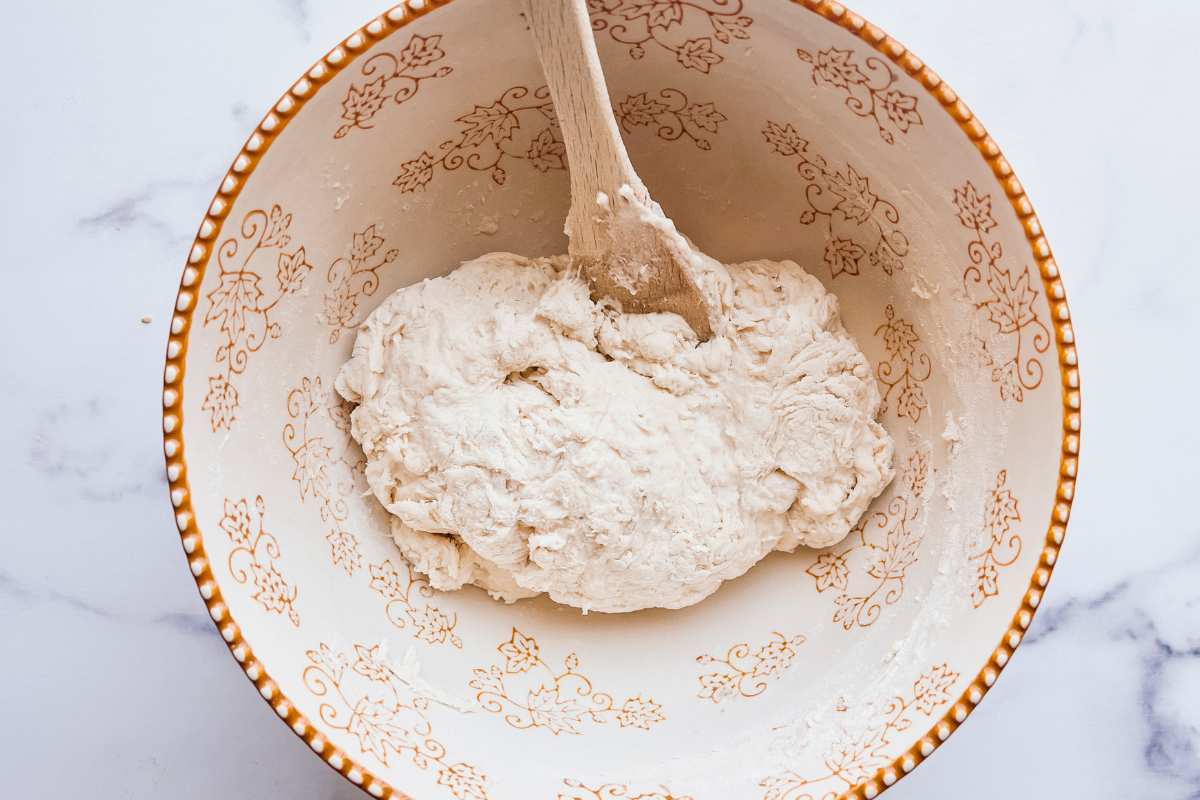
Next morning, dump your water and starter in a big bowl and mix them together. Add the flour and stir until there’s no dry bits left. Don’t worry about it being perfect – just get it combined. Cover it up and let it sit for 30 minutes.
Step Three: Add Salt
Now add the salt and mix it in really well. The dough should feel a little sticky but pull away from the bowl sides. If it’s too wet, add flour one tablespoon at a time. If it’s too dry, add water by the teaspoon.
Step Four: Stretch and Fold
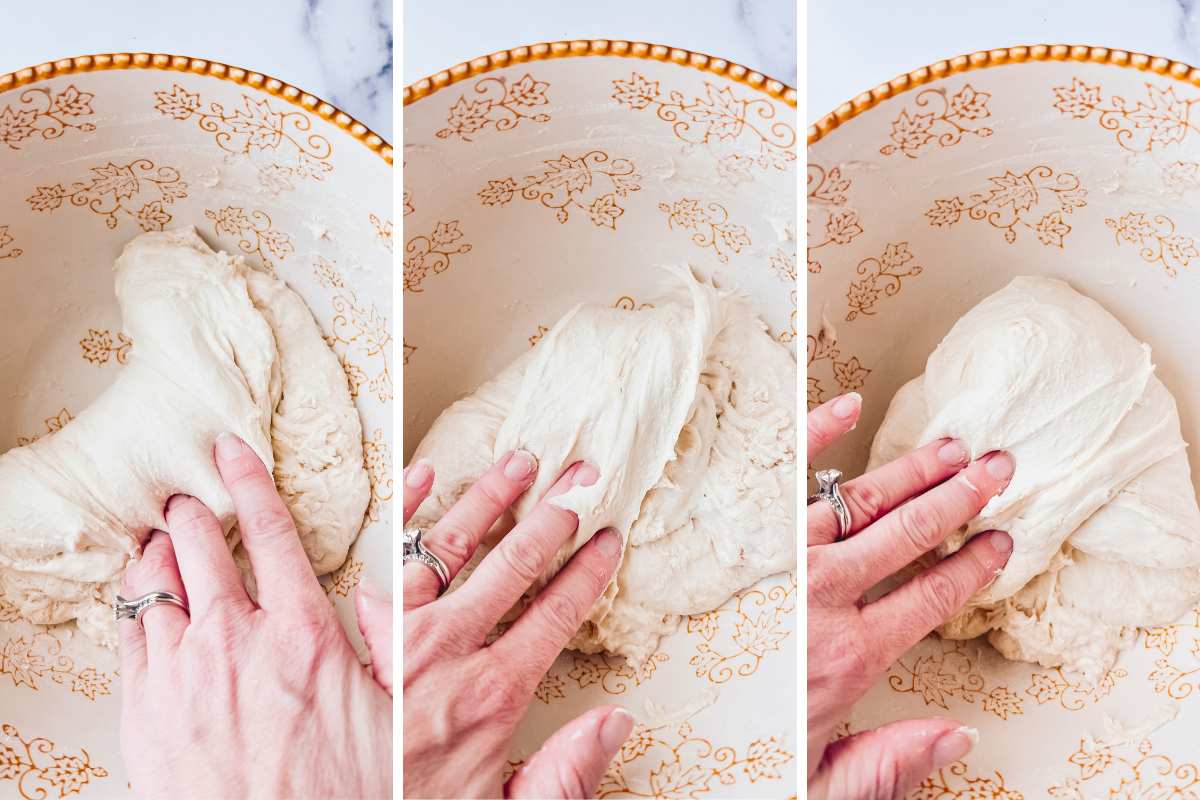
Here’s where we build strength without kneading. Every 30 minutes for the next 2 hours, do a stretch and fold. Just grab one side of the dough, stretch it up, and fold it over. Turn the bowl and repeat 3 more times. Keep it covered between rounds.
Step Five: First Rise
After those 4 sets of folds, let it rise at room temperature for 4-6 hours until it’s doubled and bubbly. This is where patience pays off.
Step Six: Shape the Dough
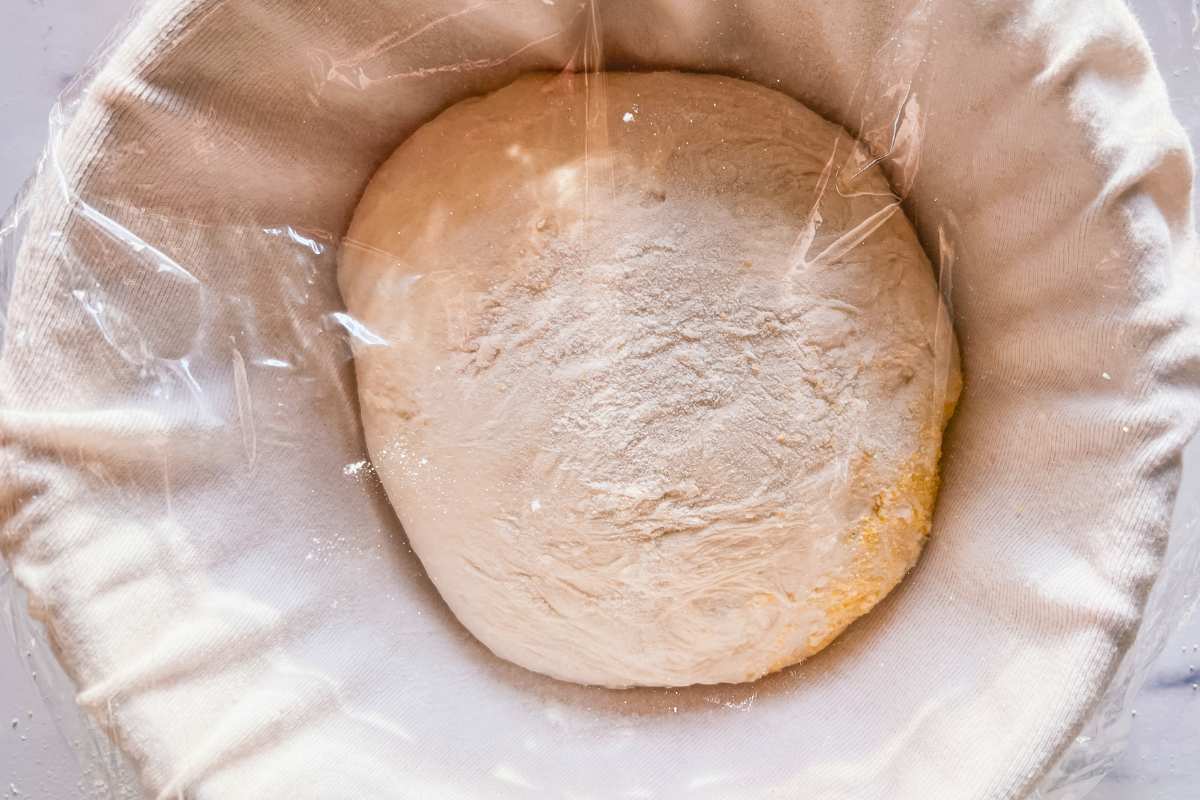
Time to shape. Turn it out onto a floured surface and gently shape it into a round by folding the edges underneath. Plop it seam-side-up in a flour-dusted bowl lined with a clean kitchen towel.
Step Seven: Cold Rest
Into the fridge overnight – anywhere from 8-14 hours works. This cold rest makes SUCH a difference in flavor and makes the dough way easier to handle.
Step Eight: Prep for Baking
When you’re ready to bake, crank your oven to 450°F with the Dutch oven inside. Line parchment with a little cornmeal.
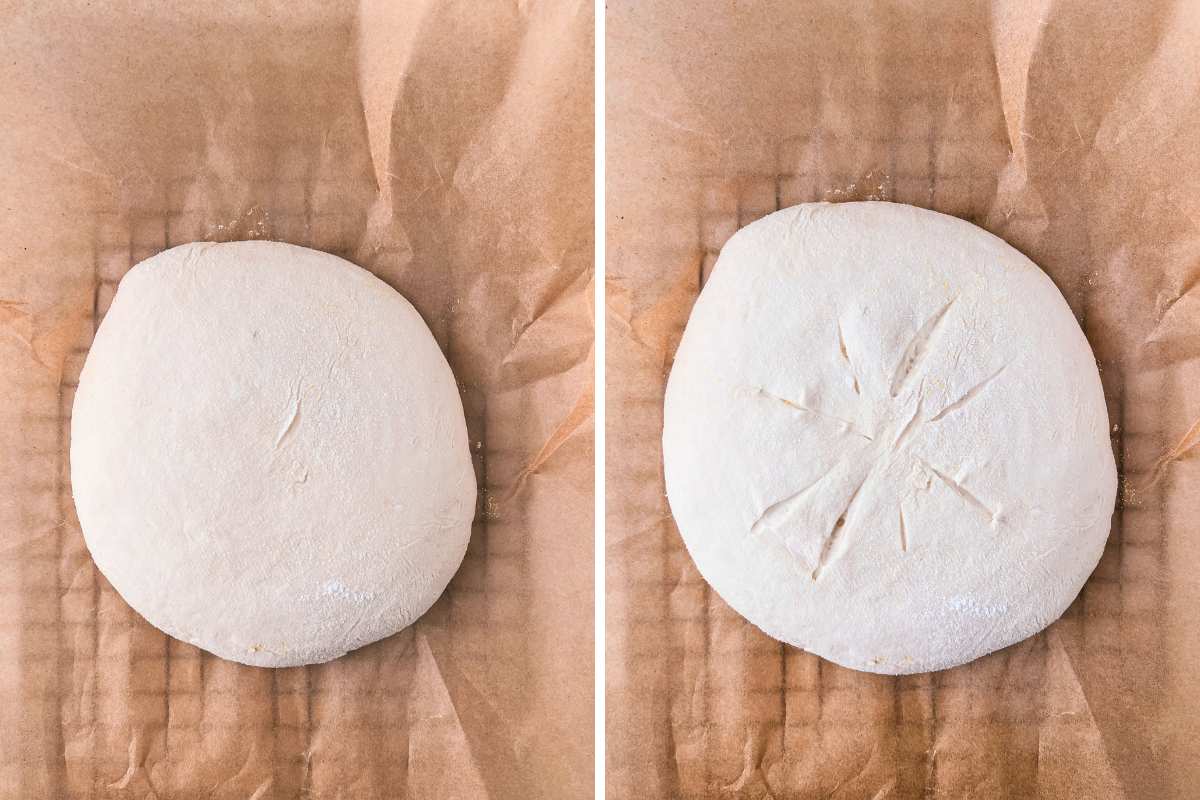
Step Nine: Score and Transfer
Turn that cold dough right onto the parchment, dust the top with flour, and slash it with your sharpest knife. Lower the whole thing (parchment and all) into that screaming hot Dutch oven.
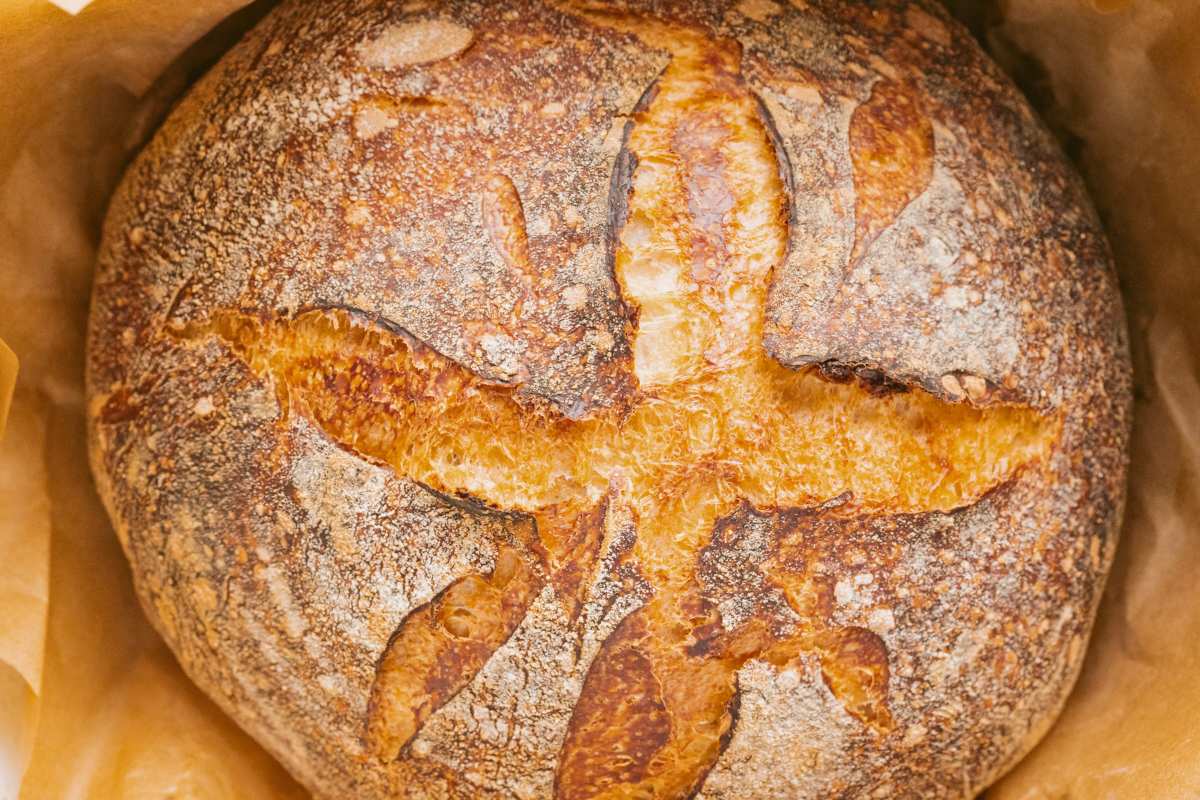
Step Ten: Bake
Cover and bake 20 minutes, then take the lid off and bake another 15-20 minutes until it’s deep golden brown.
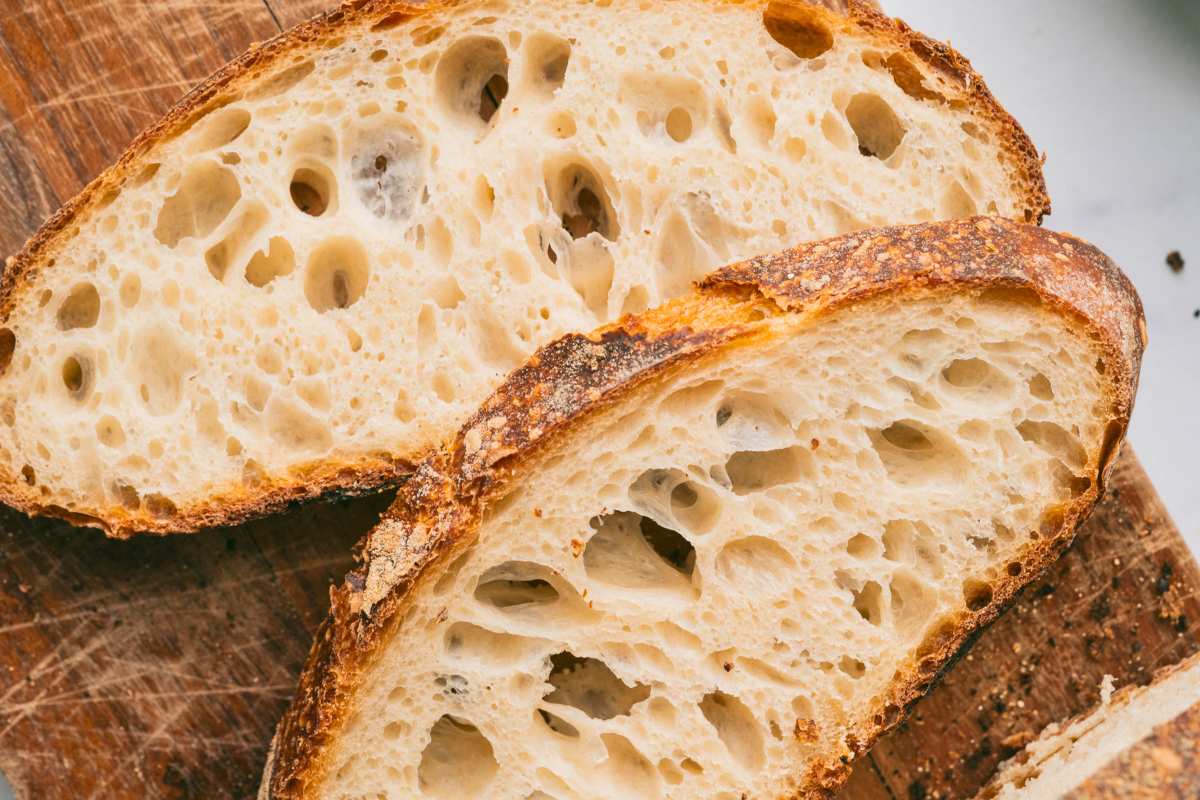
Step Eleven: Cool
Let it cool COMPLETELY before you slice it. I know it’s torture, but trust the process.
Serving & Storing
Use for grilled cheese sandwiches and serve with tomato soup, toast with strawberry jam, or as a side for beef stew.
This bread stays fresh at room temperature for 2-3 days, stored in a paper bag, or wrapped in a clean kitchen towel.
For longer storage, slice and freeze for up to 3 months. The crust will soften slightly when stored, but 5 minutes in a 350°F oven brings back the crunch.
Make It Your Own
Change it up while keeping it simple.
- Replace up to 1 cup of bread flour with whole wheat flour
- Shape into two smaller loaves (reduce baking time by 5-10 minutes)
- Leftover bread makes great homemade sourdough croutons
More Sourdough Bread Recipes
- You don’t need all the fancy tools for sourdough. Let me show you how to make sourdough bread on a budget.
- Everyone loves this simple and soft sourdough white sandwich bread.
- Sourdough dinner rolls don’t just have to be for holiday dinners. Make a batch and make sliders for dinner.
- If you’re ready to add things to your dough, I recommend this sourdough cinnamon raisin boule bread.
Printable Recipe

Sourdough French Bread
Equipment
- Large mixing bowl
Ingredients
- 3 ¼ cups bread flour
- 1 ⅛ cups water
- ½ cup active sourdough starter (100% hydration)
- 2 teaspoons salt
- Pinch cornmeal for dusting parchment
Save This Recipe
You'll join my email list which you will love. And if you don't, unsubscribe in one click. ❤️
Instructions
- Feed. The night before baking, feed your starter so it's active and bubbly in the morning.
- Mix. In a large bowl, combine the water and active starter. Add flour and mix until no dry flour remains. Cover and rest for 30 minutes.
- Salt. Add salt and mix until well combined. The dough will feel slightly sticky but should clear the sides of the bowl.
- Fold. Over the next 2 hours, perform 4 sets of stretch and folds 30 minutes apart. Keep the dough covered between folds.
- Rise. Let the dough rise at room temperature for 4-6 hours until doubled and bubbly.
- Shape. Turn the dough onto a lightly floured surface. Gently shape it into a round shape by folding the edges under. Place seam-side-up in a flour-dusted bowl lined with a clean kitchen towel.
- Chill. Cover and refrigerate overnight (8-14 hours).
- Prepare. Preheat oven to 450°F with Dutch oven inside. Line a sheet of parchment with cornmeal.
- Transfer. Turn the cold dough onto the prepared parchment. Dust the top with flour and slash with a sharp knife.
- Bake. Carefully lower the dough with the parchment into the hot Dutch oven. Cover and bake for 20 minutes. Remove the lid and bake for 15-20 minutes more until it is deep golden brown.
- Cool. Cool completely on a wire rack before slicing.
Notes
Nutrition