Stand Mixer Sourdough Bread
Sure, you could stretch and fold all day long (and sometimes I do), but you absolutely do not have to. If you’ve always wanted to try sourdough but it seems weird and confusing and too hands-on, this stand mixer sourdough bread recipe is the answer. Just like a classic bread recipe, we knead, we shape, we rise, we bake. Simple!
It’s definitely one of those sourdough bread recipes you’ll turn to over and over.

Stand Mixer Sourdough Bread
Equipment
- Stand mixer (with dough hook attachment)
- Mixing Bowls
- Damp tea towel or clean kitchen towel
- Plastic Wrap
- Proofing baskets (or parchment-lined baking sheets)
- Lame or serrated knife
- cooling rack
Ingredients
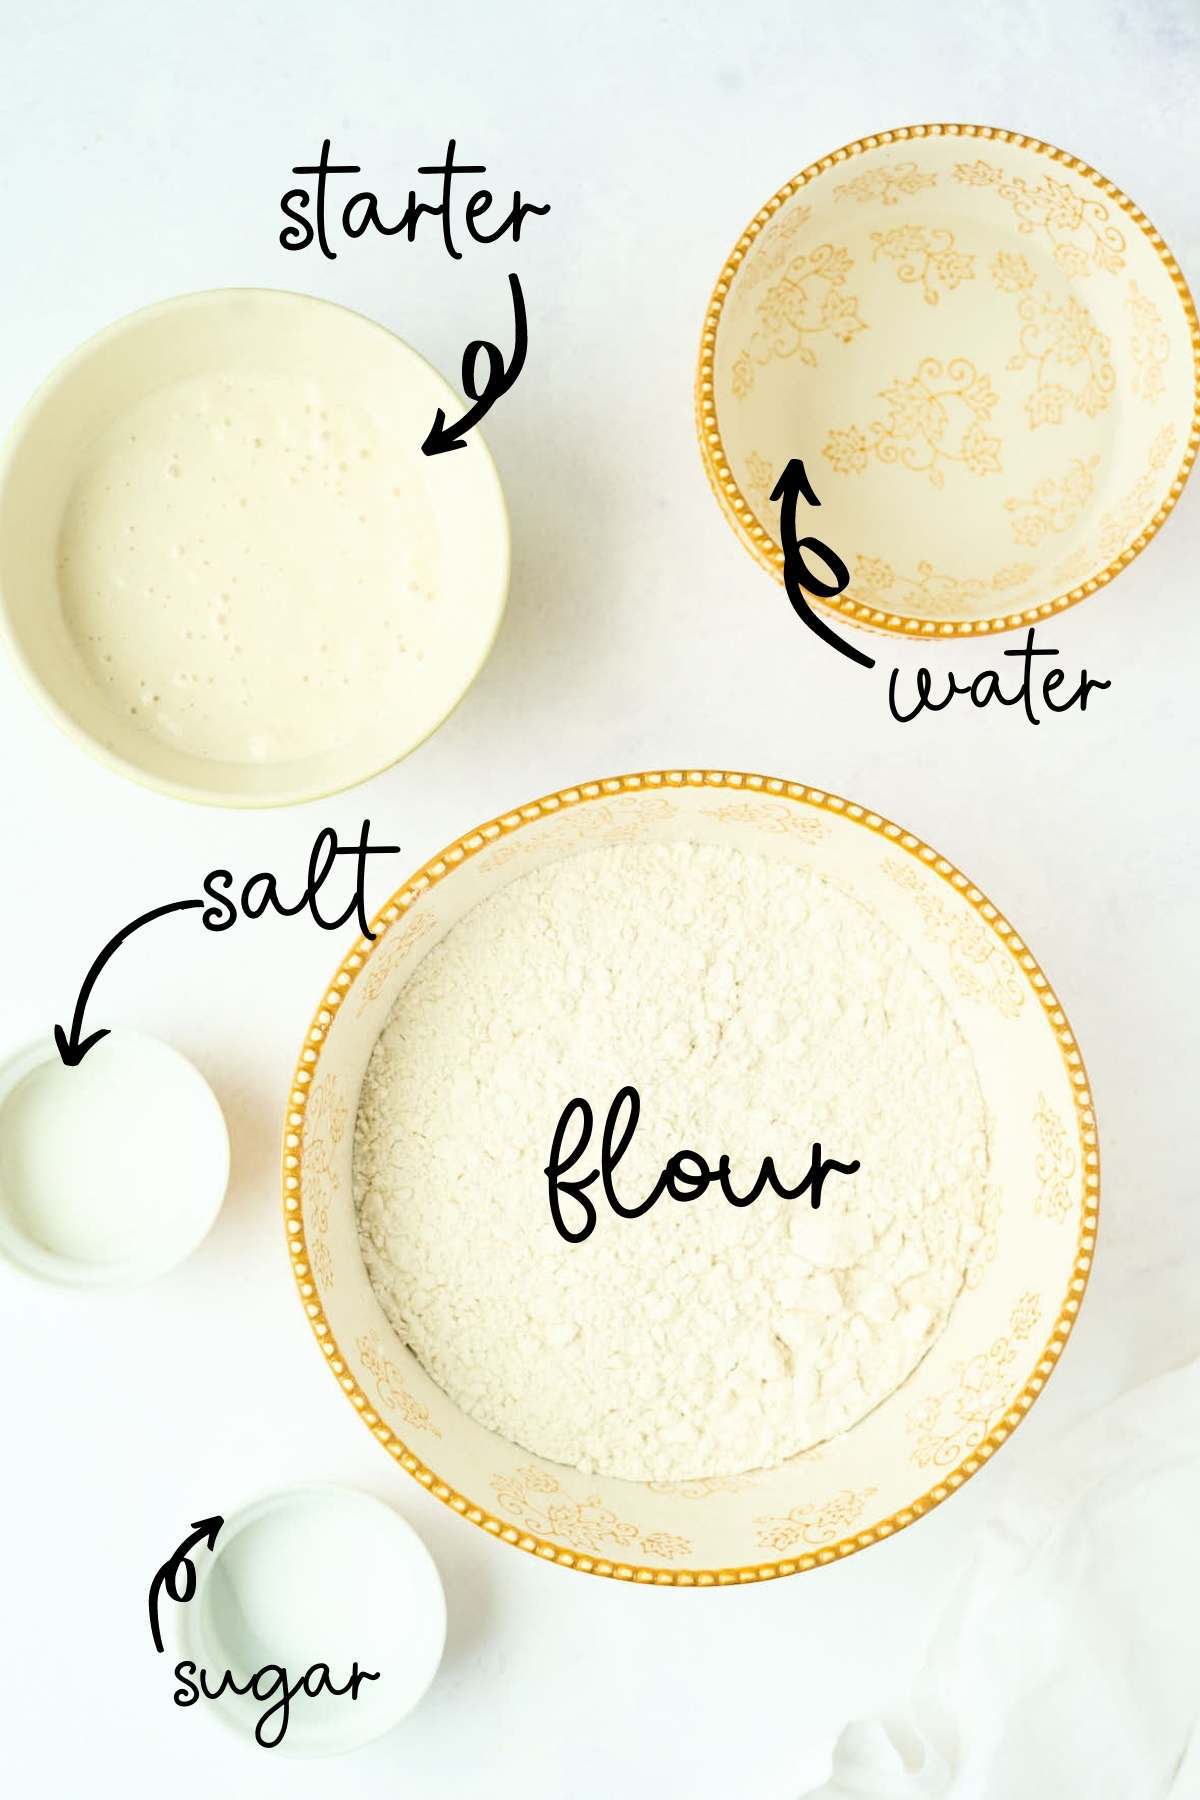
- 6 cups bread flour (31.8 ounces)
- 2 cups lukewarm water (16 ounces)
- 1 ½ cups active sourdough starter (11.25 ounces)
- 1 tablespoon sugar
- 3 ½ teaspoons salt
Save This Recipe
You'll join my email list which you will love. And if you don't, unsubscribe in one click. ❤️
Instructions
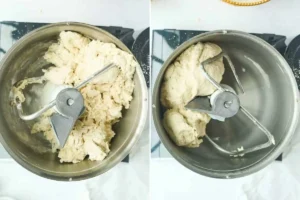
- Combine the ingredients. Combine the bread flour, sourdough starter, sugar, and lukewarm water in the bowl of your stand mixer. Mix on low until just combined. The mixture will appear rough and slightly dry. Then, cover it with a damp tea towel and let it rest at room temperature for 30 minutes.Tip: Measure the salt and place it on the towel to remind yourself to add it in Step 2.
- Knead the dough. After the dough has rested, add the salt and knead on low for 5-9 minutes until the dough is smooth and forms a ball. It should clean the sides and bottom of the bowl. If the dough feels too dry, add more water; if too wet, add more flour as needed.
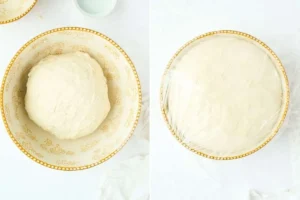
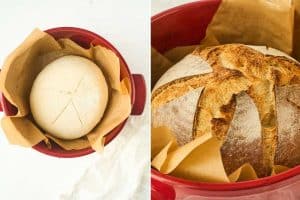
- First rise. Shape the dough into a smooth ball and transfer it to a clean, lightly oiled bowl. Then, cover with greased plastic wrap and place in a warm spot to rise for 3-4 hours or until the dough has doubled and looks very puffy.

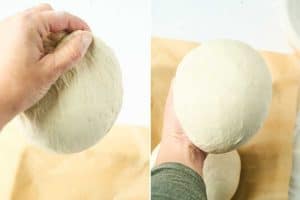
- Divide and shape. Once risen, divide the dough in half. Next, shape each half into smooth balls by gently pulling the dough from the bottom and tucking it until smooth.
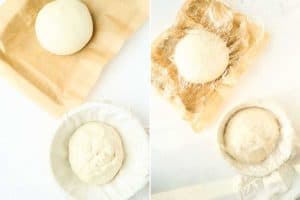
- Second rise. Place each dough ball into a flour-dusted proofing basket or onto a parchment-lined baking sheet. Then, cover with greased plastic wrap and refrigerate overnight or for up to 18 hours.
- Bake. Preheat your oven to 425°F (220°C) in the morning, placing an empty Dutch oven inside. Then, slash the top of each loaf with a lame or serrated knife. Next, transfer the loaf to a piece of parchment paper and carefully lower it into the hot Dutch oven. After that, cover with the lid and bake for 25 minutes, then remove the lid and bake for another 20 minutes until the bread is a deep golden brown.
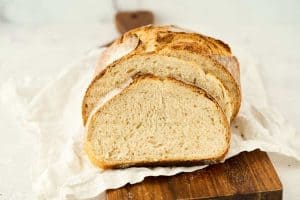
- Cool and slice. Remove the loaf from the Dutch oven and place it on a cooling rack. Allow it to cool for at least 4 hours before slicing. Store at room temperature in a bread bag or airtight container for up to 4 days.
Notes
Nutrition
At first, you love making sourdough bread. And then sometimes, you don’t. While I enjoy the process of stretching and gosling from time to time, sometimes, I just want a lovely fermented loaf without getting my hands sticky every hour. And that’s when this recipe is perfect.


I’m sure you’ll enjoy this bread as much as we do.
Key Ingredients and Tools
Here are some essential tools and ingredients that will help you make this sourdough bread recipe better and easier:
Sourdough starter: If you don’t have one, you can make your own or buy a ready-to-use starter online from Etsy. Read these articles if you need help making your sourdough starter or feeding a sourdough starter properly.
Bread flour: Compared to regular flour, bread flour has more protein, which makes the bread strong and chewy. You can find it in the baking section. If unavailable, use all-purpose flour, but your bread might not be as chewy.
Sugar:You can use honey or maple syrup if you’d prefer.
Dutch oven: You’ll need a heavy pot with a lid to create steam, which is crucial for getting that crackly crust. If you don’t have a Dutch oven, a heavy baking pan with a tray of water underneath for steam will work, too.
Lame or serrated knife: It’s important to slash the dough before baking to help it expand properly in the oven. Using a lame (a tool made for slashing bread) or a sharp, serrated knife will make this easier.
Troubleshooting and Help
A good way to test your starter is to feed it and wait about 4-6 hours. If it doubles in size and gets bubbly, it’s ready to use! You can also do the “float test” by dropping a small spoonful into water. If it floats, it’s good to go!
Don’t panic! If the dough feels too sticky, sprinkle in a bit more flour, a tablespoon at a time, until it’s manageable. If it’s too dry, add a splash of water. Sourdough can be a little unpredictable depending on your starter and the humidity in your kitchen, so it’s okay to adjust as needed.
If your bread isn’t rising properly, it could be because your starter wasn’t active enough or your kitchen is too cold. Make sure your starter is bubbly and active before you start, and try to let the dough rise in a warmer spot. If it’s still not working, give it more time—sourdough can be slow, especially in cooler environments.
Definitely! Once you’ve mastered the basic recipe, feel free to get creative. You can mix in fresh herbs, garlic, or even seeds like sunflower or pumpkin. Just add them in during the first mix, and they’ll blend right into the dough.
A banneton basket helps the dough maintain its shape during the final rise and adds a beautiful pattern to the loaves of bread. It’s a good idea to dust it with flour to prevent sticking.
Your mixer does all the hands-on work for you here, so on busy days when fussing dough doesn’t sound appealing turn to this super simple method.


What if I added the salt like a dumb dumb in step 1? Is the bread ruined?
Hey Leslie, it is absolutely not ruined. I have done it more times than I can count and, to be honest, can hardly tell a noticeable difference. Carry on with confidence 🙂
Thank you!! I’m also a Virginia girl…we live south of Charlottesville and also had chickens. 🐓
Made my best sough dough loaf yet! New to sough dough world. This was yummy! Only suggestion is to have instructions reflect the need to mix starter with the warm water first.
thank you deb! I’ll do that!
Is this for two loaves?
yes! 🙂
This is the best and easiest sourdough recipe I have found. It is my go-to from now on. Can I divide the dough into 4 to make smaller loaves and would I bake it for the same amount of time?
hey Jennifer, you can definitely divide it, but reduce the baking time. not by a ¼ but maybe ⅓. you’ll need to experiment with the timing a tad!