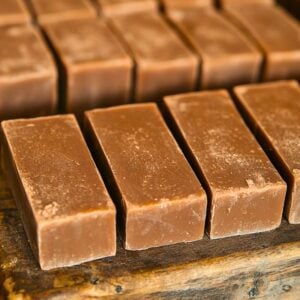
Vanilla Cold-Process Soap Recipe
This soap is about to become your signature homemade gift. This vanilla cold-process soap recipe isn’t just another homemade soap. It’s rich, creamy, and carries a scent that’ll make your bathroom smell like a French bakery. The best part? While it looks professional, cold-process soap recipes are perfect for beginners who want to learn soap-making.
Vanilla Cold-Process Soap Recipe
Equipment
- Thermometer
Ingredients
- 4.28 ounces lye
- 10 ounces water
- 11 ounces olive oil
- 12 ounces coconut oil
- 3 ounces avocado oil
- 2 ounces shea butter
- 2 ounces castor oil
- 1 ounce vanilla fragrance oil or up to 1.5 ounces for a stronger scent
- Optional: 1 teaspoon vanilla bean powder for a speckled look
Save This Recipe
You'll join my email list which you will love. And if you don't, unsubscribe in one click. ❤️
Instructions
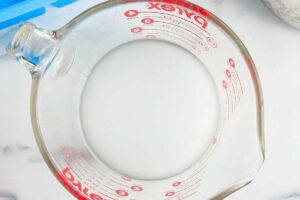
- Make lye water. Measure the lye and water separately using a digital scale. Slowly add the lye to the water (never the reverse) and stir until dissolved. The mixture will heat up significantly. Set it aside in a safe, well-ventilated area to cool.
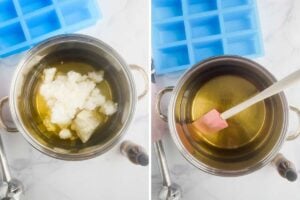
- Melt oils. Measure and combine the olive oil, coconut oil, avocado oil, shea butter, and castor oil in a pot. Heat over medium-low until all oils, especially the shea butter, fully melt. Remove from heat once the oils reach around 110°F. Let the oils cool to between 90°F and 110°F.

- Check temperatures. Once both the lye solution and the melted oils are within 90°F to 110°F, you’re ready to proceed. Make sure your mold, fragrance oil, and optional vanilla bean powder are on hand and ready to go.
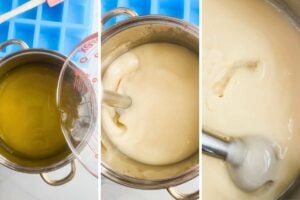
- Blend to trace. Pour the cooled lye solution into the melted oils. Use a stick blender to mix until you reach trace (a smooth, pudding-like consistency). At trace, add the vanilla fragrance oil and vanilla bean powder if using. Stir by hand to incorporate evenly.
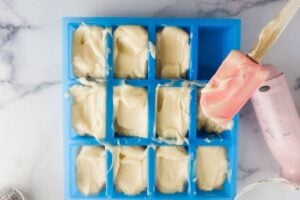
- Pour into mold. Immediately pour the soap batter into the prepared mold. Tap the mold gently on the counter to release any air bubbles.
- Cure. Allow the soap to sit in the mold for 24-48 hours until firm. Once firm, unmold the soap and slice it into bars. Place the bars in a well-ventilated area and cure for 3-4 weeks.
Notes
- Use the right fragrance oil: Make sure your vanilla fragrance oil is soap-safe and skin-safe. Some fragrance oils aren’t designed for cold-process soap.
- Trace timing: Vanilla fragrance oil can sometimes accelerate trace, so be prepared to move quickly after adding it.
- Vanilla discoloration: Vanilla fragrance oils will naturally darken soap over time due to the vanillin content. You can leave it as is for a rustic look or incorporate a vanilla-stable colorant if desired.
- Other fragrance options: You can mix vanilla fragrance oil with complementary scents like sandalwood or lavender for a custom fragrance blend.
- Add exfoliants: Ground oats or poppy seeds can be added for exfoliating properties.
- Custom colors: Use natural colorants like cocoa powder or French green clay for visual variety.
I first created this recipe while looking for the perfect holiday gift for my notoriously hard-to-shop-for mother-in-law. It was such a hit that I have to make a double batch every Christmas because she “shares” them with her friends (though I suspect she’s hoarding them in her linen closet).

Now, it’s become my most-requested gift, and my sister swears it’s the only soap she’ll use in her guest bathroom when she wants to impress visitors.
Key Ingredients and Tools
Here are some ingredients and tools that play a crucial role in creating that perfect bar of soap:
- Lye (Sodium Hydroxide): There’s absolutely no substitution here – it’s what makes soap, soap. Always use fresh lye that’s been stored correctly in an airtight container. My soap-making supplies list walks you through where to get lye and everything else.
- Vanilla Fragrance Oil: Must be soap-safe. Nurture Soap and Brambleberry are reliable sources.
- Castor Oil: Critical for bubbles – don’t skip or substitute this one.
- Digital Scale: Invest in one that measures to 0.01 ounces. Click on the link in the recipe card to get the one I use.
- Stick Blender: Dedicate one solely to soap making. The Kitchenaid cordless is perfect, but any immersion blender works.
- Safety Gear: Chemical-resistant gloves (nitrile), safety goggles, and long sleeves are non-negotiable.
- Thermometer: A laser thermometer is perfect, but a candy thermometer works too.
Remember, soap-making tools should never be used for food preparation afterward – label everything clearly as “soap-making only.”
Troubleshooting and Help
Not at all! That’s just the vanilla doing its thing. Vanilla fragrance oil naturally darkens soap over time.
Unfortunately, vanilla essential oil doesn’t exist (what’s sold as vanilla essential oil is usually an absolute or oleoresin), and it won’t perform well in cold process soap.
Wait the entire 4 weeks! I know it’s tempting to use it sooner, but proper curing makes a massive difference in the quality of your final bar. If you want a faster soap recipe, try my melt-and-pour goat milk soap (with no lye!).
Vanilla fragrance oil is known to accelerate trace. Work quickly and consider soaping at slightly cooler temperatures (around 90°F) to slow things down.
Common causes are inaccurate measurements, too much water, or not reaching proper trace. Double-check your scale’s accuracy and make sure you hit a pudding-like trace consistency.
If you have any more questions, leave me a comment. I’m always happy to help. You can also check out my soap-making for beginners, where I walk you through everything.
Trust me, you’ll be hooked on soap-making once you nail this recipe. There’s something incredibly satisfying about creating your own bars of soap, and this vanilla version will make you feel like a real artist. Remember, perfect bars come with practice, so don’t stress if your first attempt isn’t Pinterest-worthy. Focus on safety, measurements, and temperatures – everything else is just details.


