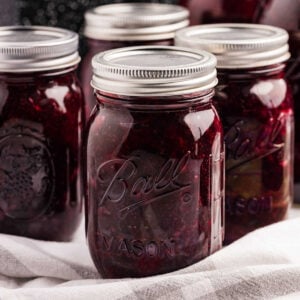
I’ll show you how to make a beautiful blackberry pie filling perfect for pies, cobblers, or even pouring over ice cream. Using clear jel instead of cornstarch is important to make sure you get a thick and stable filling that won’t break down. With a few simple steps, you can enjoy the sweet taste of berries all year long. Even beginners can make this waterbath canning recipe.

Every summer, right outside my kitchen window, my blackberry bushes go crazy. There is a blackberry patch I planted down the driveway, which of course does terribly, and my wild patch does perfectly. Anyway, no matter how you get your berries, this will taste great in a classic pie or just spooned over ice cream.
Ingredients and Tools You’ll Need
Along with all your standard canning tools, have a chopstick ready to use as a debubbler. This will keep your blackberries from breaking up compared to the standard tool. Use clear jel instead of cornstarch to keep your filling stable, and frozen blackberries are totally fine to use.

Heart’s Content Farmhouse is a participant in the Amazon Services LLC Associates Program, an affiliate advertising program designed to provide a means for sites to earn advertising fees by advertising and linking to Amazon.com. This means that when you click on certain links on this site and make a purchase, I may earn a small commission at no additional cost to you. I only recommend products I genuinely believe in and would use in my own kitchen. As an Amazon Associate, I earn from qualifying purchases.
Equipment
- 8-10 quart stockpot
- strainer (optional)
- Water Bath Canner
- Jar lifter
- Funnel
- Ladle
- chopstick (used as a debubbler)
- lids and rings
- Towel
Ingredients
- 16 cups or 4 quarts blackberries, fresh or previously frozen (see recipe card notes)
- 4 ⅔ cups sugar
- 1 ¼ cups clear jel (important for a thick, stable filling)
- 4 ⅓ cups water (or reserved liquid from frozen blackberries)
- ⅓ cup lemon juice
How to Make Blackberry Pie Filling
Step 1: Prep Berries
If you are starting with frozen blackberries, allow them to thaw in the fridge overnight. The next day, place the blackberries in a colander over a bowl and allow the blackberries to drain, reserving the juice of the blackberries.

FREE FOR SUBSCRIBERS
Canning Binder
Subscribe (free!) to my newsletter to receive this PDF + dozens of others in my printable library. You’ll also get emails you’ll truly love, with a weekly meal and so much more.
Step 2: Prep Canning Supplies
Wash your jars with hot, soapy water. Prepare your water bath canner by filling it with water and allowing the jars to be fully submerged in water. Place over medium heat, cover, and simmer. Place the lids and rings in a pot of water and simmer on low.
Step 3: Combine Sugar And Clear Jel
In a large bowl combine the sugar and clear jel together. Set aside.

Step 4: Mix With Liquid
In a large pot, add the water or reserved berry liquid. (If, when thawing your berries, you do not get enough liquid, add water until it equals 4 ⅓ cups liquid) Add the sugar and clear jel mixture to the large pot stir to fully combine.

Step 5: Heat Until Thickened
Set to medium heat, stirring constantly, and allow the mixture to thicken and start to bubble. The mixture will become thick, and if you are not stirring constantly, it will stick to the bottom of the pot.

Step 6: Add Lemon Juice And Boil
Add lemon juice and stir to combine fully. Allow the mixture to come to a boil and cook for 1 minute.
Step 7: Add Berries
Remove from the heat and fold in the blackberries.

Step 8: Fill Jars
Ladle the blackberry pie filling into the prepared jars. You will want to leave 1 ¼ inch head space to prevent oozing. Using a chopstick, remove any bubbles. A wooden or plastic chopstick works better than a standard debubbler to prevent breaking up the blackberries.

Step 9: Wipe And Add Lids And Rings
Wipe jars using a moist paper towel (water or white vinegar will work), making sure that the rims are fully clean. Add lids and rings.

Step 10: Process
Process in your water bath canner for 30 minutes, adjusting for altitude. Once done, turn off the heat, remove the lid of the canner, and allow the jars to rest inside the canner for 10 minutes.

Step 11: Cool And Check Seals
Remove from the canner and allow them to cool. Let them sit undisturbed for 12-24 hours. Check the seal. Once a seal has been confirmed, remove the ring and store it in a cool, dark place for up to 18 months.

Serving and Storing Blackberry Pie Filling
Let the jars cool undisturbed for 12-24 hours. Press the center of each lid to make sure it’s sealed properly. If the lid doesn’t pop back, it’s sealed. Once sealed, remove the rings to prevent rusting. Place the jars in a cool, dark place. They will keep for up to 18 months.
If you have an unsealed or open jar, store it in the refrigerator. It will keep for up to 2 weeks.
Freezing is not recommended.
Questions and Troubleshooting
Cornstarch can break down under high heat and with acidic ingredients, which might leave you with a runny filling. Clear jel is designed to handle these conditions, so it’s worth getting for the best results.
No worries! You can use a large pot with a lid. Just make sure it’s deep enough to fully submerge your jars in water with at least an inch of water covering the tops.
After the jars have cooled for 12-24 hours, press the center of each lid. If it doesn’t pop back, it’s sealed. If it does, you’ll need to reprocess the jar or refrigerate and use it soon.
Reducing the sugar might affect the texture and preservation of the filling. If you’re looking to cut back on sugar, you might want to look for a recipe specifically designed for that.
You can use it as soon as it’s fully cooled and sealed, but it’s best after a week or so. This allows the flavors to meld together beautifully.

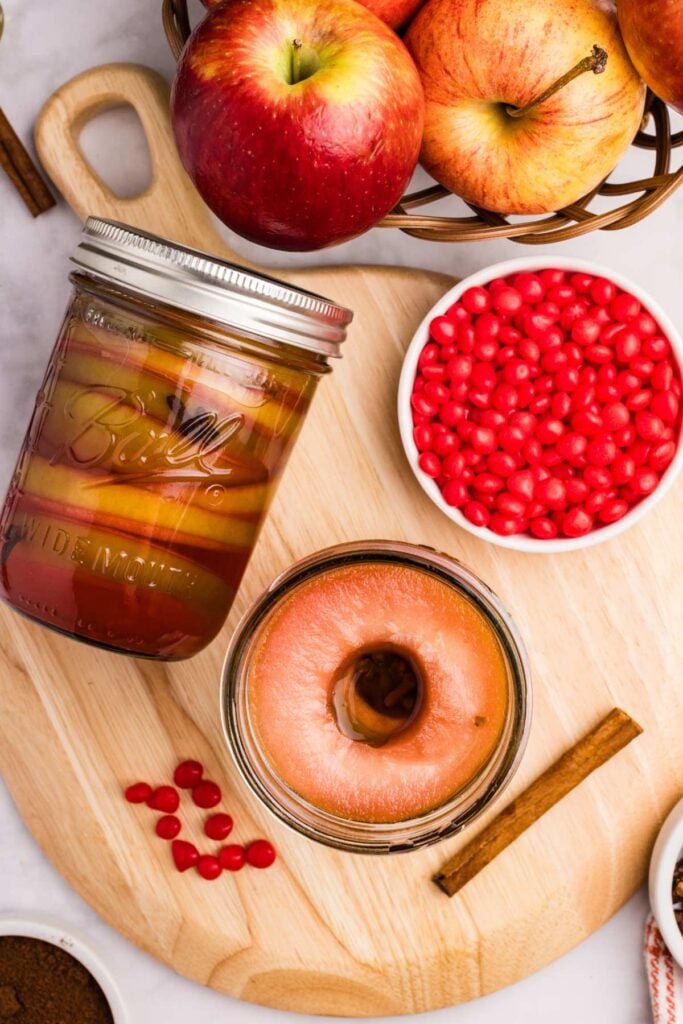
More Ways to Use Summer Berries
- Make cherry pie filling when the farmer’s markets are full of them.
- Who doesn’t love a classic apple pie filling?
- If you are still overrun with blackberries, make some blackberry jam!
- This blackberry Bundt cake is one of my favorites!
- This summertime blackberry lemonade is pretty and super easy to make.
Printable Recipe
Blackberry Pie Filling
Equipment
- 8-10 quart stockpot
- strainer (optional)
- Jar lifter
- Funnel
- Ladle
- chopstick (used as a debubbler)
- lids and rings
- Towel
Ingredients
- 16 cups or 4 quarts blackberries fresh or previously frozen (see notes)
- 4 ⅔ cups sugar
- 1 ¼ cups clear jel
- 4 ⅓ cups water (or reserved liquid from frozen blackberries)
- ⅓ cup lemon juice
Save This Recipe
You'll join my email list which you will love. And if you don't, unsubscribe in one click. ❤️
Instructions
- Prep berries. If you are starting with frozen blackberries, allow them to thaw in the fridge overnight. The next day place the blackberries in a colander over a bowl and allow the blackberries to drain, reserving the juice of the blackberries.
- Prep canning supplies. Wash your jars with hot, soapy water. Prepare your water bath canner by filling it with water and allowing the jars to be fully submerged in water. Place over medium heat, cover, and simmer. Place the lids and rings in a pot of water and simmer on low.
- Combine sugar and clear jel. In a large bowl combine the sugar and clear jel together. Set aside.
- Mix with liquid. In a large pot add the water or reserved berry liquid. (If when thawing your berries you do not get enough liquid, add water until it equals 4 ⅓ cups liquid) Add the sugar and clear jel mixture to the large pot stir to fully combine.
- Heat until thickened. Set to medium heat, stirring constantly and allow the mixture to thicken and start to bubble. The mixture will become thick and if you are not stirring constantly it will stick to the bottom of the pot.
- Add lemon juice and boil. Add lemon juice and stir to fully combine. Allow the mixture to come to a boil and cook for 1 minute.
- Add berries. Remove from the heat and fold in the blackberries.
- Fill jars. Ladle the blackberry pie filling into the prepared jars. You will want to leave 1 ¼ inch head space to prevent oozing. Using a chopstick, remove any bubbles. A wooden or plastic chopstick works better than a standard debubbler to prevent breaking up the blackberries.
- Wipe and add lids and rings. Wipe jars using a moist paper towel (water or white vinegar will work) making sure that the rims are fully clean. Add lids and rings.
- Process. Process in your water bath canner for 30 minutes, adjusting for altitude. Once done, turn off the heat, remove the lid of the canner and allow the jars to rest inside the canner for 10 minutes.
- Cool and check seals. Remove from the canner and allow them to cool. Let them sit undisturbed for 12-24 hours. Check the seal. Once a seal has been confirmed, remove the ring and store it in a cool, dark place for up to 18 months.
Notes
Nutrition


Can you make pie filling with just BlackBerry juice, we don’t like the seeds.
no you really need the whole fruit to get it to thicken properly!
I just finished and in the canner. it was very very thick. is this how it should be? i followed to a t. Ava Lansbery
yes, its thick! It’s a pie filling, so it’s spoonable. not quite as thick as jam but much thicker than a syrup
I don’t see how many quart jars this receipe yields. I’d like to attempt to make 6 to 12 quart jars. my blackberries are ripe on bush now.
hi Cheryl, 4 quarts 🙂
Can this recipe substitute blueberries? We love blackberries but don’t like the seeds.
hey pat yes! I have a blueberry pie filling on the site