This is the kind of old-fashioned dessert that feels like something your grandma would make: simple, sweet-tart, and full of real fruit flavor. The filling holds together beautifully once chilled, and the crust turns out crisp and golden every time. This is the pie we come back to, year after year.

Five years ago, we put in some apple trees and a bunch of berry bushes. The apple trees have been… interesting (nope, still no apples), but the berries? They’ve been perfect.
Every June and September, we get blackberries and raspberries at the same time. And when that happens, we make this homemade pie. This is one of my husband’s favorite dessert recipes, since it is not super sweet.
Ingredients and Tools You’ll Need
If you prefer very sweet pies, add more sugar to this recipe. I suggest starting with 1 cup, but adjusting to your taste is up to you. The sweetness of the berries may vary, so taste the filling before adding more sugar. If you prefer it less sweet, one cup of sugar may be enough.
Heart’s Content Farmhouse is a participant in the Amazon Services LLC Associates Program, an affiliate advertising program designed to provide a means for sites to earn advertising fees by advertising and linking to Amazon.com. This means that when you click on certain links on this site and make a purchase, I may earn a small commission at no additional cost to you. I only recommend products I genuinely believe in and would use in my own kitchen. As an Amazon Associate, I earn from qualifying purchases.
Get Access to
All my Free planners, Printables, binders and more
Get a copy of this frugal recipe binder with lots of crockpot favorites, pasta dishes, casseroles, and more inside the subscriber library. Plus SO much more.

Equipment
- Pie plate
- saucepan
- cooling rack
Ingredients
- 2 prepared pie crusts (1 top, 1 bottom)
- 3½ cups blackberries (fresh is best, but frozen is fine)
- 3½ cups raspberries (fresh is best, but frozen is fine)
- 1 cup sugar (adjust more according to taste, 1 tablespoon at a time)
- 2½ tablespoons lemon juice
- 2 tablespoons cornstarch
- 1 tablespoon milk (for topping the crust)
- 2 tablespoons coarse sugar (will hold its shape in the oven, giving the crust a yummy sweetness and crunch)
How to Make Blackberry Raspberry Pie
Step One: Prep
Preheat the oven to 400℉ (204℃). To make cleanup easier, line a baking pan with aluminum foil. Sprinkle some flour on the pie plate and gently put the bottom crust into it, cutting off any excess.

Step Two: Make The Filling
Combine the blackberries, raspberries, and sugar in a large saucepan over medium heat. Stir for around 5 minutes until the sugar dissolves and the berries release their juices. Once done, taste the mixture and add more sugar, if needed, one tablespoon at a time. Mix cornstarch and lemon juice in a separate bowl to make a smooth slurry. Gradually pour this mixture into the simmering berries while stirring continuously. Continue to cook and stir for 2-3 more minutes until the mixture thickens slightly.

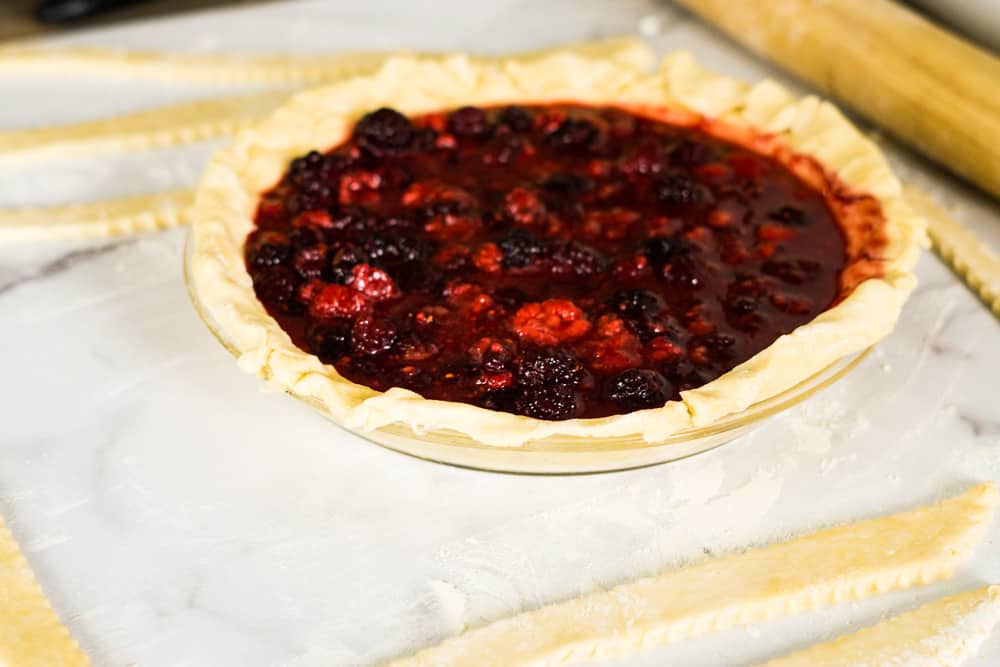
Step Three: Assemble The Pie
After preparing the berry mixture, let it cool for 10 minutes so the bottom crust doesn’t become soggy. Then, pour the slightly cooled berry filling into the pie crust that you have prepared. Cover the filling with the top crust and seal the edges by crimping with a fork or your fingers. Make small slits in the top crust to allow steam to escape. Finally, brush the top crust with milk and sprinkle coarse sugar for a shiny and sweet finish.
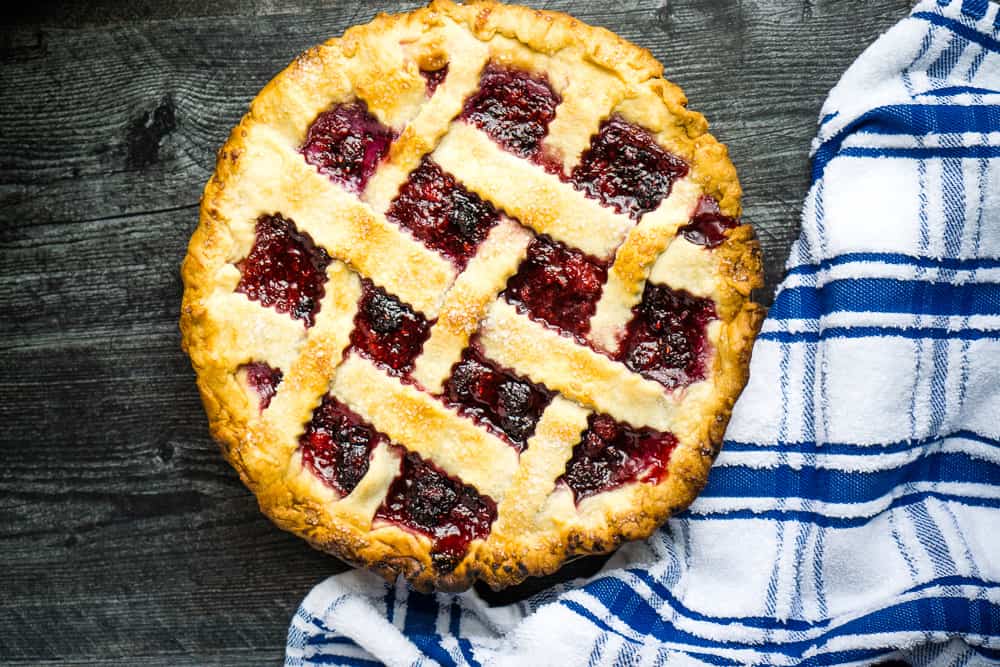
Step Four: Bake
Put the pie on a baking sheet you’ve prepared earlier and bake it at 400℉ for 40-45 minutes. Make sure it turns golden brown and the filling bubbles through the slits. If the edges of the crust become brown too quickly, cover them with foil strips or a pie crust shield halfway through baking.

Step Five: Chill And Serve
After baking the pie, put it on a cooling rack and let it cool for about 2 hours at room temperature. Then transfer it to the fridge and let it chill thoroughly before serving. If you skip this step, it will be very runny.
Serving & Storing Blackberry Raspberry Pie
The best way to store this pie is to wrap it up with plastic wrap and place it in a ziplock bag before storing it in the refrigerator for 3-4 days..
More Blackberry Recipes
- This blackberry Bundt cake is perfect to serve for Father’s Day.
- Serve this pretty summertime blackberry lemonade for your next summer party.
- If you still have lots of berries, learn to can and make some blackberry jam or raspberry jam.
- Having this blackberry pie filling on hand makes pies and cobblers so much easier.
Printable Recipe
Blackberry Raspberry Pie
Equipment
- Pie plate
- saucepan
- cooling rack
Ingredients
- 2 prepared pie crusts (1 top, 1 bottom)
- 3½ cups blackberries (frozen is fine)
- 3½ cups raspberries (frozen is fine)
- 1 cup sugar (adjust more according to taste)
- 2½ tablespoons lemon juice
- 2 tablespoons cornstarch
For topping the crust
- 1 tablespoon milk
- 2 tablespoons coarse sugar
Save This Recipe
You'll join my email list which you will love. And if you don't, unsubscribe in one click. ❤️
Instructions
- Prep. Preheat the oven to 400℉ (204℃). To make cleanup easier, line a baking pan with aluminum foil. Sprinkle some flour on the pie plate and gently put the bottom crust into it, cutting off any excess.
- Make the filling. Combine the blackberries, raspberries, and sugar in a large saucepan over medium heat. Stir for around 5 minutes until the sugar dissolves and the berries release their juices. Once done, taste the mixture and add more sugar, if needed, one tablespoon at a time. Mix cornstarch and lemon juice in a separate bowl to make a smooth slurry. Gradually pour this mixture into the simmering berries while stirring continuously. Continue to cook and stir for 2-3 more minutes until the mixture thickens slightly.
- Assemble the pie. After preparing the berry mixture, let it cool for 10 minutes so the bottom crust doesn't become soggy. Then, pour the slightly cooled berry filling into the pie crust that you have prepared. Cover the filling with the top crust and seal the edges by crimping with a fork or your fingers. Make small slits in the top crust to allow steam to escape. Finally, brush the top crust with milk and sprinkle coarse sugar for a shiny and sweet finish.
- Bake. Put the pie on a baking sheet you've prepared earlier and bake it at 400℉ for 40-45 minutes. Make sure it turns golden brown and the filling bubbles through the slits. If the edges of the crust become brown too quickly, cover them with foil strips or a pie crust shield halfway through baking.
- Chill and serve: After baking the pie, put it on a cooling rack and let it cool for about 2 hours at room temperature. Then transfer it to the fridge and let it chill throughly before serving. If you skip this step, it will be very runny.
Video
Notes
Nutrition


This is so very delicious, especially with a dollop of freshly whipped cream! I, like others, cooked the berries a little too long though, so the raspberries completely became liquidized. I would have like more whole fruit. Plus, the raspberries really took over the taste, so next time I think I’d use more blackberries. And because I cooked them too long, I should have used more constarch. It holds together but is a little runnier than I would have like. I didn’t pre-bake the crust though and the bottom crust was fine. Just be sure to cool the berries and then bake as soon as you fill the crust.
All in all, though, super easy and super yummy!
hey PJ! I love blackberries most too. glad it all turned out 🙂
hello–i am going to try this recipe today…one thing i could not find in the instructions was the oven temperature recommended. i will use a berry pie temp from the ‘better home’ ‘cookbook (375 degrees) today, fingers crossed
thanks
hi cary! it is 400. (hiding in step 1) i’ll make it more clear byy adding to another step too. 375 will be just fine 🙂
I just made this with freshly picked wild raspberries (no blackberries) and it is delicious!! I am an experienced baker but by no means a pro at pies. I would recommend draining any excess water from freshly washed or thawed frozen berries and using one’s own judgement on the cooking times needed for proper thickening based on what you are seeing in the pot. Also recommend adhering to the instructions as to amount of time to let the pie set.
hi terri! great tips and i’ m glad you like the recipe!
This recipe did not work out well for me. BUT, to be fair, this is my very first berry pie, and really only my third pie ever.
Cooking the berries first made them too juicy, which is what I was afraid of, but wanted to try anyway, because Im in experiment mode. Obviously, it works for others, so I wanted a hand at it too, but by the time the pie was done and cooled, i had a very tart soup…which is not an exaggeration. Even now, the next day, its still drinkable, which is weird because anything left in the pan when i warmed up the berries set up nicely. Im going to try a different oven, and maybe a lot more cornstarch.
I think the tartness was as strong because store bought berries are hard to find ripe and the right kind of sweet, so the lemon juice kinda made it worse. Im trying to avoid adding MORE sugar.
Honestly, im still picking at it so it didnt turn out bad, but im going to be doing a bit more research and delicious practicing to figure this out, and I will still have this recipe bookmarked to try again!
hey jess! a few things i thinkk will help you next time… 1. get frozen berries. they are sweeter and better than fresh at the store this time of year because thy aren’t varieties bred to stay hard and “shippable”. 2. DO NOT cut the pie until the chilling period mentioned at the end of the recipe. like….EVER. it really needs to cool to set. almost like jello. it’s not optional. and make sure you aren’t overcooking the berries in step 1, it’s just for five minutes until they get slightly juicy. hope this helps and good luck!! 😊
Thanks for the tips!! I def think my major problem was cooking the berries too long in step one. I altered it according to your suggestions and it worked wonders. I did one fresh and one frozen and they came out relatively the same. Now my family wont stop asking me for more pie (a very good problem to have)!
so happy to hear this! i made it for Christmas and thought off you!
Do you think it helps to pre bake the pie crust for 10 or 15 minutes before adding the fruit filling? Just worried the crust won’t cook enough and will be gummy given how wet the filling is.
i have never had that problem but i can tell you my mom pre-bakes EVERY crust whenever she makes a pie and swears by it. so it’s up to you!
If your cookdown of fresh berries is too juicy, you may need additional cornstarch. Also, you may want to hold back some of the berry juice when you fill the pie shell prior to baking. As the pie cools, it should thicken appreciably. My first one did. This is my second and it remains to be seen after it has cooled. More of it overflowed during baking this time, but I don’t see that as a spoiler. BTW, I’m using a gluten free shell (last time I used a cauliflower shell from “Sprouts” which was delicious). I use CocoWhip whipped coconut topping rather than the suggested vanilla ice cream to keep the sugar down.
Mine turned out runny! I used fresh berries please help
hi Melinda, did you allow it chill before serving it? if not, just pop it in the fridge and it will firm up!
I’m trying again today!
If your cookdown of fresh berries is too juicy, you may need additional cornstarch. Also, you may want to hold back some of the berry juice when you fill the pie shell prior to baking. As the pie cools, it should thicken appreciably. My first one did. This is my second and it remains to be seen after it has cooled. More of it overflowed during baking this time, but I don’t see that as a spoiler. BTW, I’m using a gluten free shell (last time I used a cauliflower shell from “Sprouts” which was delicious). I use CocoWhip whipped coconut topping rather than the suggested vanilla ice cream to keep the sugar down.
Just wondered if I could use frozen berries in would it be possible to use frozen blackberries and raspberries in this recipe??
absolutely!I almost always do
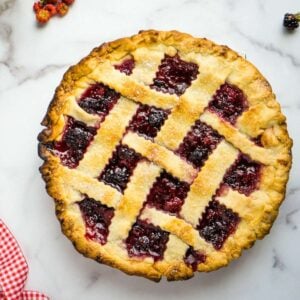
A berry pie with a lattice top crust is one of the prettiest creations ever! Gorgeous!
thank you Elise!
Looks yummy! We are not yet in surplus with the berries, I only planted them last year. Just enough to eat. Hoping for a big harvest in a few years!