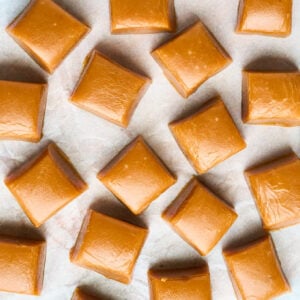
These Fireball whiskey caramels are just the thing for a classic treat with a twist. They start with a classic buttery caramel and add a hint of cinnamon whiskey for a warm kick. These caramels are great for gift-giving, mixed in with a cookie tray, or just for yourself.
Note: Some readers have reporting problems with their mixture scorching when they don’t stir. I use a copper bottomed pot and have never had this issue. But if yours seems to be scorching, it’s fine to stir continuously. Please read the notes on the bottom of the recipe before making.
Fireball Whiskey Caramels
Equipment
- 3 quart saucepan
- Wax paper (for wrapping caramels)
- 9×9 or 8×8 baking pan
- Measuring cups and spoons
- Buttered knife (for cutting caramels)
Ingredients
- 16 ounces brown sugar (use a one-pound box or 2¼ packed cups)
- 14 ounce can sweetened condensed milk
- 1 cup corn syrup
- 1 cup butter
- ½ teaspoon salt
- ⅓ cup Fireball whiskey
- 1 teaspoon vanilla
Save This Recipe
You'll join my email list which you will love. And if you don't, unsubscribe in one click. ❤️
Instructions
- Prepare the pan. Line a 9×9 or 8×8 baking pan with parchment paper, ensuring the edges extend slightly over the sides for easy removal. Set aside.
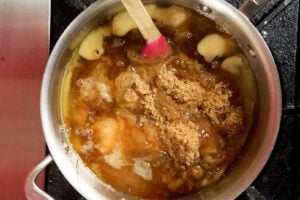
- Combine the ingredients. In a 3-quart, heavy-bottomed saucepan, place the butter, brown sugar, corn syrup, sweetened condensed milk, Fireball whiskey, and salt.

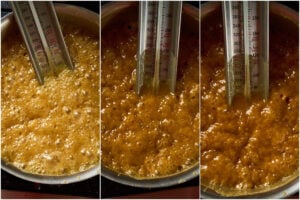
- Cook the mixture. Bring the mixture to a boil over medium heat. Allow it to cook without stirring until a candy thermometer reads 246°F (firm ball stage). This cooking stage will take about 10-15 minutes, and you’ll notice the mixture darkening as it cooks.Tip: If you’re using a standard saucepan (such as stainless steel), keep the heat lower and swirl the pan occasionally.
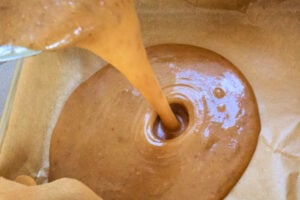
- Add vanilla. Once the mixture reaches 246°F, promptly remove it from the heat. Then, add the vanilla extract and stir until the caramel is smooth and no longer bubbling—this should take less than a minute.
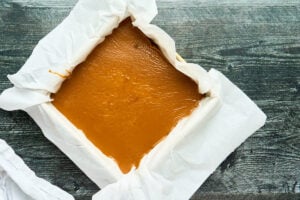
- Pour. Immediately pour the hot caramel into the prepared baking pan, smoothing it out.
- Let it cool. Let the caramel cool completely at room temperature without disturbing it. Depending on your room temperature, this will take 2 to 4 hours, and it’s important to let it be undisturbed for a smooth surface.
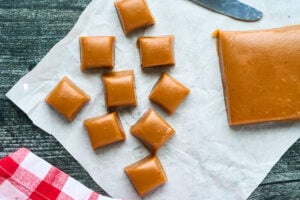
- Cut and wrap. Once cooled, use a buttered knife to cut the caramel into one-inch squares. For the best results, lightly mark the caramel with a ruler beforehand to keep your pieces uniform. Wrap each piece in wax paper to prevent sticking, and store at room temperature for up to two weeks.
Notes
Spray a measuring cup with nonstick spray before measuring the corn syrup; it will slide right out!
Don’t touch the caramel as it cools. It will stay hot in the pan and can burn your skin, and you’ll leave fingerprints.
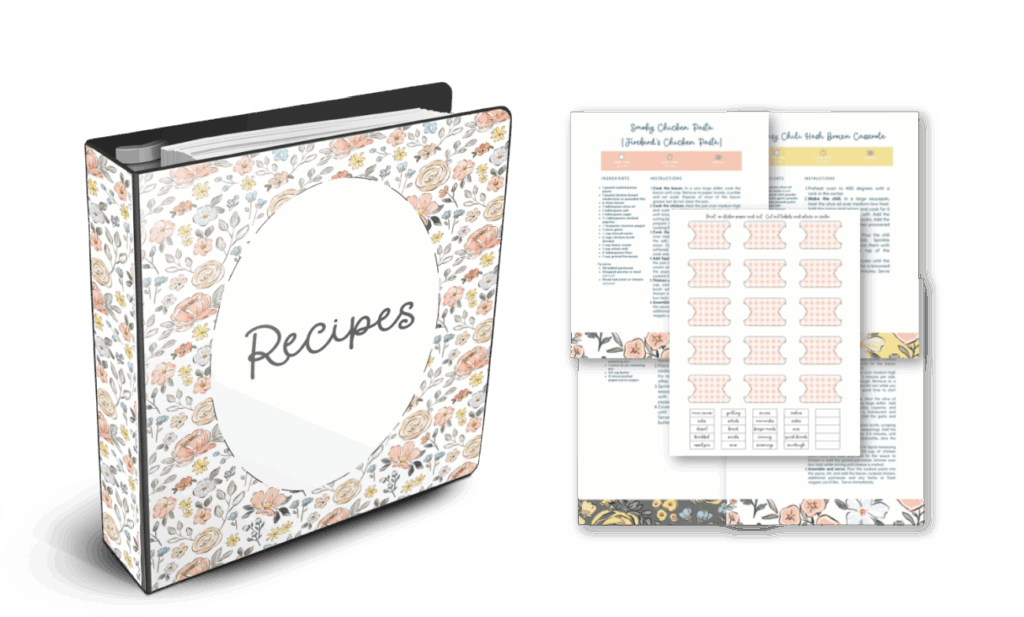
Get Access to
All my Free planners, Printables, binders and more
Get a copy of this frugal recipe binder with lots of crockpot favorites, pasta dishes, casseroles, and more inside the subscriber library. Plus SO much more.
A heavy-bottomed pot is very helpful for candy making to keep the mixture from scorching. If you do not have one, just can gently swirl the caramel mixture as it boils. Over-stirring can cause it to crystallize so I recommend stirring as little as possible.

I hope it brings you as much joy as it does for me.
Key Ingredients and Tools
To make these caramels, you’ll need a few specific ingredients and tools to get great results. Here’s a simple list of what you’ll need:

- Fireball Whiskey: This cinnamon whiskey gives the caramels a warm, spicy kick. If you want a milder flavor, you can use any cinnamon whiskey or mix regular whiskey with a tiny bit of cinnamon for a similar taste.
- Candy Thermometer: A candy thermometer is important for making sure your caramel reaches the right temperature for a smooth and soft texture. It’s best if it clips onto the pan so you can keep an eye on it without stirring.
- Sweetened Condensed Milk: This thick, sweet milk makes the caramels rich and sweet. You can find it in the baking aisle, close to evaporated milk. Don’t use evaporated milk; it won’t give you the creamy texture you want.
- Corn Syrup: This ingredient helps stop the sugar from forming crystals, keeping the caramels smooth and chewy. You can replace it with honey or golden syrup, but this may change the flavor and texture of the caramel a little.
- Heavy-Bottomed Saucepan: A heavy pan spreads heat evenly, which helps prevent the caramel from burning. If you don’t have one, keep the heat lower and stir occasionally to avoid scorching.
Troubleshooting and Help
Regular whiskey will work just fine. If you want to keep that cinnamon warmth, just add a pinch of ground cinnamon to the caramel mixture along with the vanilla.
Yes! You can skip the whiskey for a classic caramel flavor. They’ll still be rich and delicious, just without the cinnamon kick.
Yes, it’s pretty important for this recipe. Caramels must hit that precise “firm ball stage” (246°F) to set correctly. Without a thermometer, it’s tough to know when you’re there, and the caramels could end up too soft or too hard.
A grainy texture usually happens if the sugar crystals aren’t fully dissolved or the caramel is stirred after it starts boiling. To avoid this, let the mixture come to a full boil without stirring, and resist scraping down any sugar crystals from the sides of the pan.
To make slightly softer caramels, cook them to around 244°F instead of 246°F. Keep an eye on the thermometer to avoid overcooking, as even a few degrees make a difference.
Yes, parchment paper makes lifting the caramel out of the pan much easier and prevents sticking. If you’re out of parchment, you can use wax paper or lightly butter the pan, but parchment gives the best results for clean, easy removal.
Yes! A light sprinkle of flaky sea salt on top is delicious. You could also stir in crushed nuts or even a dash of espresso powder along with the vanilla for a unique twist.
You can, but remember that doubling will take longer to reach the right temperature, and you’ll need a bigger, heavy-bottomed pot to prevent burning. Also, the caramels may be thicker when set, so adjust your pan size accordingly.
Typically, it takes about 2 to 4 hours at room temperature for the caramels to cool and set fully. It’s worth the wait, as this cooling time helps get the smooth, chewy texture we’re going for. If you love caramel flavors, you might also enjoy my rich, buttery Caramel Bundt Cake—a perfect dessert centerpiece.
These caramels are a fun take on a classic treat, making them great for sharing, gifting, or keeping to yourself. With only a few simple ingredients and easy steps, you can make a batch of these treats that balance buttery sweetness with a nice cinnamon kick. Whether you’re making them for the holidays, special occasions, or just a cozy night in, these caramels will surely become everyone’s favorite. They add a homemade touch to your dessert table, and once you try them, you might want to return to this recipe.


I made the recipe as listed.. I have an aluminum pressure cooker pot that we use for candy making. It’s pretty heavy. I stir my caramels at the beginning too make sure everything is mixed but then I let it sit. I cook mine on gas stove setting between 3 and 4. So not too hot.turned out great. Might want a little more cinnamon/whiskey flavor. But it’s great. Thanks
thanks Jeremy! merry Christmas 🙂
I am
Making this today. I have always stirred my Carmels and never had an issue. So, stir I will.
I use a pizza cutter to cut my Carmels. Very slick way to cut.
Hi! Won’t the fireball burn off if you add it in the beginning? Thanks!
hey Staci! you’ll still get the flavor, but yes!
246 degrees ended up being way too hot. My caramels are definitely hard. I have made caramels using other recipes and never had an issue. I am not sure where this went wrong. Flavor was good but definitely not soft caramels.
hey Renee, they definitely should still be soft, really up to 250. check your thermometer or your other candies this season will come out too hard, this happened to me once and my taffy was rock hard, like hard as an actual rock.
The recipe itself was good. But the directions not to stir ruined the whole batch. I cooked it on medium low and when it was time to stir in the vanilla, the whole bottom was BURNED. I should have followed my c
Regular caramel recipe that says to keep stirring.
Stir it people or ruin your expensive batch if caramel!!
yup just ruined my first batch
I had never made caramel before so I followed it to a T. ruined. so I should try again and gently stri?
Jessica the problem when this happens is almost ALWAYS the pan. typically candy is made with a very heavy bottomed pot or a copper pot. a traditional, even nice quality stainless steel, isn’t quite the same. there is a note at the top of the recipe to stir if it seems to be scorching.
So delicious and excellent texture. They remind me of a cross between caramels and red hots. I don’t really pick up any whiskey flavor, but more so the cinnamon. I did go with the 1/2 cup of Fireball.
2 1/4 c packed brn sugar is given
and to reach a temp of
246F is also given.
it also says you can swirl the pot a bit if you don’t have a heavy bottom pan
I’d barely lift the pot from the stovetop to swirl though you dont want it to cool down. I’m also assuming that the 3rd picture is the color to keep checking for the finished cooking stage. making tomorrow. I used to use a heavy cast iron skillet for caramels and never had a problem with it burning, it will cook faster if you have a pan big enough or cut recipe in half.
Recipe was not easy to understand 16 ounces of brown sugar? Ounces are generally a liquid measurment, why not say 2 1/4 cups. Don’t stir???? There is a milk product is this recipe, you need to stir or it will burn. And you need to stir frequently. I made this recipe following your directions to a “T”. It burnt. I sat there at the stove watching it like a hawk, I felt it wasn’t right, but let the temp get up to where it needed to be. Do directions on what temp to cook it on med, med-high?
Needless to say, I think I will stick to my reliable cookbooks that give all the directions needed to make successful carmels.
Dawn I have always made this using a 1 pound box of sugar that is why i say 16 ounces. Not stirring caramel is common practice. If your pot is too thin it may scorch but that’s not a result of not stirring. I am sorry it did not turn out for you and I will add notes for volume measurements of the sugar. But the recipe is correct.
I’ve tried twice, and neither time did they get firm. First time questionable if I made it to hot enough. 2nd time definitely got to 246 – bottom of pan even burnt. What should I do differently with batch 3?
Hey Danielle, are you using a candy thermometer? If so, test it by measuring pot of boiling water and make sure it reads 212. If they get hot enough, they absolutely will set. The scorching could be that your pot is too thin. If you have stainless steel. or a dutch oven, that is perfect.
How big do you cut the wax paper that you use to wrap the caramels? 4×4″? 5×5″? Bigger?
Love fireball cant wait to make it thanx!