Honey Wheat Sandwich Bread
A recipe you’ll turn to again and again, this sandwich loaf relies on a blend of white and whole wheat flour to create a perfectly light and soft honey wheat bread.
Perfect for sandwiches, this recipe is perfect for doubling and freezing so you always have homemade bread on hand. It’s the perfect yeast bread recipe for picky people 😊.

Soft Honey Wheat Bread
Equipment
Ingredients
- 1 ¾ cup all-purpose flour
- 1 cup whole wheat flour
- 1 cup lukewarm water
- 2 tablespoons softened butter unsalted
- 2 tablespoons honey
- 1 ¼ teaspoons salt
- 2 teaspoons instant or active dry yeast
Save This Recipe
You'll join my email list which you will love. And if you don't, unsubscribe in one click. ❤️
Instructions
- Mix the ingredients. Add all ingredients to the bowl of an electric stand mixer or a large mixing bowl. Combine until a dough forms that holds together and does not stick to the sides or bottom of the bowl. As the butter melts and is worked into the dough during kneading, it will make the dough more hydrated, so hold off on adding any more water now, even if it seems a bit dry.
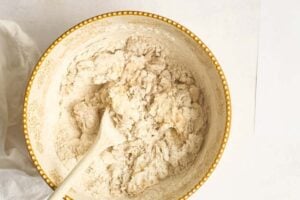
- Knead the dough. Knead for ten to fifteen minutes until it is smooth, soft, and reaches the windowpane stage (meaning that when the dough is stretched, a translucent area appears). If the dough is still dry after a minute or two of kneading, sprinkle on the water a teaspoon at a time. Different brands of whole wheat flour can absorb moisture differently, so you may need to adjust a little.

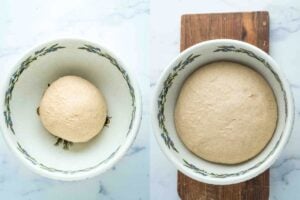
- The first rise. Shape the dough gently into a ball and place it into a clean, lightly oiled bowl. Cover with a clean, damp tea towel and place into a warm place to rise. Let the dough rise for 60 minutes until it is puffy and has doubled in size.
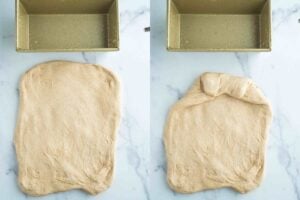
- Shape into a loaf. Spray the loaf pan with nonstick cooking spray. Gently stretch the dough into a rectangle. Use your loaf pan as your guide and make the short side of the rectangle the same length as the longer side of the loaf pan. The rectangle will be about 9 x 18 inches. Tuck in the corners and top of the dough. Think of the saying "shoulders in, head down." Keep rolling into a log. Tuck the ends under. Pinch the seams closed and place the loaf, seam side down, into a lightly oiled loaf pan.
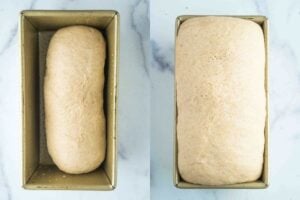
- Second rise. Cover with heavily greased plastic wrap and place in a warm place to rise again until the dough rises to one inch above the top of the loaf pan. The bread will rise very slightly as it bakes, so make sure you are happy with the height of the bread before you bake it. Towards the end of the rising time, preheat your oven to 350 degrees.
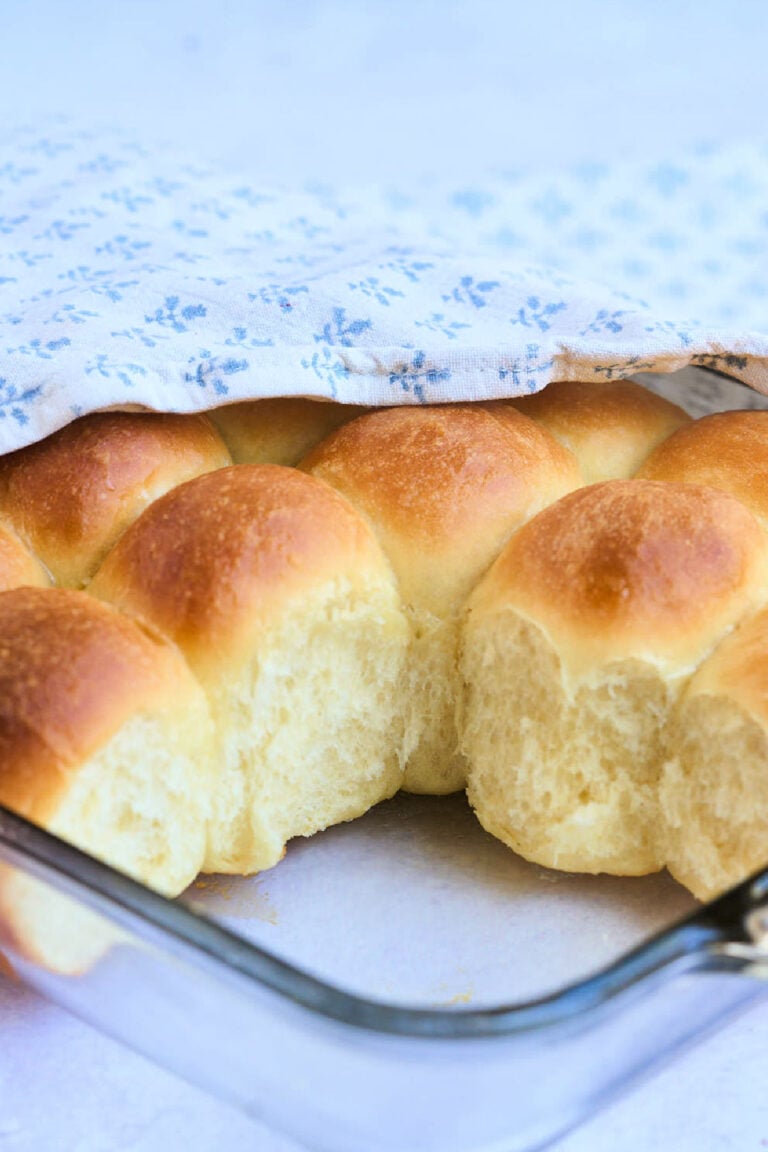
- Bake. Bake at 350 for 45-50 minutes, until the loaf sounds hollow when tapped. If you have an instant-read thermometer, check the temperature. Whole wheat loaves can be difficult to eyeball since they are darker, to begin with. The finished bread should be between 195-200 degrees. Remove the bread from the loaf pan and allow it to cool fully on a wire rack. Wait to slice until the loaf is fully cooled.


Notes
Nutrition
Something about this recipe just says fall to me. Maybe it’s because we use it for peanut butter and jelly sandwiches most of all.

It’s become something of a back-to-school tradition for us to make a big batch so we’re ready in August.
Key Ingredients and Tools
Whole Wheat Flour. This flour is found in the baking aisle, right next to the regular kind.
Honey. Honey sweetens the bread and helps retain moisture for a softer loaf.
Instant or Active Dry Yeast. You can find this in the baking aisle, but I prefer to buy in bulk online.

Loaf Pan. I use a standard sized loaf, which is 8.5 x 4.5, often called 8×4.
Bread Knife. You’ll want a good bread knife to slice your loaf without crushing it.

More Sandwich Breads to Love
Sandwich bread is easy and practical. Here are some more to try.
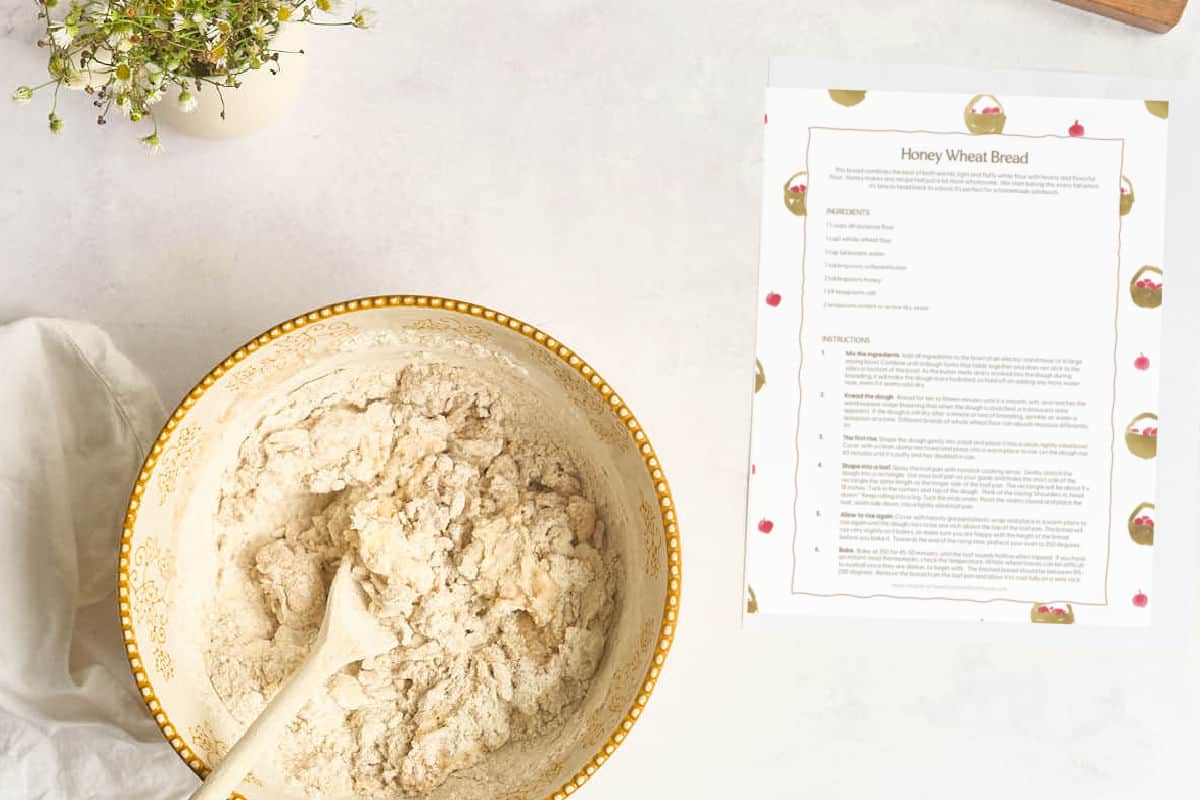
Pretty Recipe Printable
Click here or on the image below to get this pretty, vintage-inspired recipe to tuck in your recipe binder. It’s a free, instant download.
Homemade is a beautiful thing to make with your family. Kids love making it, and with this recipe, they’ll love eating it too.


I’m still working on getting better at bread making. But this one was so easy and it turned out absolutely perfect! I’ll be making this one over and over for sure. Thank you!
thank you summer! its one of our fave too.
Best bread recipe I’ve tried! Made in a Pullman pan which turned out perfect. This is going to be my ‘go to’ bread recipe from now on.
thank you elaine! i’m so so happy you liked it 🙂
Best bread I’ve ever made!
Can this be baked in a Pullman pan?
yes for sure 🙂 works beautifully in there
Hello, I was wondering if I could make this recipe ahead at all? Like could I do the first rise, refrigerate and then finish the next day?
yes! just make sure to cover it very tightly with oiled plastic wrap so the dough doesn’t dry out.
Hey I’m looking forward to trying this recipe, I like to keep track of my calories and I see it’s 70 calories is that for one slice ?
Hi! Would this recipe work if I use bread flour and white whole wheat flour in the measurements in the recipe?
yes definitely! maybe a touch more liquid too 🙂
Hello. Could I use the same recipe but put it in my bread machine on the whole wheat setting? Is there anything I should adjust or any reason it wouldn’t come out the same in the machine? My first attempt came out like a brick, not your recipe but a different one. I am trying to find one that will work.
hey amy, yes the machine will work fine for this!
your bread looks beautiful. I want to make it but would like 2 loaves. While doubling the ingredients, do I double the yeast too ???? it seems 4 tsps. would be a lot.
Thank you.
hey monique, yes double everything. 4 teaspoons of yeast won’t be that much 🙂
Thank you for responding ! 😊
Best bread I’ve made so far. I made a few changes. I used 2 cups white bread flour and 3/4 cups whole wheat flour. Added 2 tablespoons wheat gluten. Olive oil instead of butter. 2 1/4 teaspoons rapid yeast. Delicious bread.
that’s awesome jim… i’ll confess i’ve never used wheat gluten in my recipes. I’m going to try it though! 🙂
Would it work to use:
1 c AP flour
3/4 c Oat flour
1 c Whole wheat flour
I have never baked with oat flour before and am unsure if it will change the texture and rise much/at all.
hey Jack, oat flour doesn’t have gluten so I do think the rise will be affected a little. but since you have mostly wheat flour it should still rise enough. I’d give it a shot!
Thank you for your reply. I am going to make it as it is written, then try adding some oat flour (or oats?) the next time.
Maybe I will try adding just a bit of wheat gluten to offset the oats.
I’ve baked this a few times, super easy bread recipe!
I do like to combine my while wheat flour and water at least an hour before baking. It shortens the kneading time a lot
Can I add seeds to this recipe and can it be made in a bread machine. I don’t do bread machine but my friend does. Thanks
yes to both 🙂
What is the size of the loaf tin used?
8.5 x 4.5 x 2.5 🙂
Thank you will definitely try this beef recipe.
I have a 99 yr old brother Joe who will only eat wheat flour. He didn’t even know I added some bread flour with your recipe and it came out lovely. As long as Joe is happy and he eats, because Joe is having trouble eating, but he is eating your bread and that makes me very happy. Thank you for sharing.
hi dee:). I am so happy to hear that. thanks for letting me know.
Mmmm the perfect bread recipe, thanks!
Can this recipe easily be doubled to make 2 loaves? Thank you!
yes i do it all the time! 🙂